Project update 3 of 14
How Home Assistant Yellow Got Transparent
by Mike DoellWe at Nabu Casa mainly specialize in software development and hardware hacking, so we’re grateful to our friends at Adafruit for introducing us to Mike Doell from Ross + Doell, who has excellent enclosure design and manufacturing skills. After initial project discussions, we quickly found that the chemistry was right and Mike has been working with us ever since on the Amber enclosure. This is the story of Mike’s design process.
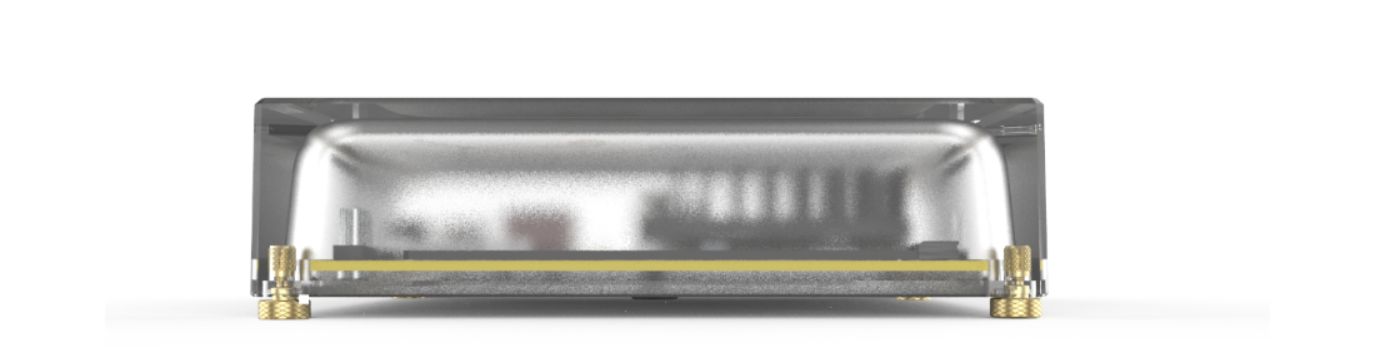
Home Assistant Yellow comes in a stunning transparent enclosure that is meant to be on display. In this update, I want to walk you through my design process and how I came up with our transparent aesthetic.
First, I thought about the environment Home Assistant Yellow will be in. Most likely, you’re going to put it on a shelf or cabinet surrounded by or near many different types of consumer electronics. Home Assistant Yellow is intended to be the brains of your home, so I wanted to make sure it would look great when it is on display for the world to see. We used different materials, finishes and forms to help differentiate it from other generic electronic enclosures.

Next, we needed to predict how many we are going to make. This was important for helping us determine the appropriate manufacturing process. If we were going to be producing millions of duplicates, we would need to pick the simplest design possible in order to keep the production cycle time low, which refers to the amount of time it takes to mould each part. Since we were anticipating creating lower volumes of parts, we were able to explore more complex moulding designs that would take longer to produce, but look more stunning as a result.
Concept Generation
After mocking up various basic 2D shapes in Illustrator and 3D CAD, I started to explore the idea of using transparent materials. This provided options for illumination and form, and aligned nicely with the open source nature of Home Assistant Yellow.
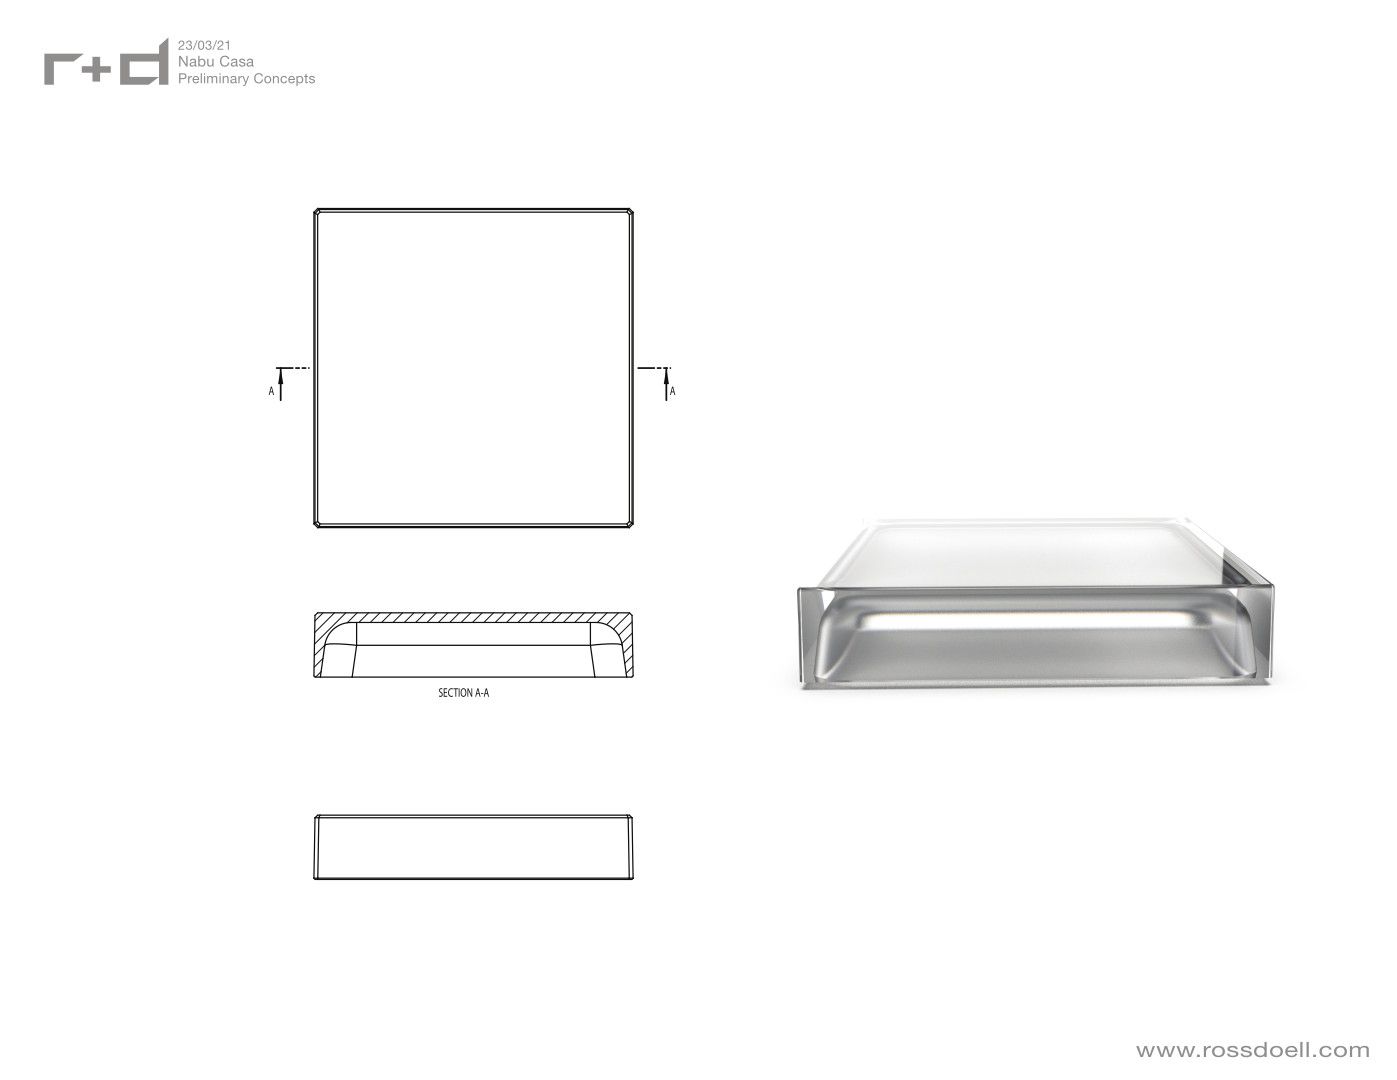
By making the enclosure transparent, it allowed us to hint at the electronic components and offered the potential of creating an internal shape that contrasted with the exterior.
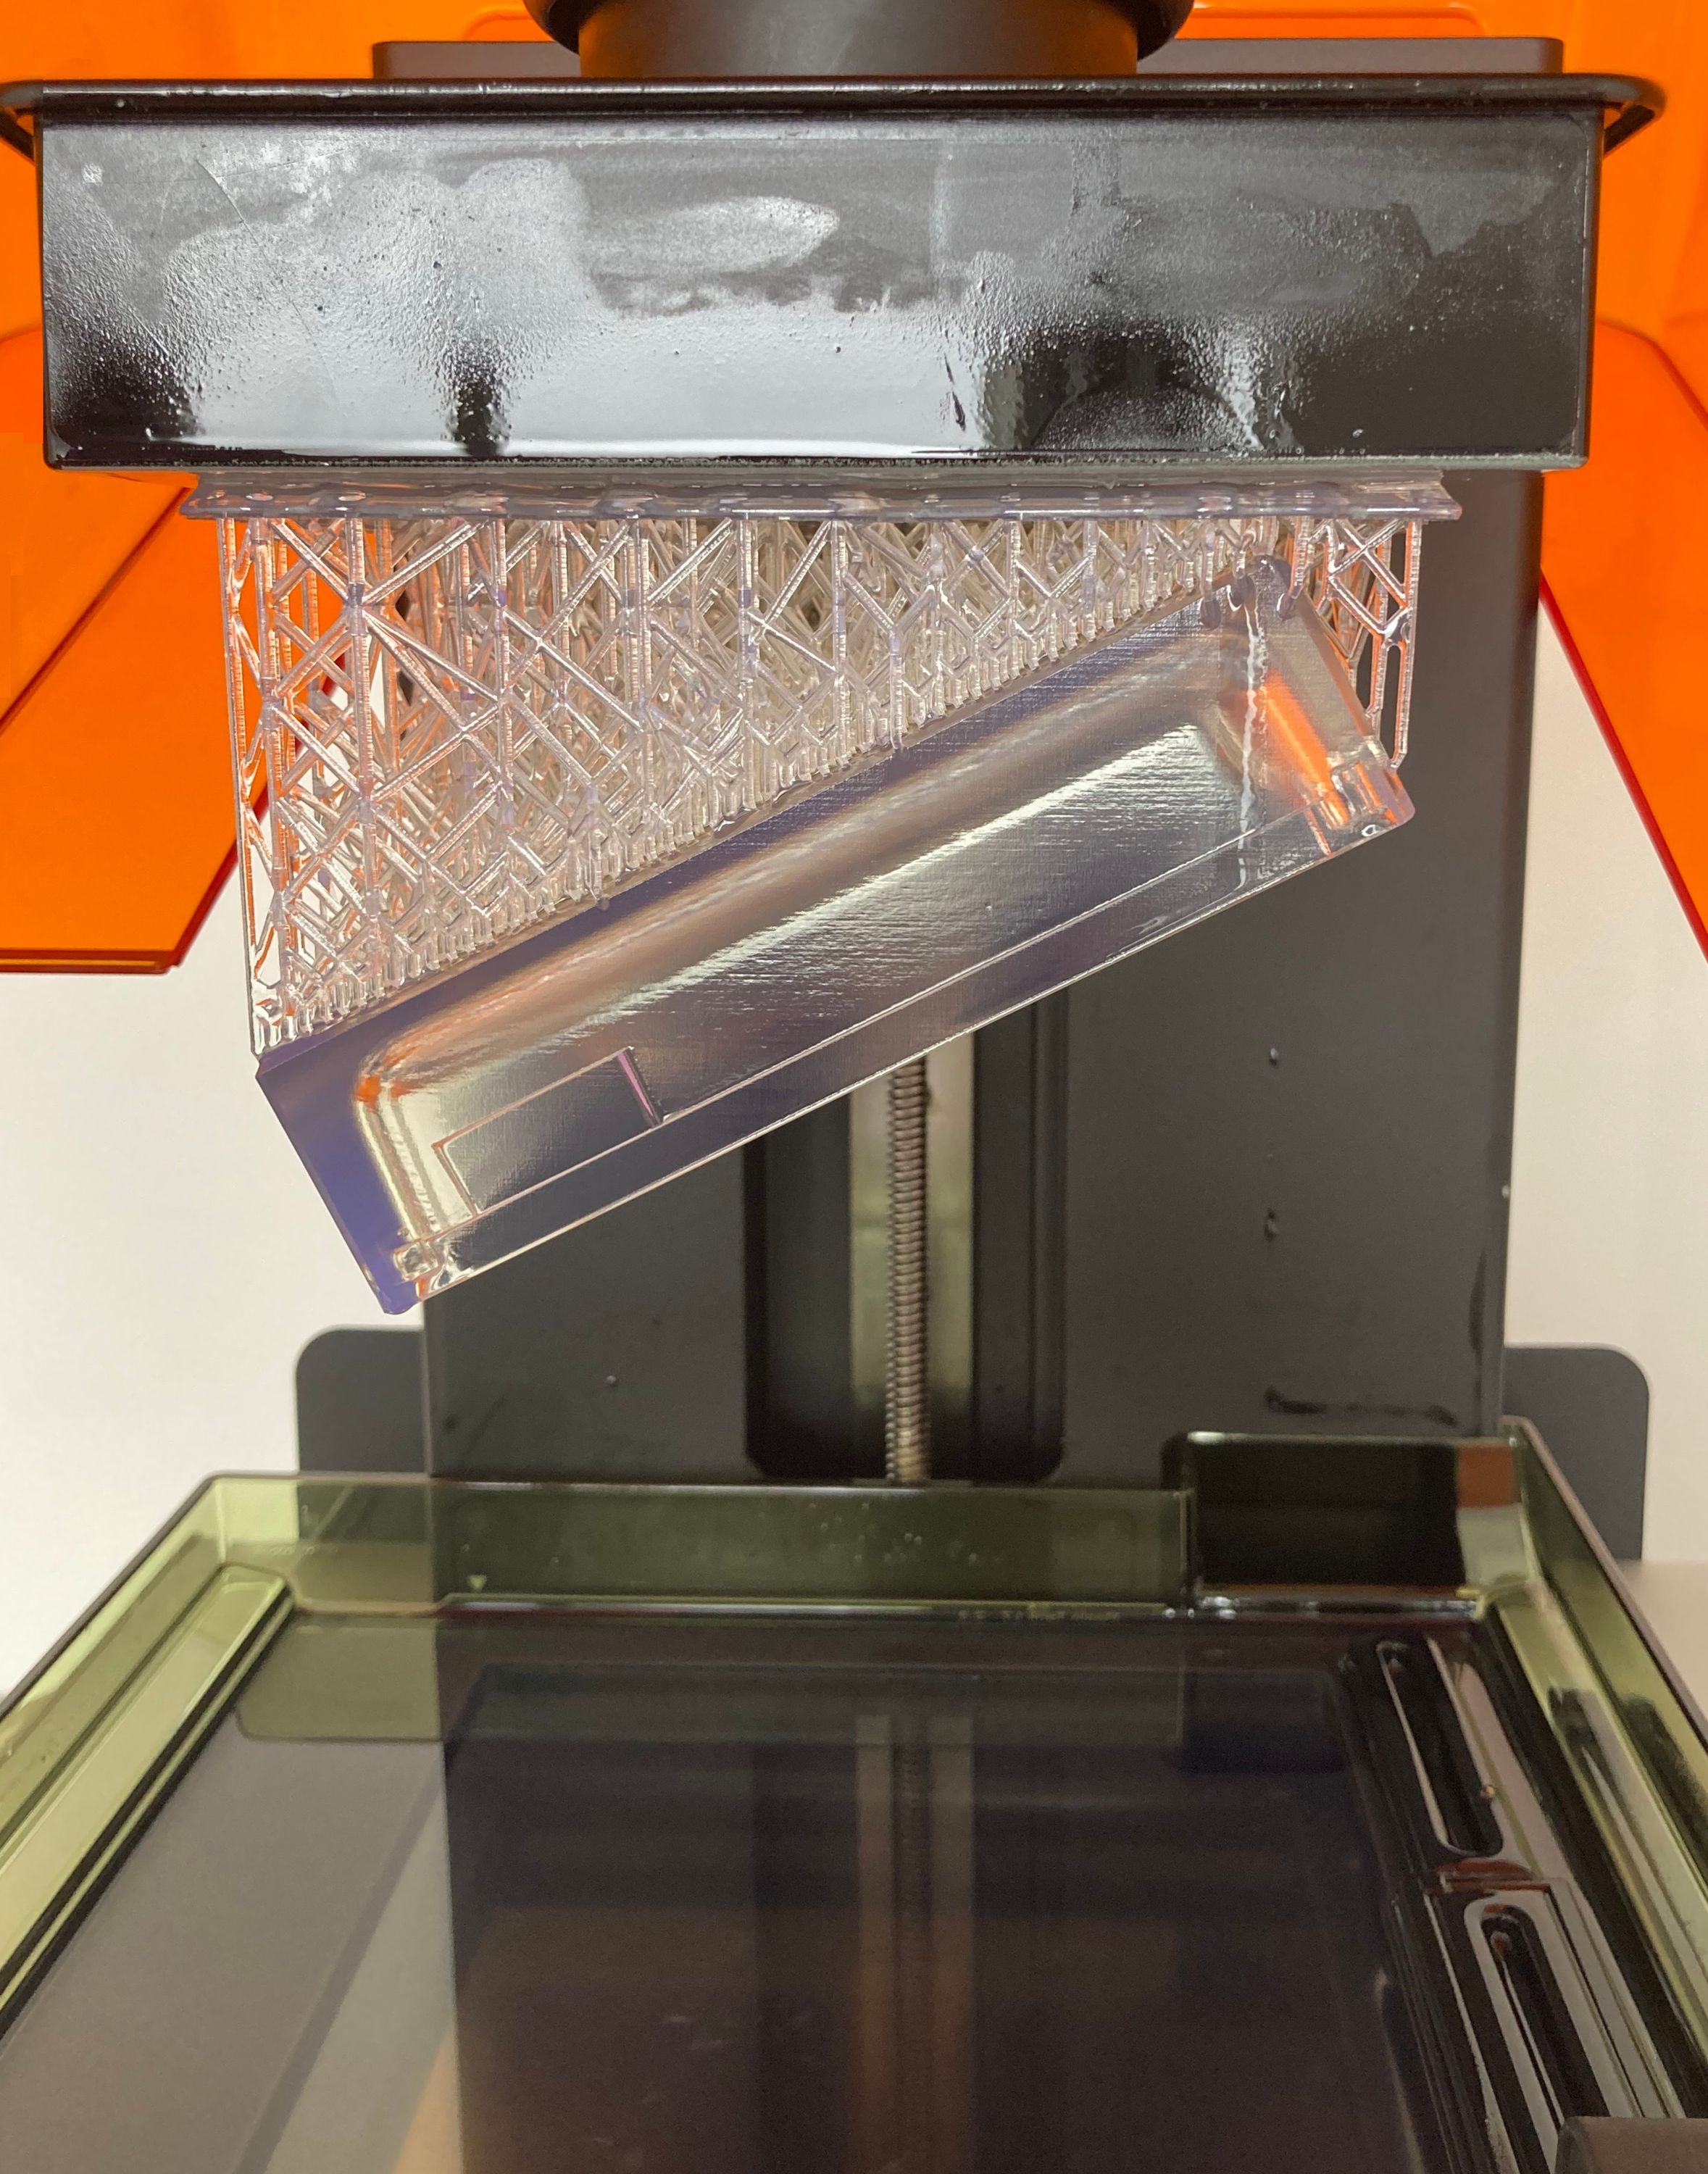
Concept Rendering
Highlighting the contrasting internal and external forms by etching the internal surfaces and highly polishing the exterior created visual tension and interesting textures.
Once the shape had been finalized and we ensured everything fit together nicely, we began digging into the accessibility features. I liked the idea of using thumbscrews to allow user access without the need for tools. This showcases the PCB and other components as design features that are meant to be on display. Using the screws as feet also came in handy as it lowered our part count!
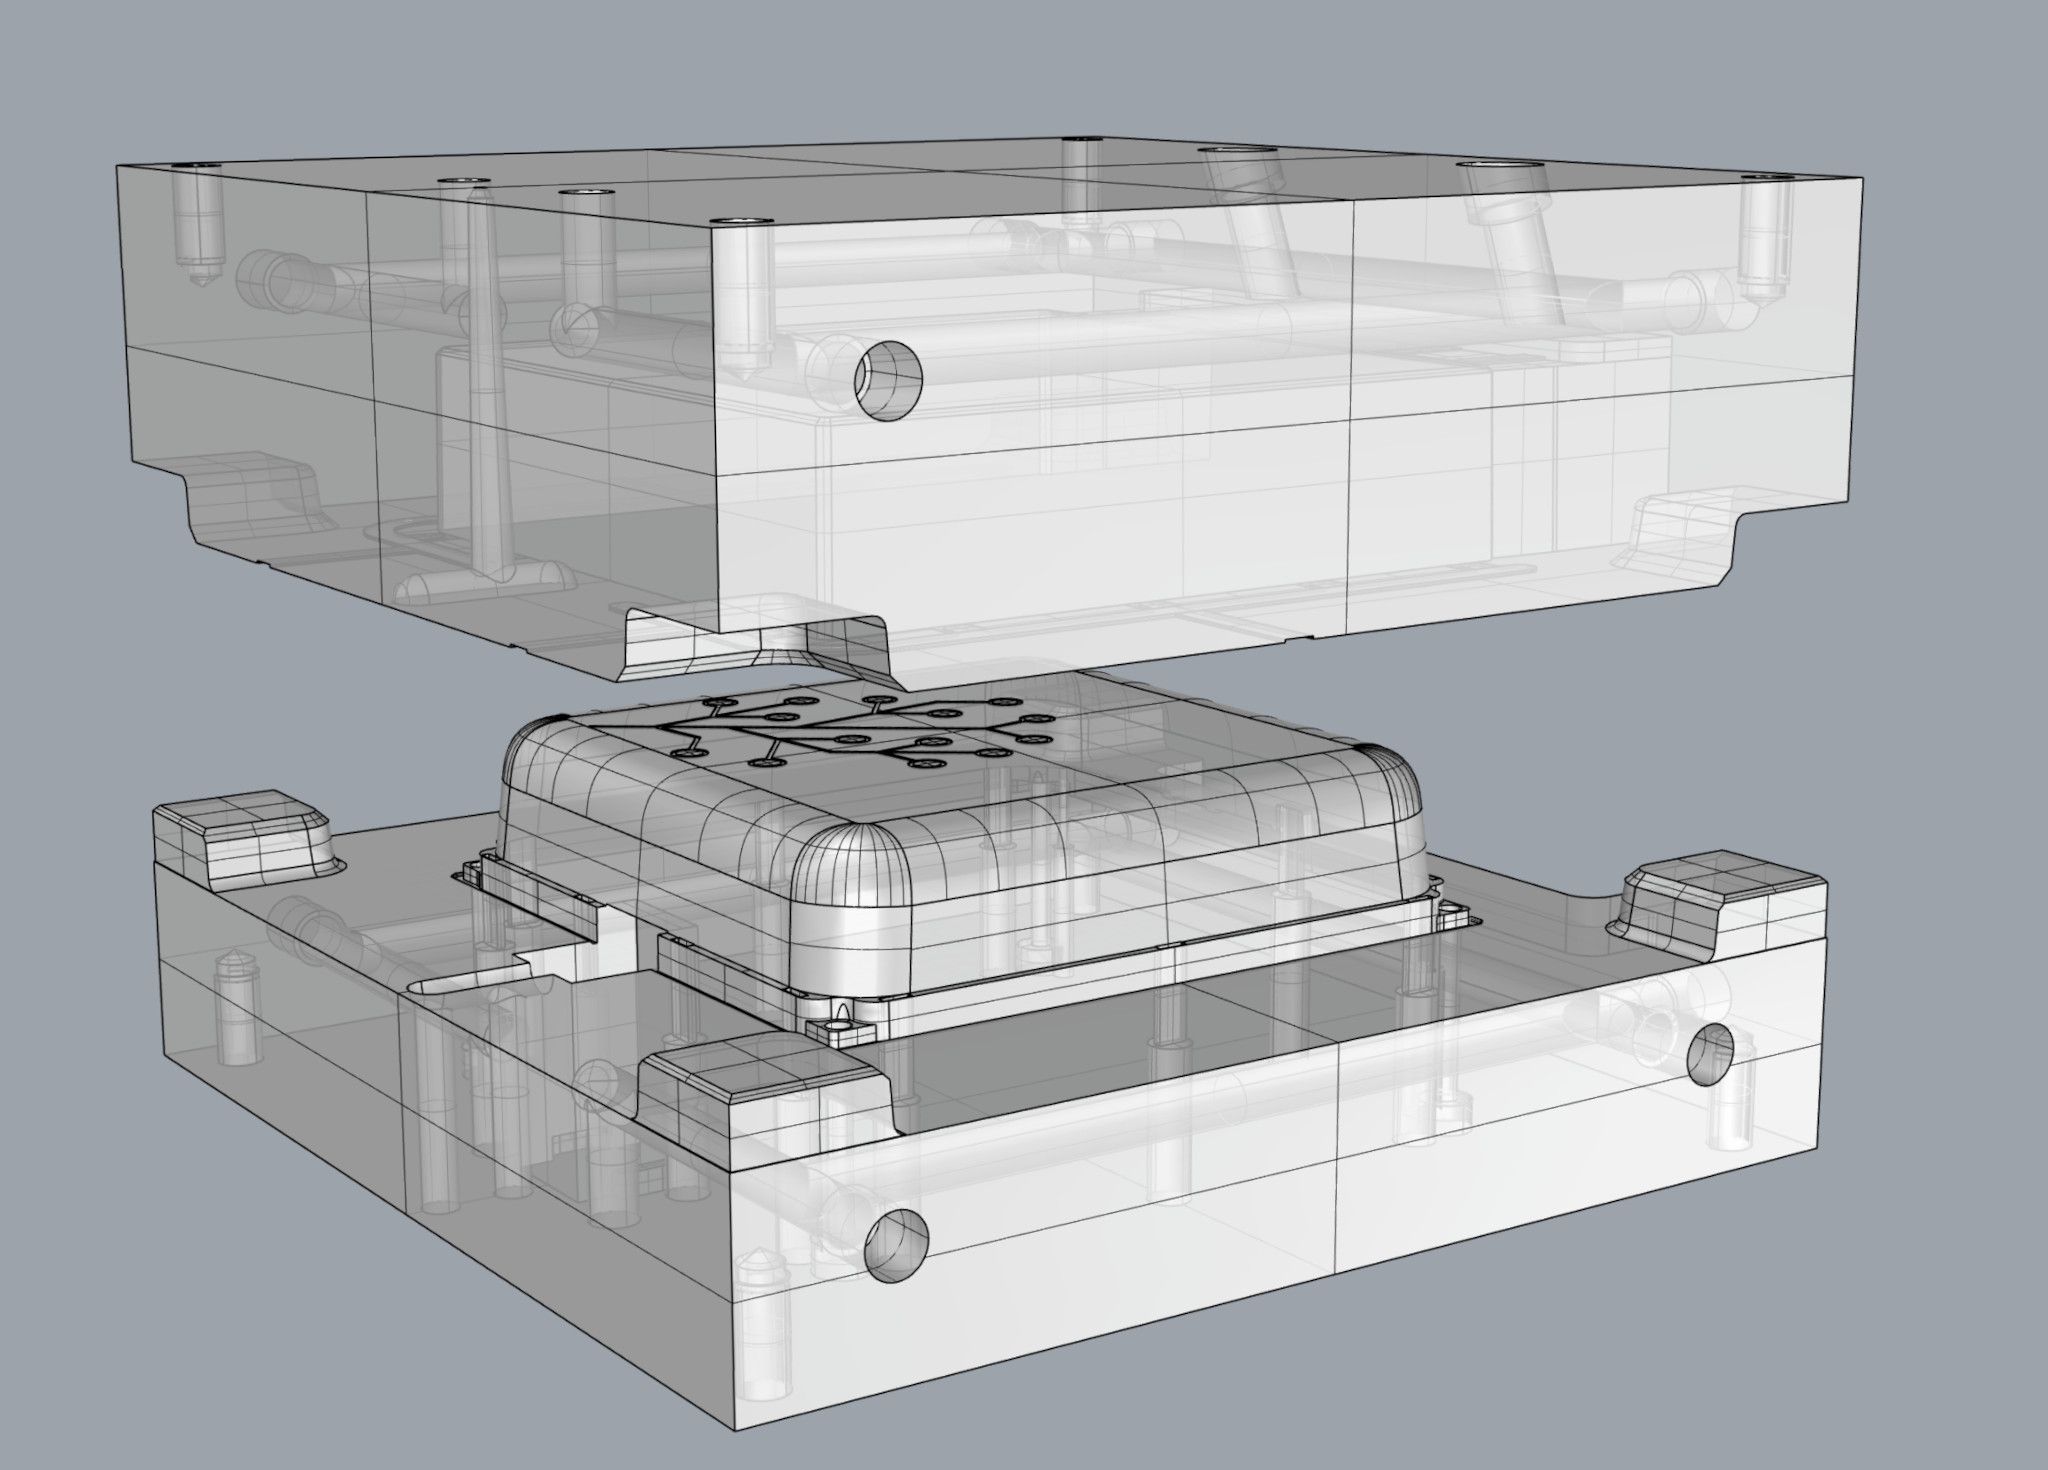
I provided CAD files and design instructions to the factory to begin creating the master-mould for the mould-making process. It was important to specify details like ejector pin locations, because the resulting pin marks would become a focal point on the inside of the clear enclosure and distract from the integrated logo.
Shown below is a render of the injection mould created by the tool shop for us to review before proceeding to cut the master mould out of steel.
The tooling is currently being produced. We hope to be able to share photos of our first samples by the end of October. Stay tuned!