Project update 2 of 12
From the Beginning Stages to Today
by Alessandro AHello everyone! First and foremost, I would like to express my heartfelt gratitude for all the support received so far. It has been truly amazing, as the goal was reached and surpassed in less than 24 hours and the project is still soaring! I’m also committed to continuously improving the ESP 360 Remote and making it even easier to use with Home Assistant. In this update, I would like to share the history of the ESP 360 Remote, and then delve into ESPHome, the software behind the ESP 360 Remote.
Early experiments with IR
The beginning stages of the ESP 360 Remote came from me working to control my AC unit by building my own IR controller circuit back in 2018. I installed Home Assistant for the first time on an old Raspberry Pi B+ (when they were still available) and controlled the LED through HTTP requests to the ESP8266 and similar stuff. A short time later, I tried to build a PCB to give my creation a touch of professionalism and improve it. First, I made a clear, clean, and very easy-to-read diagram:
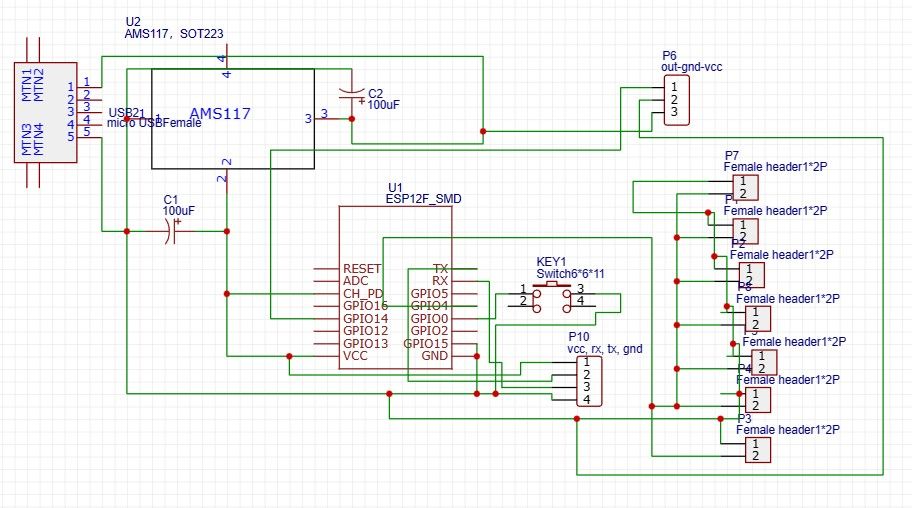
Then, I proceeded with the layout and ordered the PCB. The result was this:
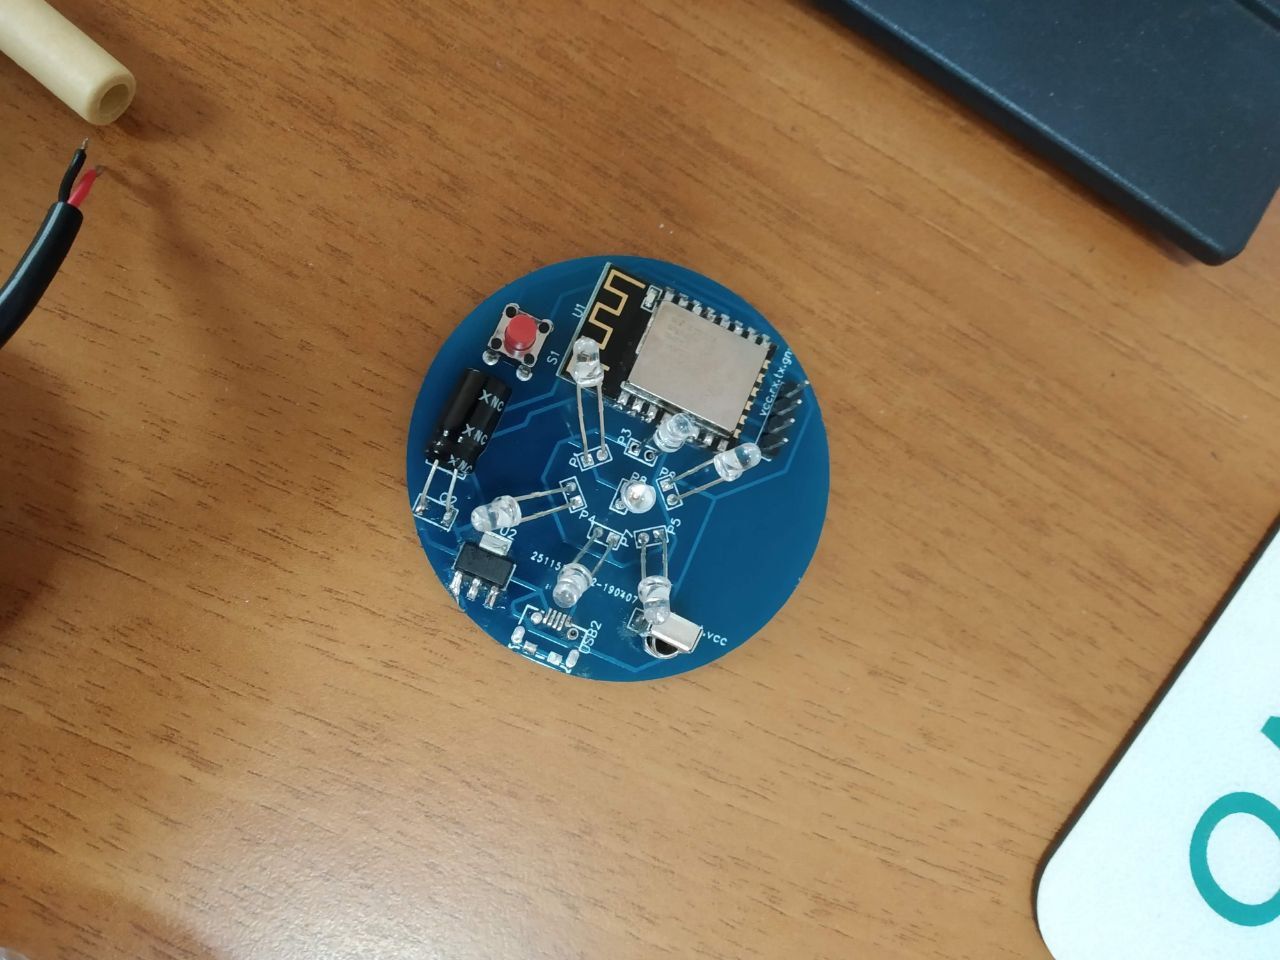
An ESP8266, a micro USB, a voltage regulator, and not 1, not 2, but 7 LEDs! The coolest thing was that they were all controlled by the same pin, without any transistor or resistor to limit the current. World record! To my youthful surprise, the board didn’t work, so it was time to learn more electrical theory at my university. Fast forward four years to September 2022, and I picked up the project again. With more knowledge and experience than the younger me, I was able to redesign it with better power regulation and more functions.

This is where the ESP 360 Remote version 1 was born: ESP32, IR LEDs properly controlled, radio frequency modules, temperature, humidity, and ambient light sensors, and a USB-to-serial converter. Everything worked correctly, but with that form factor, it was really hard to think of a case to enclose it without making it look like a brick. Looking back at the first PCB I made, the round shape wasn’t so bad (so there was something good about it), and to keep it small and circular, I had to split all the components on two separate PCBs. An 8-pin connector, and voila! The result was a neat, small, and easy-to-enclose board. Now that board is successfully crowdfunding on Crowd Supply! What an amazing journey!
Now let’s talk about what we’re really here to learn about: the software.
IR and RF signals
Let’s start with the basics. The ESP 360 Remote comes with two pairs of transmitter and receiver: one for infrared (IR_TX and IR_RX) and the other for radio frequencies (RF_TX and RF_RX). Although they are not visible on Home Assistant, they can be controlled through two services that send raw IR and RF signals. There are also events that will be triggered once IR and RF signals are received from your remote controls. This means that you no longer need to look at the ESPHome log to understand if and which signal you have received, and you can directly use this information in your Home Assistant automations.
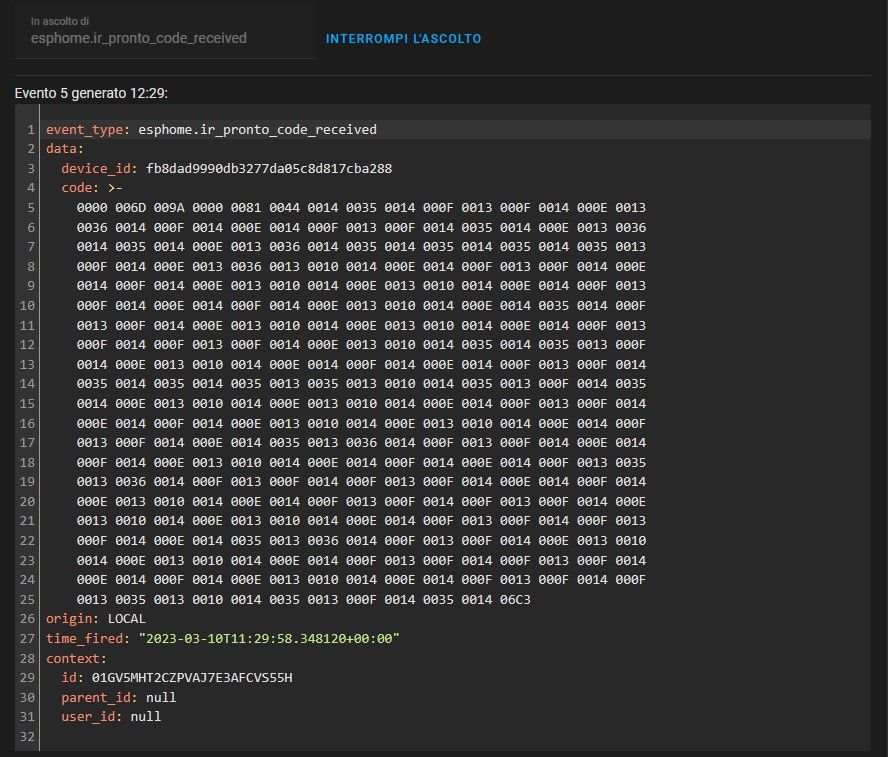
Speaking of signal reception events, I recently identified a bug in ESPHome that prevented the configuration from being compiled. The problem originated from the remote_receiver component, which did not allow the creation of automations when configured multiple times. Here is the issue #4021 After reporting it, the ESPHome developers fixed the bug in a very short time and released the fix with version 2023.2.4. Thanks to this, everything could be set up correctly. In particular, 3 events can be triggered, one for receiving RF signals (this is already explained in the Github repo) and two more new services for receiving IR signals in RAW and PRONTO format, respectively esphome.ir_pronto_code_received and esphome.ir_raw_code_received. Here are some screenshot from the Home Assistant frontend:
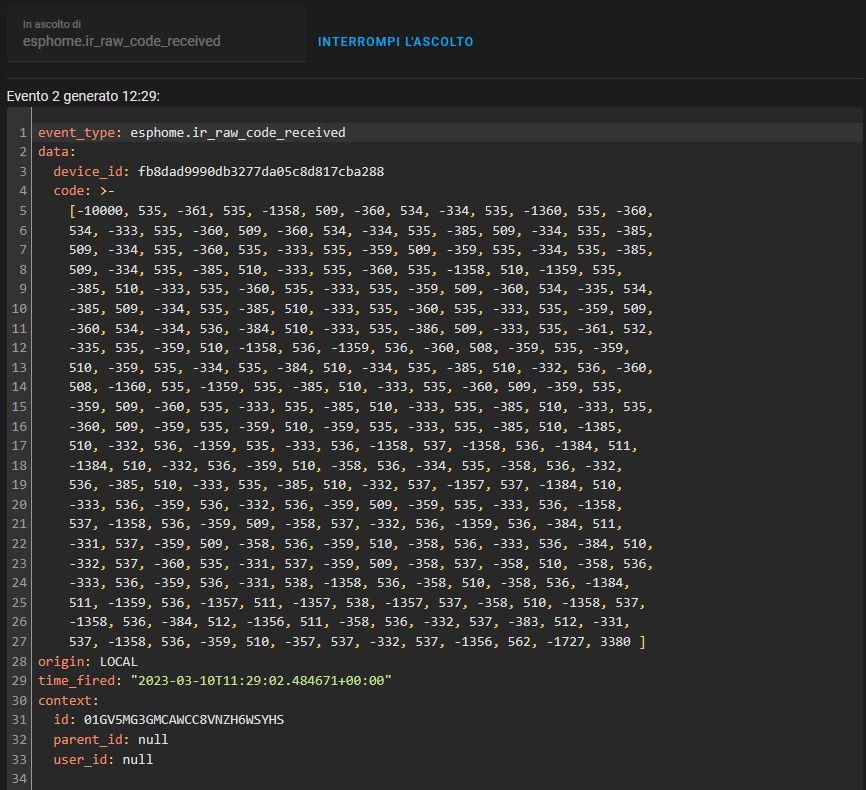
For the raw one, values are already reported in this array format, so you can just copy and paste the whole code section to use it in your automations or the integrated service to transmit raw signals.
Built-in Sensors
Now let’s move on to the sensors on the board. Calibration was necessary for the temperature and humidity sensors since it is always difficult to make them work optimally when mounted directly on the main PCB. However, wanting to maintain a small form factor, a compromise was essential. The SHTC3 sensor is affected not only by the heat of the PCB on which it is mounted but also by the upper layer of the board and the case. To counter this, the sensor has been placed on the edge of the board with an air barrier around it to isolate it from other components. Moreover, its multilayer footprint allows the dissipation of accumulated heat on the underside of the board. These measures resulted in consistent and linear temperature readings, with just a -4°C offset in the ESPHome configuration, and a maximum difference of ±0.3°C with the reference sensor, even after the board has been powered for a long time, thanks to the holes in the case that optimize the airflow. A similar approach was applied to the humidity sensor, resulting in consistent and linear readings. In this case, too, just an offset was needed to have a maximum difference of ±3% compared to the reference sensor. As for the light sensor, it has been calibrated both with and without the case and upper layer, and after several tests, a multiplication factor of 5 was enough to obtain reasonably accurate measurements.
Status LED
Finally, the status LED. The issue is very simple: it is annoying at night. Nowadays, any electronic device has LEDs that are on permanently and every night the room looks like a disco. Well, the ESP 360 Remote is built different. By default, it will turn on at startup, if you want to keep it you can, or you can turn it off and not worry about it. That’s it. If you would like to know more about outdoor and indoor light pollution and how these can potentially impact our health, consider reading this interesting article from Harvard University’s blog
I believe I have covered everything regarding the software and I hope you enjoyed peeking into the past of the ESP 360 Remote and getting to know its ancestors.
If you have any questions, I’ll be happy to answer from the "ask a technical question" page. If you haven’t bought yourself an ESP 360 remote yet, please consider supporting us by buying one, or a two-pack during the campaign! The two-pack will not be available once the campaign ends, so this is the best way to get them at the lowest price. Stay tuned for the next update!