Project update 3 of 13
[VIDEO] ANAVI Miracle Controller and Adafruit NeoPixels
NeoPixels are rings, strips and other printed circuit boards with addressable RGB LEDs manufactured by Adafruit Industries, an open-source hardware company based in Manhattan, New York City. These chainable bright LEDs products are extremely popular in the maker community.
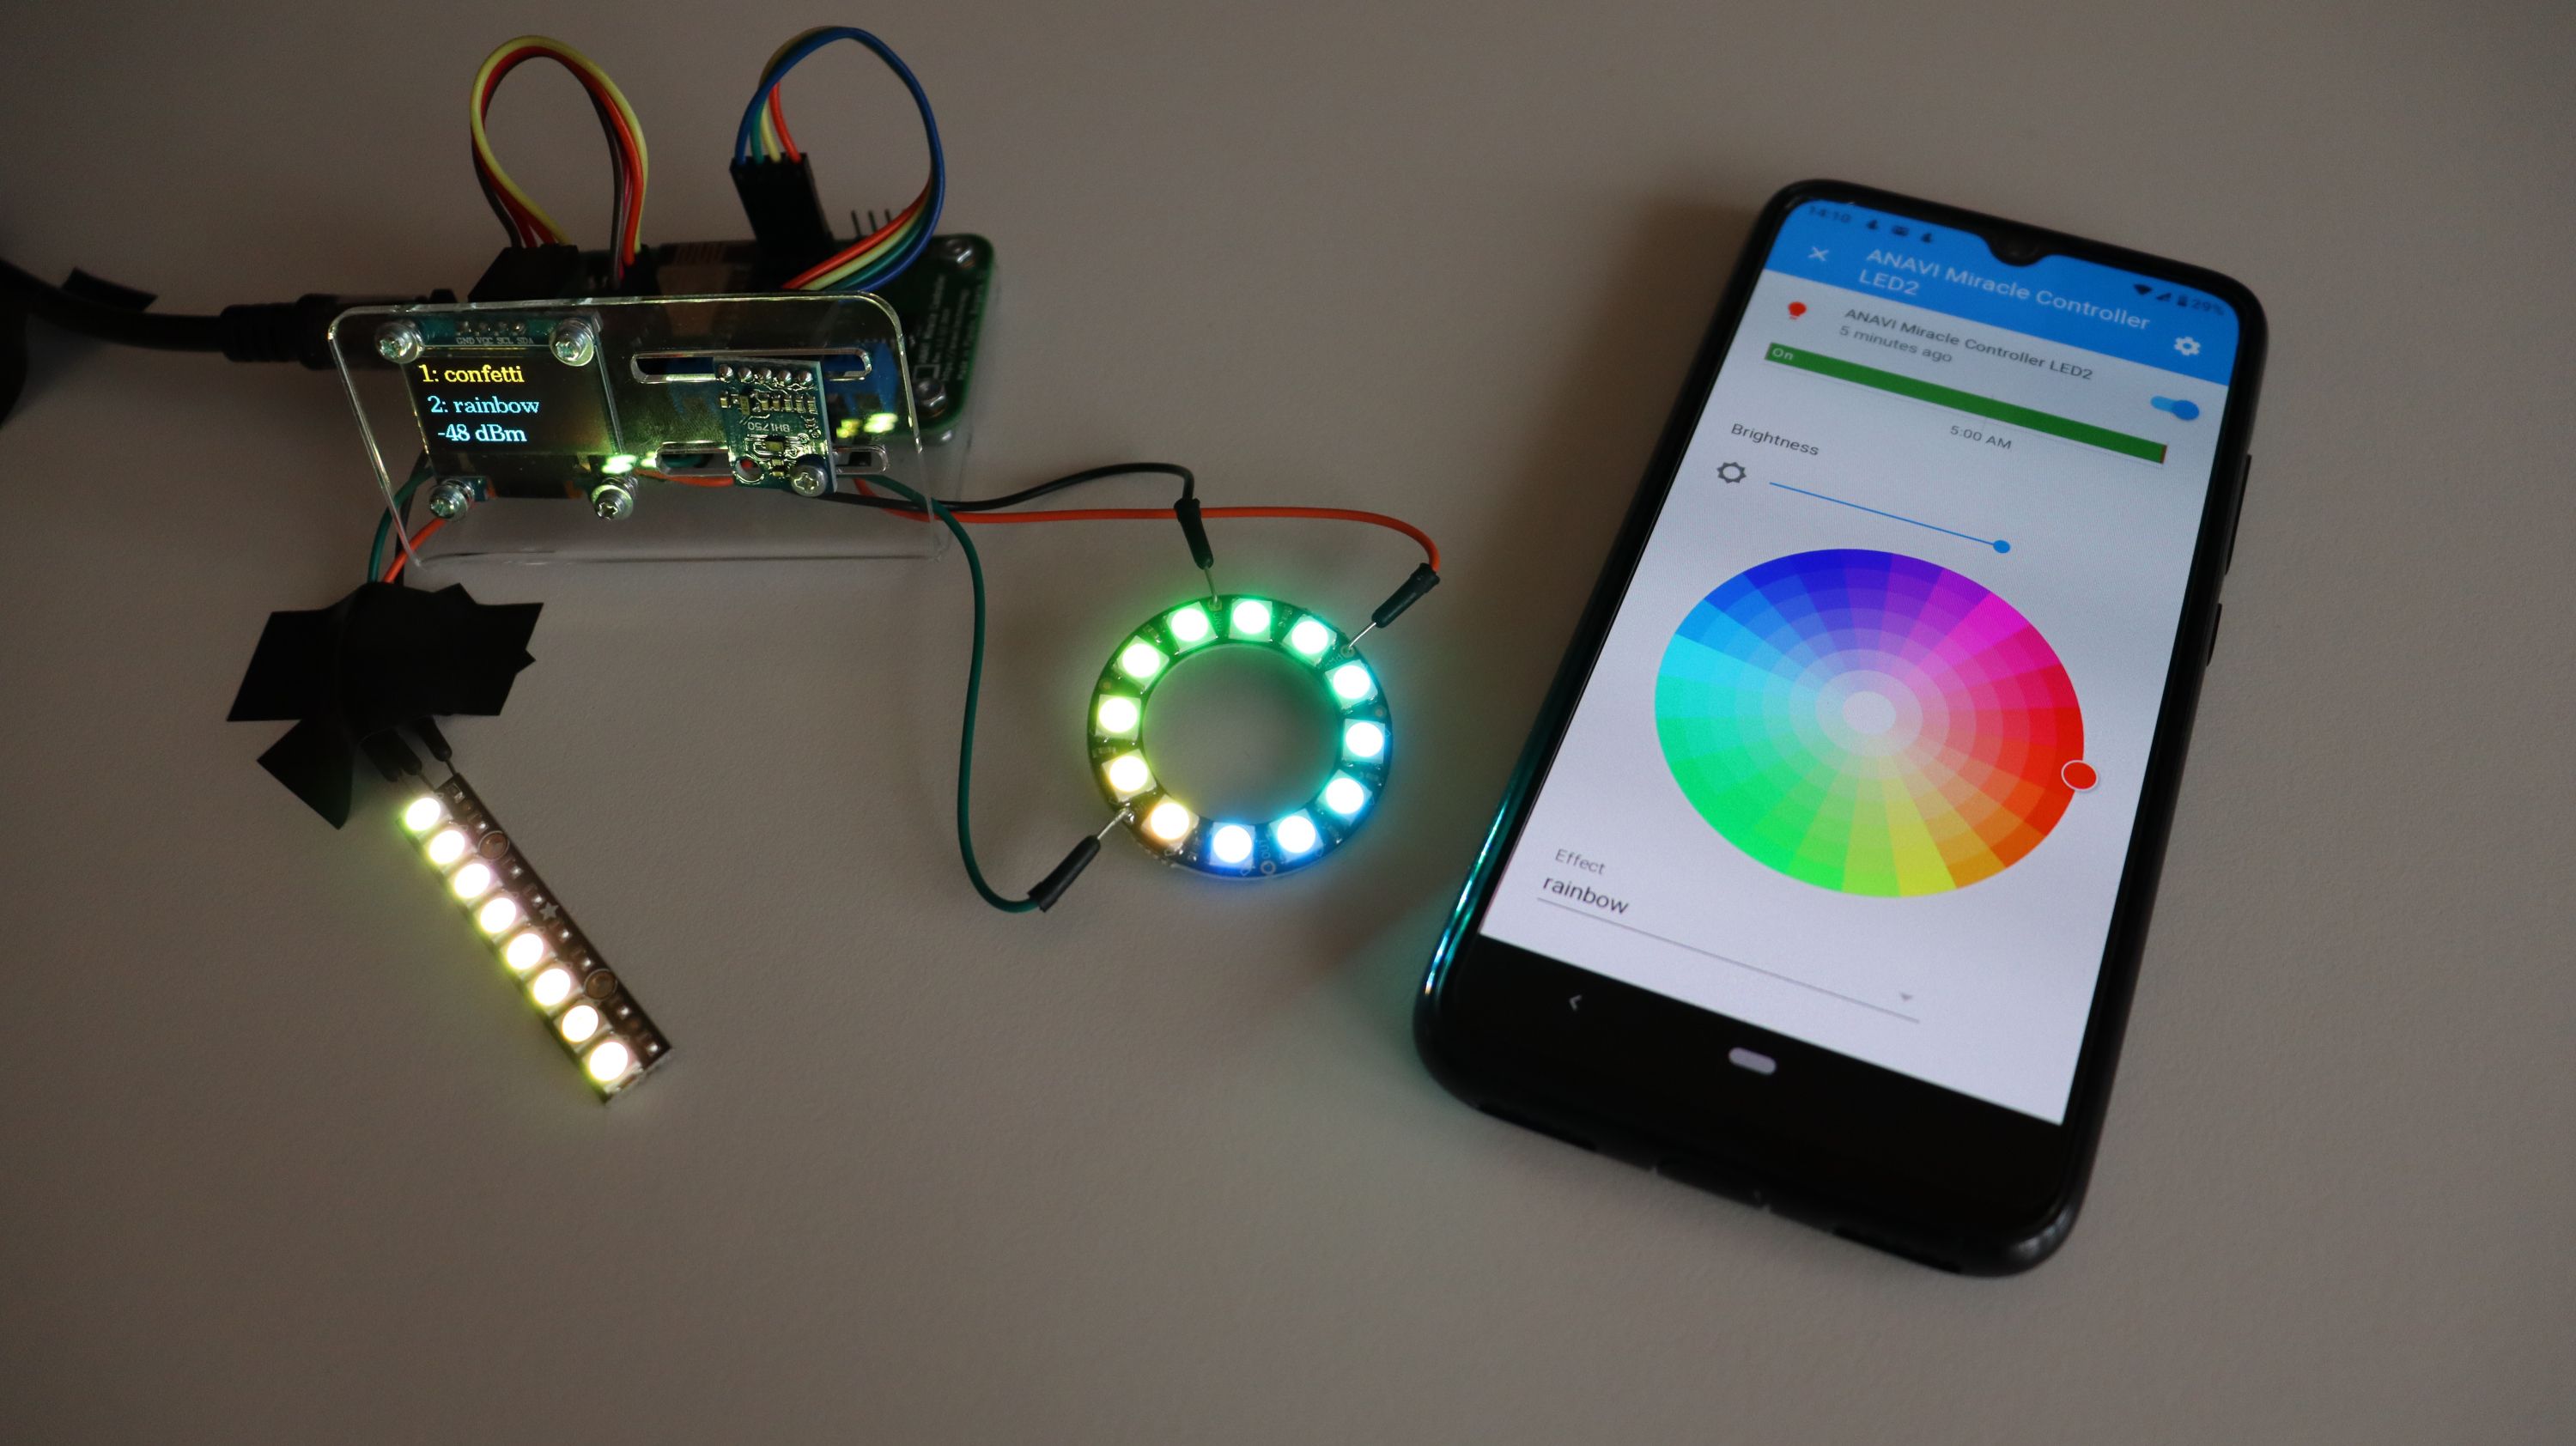
ANAVI Miracle Controller is also an open source hardware product. All kits include WS1812B LED strips but other products with addressable RGB LEDs are also supported. I decided to give it a try and control simultaneously Adafruit NeoPixel Ring and Adafruit NeoPixel Stick.
Without any coding, thanks to the default open source firmware of ANAVI Miracle Controller and the popular open source home automation platform Home Assistant everything works out of the box! Have a look at the video below or in my YouTube channel to see the whole setup and follow the steps below to reproduce it.
Required Hardware
- ANAVI Miracle Controller
- Adafruit NeoPixel Ring
- Adafruit NeoPixel Stick
- 6 male to male jumper wires
- 5V DC power supply
- Personal computer, for example Raspberry Pi
Optionally, you may also attach a mini OLED display as the one used in the video. Such a display is included in any of the Advanced and Developer kits.
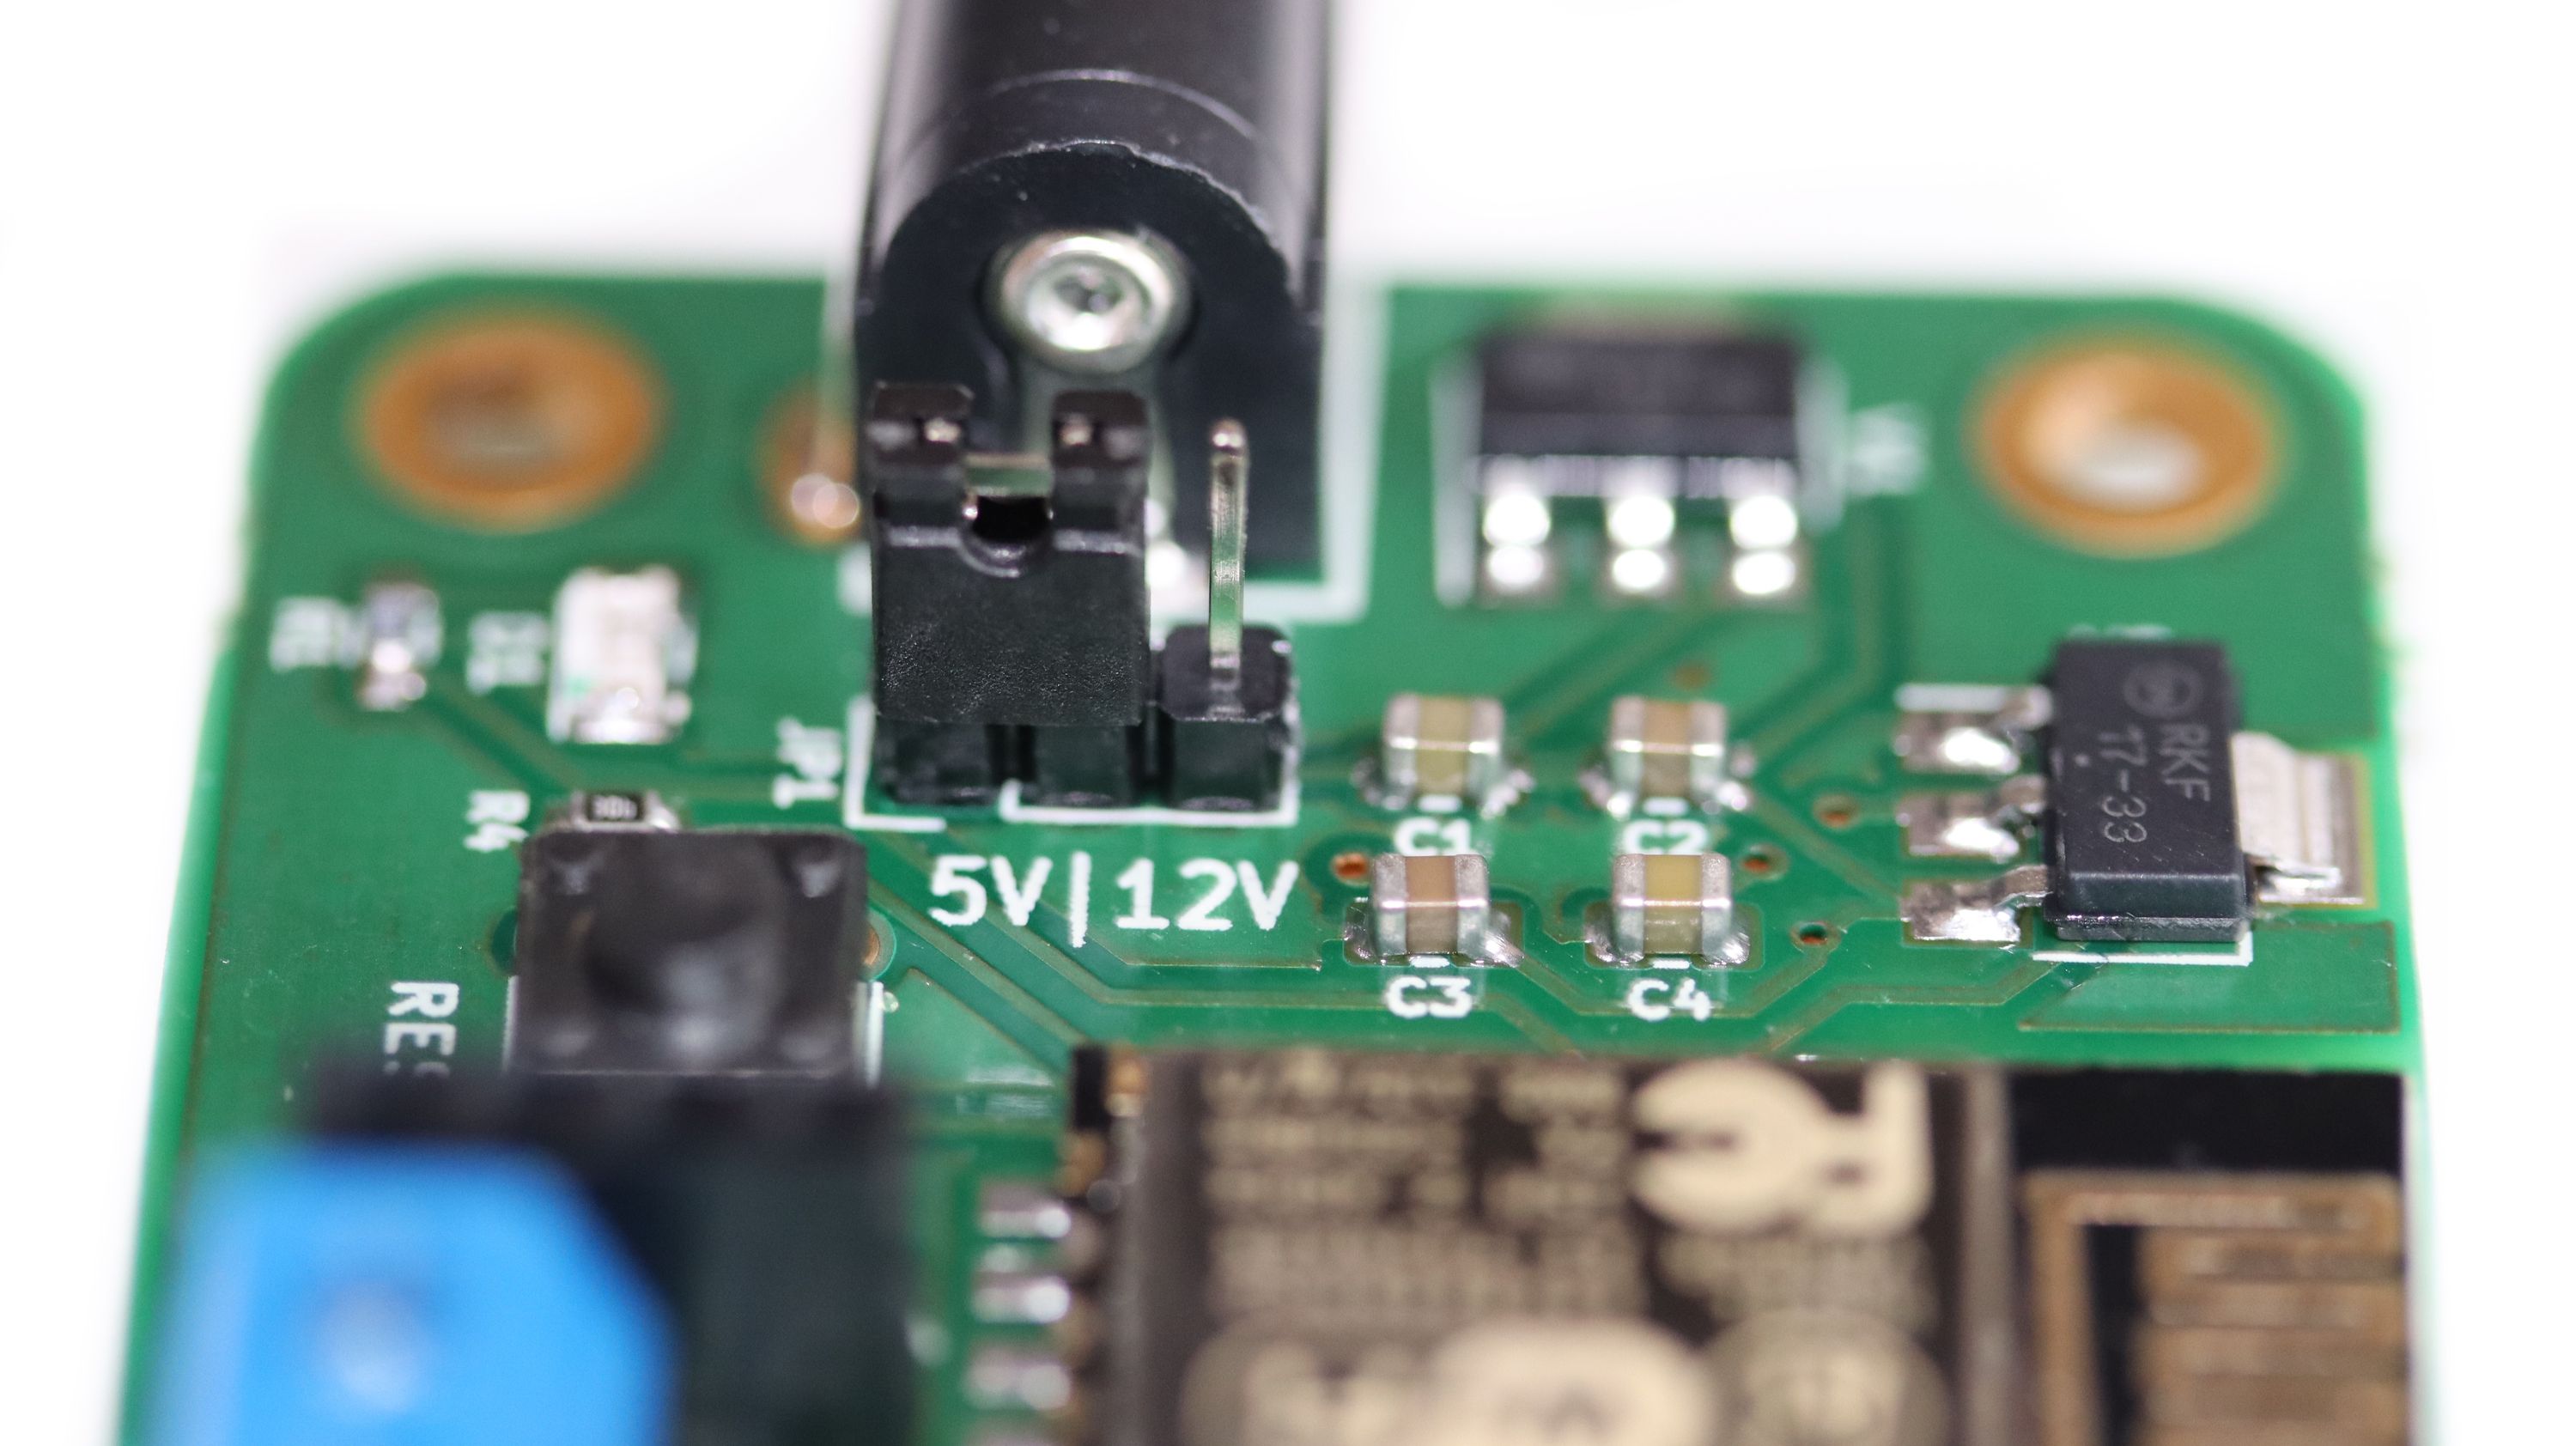
Adafruit NeoPixels work at 5V so it is mandatory to set the jumper on ANAVI Miracle Controller to 5V and use an appropriate 5V power supply!
Step By Step Installation
- Install Home Assistant through Hass.io on the personal computer (it is recommended to use Raspberry Pi 3 or 4).
- Install Mosquitto MQTT broker from Hass.io add-on store, configure username and password as well as Access Control Lists (ACL).
- From Configure > Integrations add new MQTT integration and click Enable discovery. It is mandatory to enable discovery!
- Solder male to male jumper wires to Adafruit NeoPixel Ring and NeoPixel Stick.
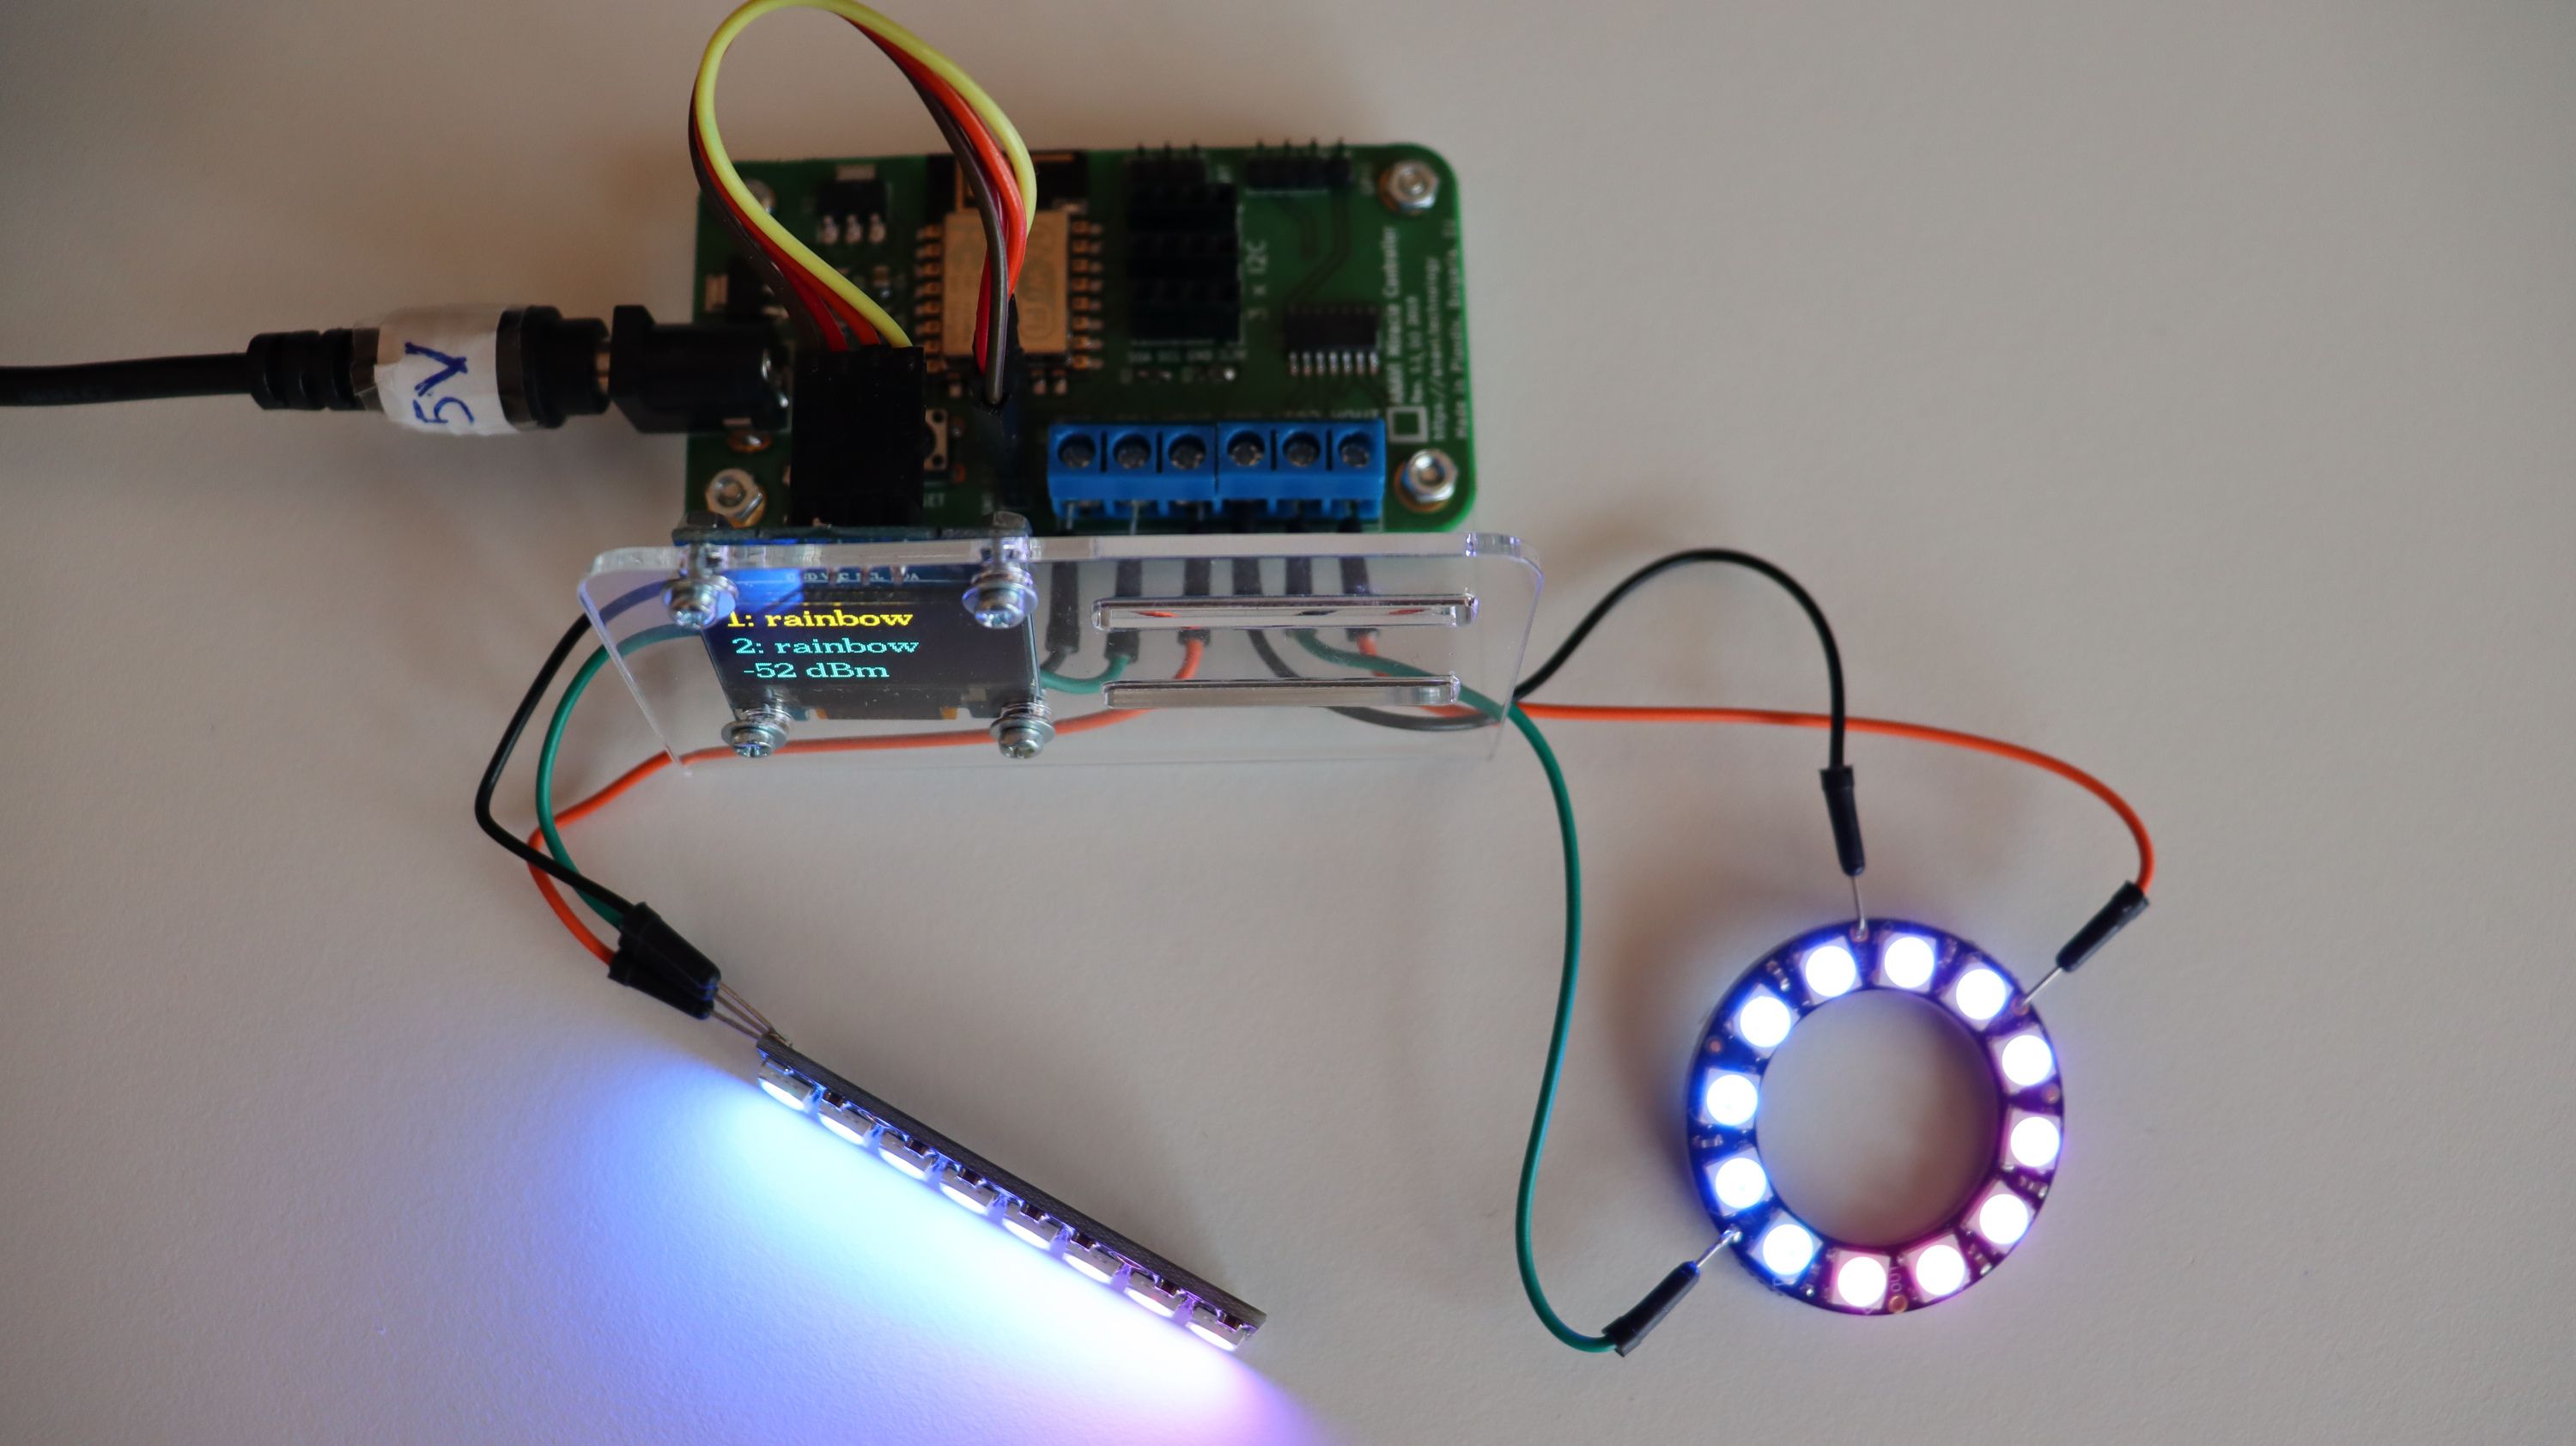
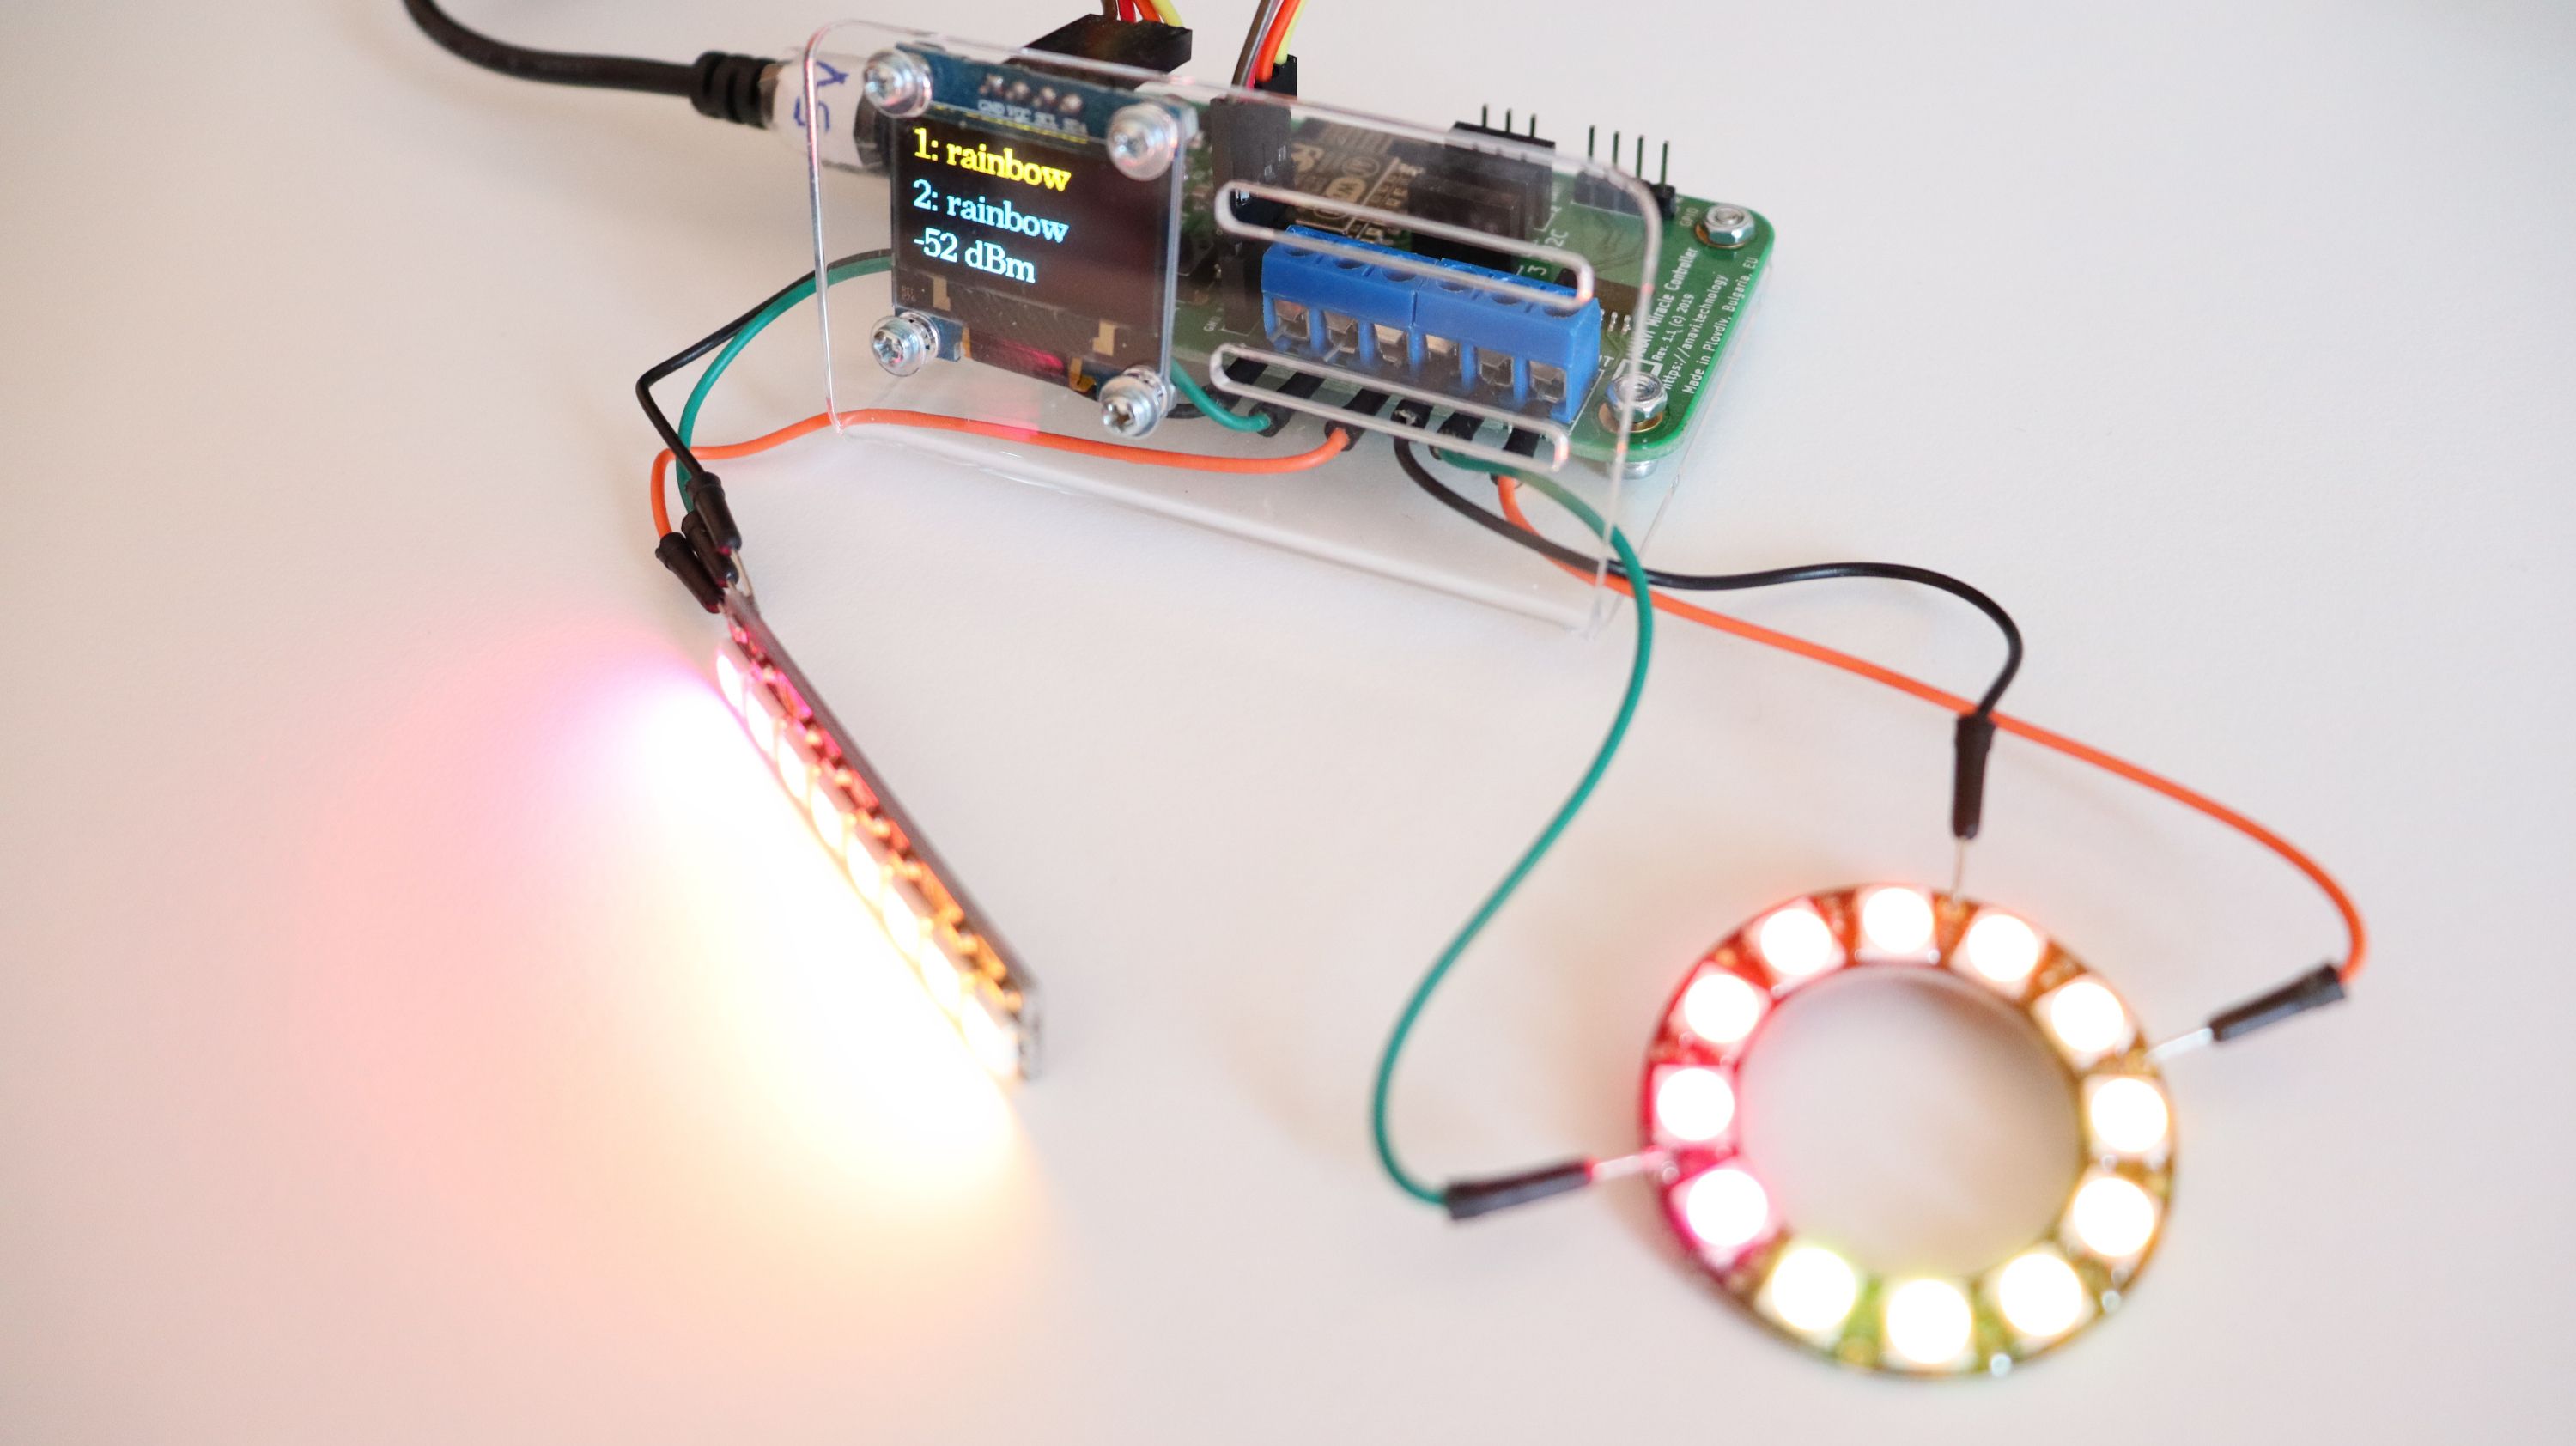
- Connect NeoPixel Stick DIN to LED1, GND to GND and 5VDC to VOUT on ANAVI Miracle Controller. * Connect NeoPixel Ring Data Input to LED2, GND to GND and 5V DC Power to VOUT on ANAVI Miracle Controller.
- Set the jumper of ANAVI Miracle Controller to 5V and use appropriate power supply to turn on the board.
- Configure ANAVI Miracle Controller to connect to your local WiFi network, set LED type to NEOPIXEL, number of LEDs for LED1 to 8 and number of LEDs for LED2 to 12.
- In Home Assistant web interface, a couple of new devices will be automatically added under the names ANAVI Miracle Controller LED1 and ANAVI Miracle Controller LED2. Set different effects and colors for each Adafruit NeoPixels.
How Does It Work?
ANAVI Miracle Controller combines open source hardware with free and open source software. It has been certified by the Open Source Hardware Association under UID BG000050. The default firmware is available as Arduino sketch at GitHub. It relies on several popular Arduino libraries. The communication is done over the machine-to-machine real-time protocol MQTT. The Arduino sketch implements MQTT Light of Home Assistant with JSON schema for the payload of the messages.
When you turn on ANAVI Miracle Controller for the very first time it creates a WiFi Access Point (AP). From a smartphone, tablet or a personal computer connect to the WiFi AP and follow the on-screen instructions at the captive portal to complete the initial setup. After that ANAVI Miracle Controller will connect to configured WiFi network and the MQTT broker.
ANAVI Miracle Controller sends a retained MQTT message with JSON payload containing description of the device. Home Assistant, thanks to the MQTT integration with enabled discovery, automatically receives the message and recognizes the device as MQTT Light component. As a result out of the box ANAVI Miracle Controller appears in the Home Assistant GUI. All these internal may sound difficult but luckily they happen behind the curtains and as you can see in the video for the user the whole process is straight-forward.
Thank you for supporting the crowdfunding campaign of ANAVI Miracle Controller. We are working on hardening the default open source firmware and we will keep sharing more details in the next updates.
Thanks,
Leon