Project update 6 of 13
[VIDEO] Getting Started with ANAVI Miracle Controller

ANAVI Miracle Controller is an open source, Wi-Fi dev board to control two 5V or 12V LED strips. [In a previous update we have already covered the procedure for compiling and uploading to it Arduino sketches])(https://www.crowdsupply.com/anavi-technology/miracle-controller/updates/video-uploading-arduino-sketch-to-anavi-miracle-controller). Now we will explore how the default firmware works and how to connect ANAVI Miracle Controller to your WiFi and MQTT broker. MQTT is a lightweight messaging protocol for (near) real-time communication between Internet of Things (IoT).
Out of the box ANAVI Miracle Controller comes with default firmware, compatible with Home Assistant. The initial configuration for connecting ANAVI Miracle Controller to your local WiFi network is straight-forward and takes less than a couple of minutes. This short video tutorial covers the whole procedure and show a quick demonstration with the simple HTML5 web site at http://demo.anavi.technology/ using the free public MQTT broker at https://mqtt.eclipse.org/.
Connecting ANAVI Miracle Controller to the WiFi
Follow below the exact steps to setup ANAVI Miracle Controller as shown in the video:
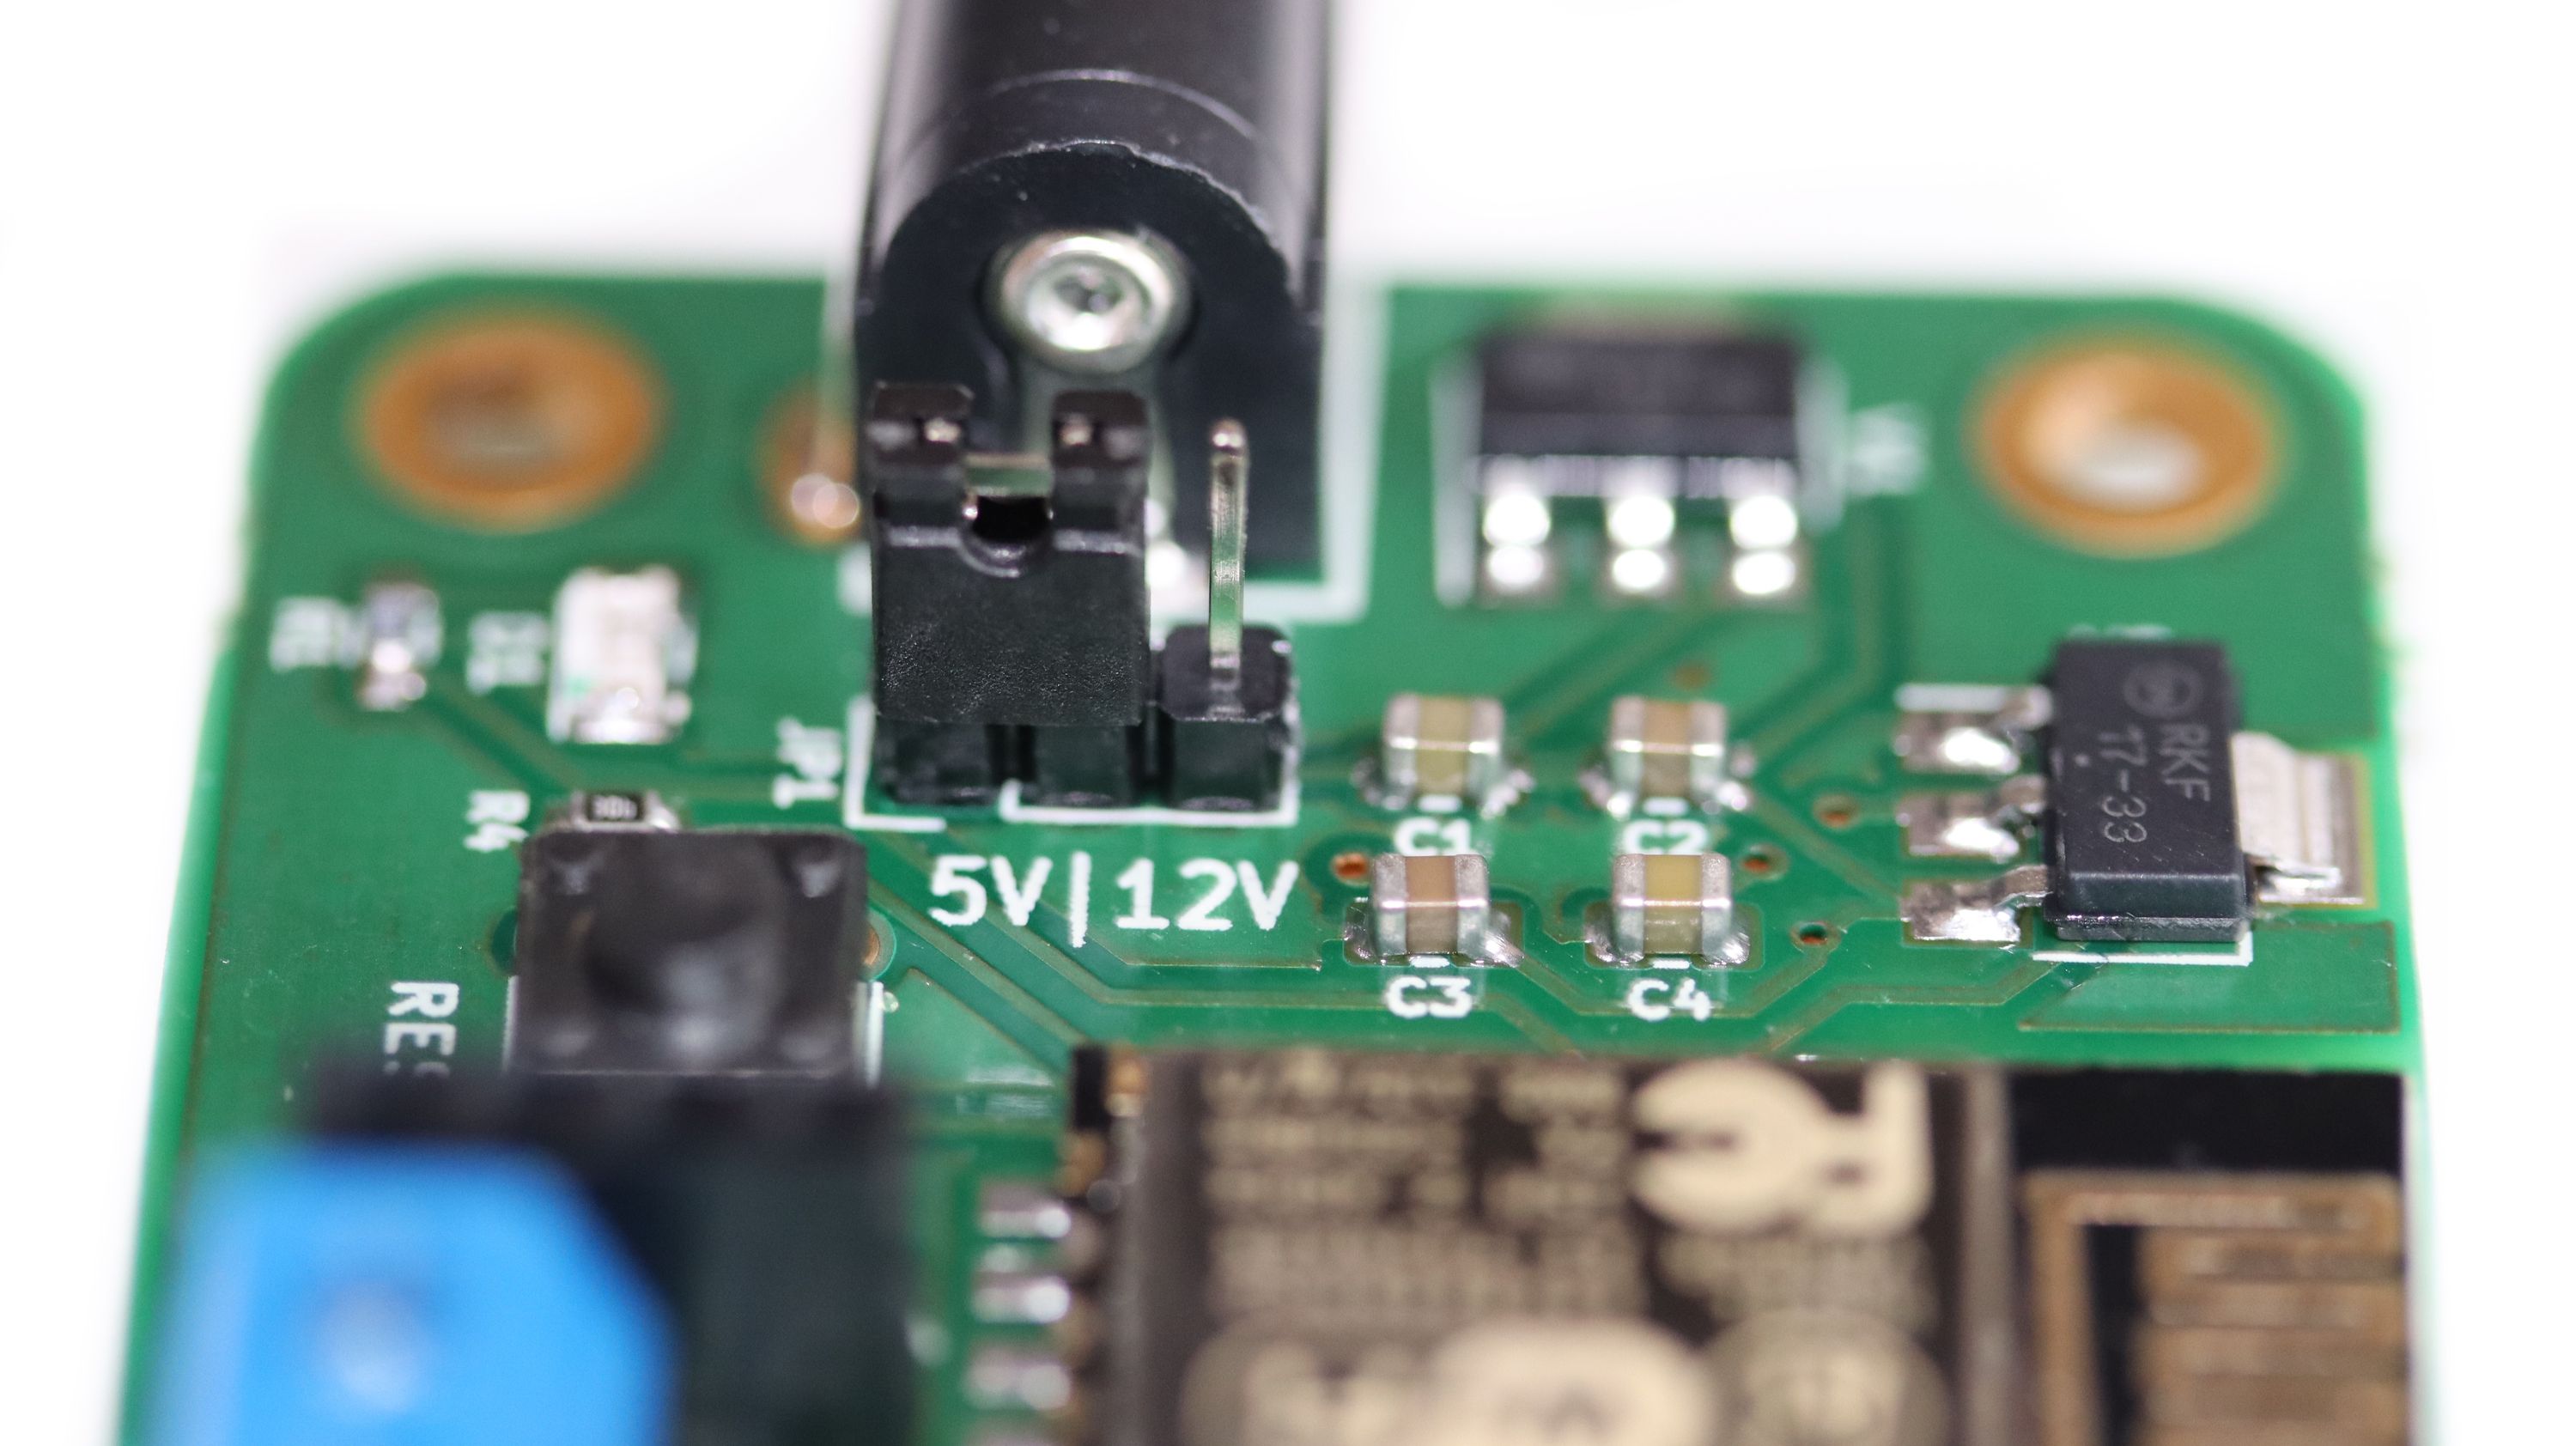
- Ensure that the jumper on ANAVI Miracle Controller is set to the appropriate voltage that matches the power supply and the requirement of the attached LED strips. All WS2812B LED strips provided as part of our kits work at 5V so the jumper must be set to 5V and 5V power supply must be used.
NOTE: Be careful, using a power supply at a wrong voltage will severely damage ANAVI Miracle Controller and the LED strips!
- Turn on ANAVI Miracle Controller by plugging the appropriate power supply.
- From your personal computer, tablet or smartphone connect the temporary WiFi AP (Access Point) created by ANAVI Miracle Controller.
- A captive portal will open and guide you through the rest of the process.
- Click Configure WiFi.
- From the list select your local WiFi network and type in your password.
- Set MQTT broker credentials (address, username, password). It is recommended to set up your own secured MQTT broker. Optionally, just for quick demonstration, you may leave the default values for the free public MQTT broker at mqtt.eclipse.org.
- Copy the unique machine ID of your ANAVI Miracle Controller
- Click Save
After this ANAVI Miracle Controller will save the configurations, turn on its temporary WiFi AP and try to connect first to your local WiFi network and after that to the configured MQTT broker.
Quick Demo
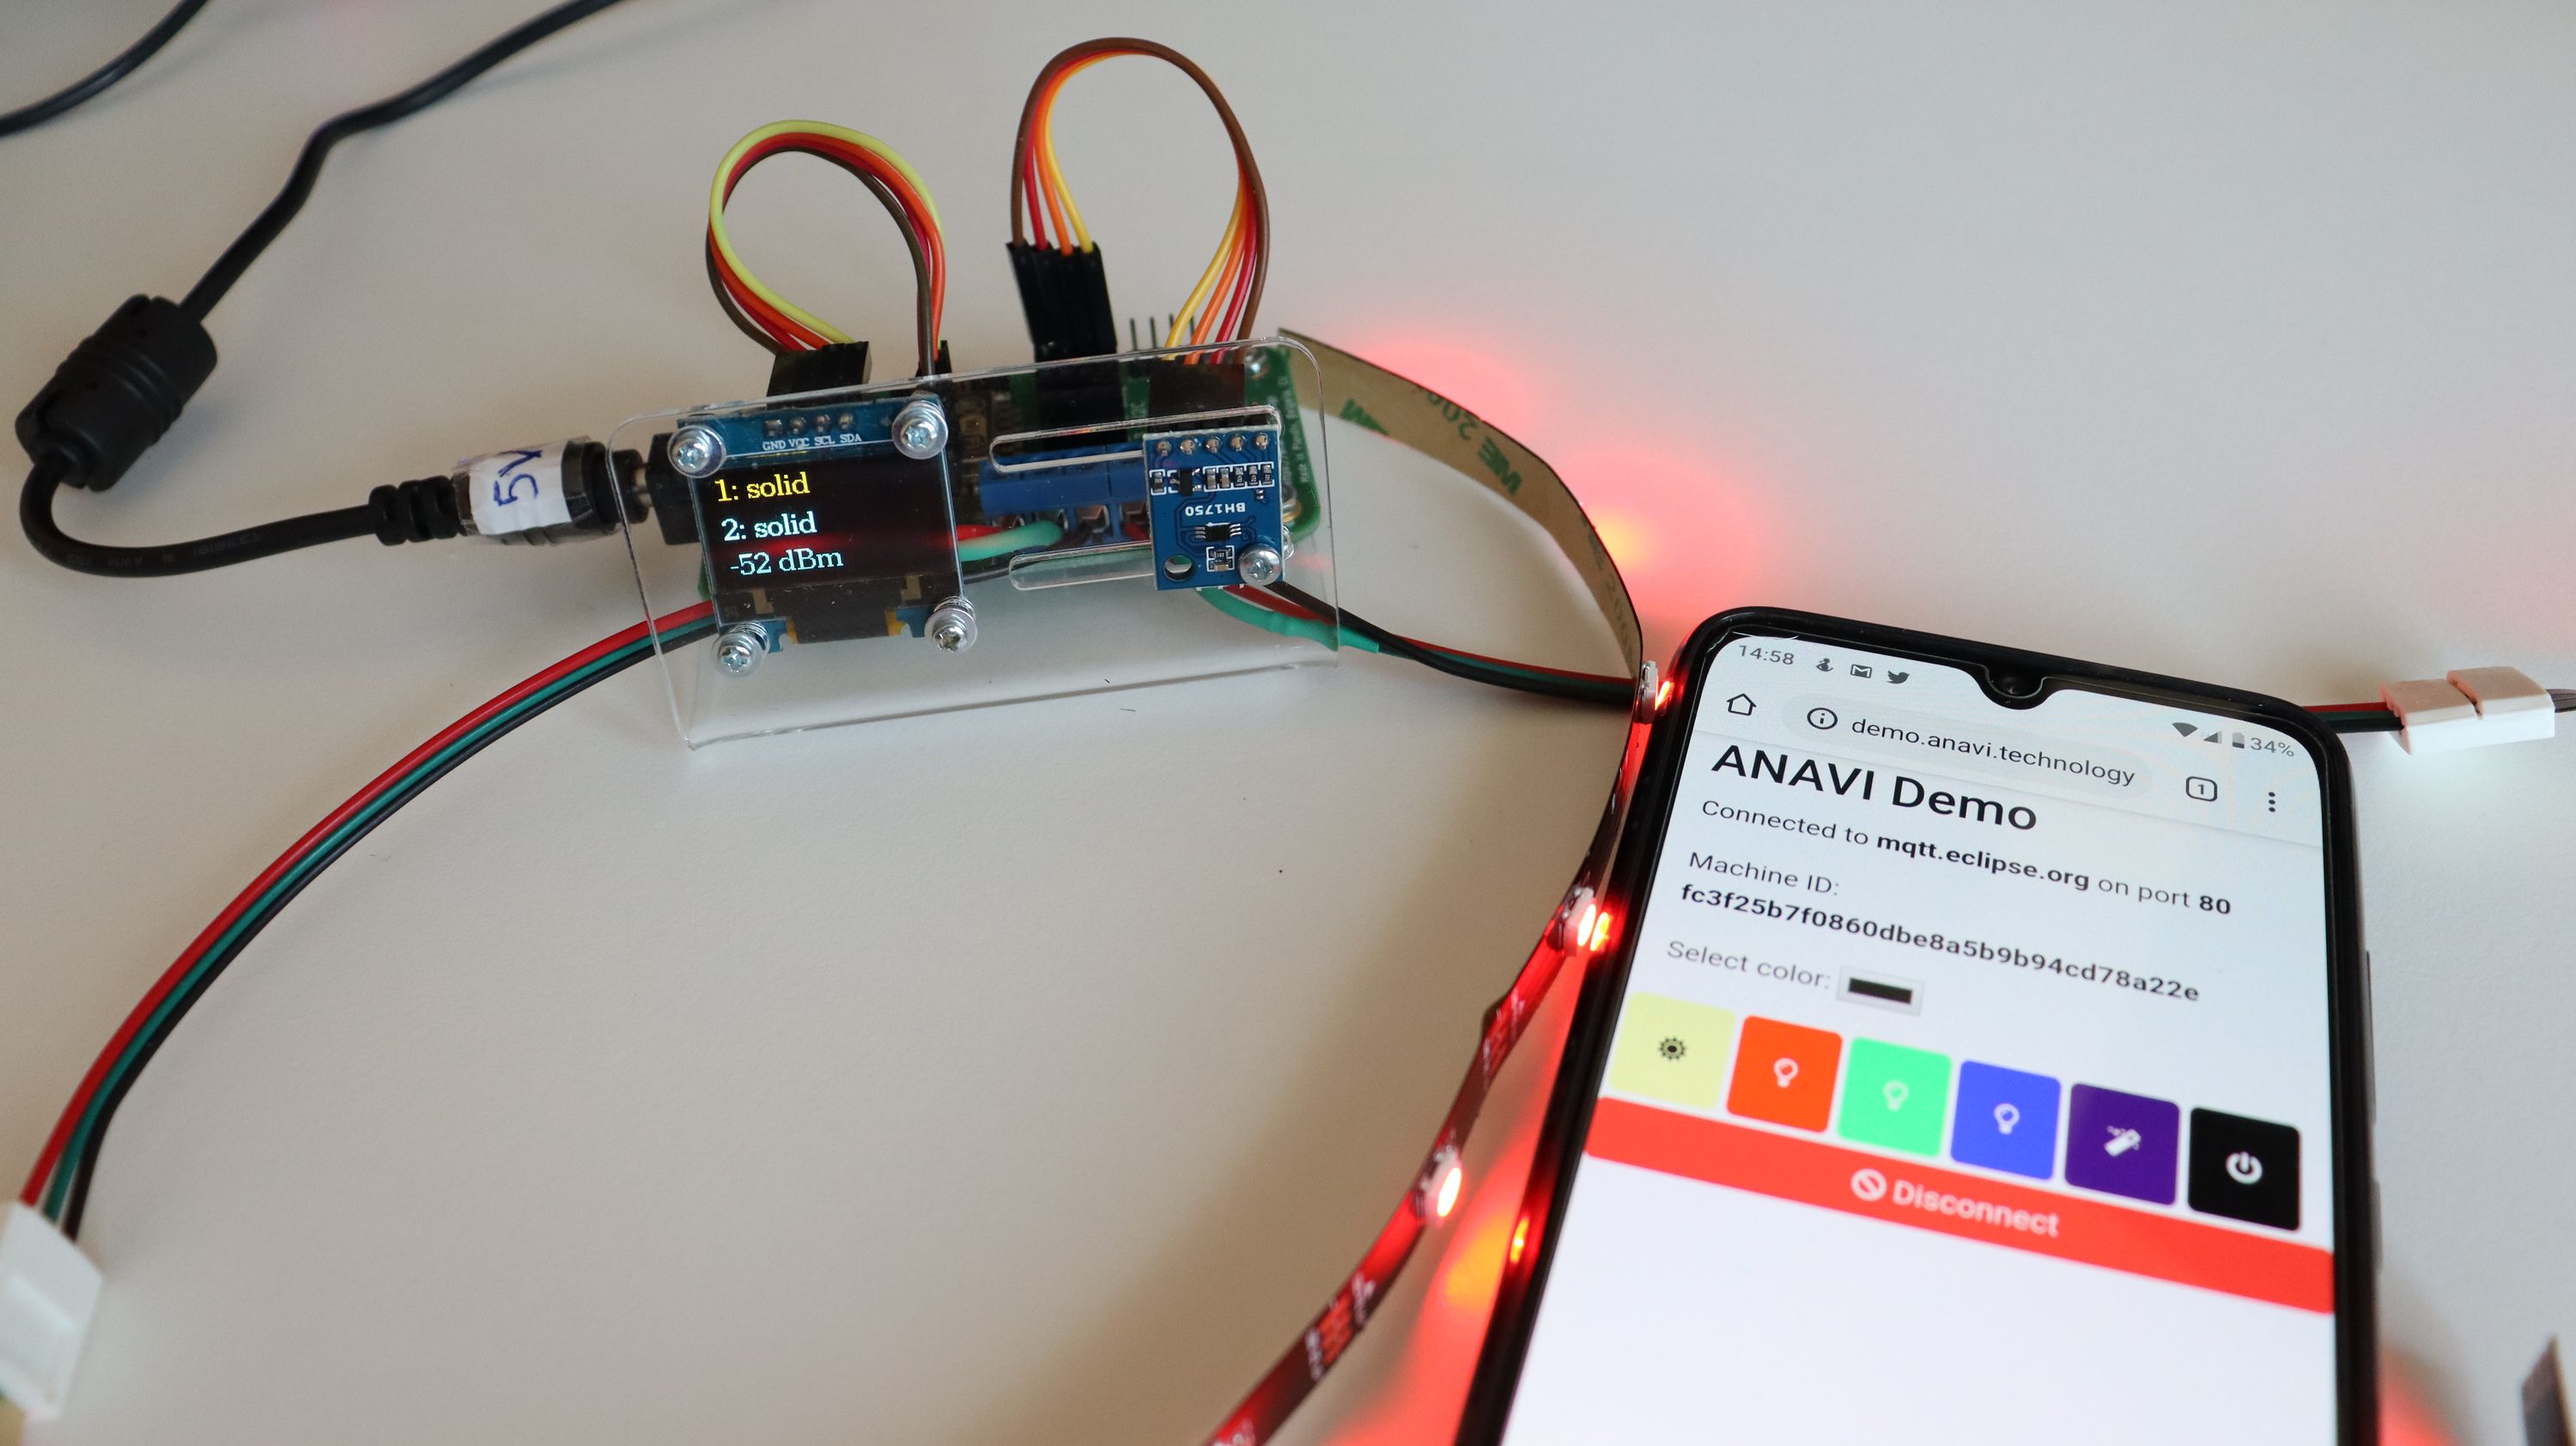
As shown in the video, for a quick test and demonstration you can control ANAVI Miracle Controller through http://demo.anavi.technology/. By default this simple HTML5 web page connects to mqtt.eclipse.org (same as the default configuration for ANAVI Miracle Controller). From the advanced tab on http://demo.anavi.technology/ you can switch to another free public MQTT broker.
Open a web browser and go to http://demo.anavi.technology/. Type in the unique machine ID of your ANAVI Miracle Controller and click Connect. After successfully establishing a connection click the buttons to change the colors of the LED strip.
This simple HTML5 web page is also open source and it is available at GitHub. Keep in mind that it is not secure to use free public MQTT broker and this web page is intended only for quick tests and demonstrations.
Resetting ANAVI Miracle Controller to Factory Defaults
If you need to change the configurations of ANAVI Miracle Controller and for example connect to a different MQTT broker or WiFi network, you need to perform a reset to factory default. While ANAVI Miracle Controller is running, press the RESET button and hold it for 10 seconds. During this time the RESET button will be blinking. After that ANAVI Miracle Controller will wipe out all configurations, reset to factory defaults and you will need to setup it again.
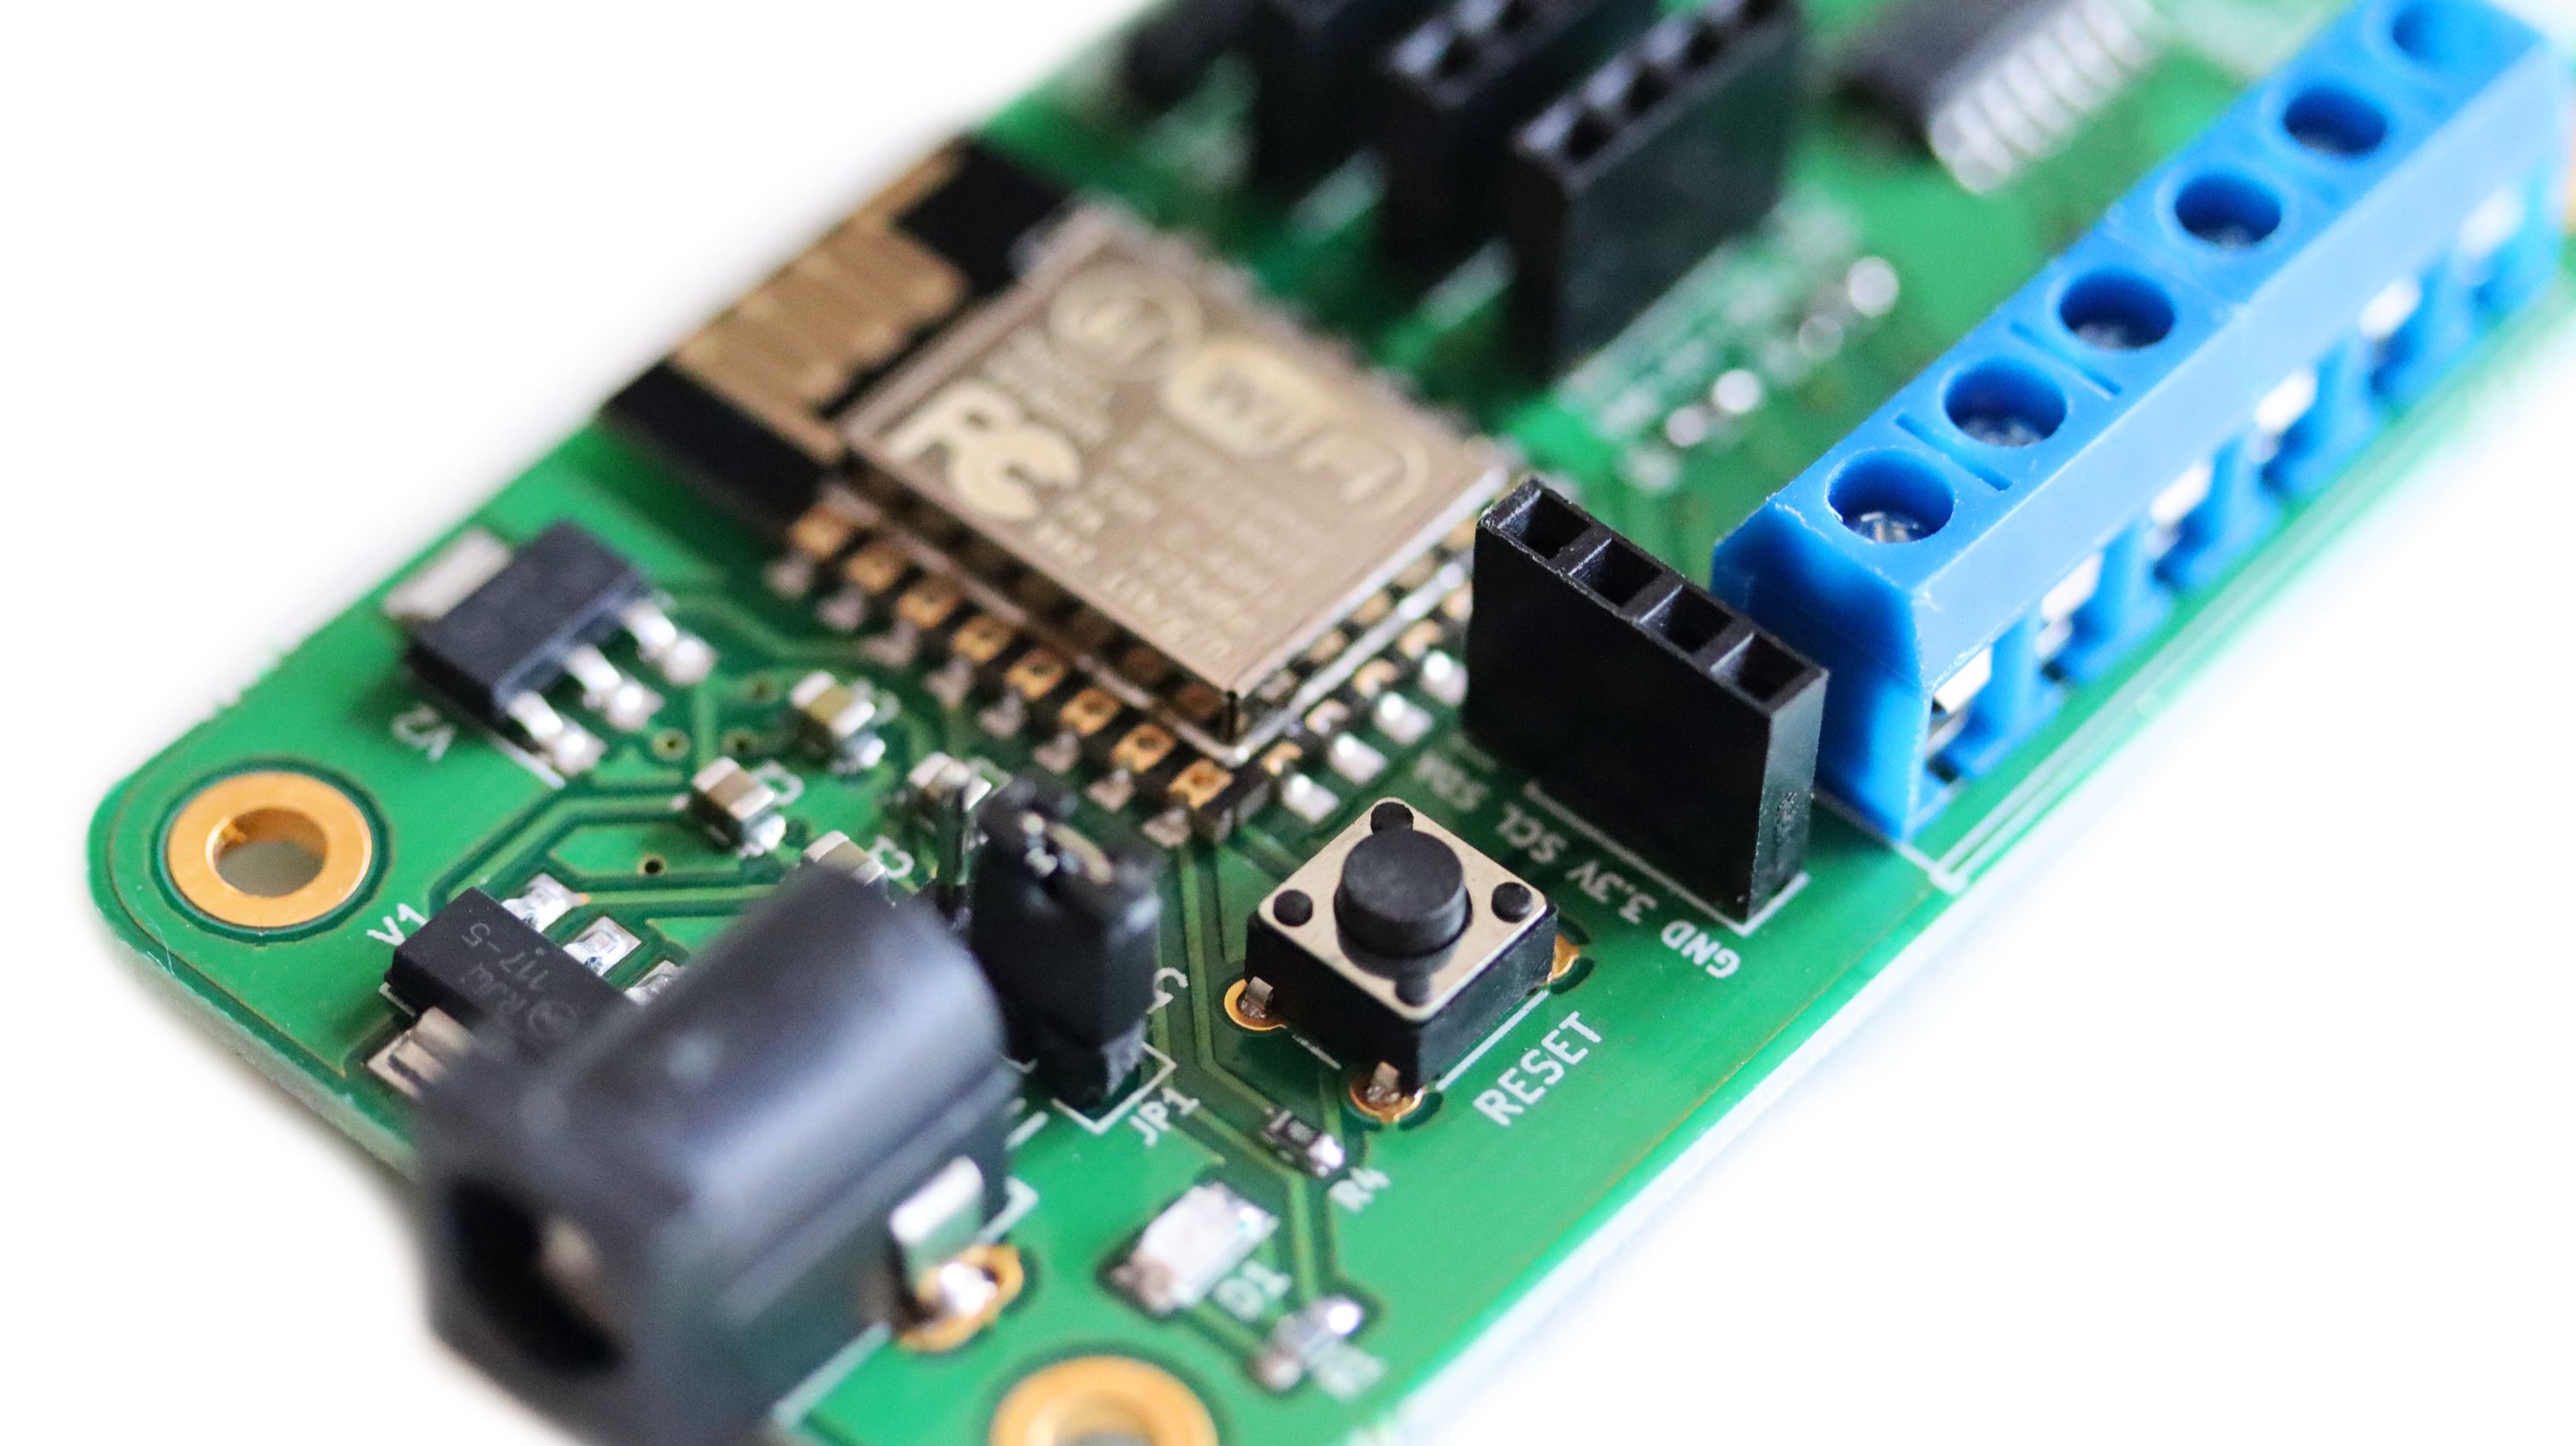
Please note, that immediately after booting the board, LED D1 blinks for a couple of seconds, at this moment you can also press and hold RESET button to perform reset to factory defaults.
Our crowdfunding campaign has been funded successfully. We have already started the manufacturing and we are doing our best to ship on the estimate dates. If you haven’t ordered ANAVI Miracle Controller yet, you still jump in and make sure you are among the first owners of this entirely open source controller for addressable (digital) LED strips!
Best regards,
Leon