Project update 2 of 12
A Detailed Look at Bela Gem Physical Construction
by Andrew McPherson, Giulio Moro, Adan Benito, Astrid Bin, Robert JFirstly we’d like to thank everyone for the amazing support so far – it’s been an excellent first weekend of the campaign. We greatly appreciate every one of you who has supported us or helped us spread the word. In this update (the first of many to come) we will take a detailed look at the Bela Gem hardware and the assembly of each product.
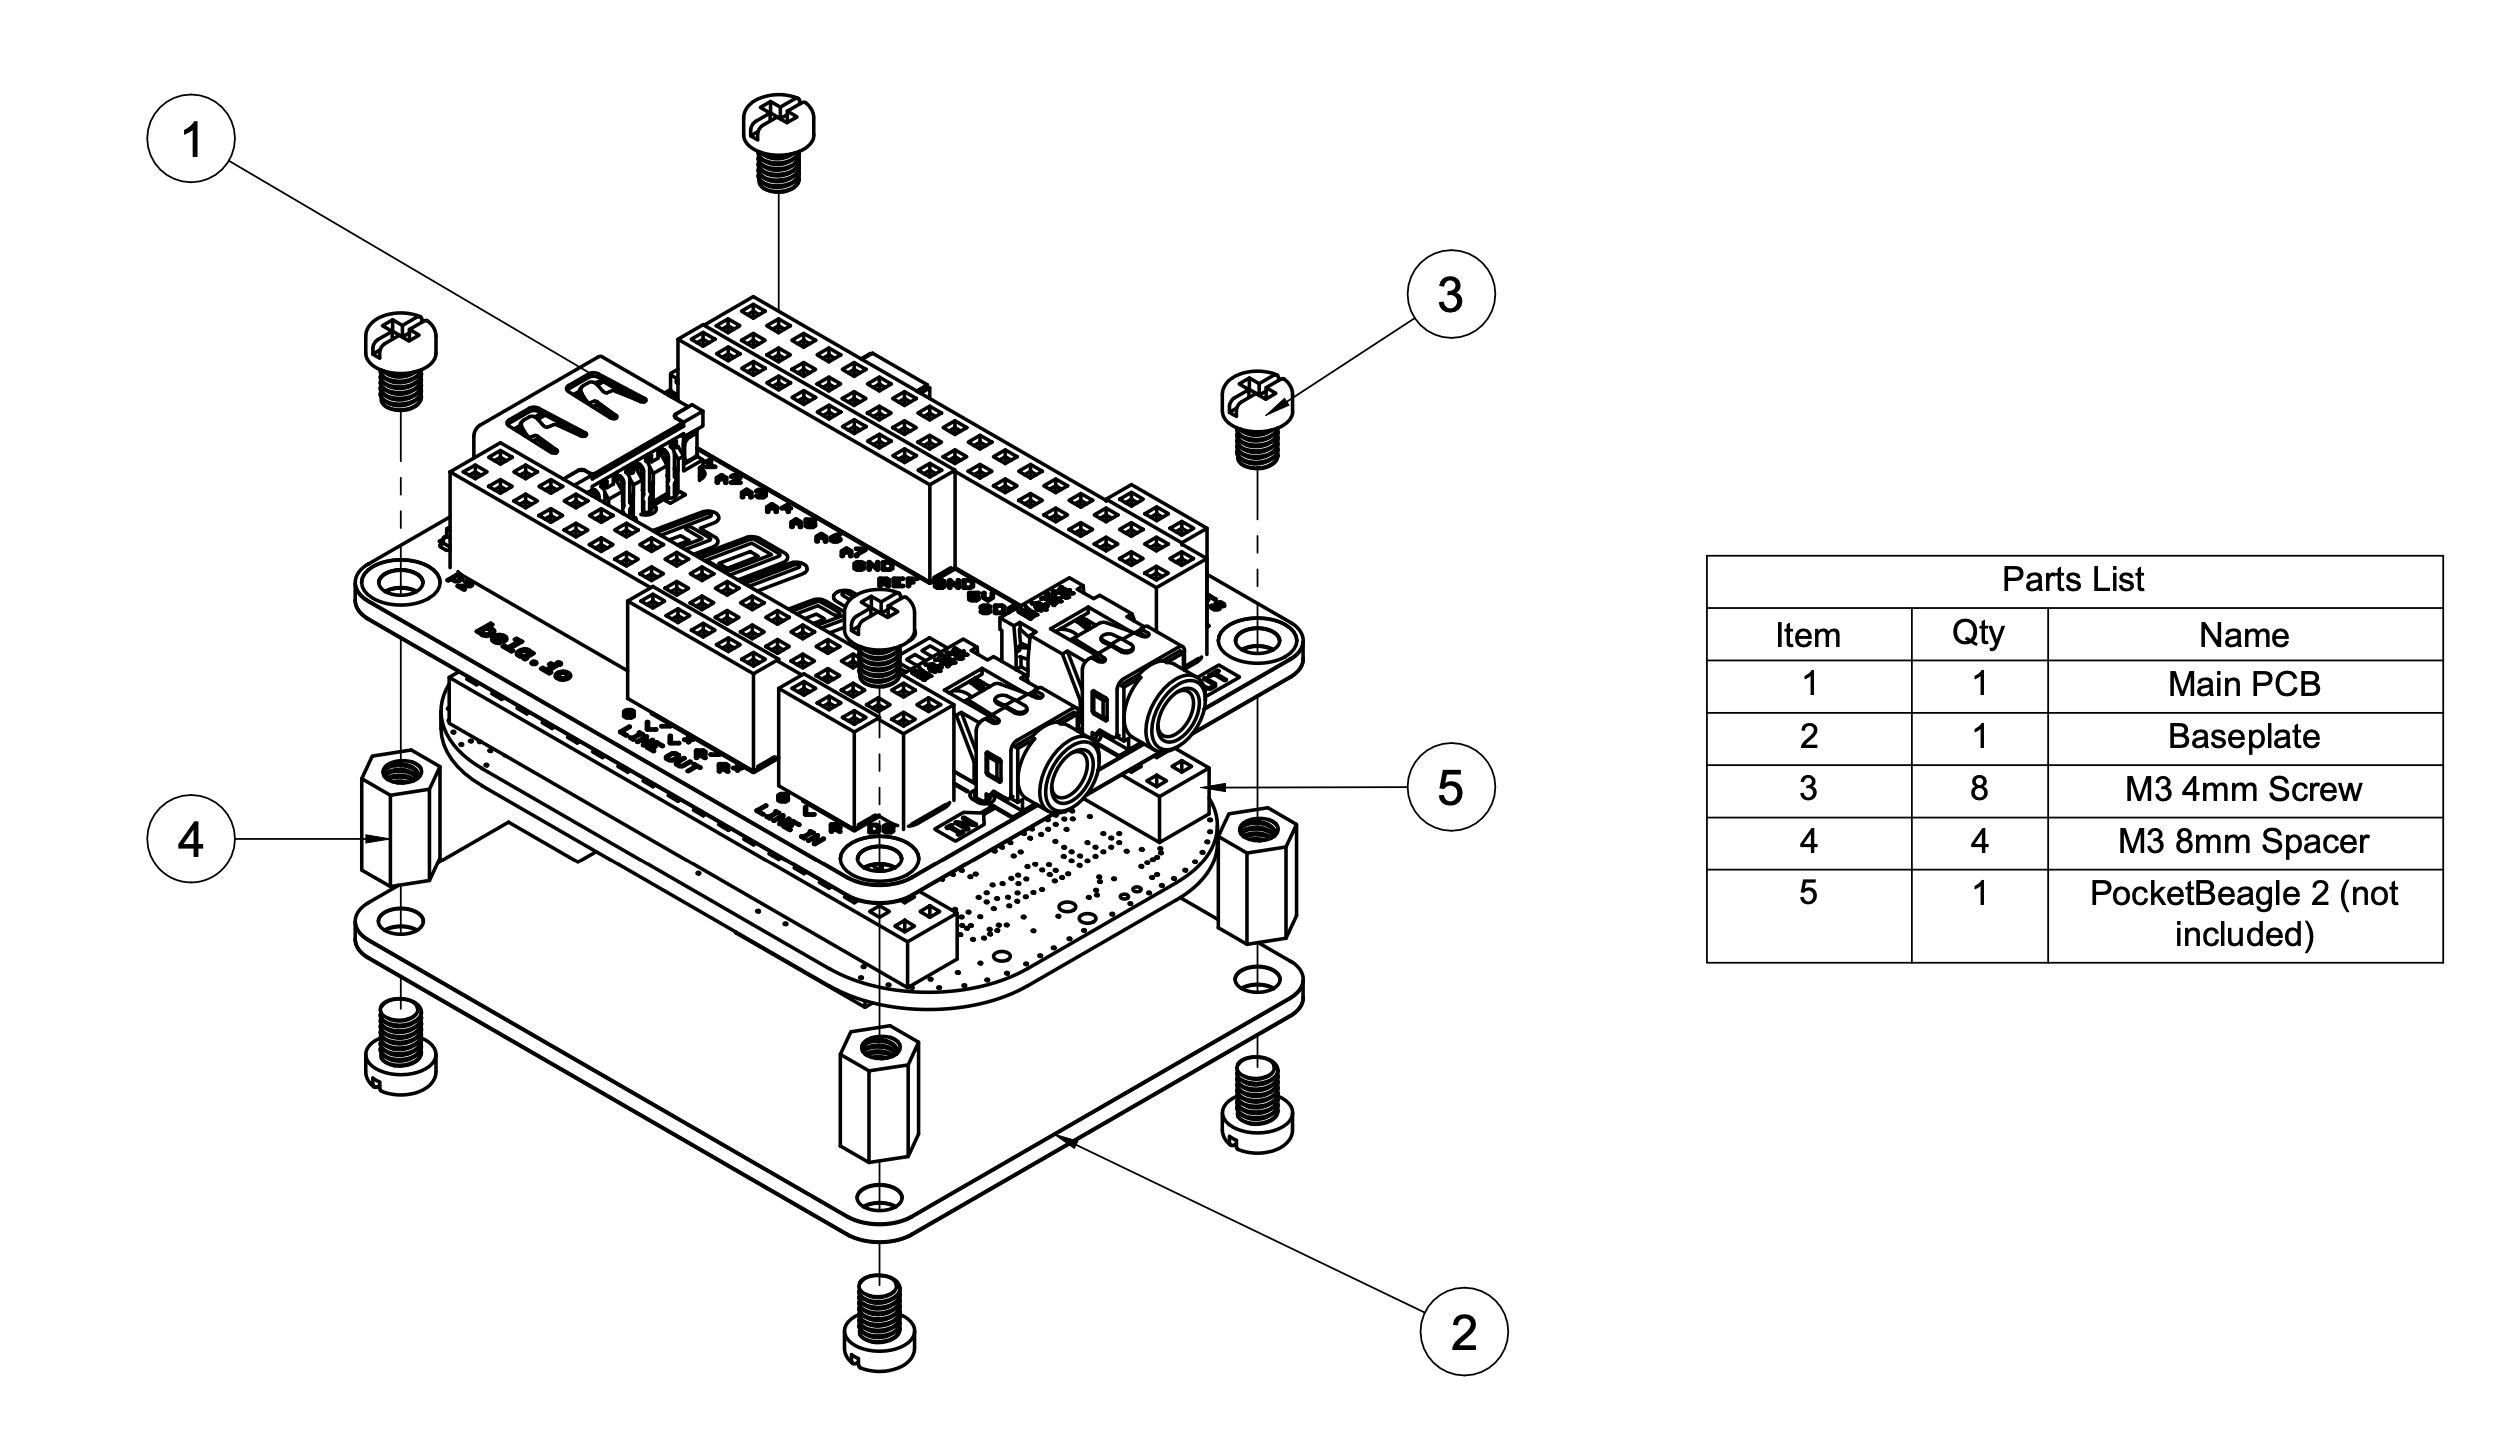
Bela Gem Stereo Assembly
Bela Gem Multi Assembly
Designed for the PocketBeagle 2
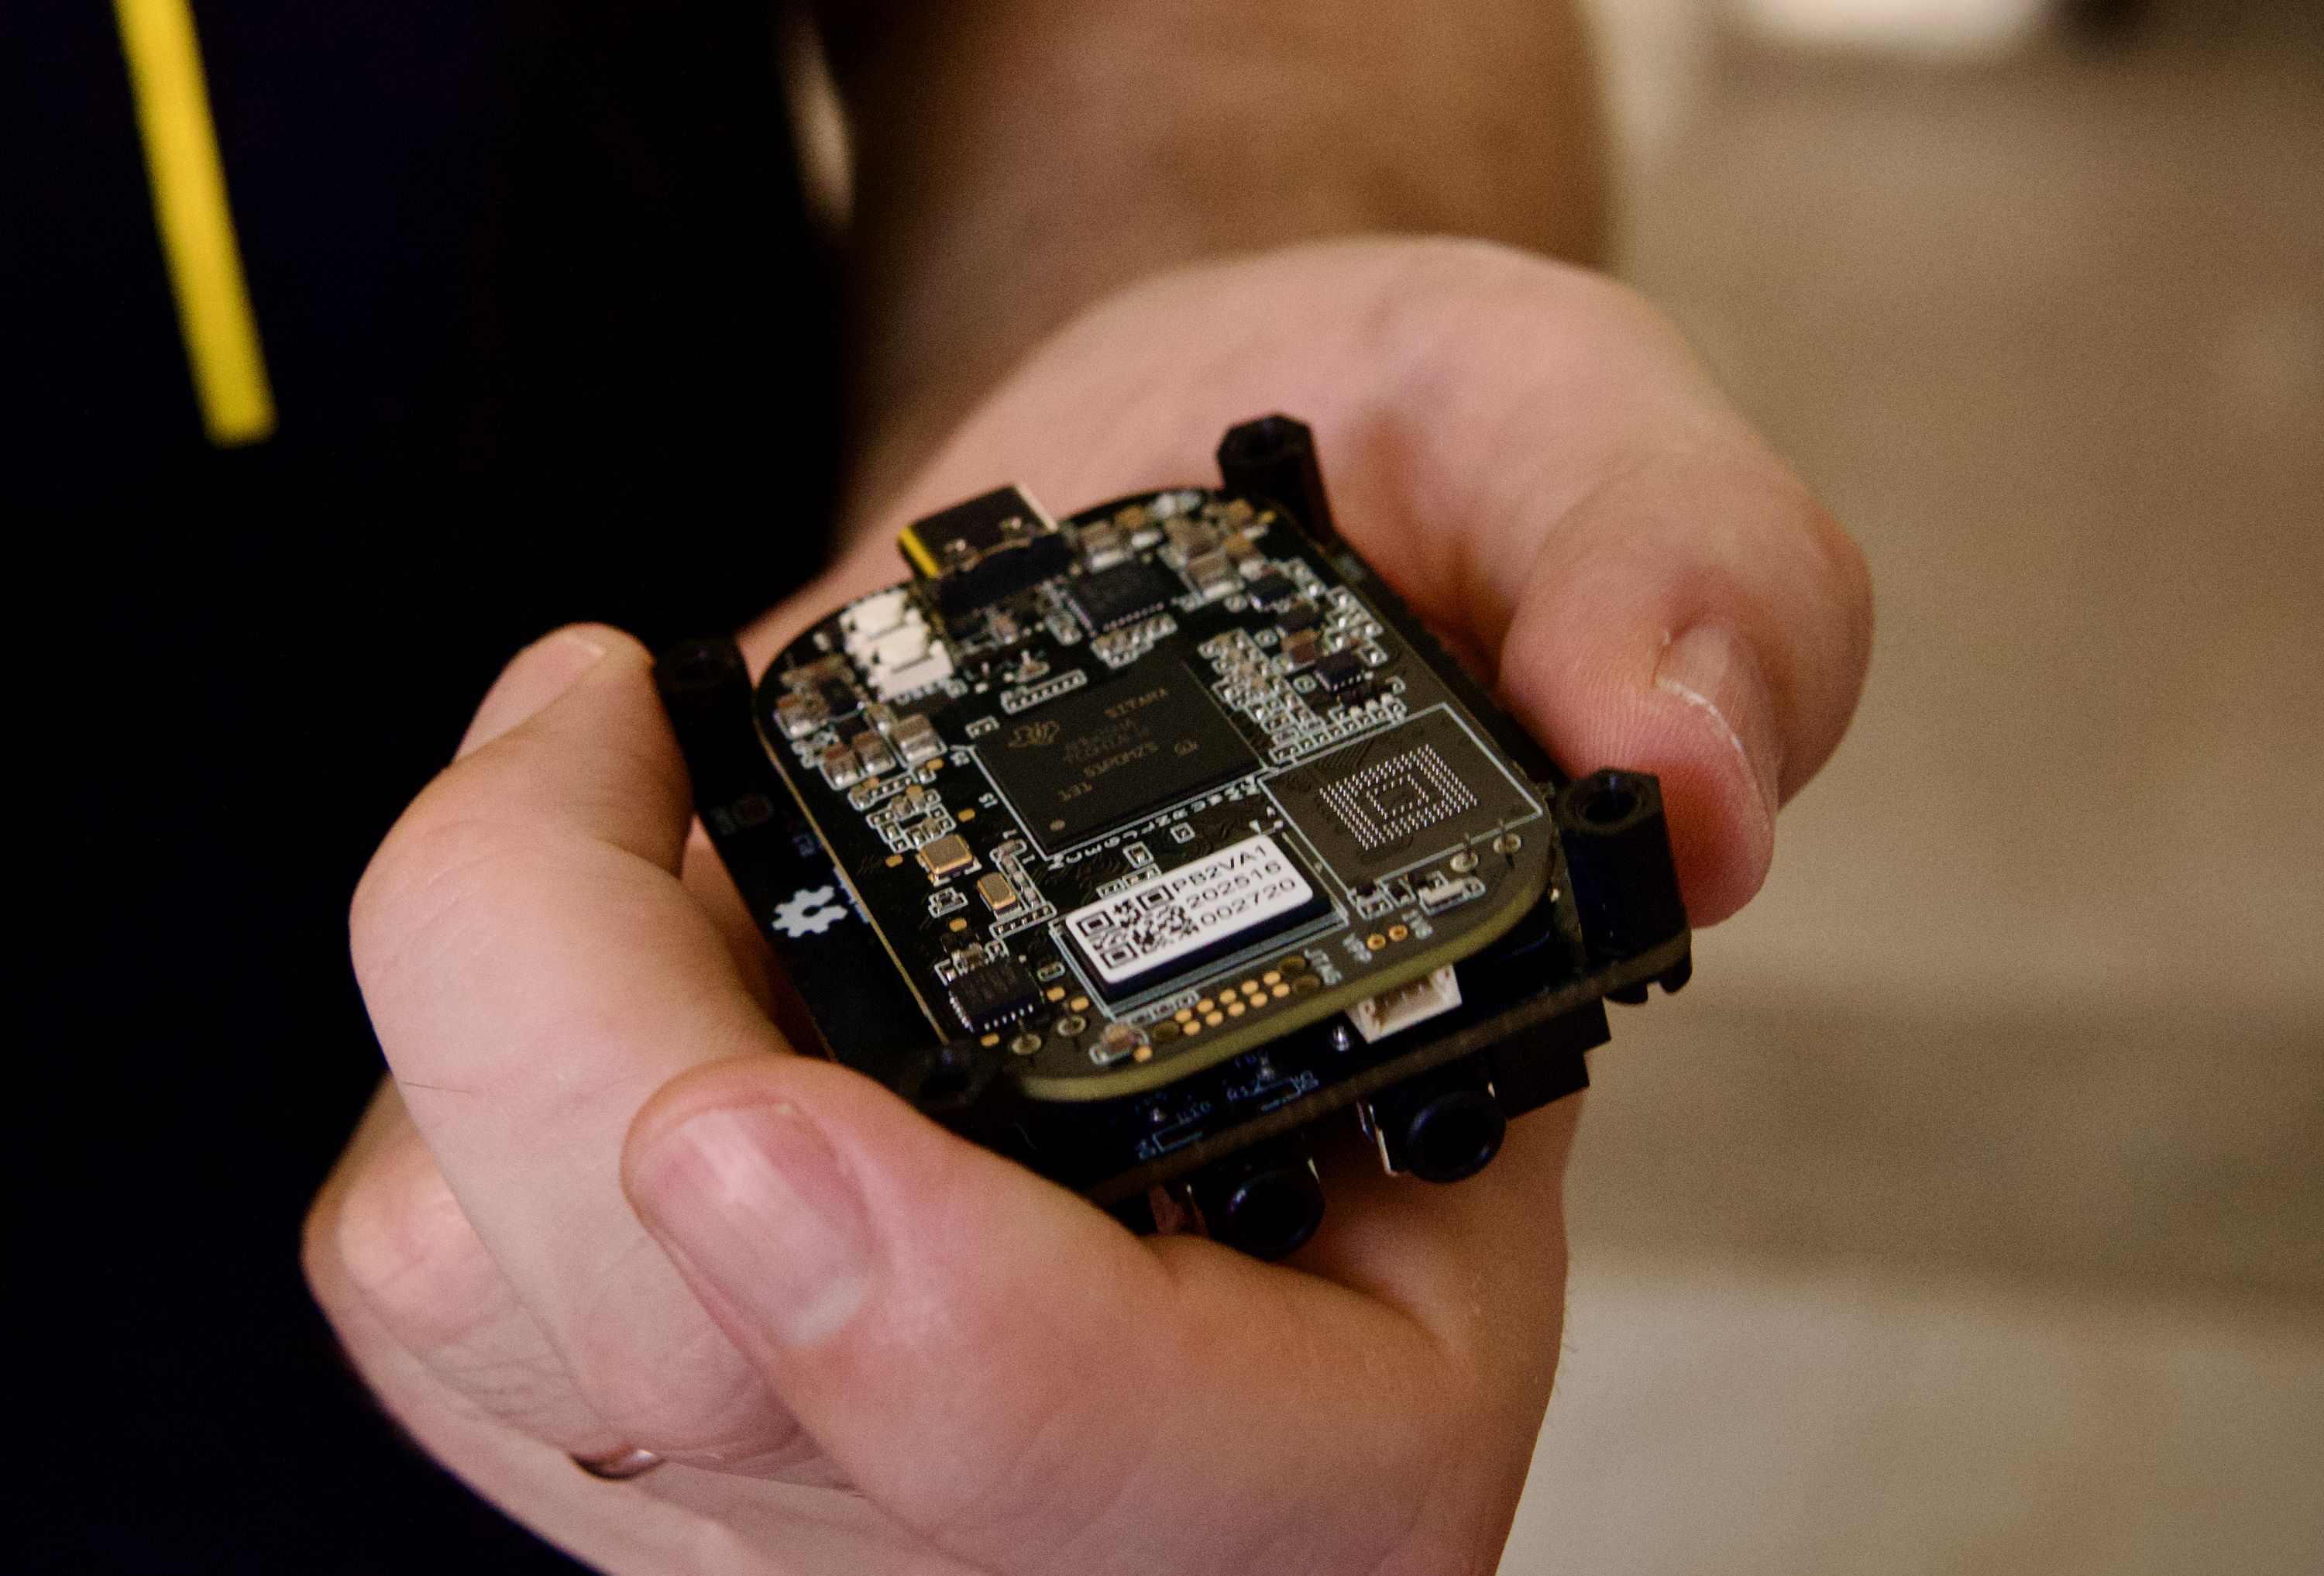
- The main Bela Gem board (sometimes called a "cape" in BeagleBoard parlance) is designed to sit on top of the PocketBeagle 2.
- The main board connects with the PocketBeagle 2 via two banks of pin headers, each with 2x18 pins.
- The pin headers are exactly long enough to make a reliable connection with the PocketBeagle 2 while minimising the height of the stackup.
A Protective Case
- The PocketBeagle 2 was designed to be mounted with the headers facing down and its buttons and LEDs on the top. As we need the headers to be facing up, its buttons, LEDs and components will now face down. To protect the components from damage and the buttons from accidental presses, we include an optional baseplate so that the board can comfortably sit on your desk during prototyping.
- The baseplate is mounted on 8 mm spacers (included) giving you protection while taking up the least height possible. Screws, also provided, connect with the spacers and the screw heads become the feet of the whole assembly.
- The baseplate has cutouts for the buttons and USB-C port and reflective panels to make sure LEDs on the Pocketbeagle 2 remain visible.
Easy to Embed
- Bela Gem Stereo has a footprint similar to PocketBeagle 2 but slightly wider to provide mounting holes for securing the board in a case.
- The audio signals on Bela Gem Stereo are available on both the mini jacks (3.5mm TRS jacks) and the socket headers, so you can easy embed the board in your projects.
- Bela Gem Multi features a taller stackup so 10 mini jacks can fit in its small 70x58mm footprint. The wing boards with the mini jacks can be removed when not needed for embedding the Bela Gem Multi in your project.
- We provide a landing pattern for both boards in KiCad to make designing additional expander PCBs which connect with the Bela Gem boards as easy as ever.
The Stackup
Bela Gem Stereo
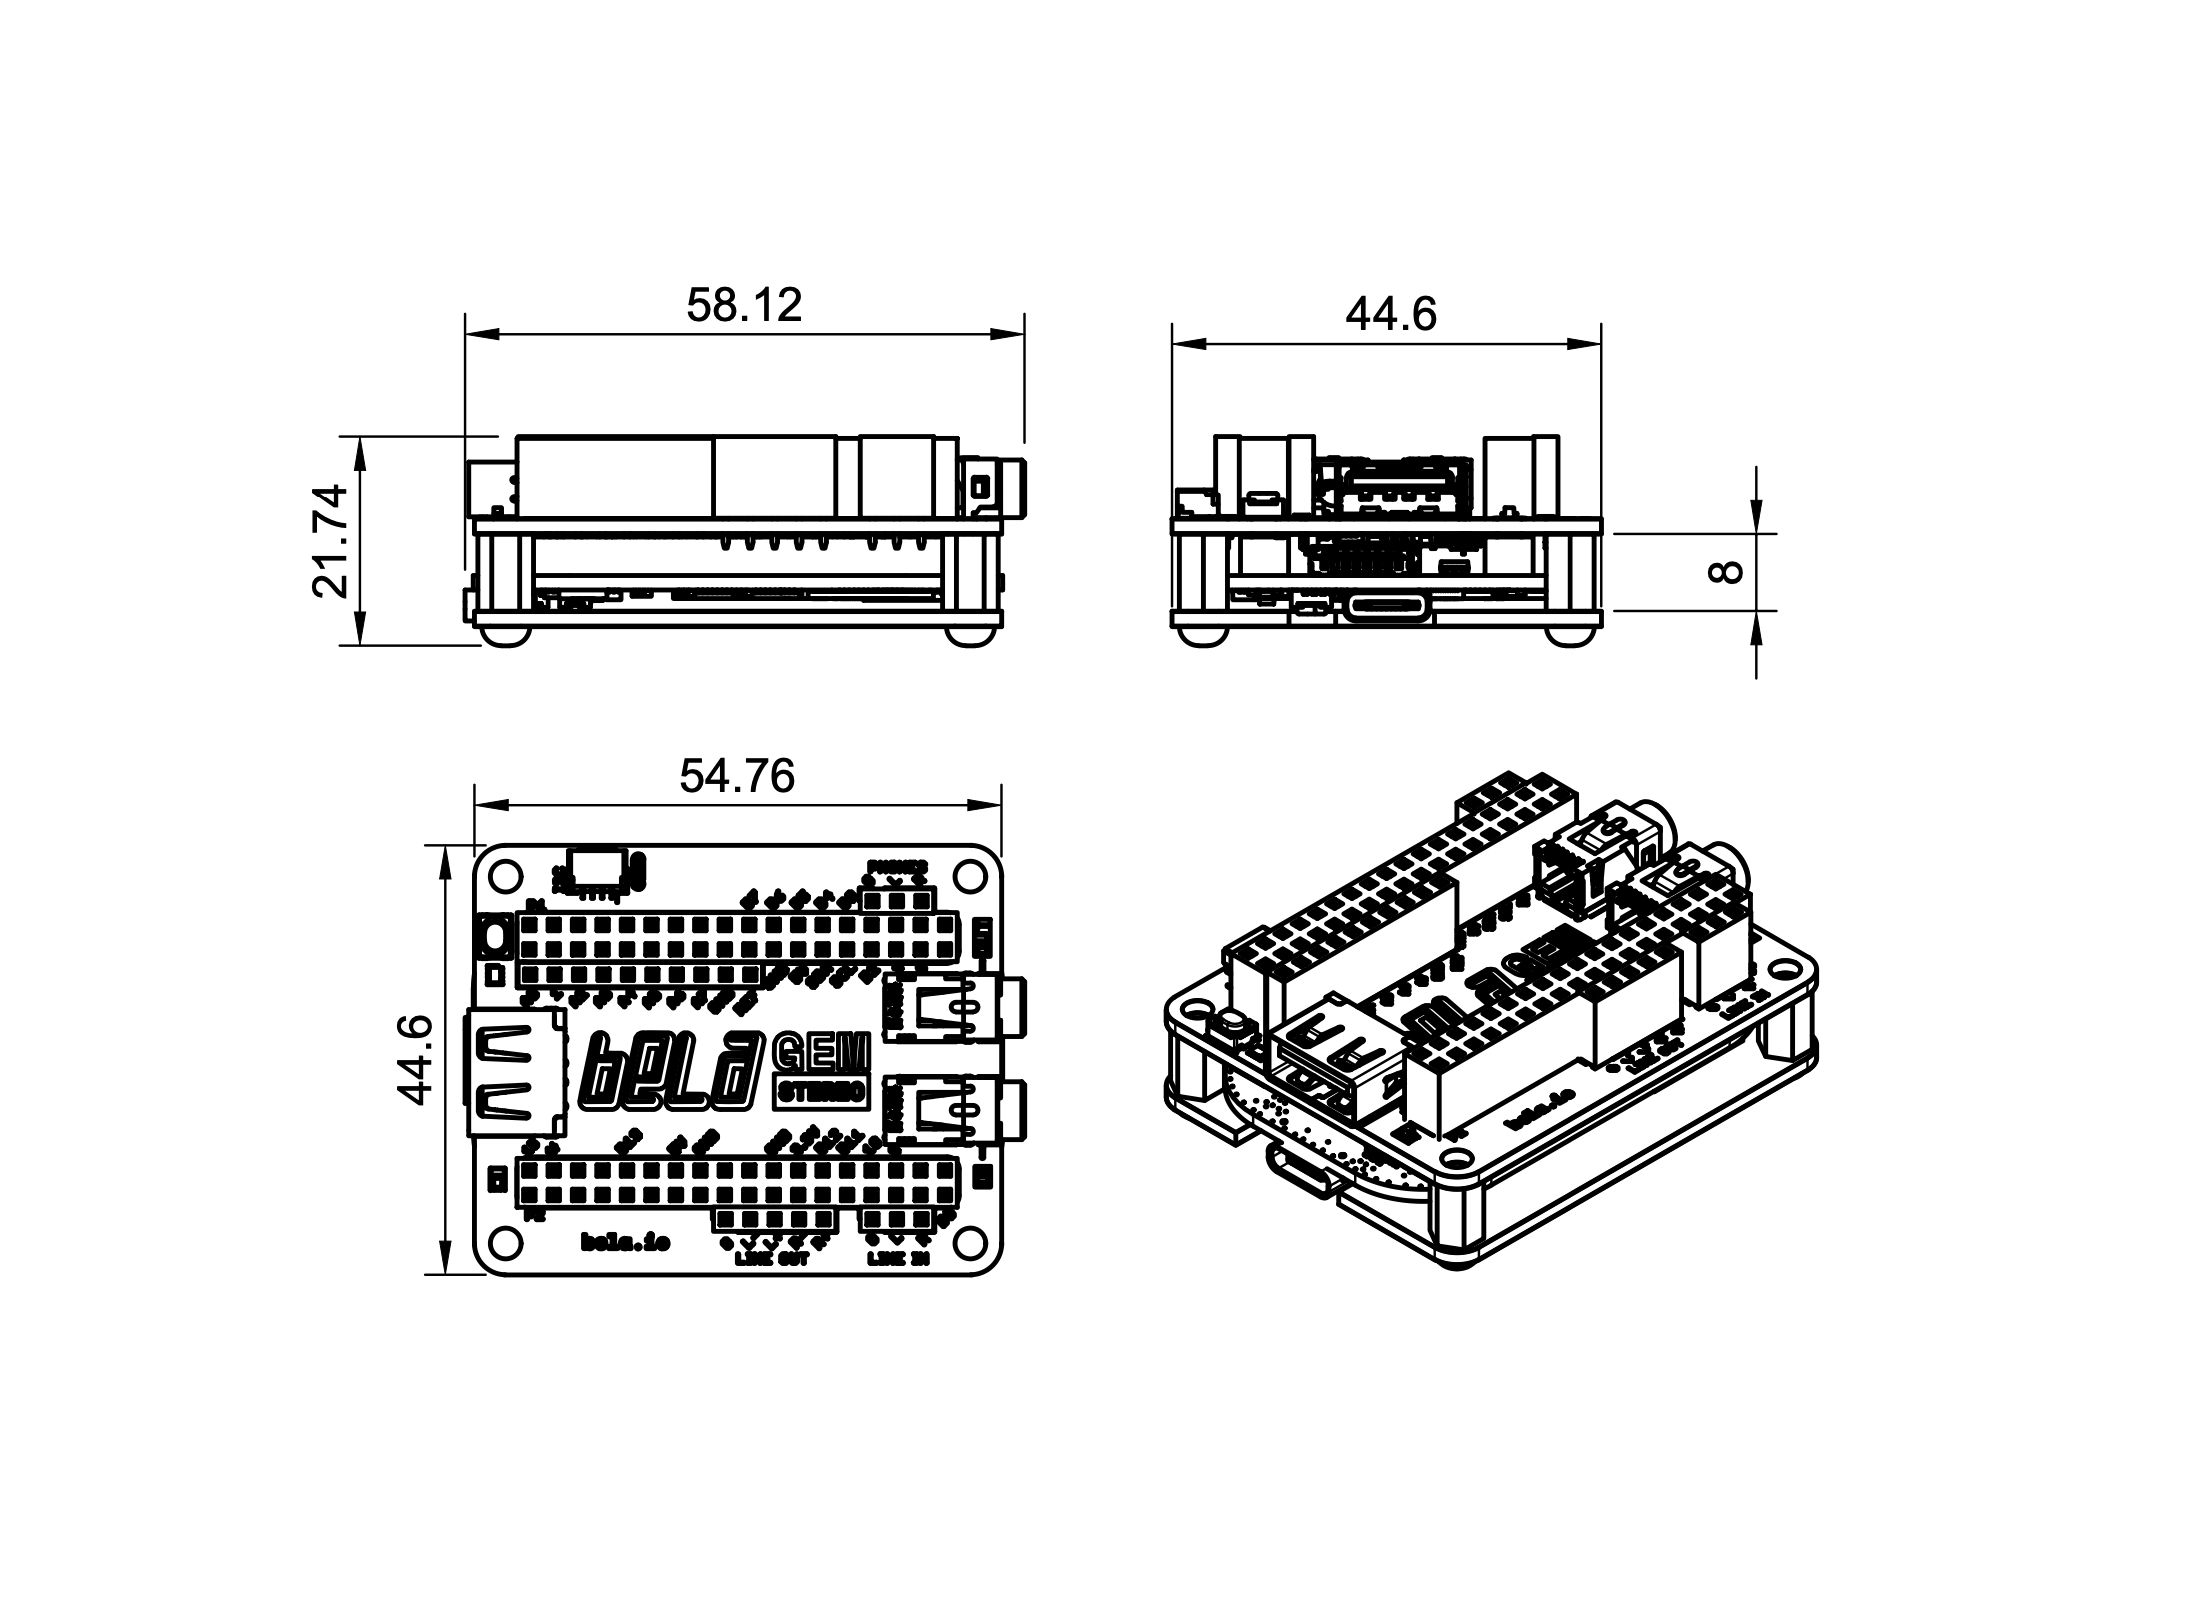
Dimensions: 58 x 45 x 22 mm
Bela Gem Multi
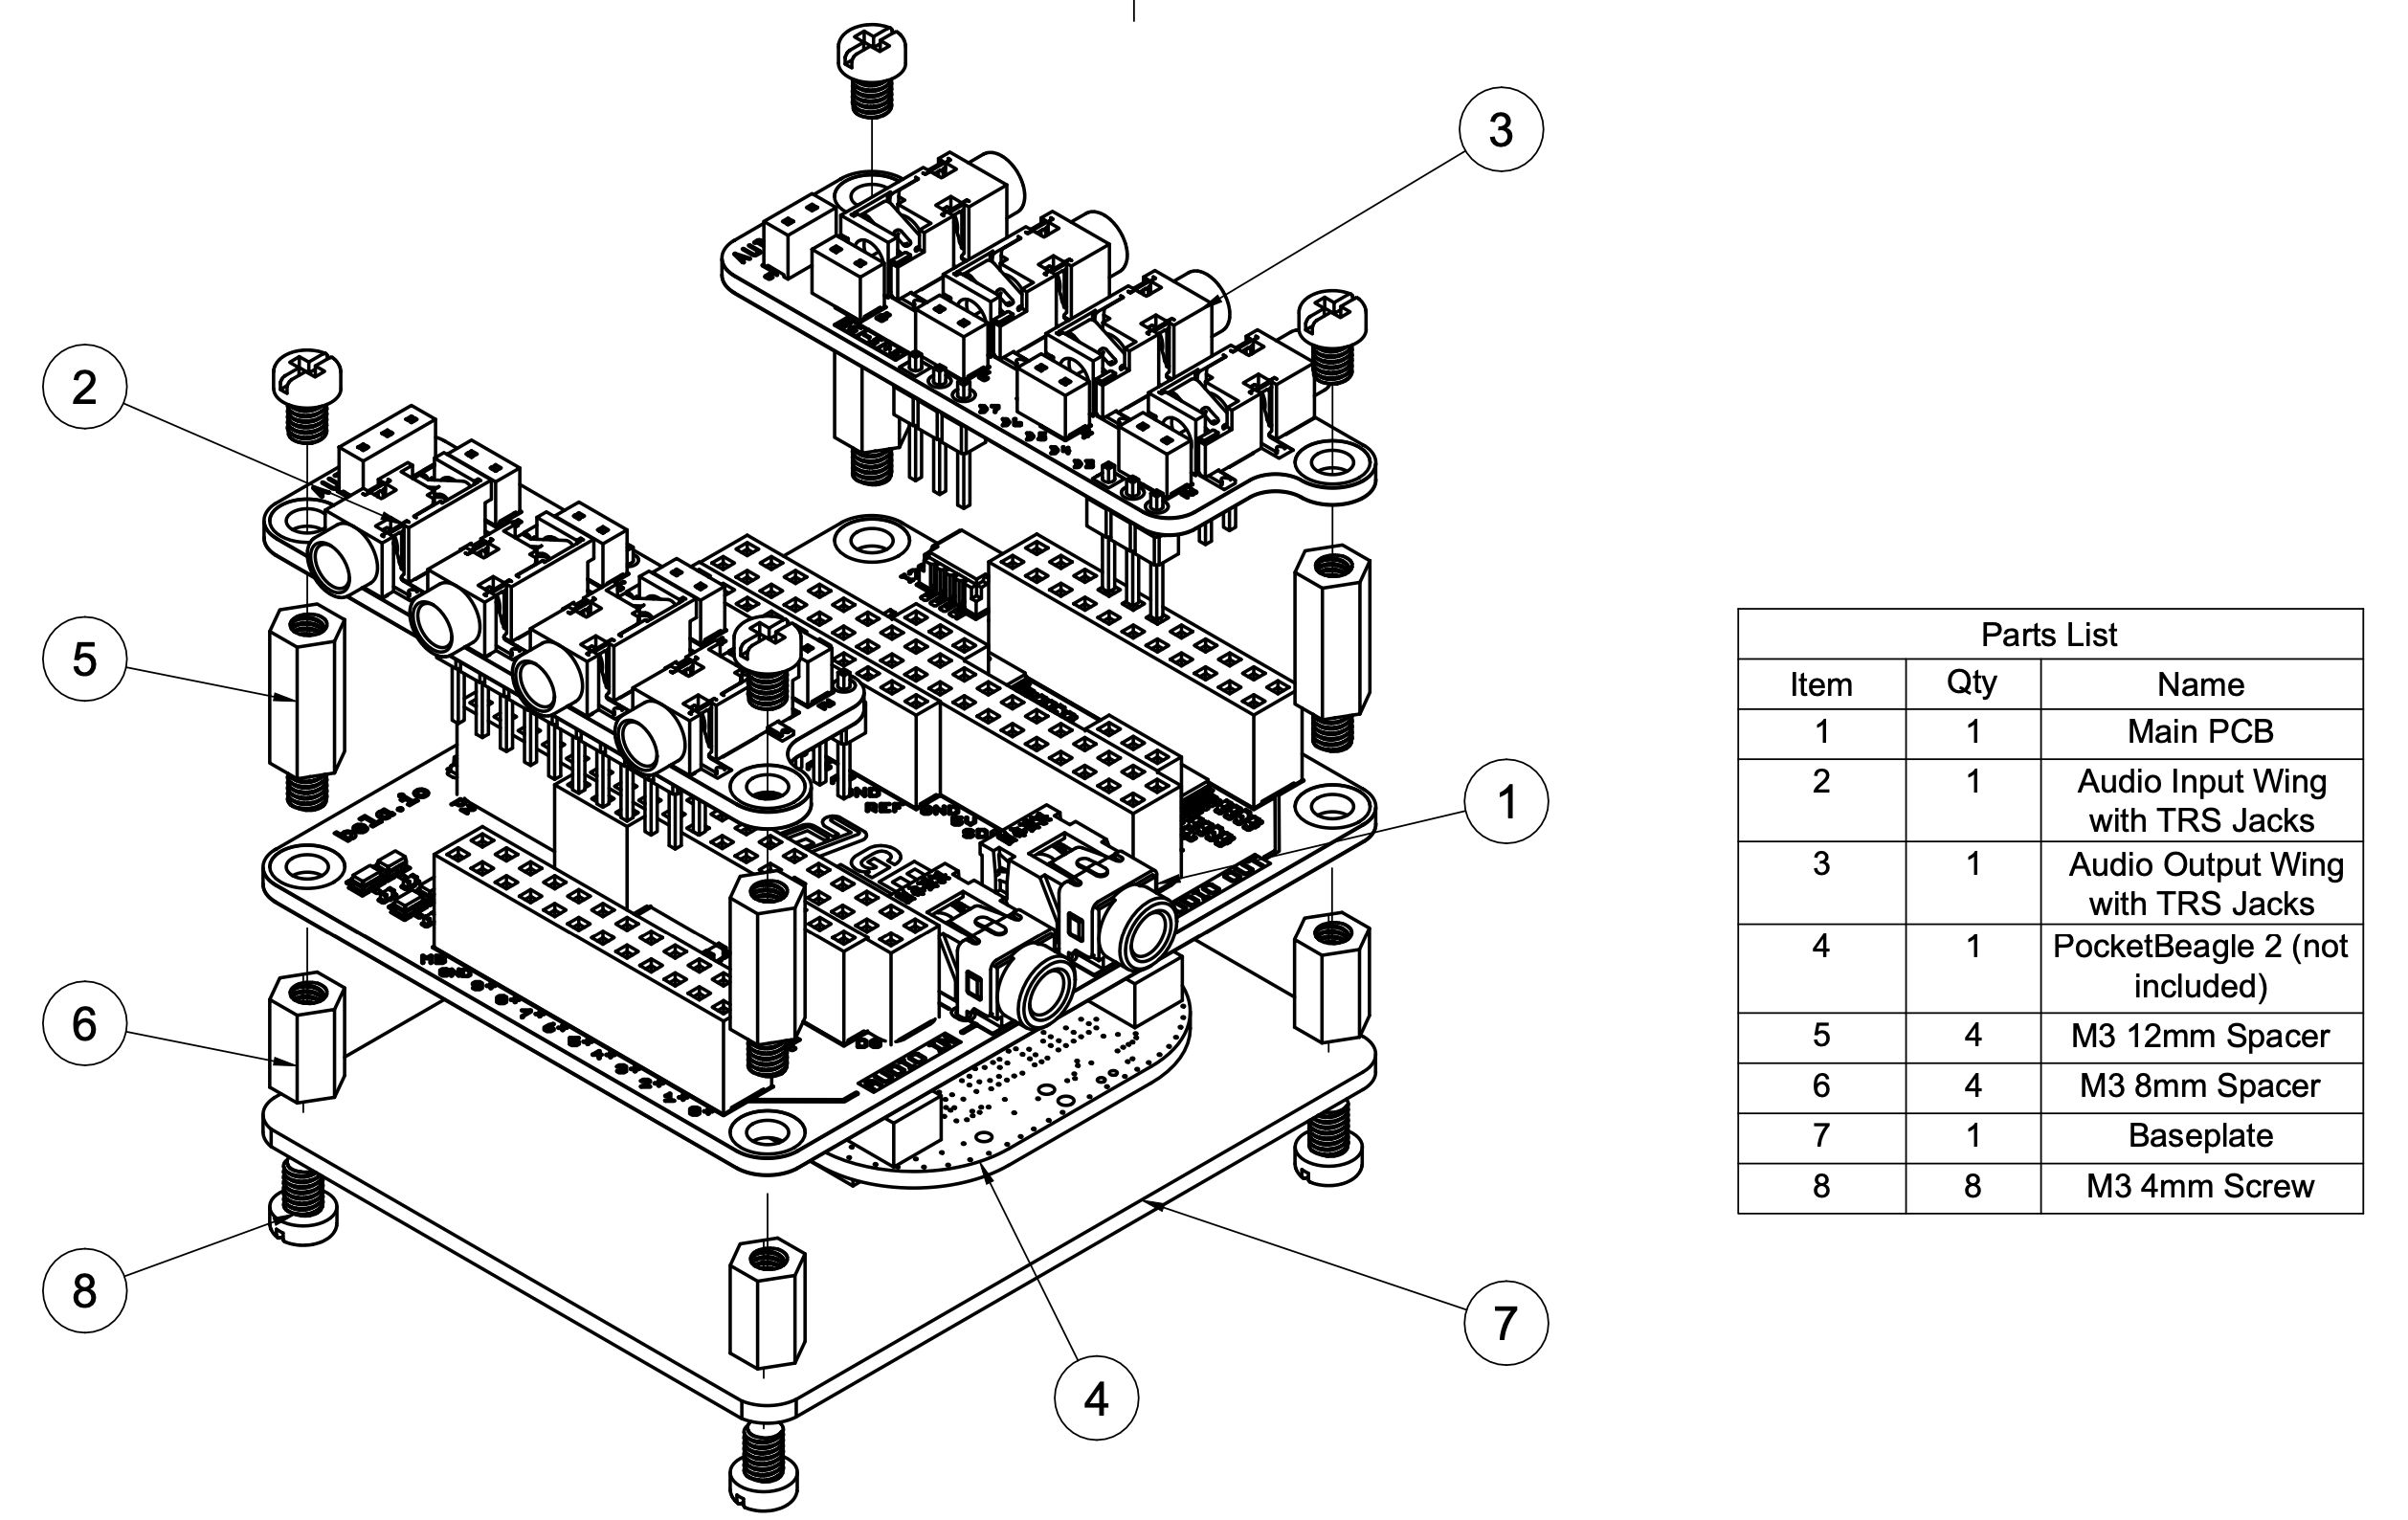
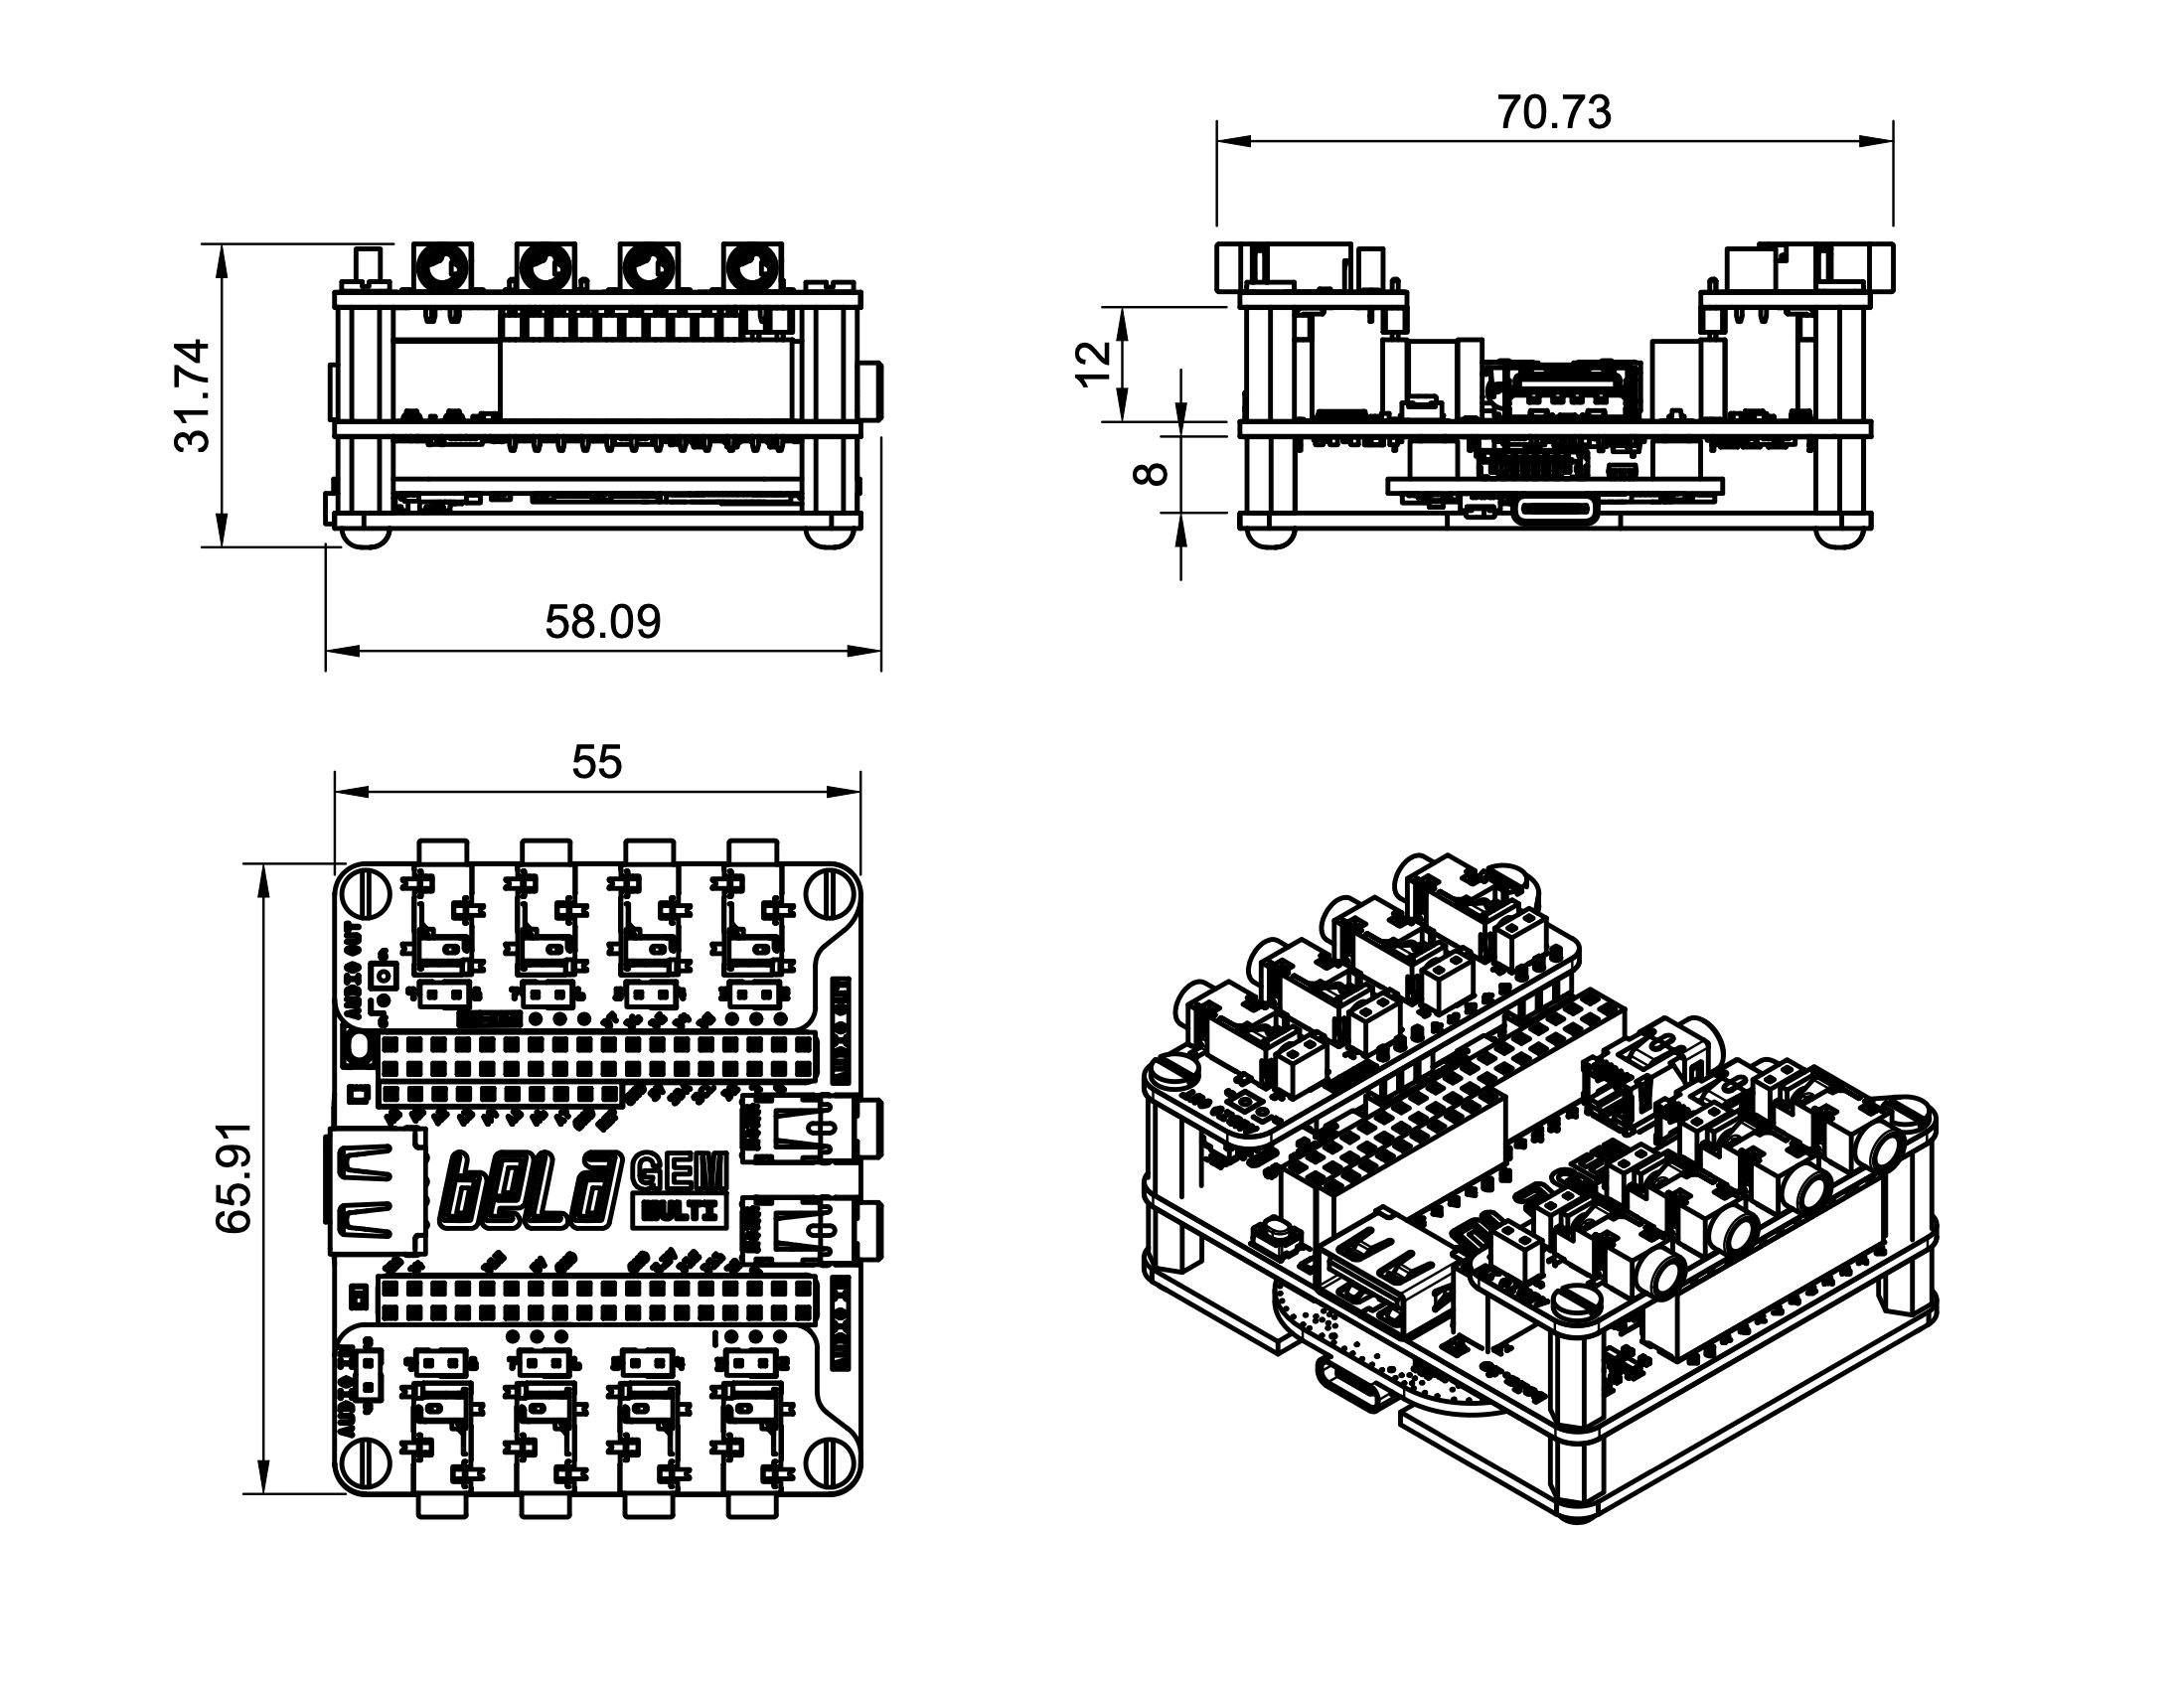
Dimensions: 70 x 58 x 22 mm (32 mm with wings installed)
Assembling the Bela Gem
Bela Gem Stereo and Multi ship partially assembled so they are protected during shipping. To get your board up and running it is just necessary to remove the bottom screws and baseplate so you can add the PocketBeagle 2. You will also need a microSD card with the Bela Gem image on it (forthcoming) and a USB-C cable to connect the board to your computer for programming.
Thanks for all of your support, and if you haven’t yet, don’t forget to grab your Bela Gem today while our campaign is live.