Project update 8 of 14
Manufacturing Progress, Hardware & Firmware Improvements, and a New Cover Design
by Alfredo BoniniHi everyone! It is our pleasure to return with this update full of information about what we’ve been up to over the past month. We have been working really hard on manufacturing management and introducing the latest improvements in hardware and firmware.
Manufacturing Progress
With the exception of a few standard components and some packaging material, orders for all Lite3DP Gen 2 parts and accessories have already been placed. Some parts are already finished, others are in manufacturing, and a few are still waiting on samples to arrive so we can validate them.
Among our next manufacturing milestones is PCB assembly, which we’ve scheduled for next week. We expect to gather all remaining parts over the next three to four weeks, after which we’ll begin assembling Lite3DP Gen 2 printers and accessories. There is still a lot of work ahead, but we are off to an auspicious start. Despite the delayed transfer of funds and some increased complexity caused by post-campaign product improvements, we are still on track to complete the machines by the end of May, after which Mouser has a month reserved to fulfill orders and make shipments.

Recent Hardware & Firmware Improvements
In our quest for continuous improvement, we have found some room to introduce a few hardware and firmware changes. One of them is the board with a USB Type-C port that we mentioned in our previous update. This adapter board includes the USB to UART IC CP2102, a TVS diode for protection against electrostatic discharge, and a schottky diode to prevent the board from being energized by the main board. Both are highlighted in the image below. The latter is especially important as it takes care of the CP2102 (and your computer!) in case you forget to disconnect the board.

You can see a few small modifications to the main board above, including the MicroSD card reader (which is further inside the board to make room for the new cover), the upper heatsink for the LED driver IC, and a new tact switch for play/pause. The latter replaces a tact switch that we found to be very weak and susceptible to breakage. We also placed it close to the rest of the interface to facilitate more comfortable operation.
Regarding the firmware, we have completed a new and conceptually improved version. MSLA 3D printing is essentially based on three pillars:
- Preparation of the build platform and the resin vat
- Generation of the print-job sections
- Configuration of the printing parameters
The new printing flow clearly and fluidly represents this concept. Lite3DP pioneered the ability to print a set of sections under different conditions, introducing parameter configuration on the application menu. In this latest version, that set of 12 parameters have their own section for quick configuration and can be modified within the printing section. We have added memories ("A" to "F") to save six sets of the 12 parameters, in addition to the "current" set. Within those 12 parameters, we have included a new one: the transition layer count, which allows a gradual decrease from the initial exposure value to the regular exposure value. Before starting a job, all 12 parameters are presented in 3 "confirmation" screens, for greater control.
Here is a brief snippet from the code—based on the pre-installed preferences.h library—that enables the magic of memories:
void WritePref() {

  switch (PrefMode) {

    case 0:
      preferences.begin("Current", false);
      break;

    case 1:
      preferences.begin("MemoryA", false);
      break;

    case 2:
      preferences.begin("MemoryB", false);
      break;

    case 3:
      preferences.begin("MemoryC", false);
      break;

    case 4:
      preferences.begin("MemoryD", false);
      break;

    case 5:
      preferences.begin("MemoryE", false);
      break;

    case 6:
      preferences.begin("MemoryF", false);
      break;
  }

  preferences.putFloat("hLayer", hLayer);              // 1.Layer Height (0.025, 0.05 or 0.10 mm)
  preferences.putInt("iexpotime", iexpotime);          // 2.Bottom exposure time (s)
  preferences.putFloat("expotime", expotime);          // 3.Exposure time (s)
  preferences.putInt("PWMUV", PWMUV);                  // 4.UV power (0-255)

  preferences.putInt("FirstLayers", FirstLayers);       // 5.Bottom layer count
  preferences.putInt("TraLayers", TraLayers);           // 6.Transition layer count
  preferences.putInt("hUpInitial", hUpInitial);         // 7.Inital layers lift height (mm)
  preferences.putInt("hUp", hUp);                       // 8.Lift height (mm)

  preferences.putFloat("LiftSpeed", LiftSpeed);           // 9.Lift speed (mm/s)
  preferences.putFloat("RetractSpeed", RetractSpeed);     // 10.Retract speed (mm/s)
  preferences.putFloat("LiftSpeedInit", LiftSpeedInit);   // 11.Bottom lift speed (mm/s)
  preferences.putInt("RestTime", RestTime);               // 12.Delay after retract (ms)

  preferences.putLong("stepsadditional", stepsadditional);     // Additional steps for level fine tuning

  preferences.end();
}
The previous one is the function dedicated to saving the variables in the memory keys, using a single variable "PrefMode" to alternate saving in the different memories. You can see the aforementioned 12 parameters commented in detail. Another very similar function is responsible for reading the saved parameters.
Although it seems like a lot of variables to modify, don’t worry, most of them have a wide range of operation and can even be kept constant between different resins and layer thicknesses. The initial and layer exposure times will be the two parameters that you will most frequently have to modify. We just couldn’t resist the temptation to give you full control over your Lite3DP, including the ability to modify all of the parameters present in the latest 3D printers that use the same technology.
Another tool that we initially overlooked is a way to clean the bottom of the resin vat by turning on the UV light for a few seconds with a completely blank screen. This causes the solidification of a thin layer of resin at the bottom of the resin vat. When removed, this layer takes with it the impurities stuck to the film.
void cleanresinvat() {

  tft.fillScreen(TFT_WHITE);
  ledcWrite(ledChannel, PWMUV);
  delay(cleanexp * 1000);
  ledcWrite(ledChannel, 0);
  delay(1000);
  screen201();
  screen = 201;
}
Above is some very simple code that achieves this. All it does is…
- Blank the screen
- Turn on the UV LED at the selected power level
- Stay on for selected number of seconds
- Turn off the UV LED
- Delay for one second
- Return to the tools screen
And here is a short preview video:
Release Film Testing
Photosensitive resin technology is advancing at a dizzying pace, as are release films. The latter have a central function in the 3D printing process. In addition to containing the resin within the vat, they allow UV light to pass through to solidify layers of resin. This material must be resistant and transparent to 405 nm UV light while minimizing the lift forces that occur when raising the platform and peeling off the last solidified layer.
ACF films are the latest industry standard, and we have been testing them rigorously. This evaluation has not been easy, but it has demonstrated that such films have greater durability and produce parts with a smoother surface finish. As a result, we consider ACF films to be a candidate to replace, or perhaps complement, the NFEP film we originally chose for the Gen 2. We’ll keep you posted on our final resolution!
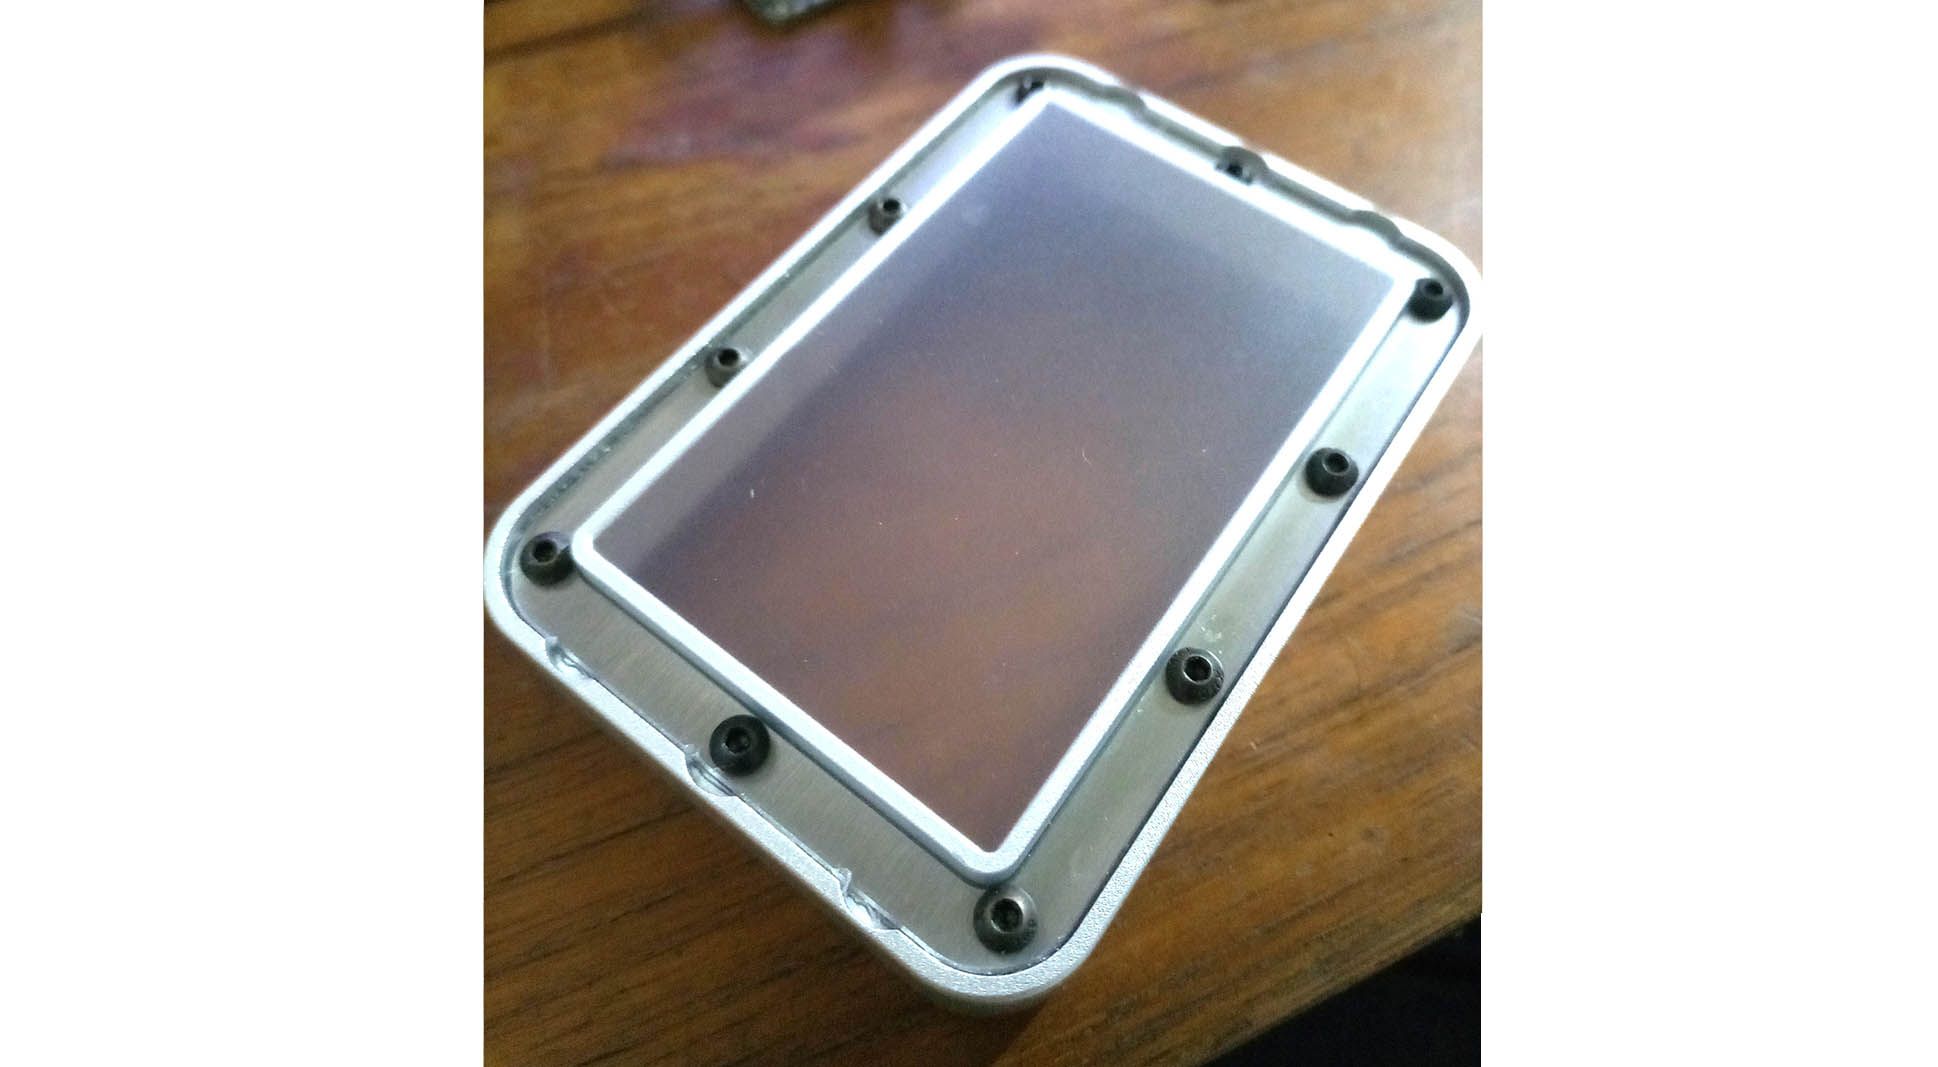
Above, you can see the characteristic opaque finish of the ACF film on the side facing the mask display.
New Machine Cover Design
We were not completely satisfied with the cover proposed in the campaign, and we were not sure that it would be required by the majority of users. Because a large percentage chose to add the cover to the machine, we took advantage of the downtime after the campaign ended to focus on achieving an outstanding design, which is not just a box that covers the machine. We were waiting to get real images of the new cover design, but we’ve decided to reveal it ahead of time with some rendered images:
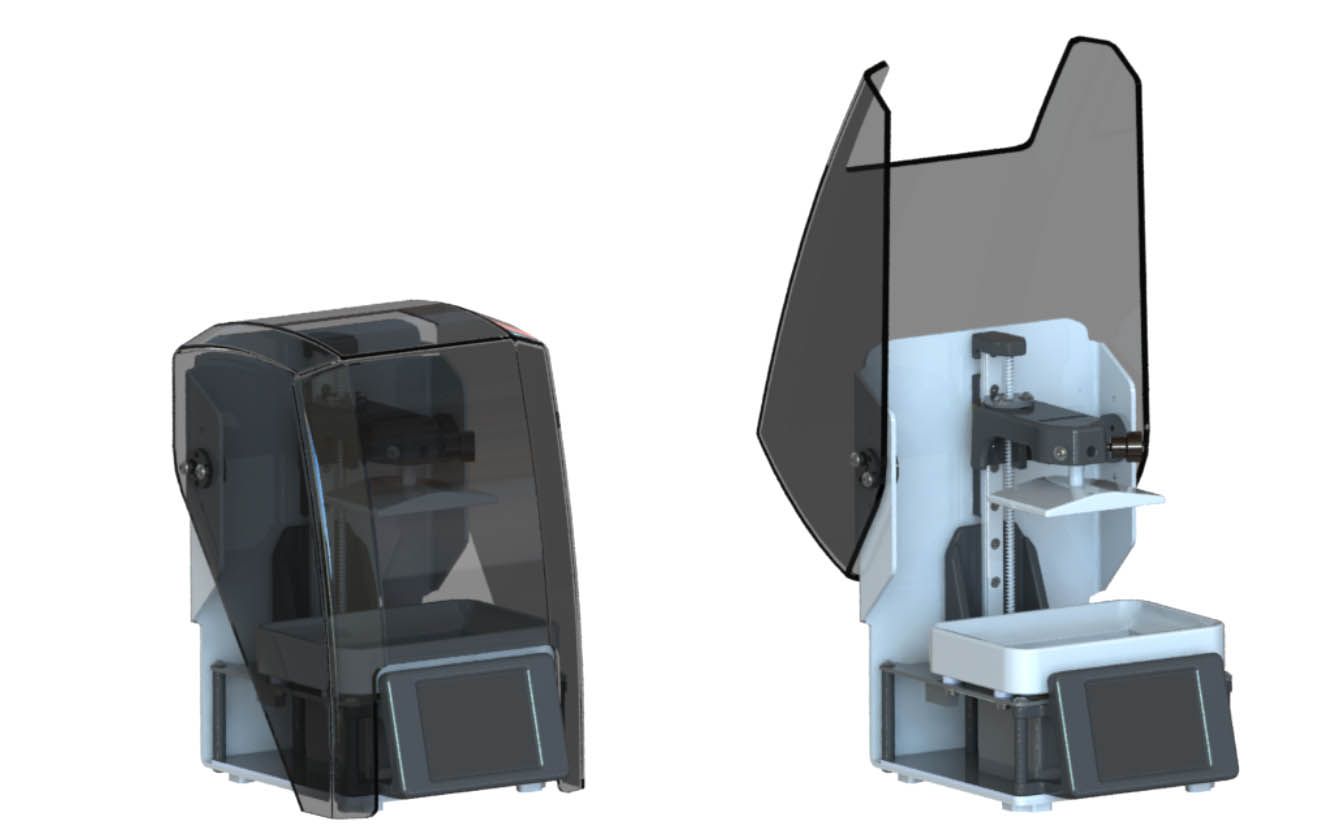
We found this flip-top design to be far more convenient than having to remove an acrylic box and place it somewhere on your desk. The new cover’s main function is to protect the resin inside to prevent it from solidifying due to ambient UV light. But, because its structure is made of folded aluminum, it helps improve thermal exchange and the rigidity of the Z axis as well. In addition, its elegant lines do not alter the minimalist concept originally proposed, and it is easy to disassemble.
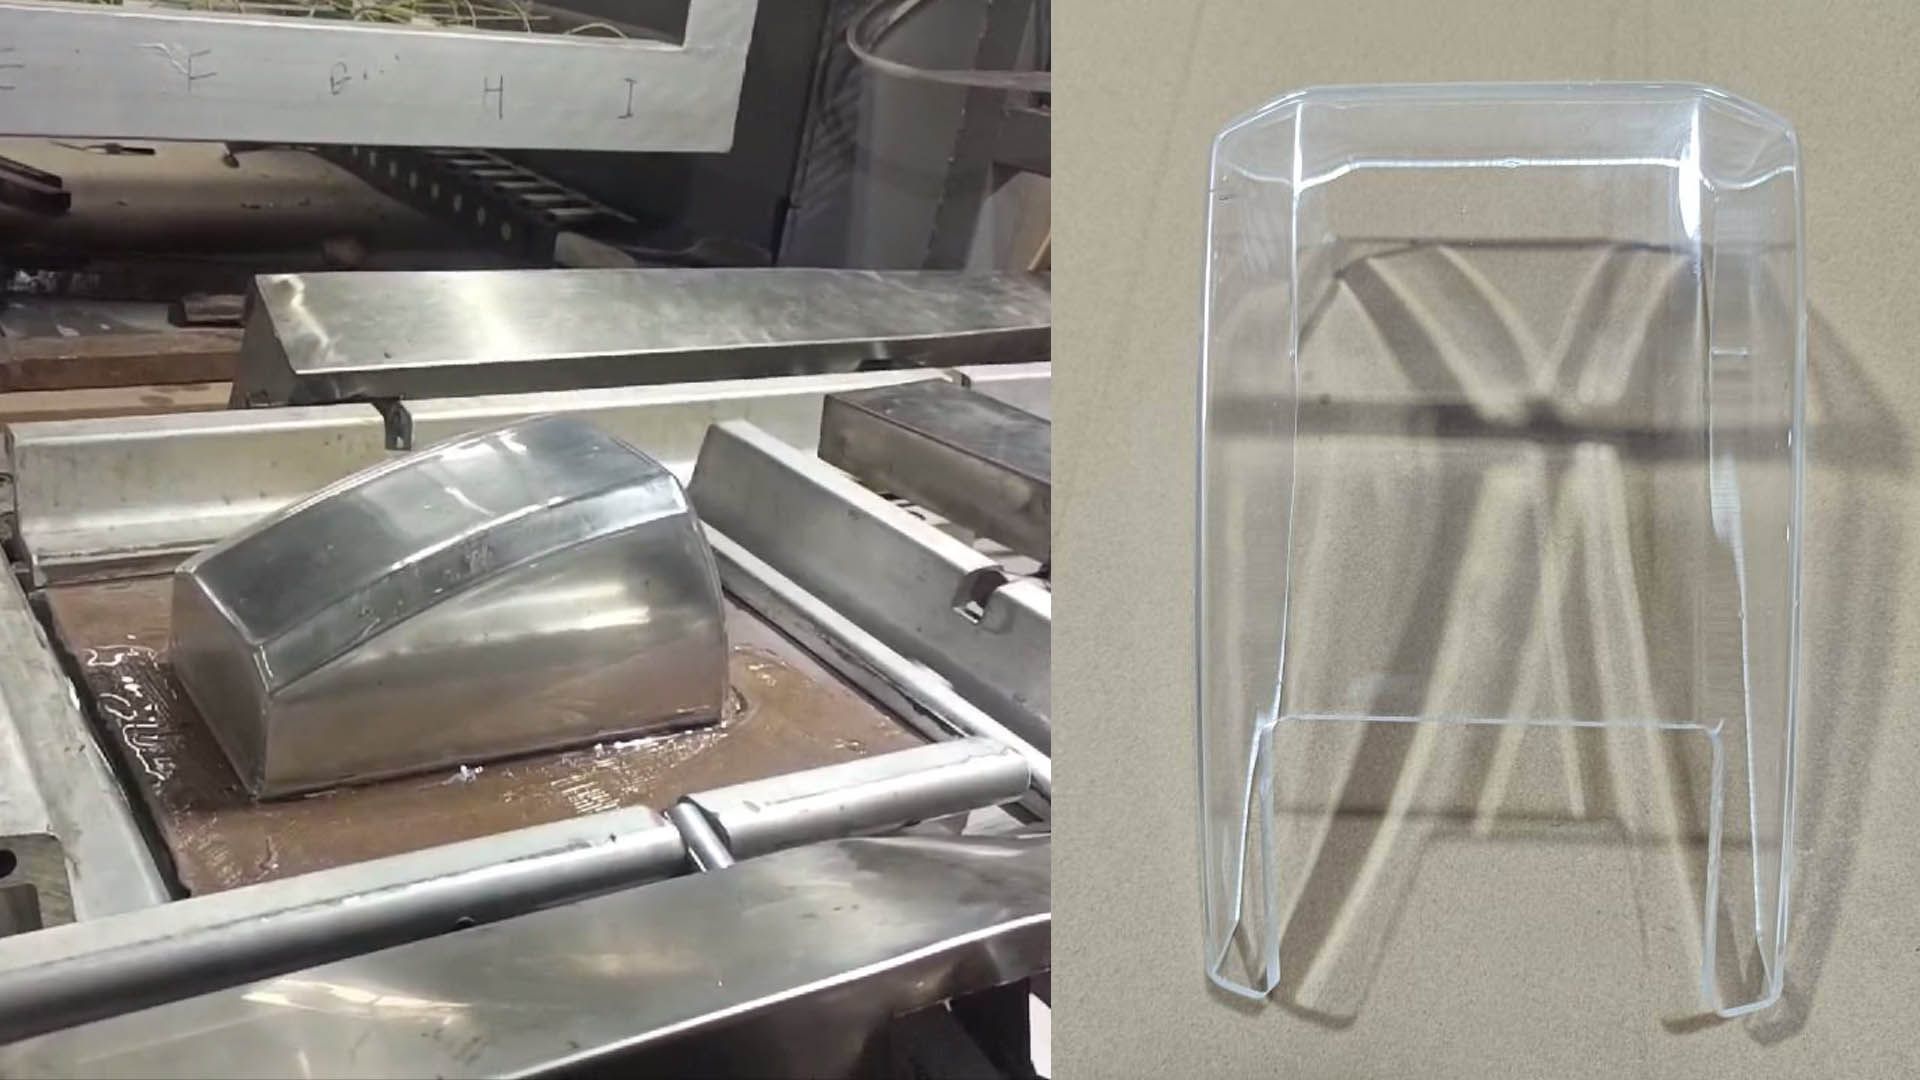
The plastic cover is made of translucent, black, 3 mm acrylic. We have proven that it effectively filters more than 90% of the UV light around 405 nm, which means that, in ambient lighting conditions, it will passes through practically zero power. Of course, it cannot be exposed to direct sunlight, which can solidify resin even through the cover.
Here you can see the manufactured mold, thermoforming the first sample:
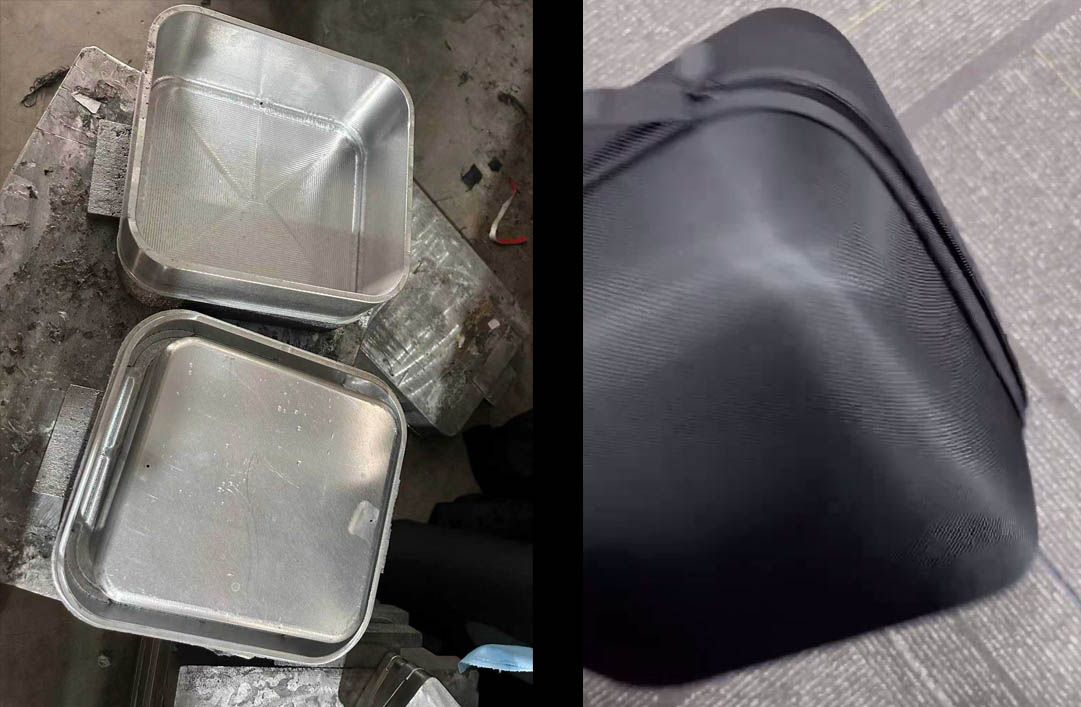
Bonus Update: Padding!
In our commitment to achieve packaging that protects Lite3DP Gen 2 while it’s being shipped around the globe, we had already explored the use of protective foams. We’ve now gone even further, but we’ll keep that announcement for another day. For now, you can see some images sent by our supplier, including molds and samples:
We greatly value all of your feedback, so please feel free to write us using the Ask a Question link_ on our project page.
Thank you very much for your support. We look forward to your comments!