Project update 2 of 13
Hardware Details!
by Joël G, Juan GHi there! In this campaign update, we want to share more details of the Air Labs’ hardware.
Selecting the components for the Air Lab was not an easy task. We strived to find a good balance between components that are easy to use, high quality and power efficient. Also, it was important for us to add a variety of support components that allow extensibility and rich human interfaces.

Air Sensors
The Air Lab’s sensors are all located at the top rim behind the Logo on the front face. This area is well isolated from the rest of the board and ensures that components with heat dissipation do not interfere with the sensor readings.
To measure the various aspects of air quality we rely on the following set of sensors:
- SCD41: Measures CO₂ concentration, temperature, and relative humidity.
- SGP41: Detects volatile organic compounds (VOCs) and nitrogen oxides (NOx).
- LPS22: Measures barometric pressure.
We chose CO₂ and as the primary air quality indicator as it is useful in most indoor environments. The SCD41’s NDIR (Non-Dispersive Infrared) technology to measure CO₂ offers excellent long-term stability, is immune to environmental contaminants, and maintains a high accuracy without requiring frequent recalibration (exposure to outdoor air).
The SGP41 detects additional important and highly damaging air pollutants that should be avoided. The form of the sensing technology used, does not support absolute readings and instead provided an indexed value that correlates with a rise an fall in pollutant detection.
Finally, we added the LPS22 sensor to support correlation of air quality with weather changes. This may be useful for environments with strong air pollution that affects indoor environments differently depending on the weather.
If you want to know more about the differences between CO2 sensor technologies, check out this blog post that does, and excellent job in comparing them.
Controller & Power
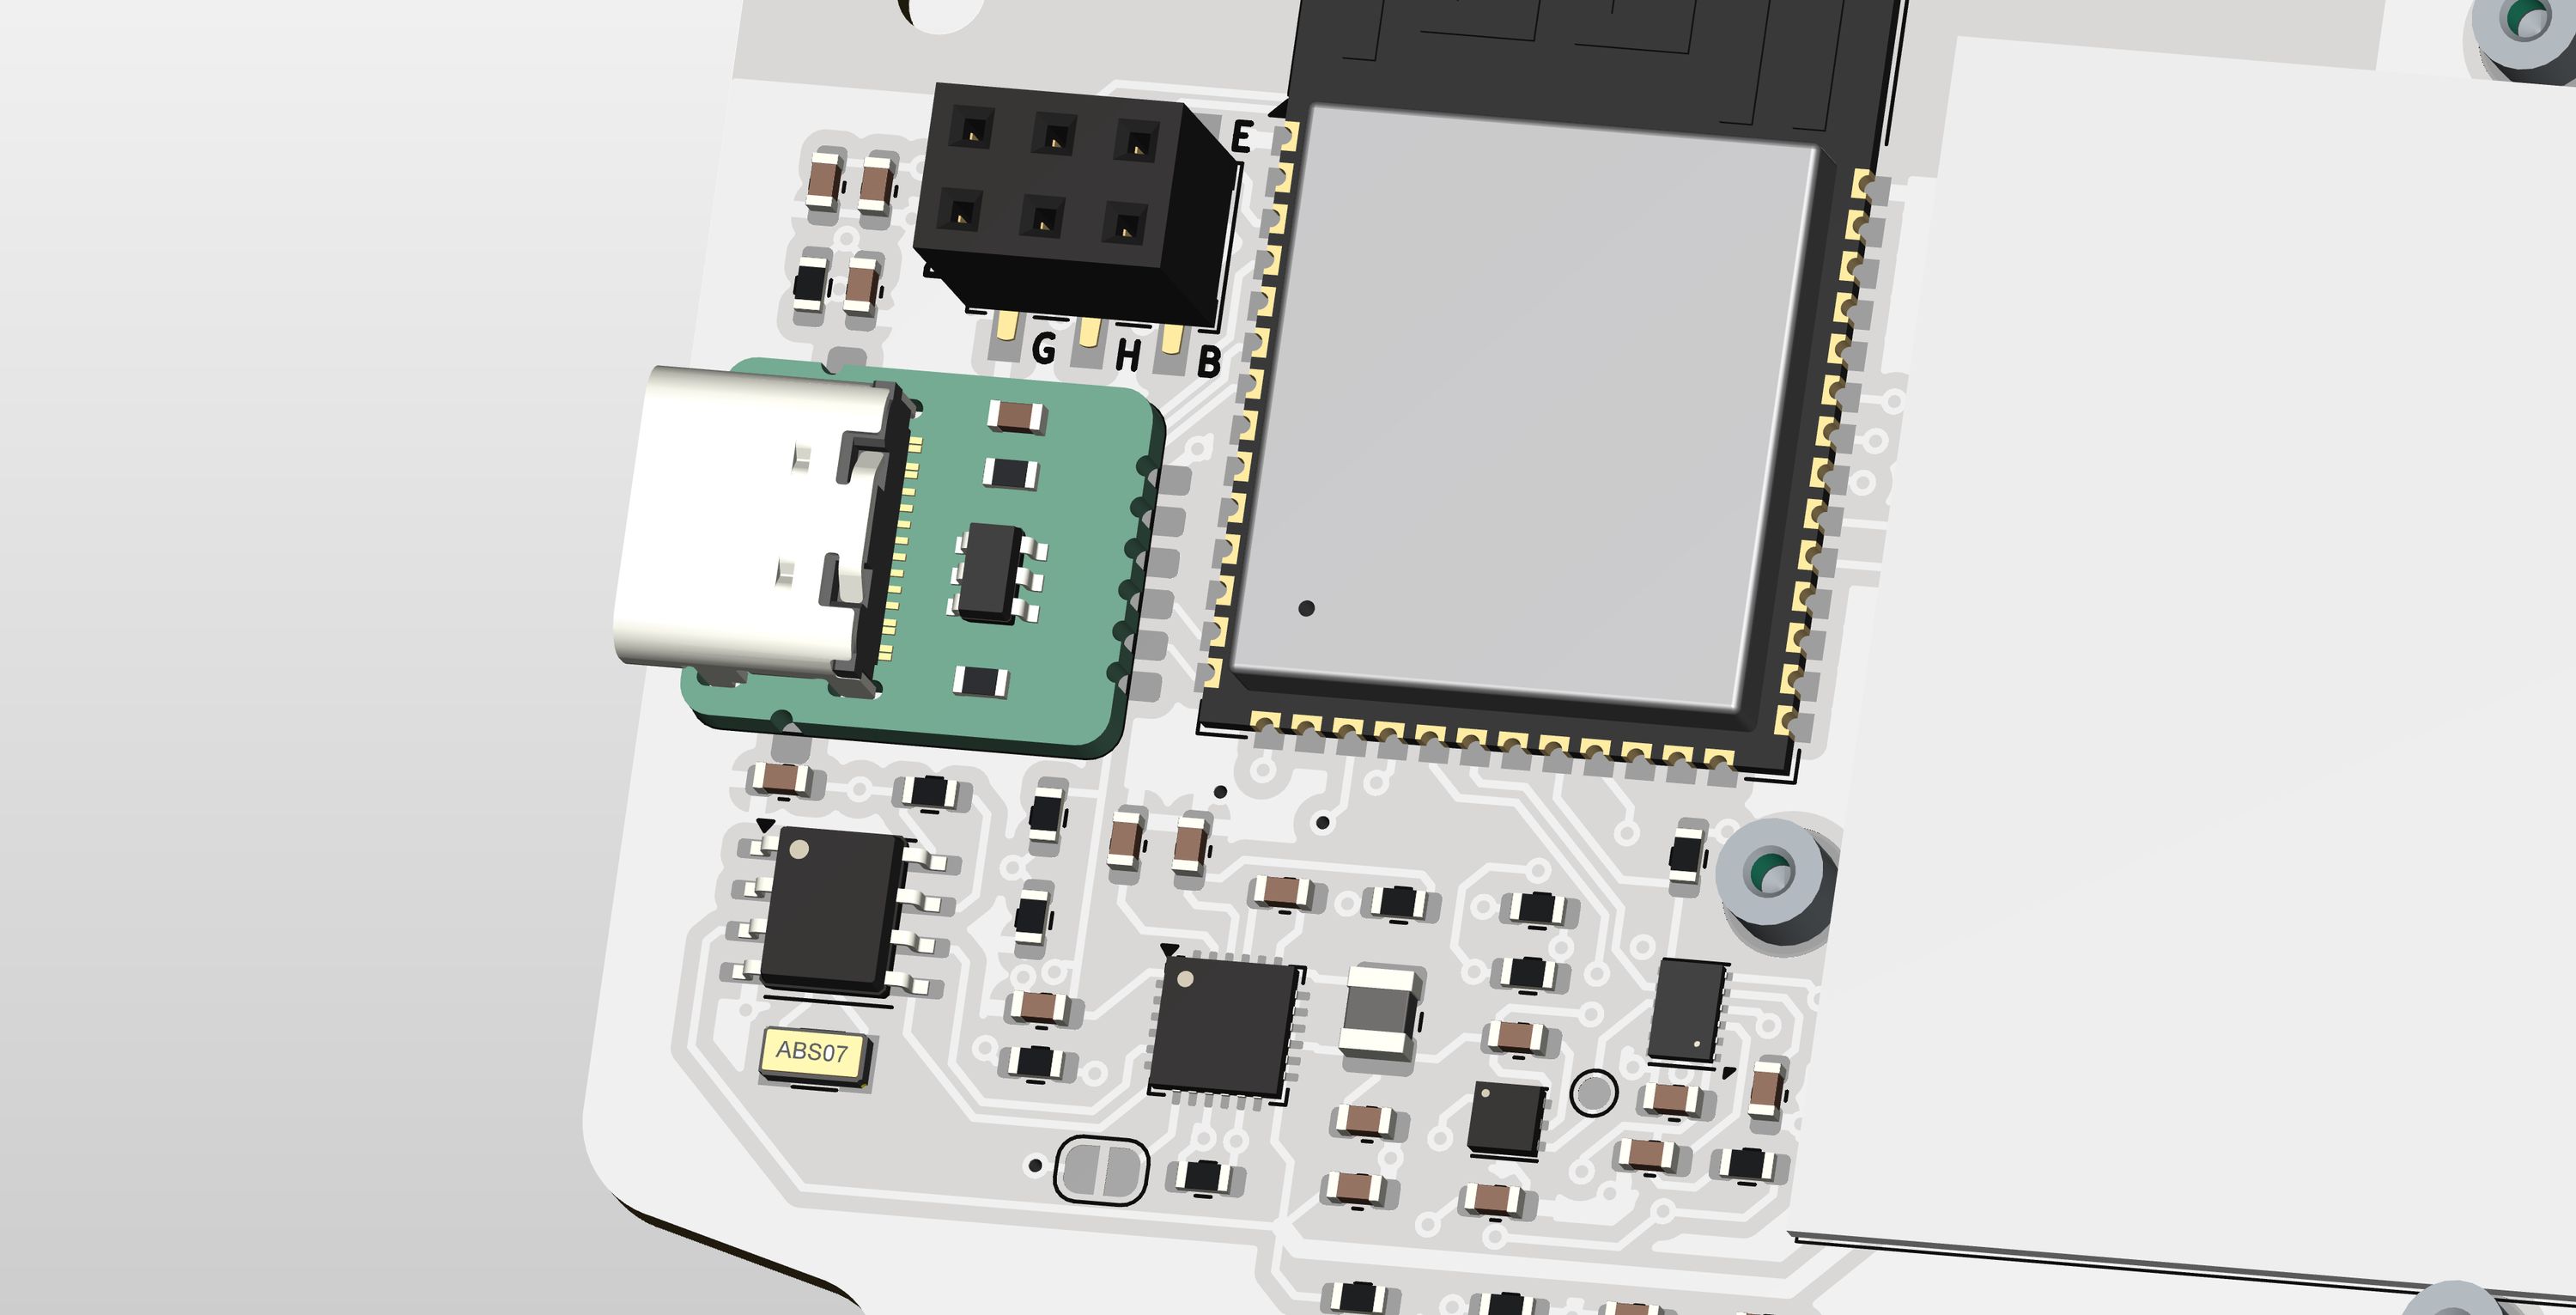
At the heart of the Air Lab is the ESP32-S3 microcontroller and its support circuitry. We decided to go with an ESP32 mainly because of its wide adoption in the community. Even though other microcontrollers like Nordic’s would be more power efficient, it was important to us that programming for the Air Lab is as easy as possible. The “ESP32-S3-WROOM-1-N16R8” module selected for the Air Lab comes with 8 MB of additional PSRAM for graphics and 16 MB built-in flash storage to give enough headroom for future firmware features.
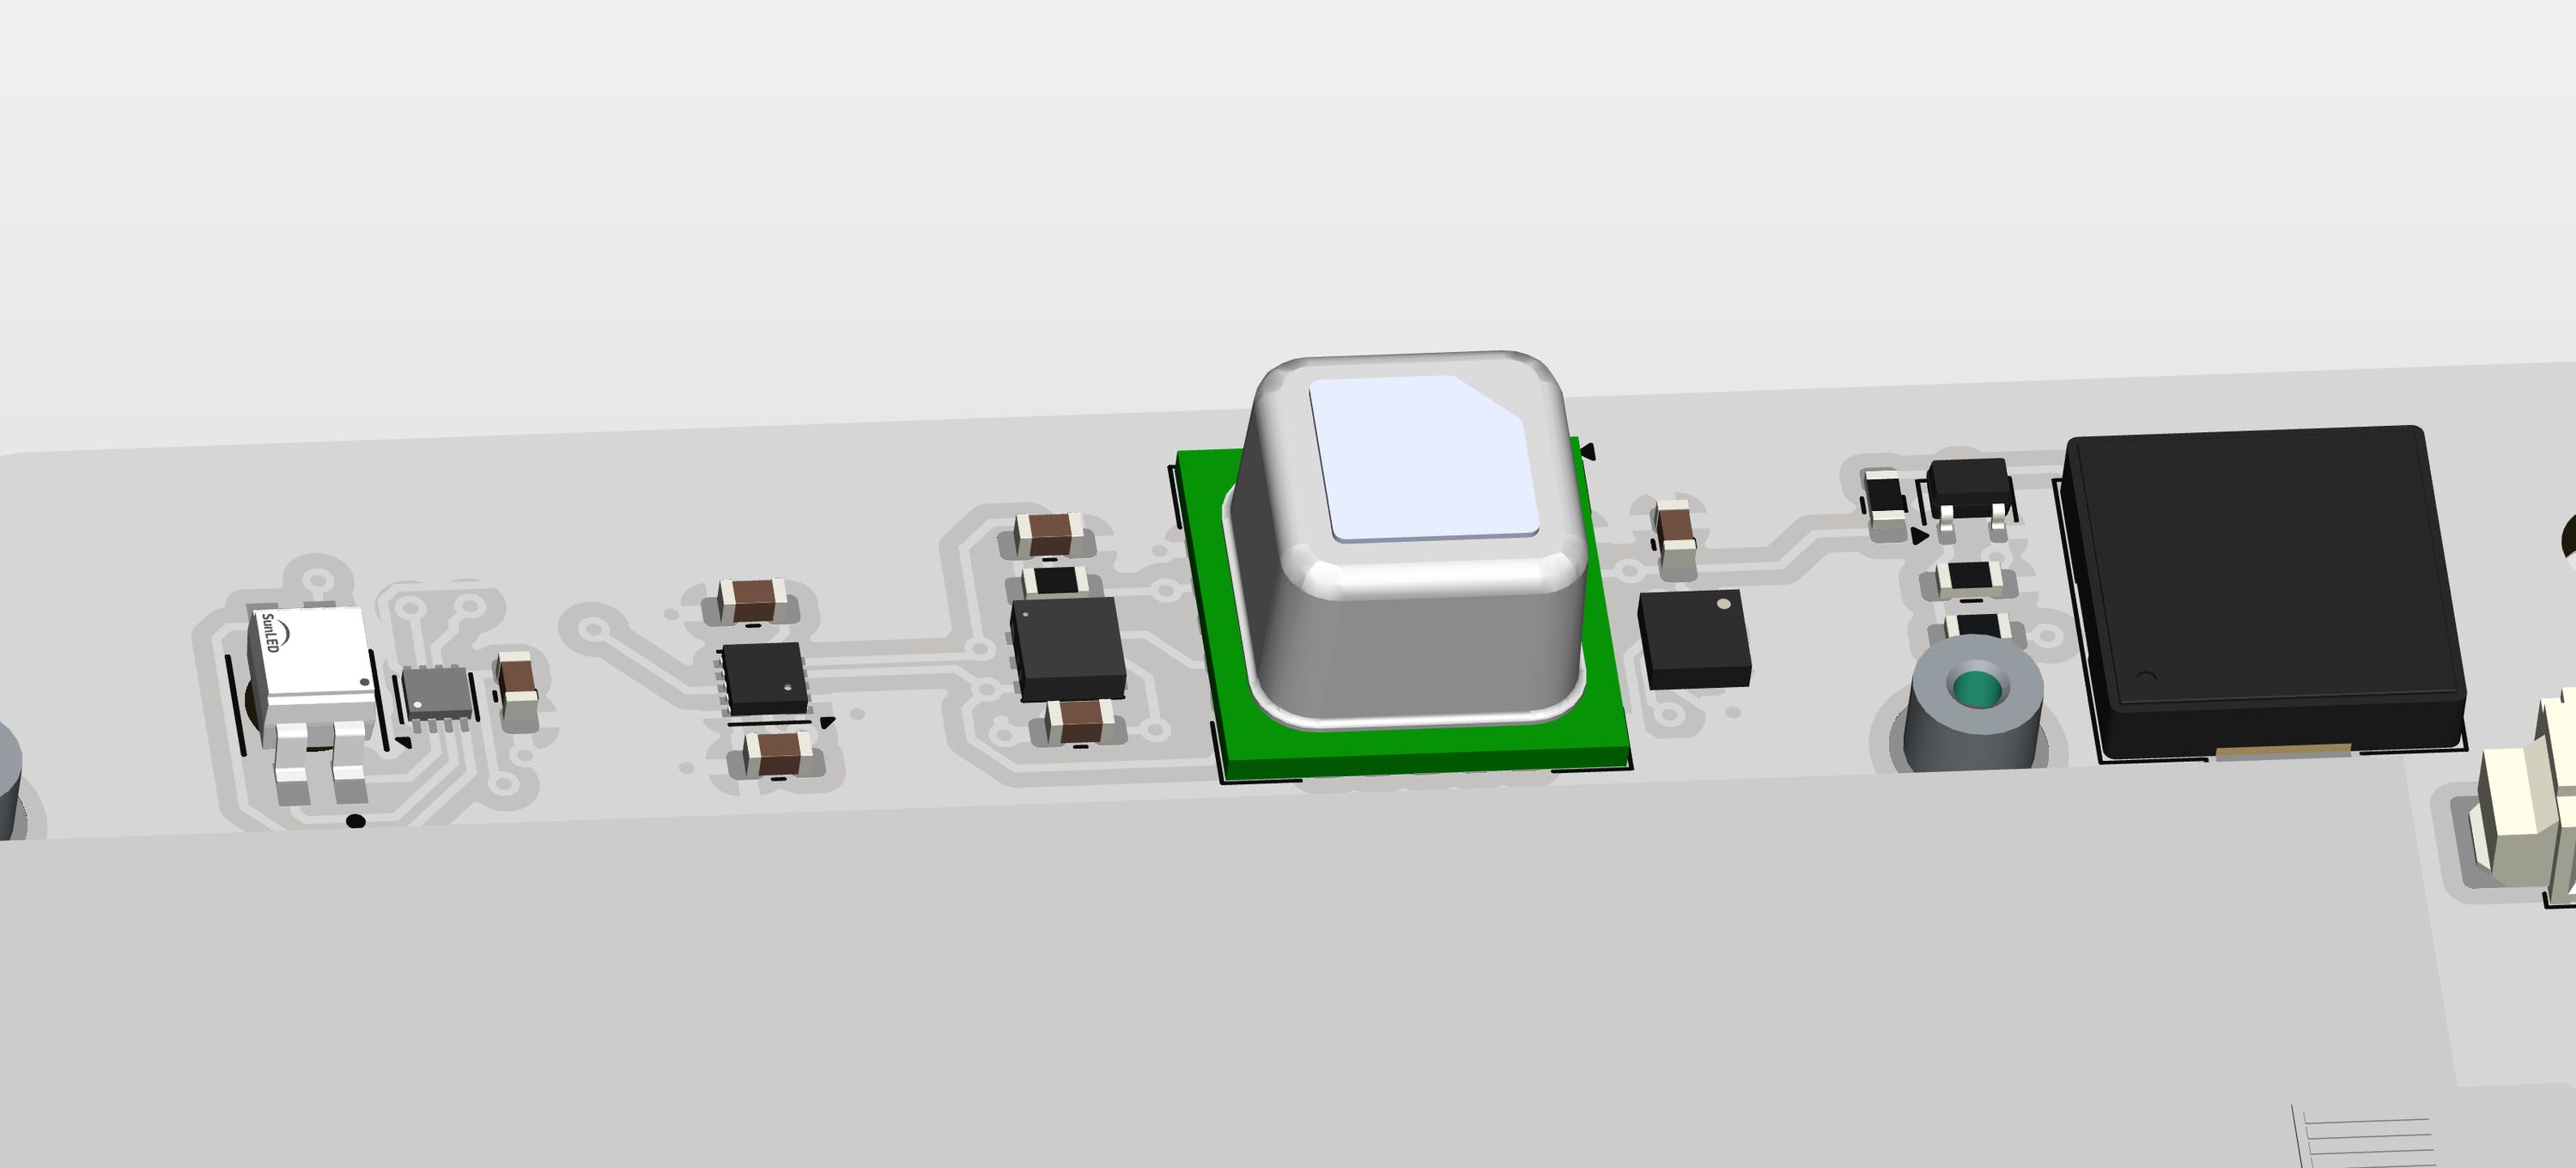
Next to the microcontroller, we use the following supporting ICs:
- BQ32000: A real-time clock for accurate timekeeping and scheduling, operating at ultra-low power with battery backup.
- FXLS8974CF: A low-power 3-axis accelerometer for motion detection and orientation sensing, with 14-bit resolution.
- BQ25601: A high-efficiency battery charging IC with power path management and USB input current limiting.
- STM6601: A power supervisor and on/off controller with debounced button input and programmable timing.
Human Interface
We knew early on that we wanted to use an E-Paper display, as they are perfect for such a device that displays information updated at a regular schedule. Furthermore, the recent E-Paper displays support partial update mode that even allow the use of simple animations. The Air Lab uses a standard 2.9” E-Paper display that is available in many stores should it ever need a repair.
We’re particularly proud of the Air Lab’s user input elements. Especially, the touch bar is a great interface element that counter-intuitively is able to hide the latency of the E-Paper display very well. It is accompanied by 6 standard SMD buttons that have a nice click feeling and help navigating the menus.
To measure the touch-bar’s seven touch-points, we added a CY8CMBR3108 capacitive touch controller. This controller may be a bit over-specified for such a device, but once we started to work with it and ran out of pins anyway, we couldn’t miss its features. The controller offers a sensing algorithm that is far superior to one built-into to ESP32 while also being very power efficient.
On top of that, we also added an RGB LED that is driven by a separate controller. The LED is reverse-mounted and shines through the PCBs epoxy core on the top silkscreen layer. Almost next to it is also a piezo buzzer that is used for the click-feedback and playing alert notifications.
That’s it!
We hope you gained some insight into the component selection process of the Air Lab. Stay tuned for more updates in the coming weeks. If you have not yet backed the project, we would very much welcome your support!