We’re in the final couple days of the PicoIDE campaign and I’m so grateful to see the response it has had! I’ve heard from so many people who have backed for multiple PicoIDE units or are coming back and adding more before the campaign closes. Seeing this level of support really inspires me to make sure the next phase goes well: production! As we start transitioning into full production mode, I thought for this update I’d give some background on how the PicoIDE case came to be and the challenges in actually making it production-ready. I’ve been very lucky to have a talented designer friend to be my partner in bringing the PicoIDE case to life: GutBomb, who was able to not only make the case look great, but also make it possible to be produced in volume.
Elevating a Project to a Product
In the early days of the PicoIDE project, the first thing that came into my head was that I wanted to make a Gotek for CDs. For those who don’t know what a Gotek is, it’s a floppy drive emulator that fits in a 3.5" floppy drive bay. It originally started off as a bare-bones replacement for drives in industrial and embedded settings, but then the HxC and FlashFloppy firmware projects took the Gotek to the next level, adding features with vintage computing hobbyists in mind. The original Goteks came with a basic 7-segment numerical display, but those firmwares added the capability to use a nice OLED screen to navigate disk images and see the device’s status. That’s exactly what I was going for, but with the largest screen possible in the 3.5" drive form factor.
One thing I started with my PicoGUS project that I wanted to continue on with PicoIDE was adding one extra detail to bring it to the next level of fit and finish, elevating the project above your typical homebrew endeavor. With the PicoGUS that detail was using a metal bracket instead of the 3D printed bracket typical of most other modern retro add-in card projects. A metal bracket meant somewhat increased marginal costs, but the fit and finish said "actual product" instead of "hobby project." Worth it in my mind!
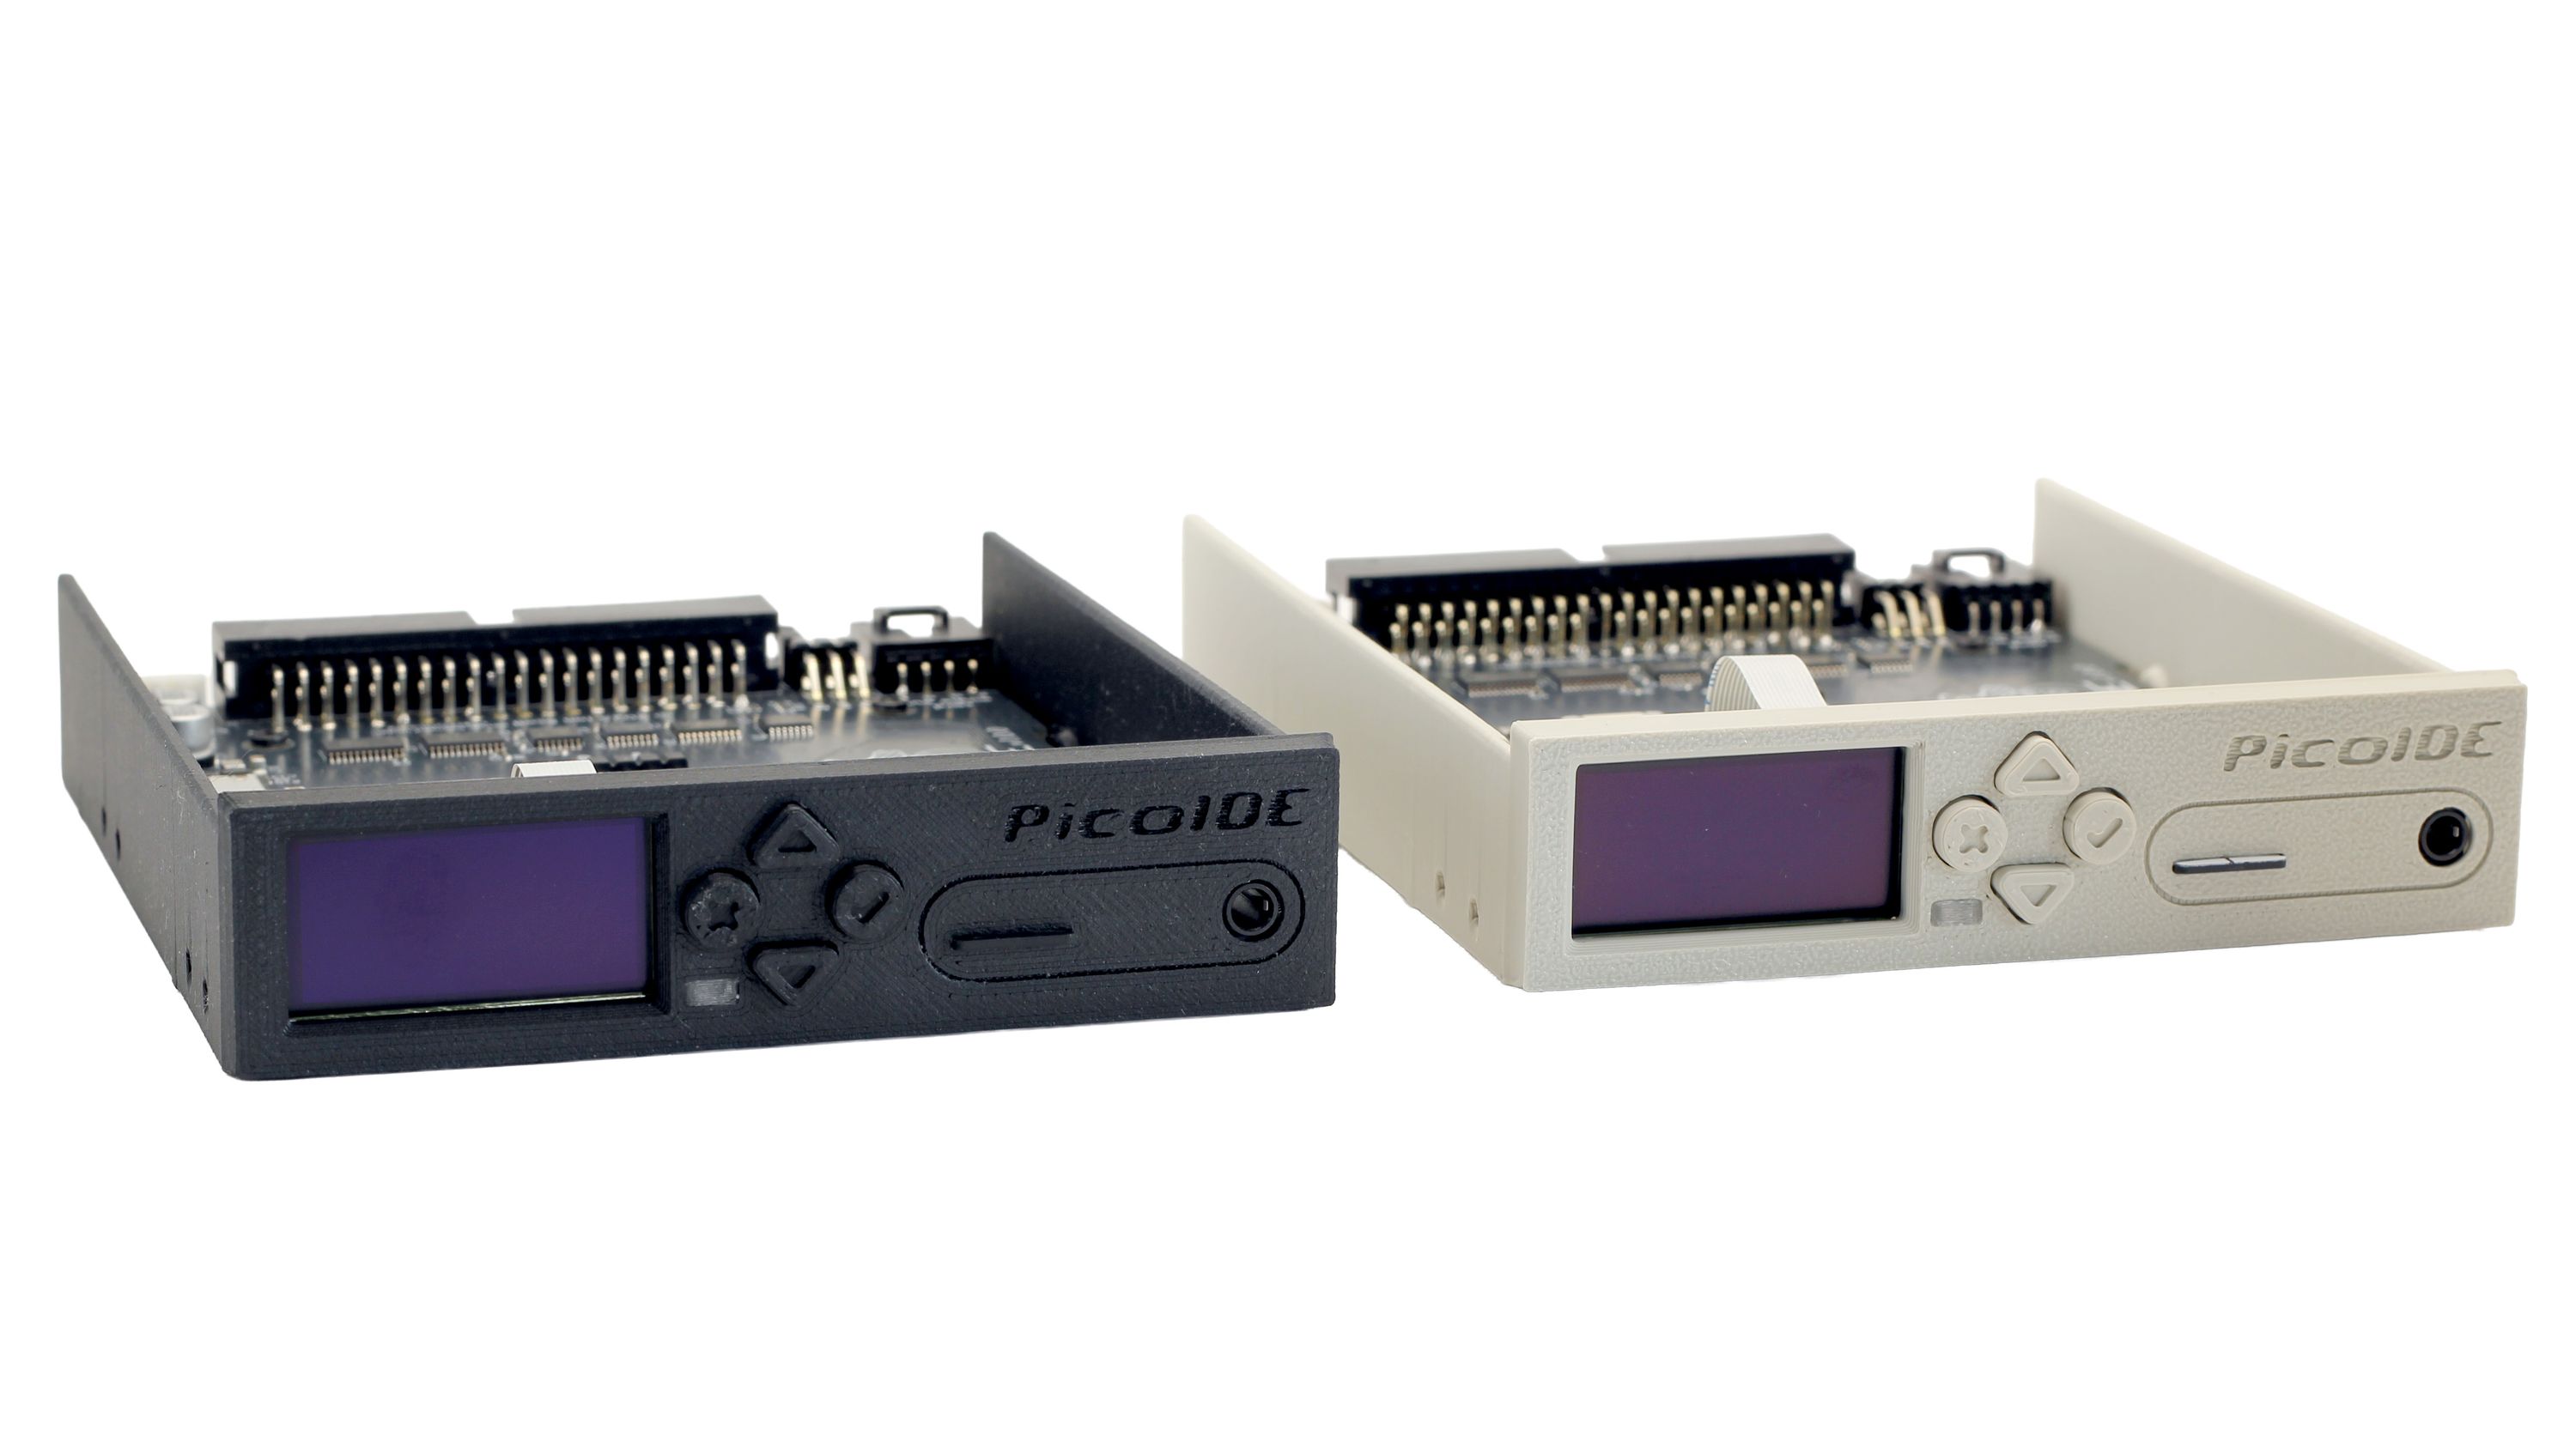
While I was looking at my Gotek to get a feel for the dimensions I needed PicoIDE to fit in, I decided that the extra detail for PicoIDE would be an injection molded case, just like the Gotek. That, along with a great looking design, would be what would elevate PicoIDE’s fit and finish to "actual product" level. Now I knew I had a big obstacle to overcome: initial engineering and fabrication costs for an injection mold are significant. But I had a feeling that if I could launch PicoIDE here on Crowd Supply, I could build up enough interest to produce enough units all at once to make the incremental cost of an injection molded case actually make sense. And thanks to all of you who have backed the project so far, you’ve actually made that possible!
Actually Designing the Thing
The PicoIDE main PCB was designed to bring a microSD card slot and 3.5mm line out jack all the way to the drive front, while leaving enough room for the front panel interface with 1.3" OLED and navigation buttons, roughly fitting into the Gotek 3.5" drive form factor. With that in mind, I gave GutBomb the 3D CAD files for the boards and he went to town, creating a great looking design with embossed PicoIDE logo, oval outline around the card slot and audio jack, and up/down/cancel/OK iconography on the buttons. We just had to make sure this design could actually be made.
PicoIDE is part of the Soldered Electronics Inkubator here on Crowd Supply, and Soldered has a lot of experience bringing electronic products to life. They’ve been a valuable partner, especially when it comes to areas where I lack experience, and that includes injection molding. GutBomb knew quite a few of the things to avoid when designing for injection molding, so through the cycles of feedback we’ve gone through, making necessary changes for manufacturability have all been doable. Here’s an animation of the changes GutBomb’s enclosure design has gone through: moving standoffs and notching out areas around to help mold release, and also dealing with my odd requests to add extra mounting holes to allow both internal and external mounting.
Once the campaign closes we’ll immediately start the final process of producing the injection mold. I can’t wait!
Don’t Forget the Buttons
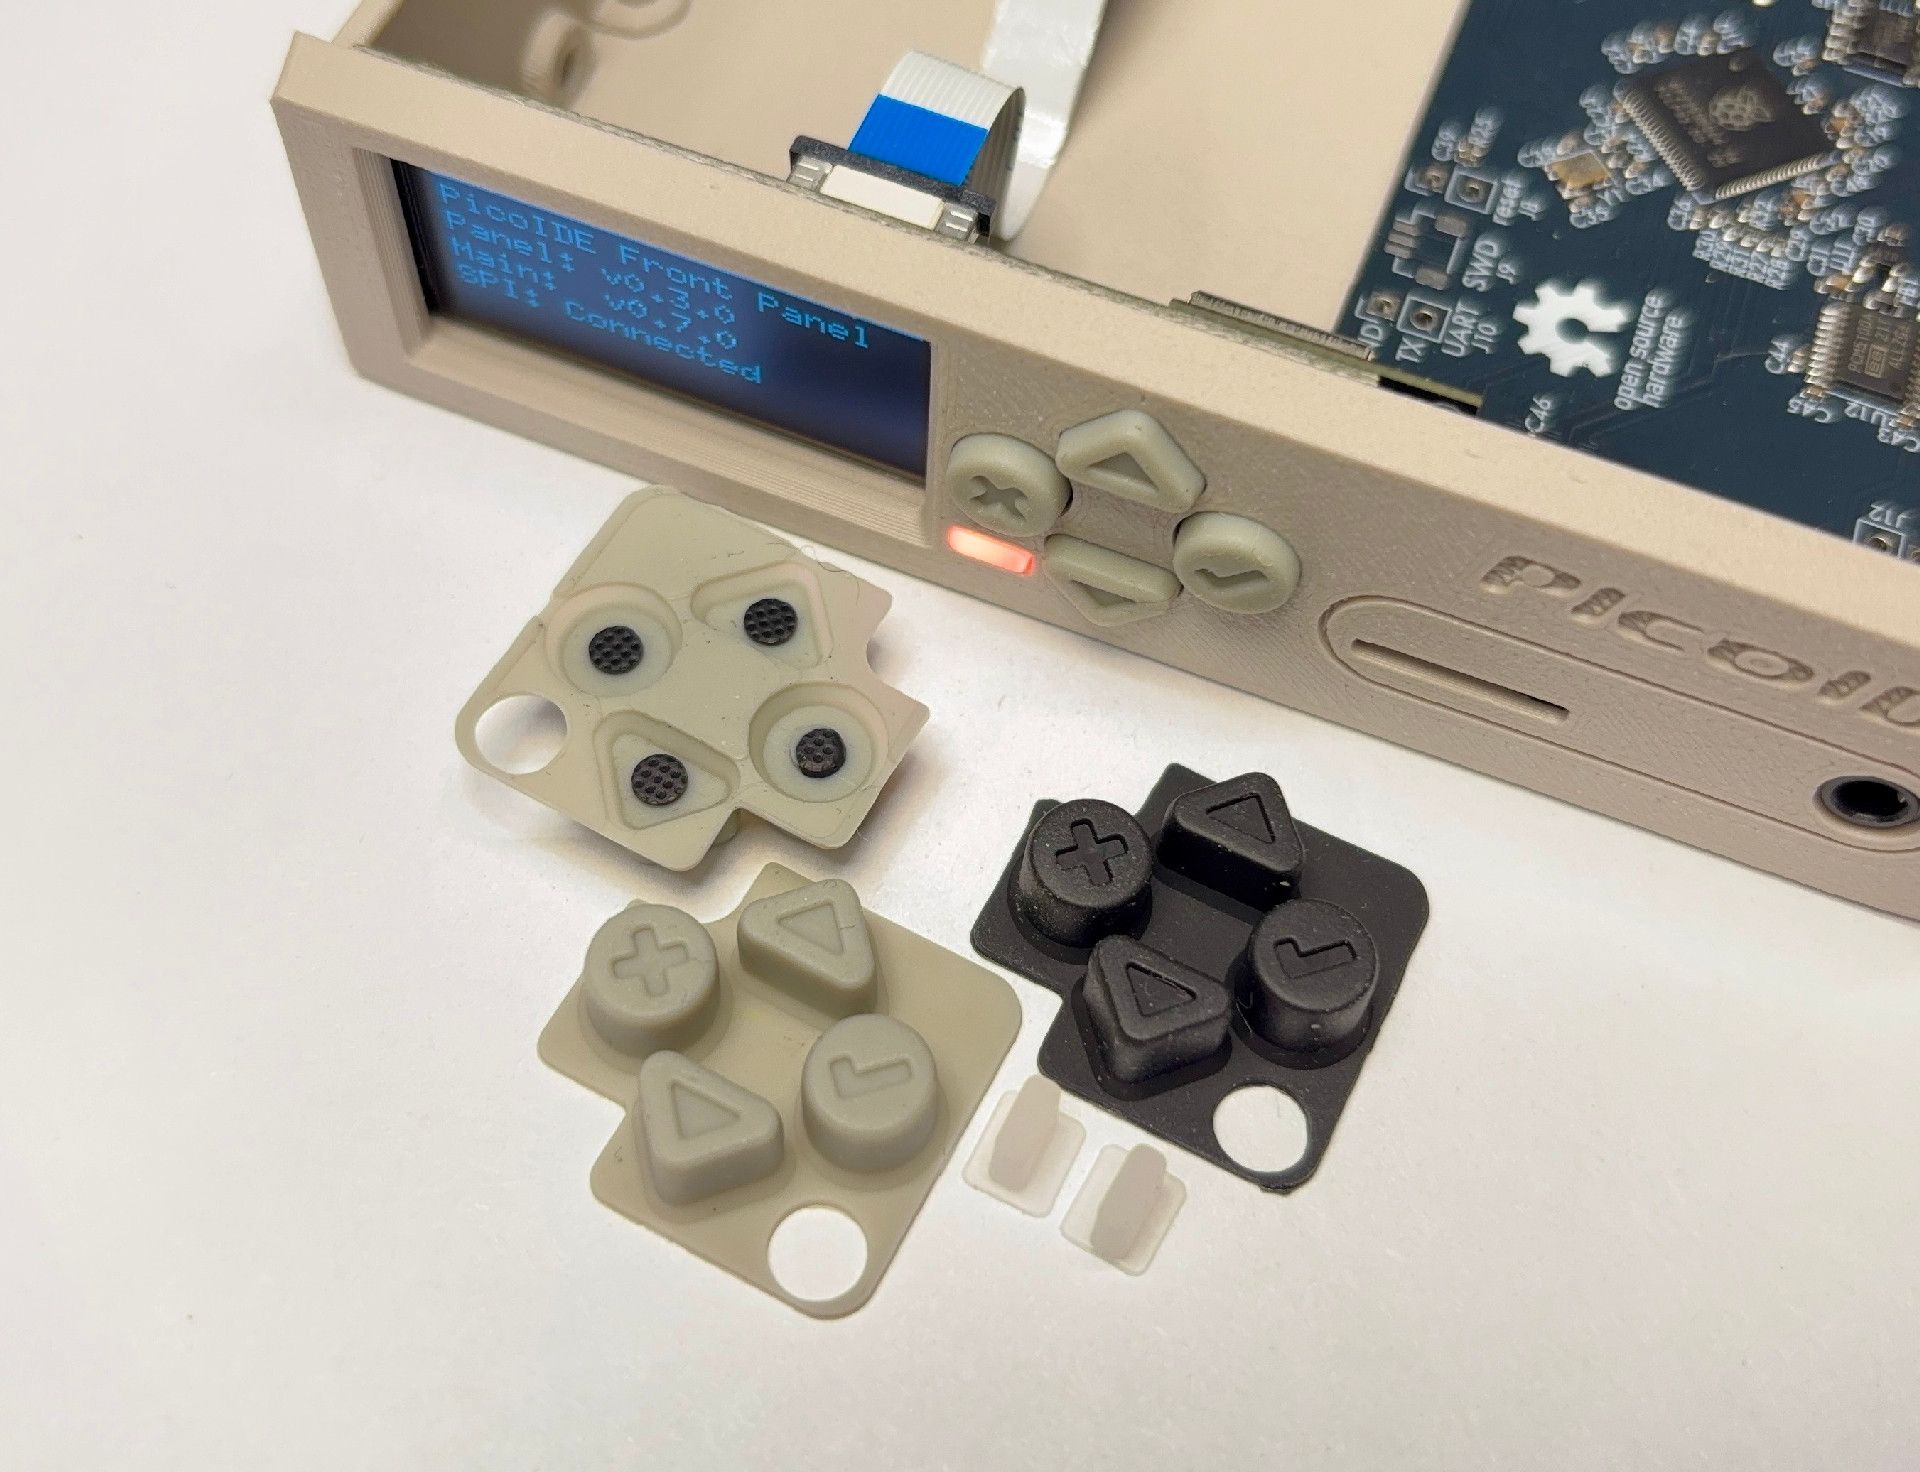
We can’t forget about making the buttons, either. In my 3D printed prototypes, I used solid plastic buttons with silicone rubber domes beneath them, but individual domes were oddly expensive even in quantity, and the additional cost of an injection mold for the buttons was significant. When I’m designing for production, I’m a relentless cost optimizer, so long as the ultimate experience isn’t compromised. So how about using a one-piece molded silicone membrane for the buttons? If done well, they can actually have good tactile feel, and the cost of a silicone mold is much less than one for ABS. I asked GutBomb to design a silicone button membrane, and he again came up with a great design, using buttons from various remote controls that he had on hand as a reference.
Again, having a manufacturing partner who was willing to work with us to provide feedback was invaluable. We learned about the requirements for channels to allow air to escape and enter when actuating the button, color possibilities, and more. I’m happy to show that the button mold is complete and we already have samples in hand of the buttons. They are ready to go into mass production after some color tweaks.
Heading Into Production
Designing PicoIDE’s enclosure was about making a series of deliberate decisions in pursuit of something that works well, looks good, and is actually possible to produce in quantity. I committed to injection molding when I saw a path to making it possible, GutBomb and I iterated endlessly on visual look and form factor decisions, and I rethought the buttons so they could be both satisfying and cost-effective. Each decision pushed the project a little further from "homebrew project" and closer to "finished product." This was all made possible with GutBomb’s design savvy and Soldered’s manufacturing experience, and of course with the support of all of the backers here on Crowd Supply that made injection molding a realistic option.
As we move into production, it’s exciting to see PicoIDE and its enclosure start to become a real, tangible thing. Again, thank you to all of you who have backed the project and spread the word.