Project update 2 of 8
How to use E3K DCPU and Sensors
by Varan GuptaThis update will cover how to set up your E3K platform. E3K is a framework of biosensors bundled together for your immediate and easy usage. One can develop a project or prototype easily using this platform.
In the E3K framework, we are providing sensors to measure the electrical signals generated by heart, muscle and brain using ECG, EMG and EEG sensors respectively.
Data Communication and Processing Unit (DCPU):
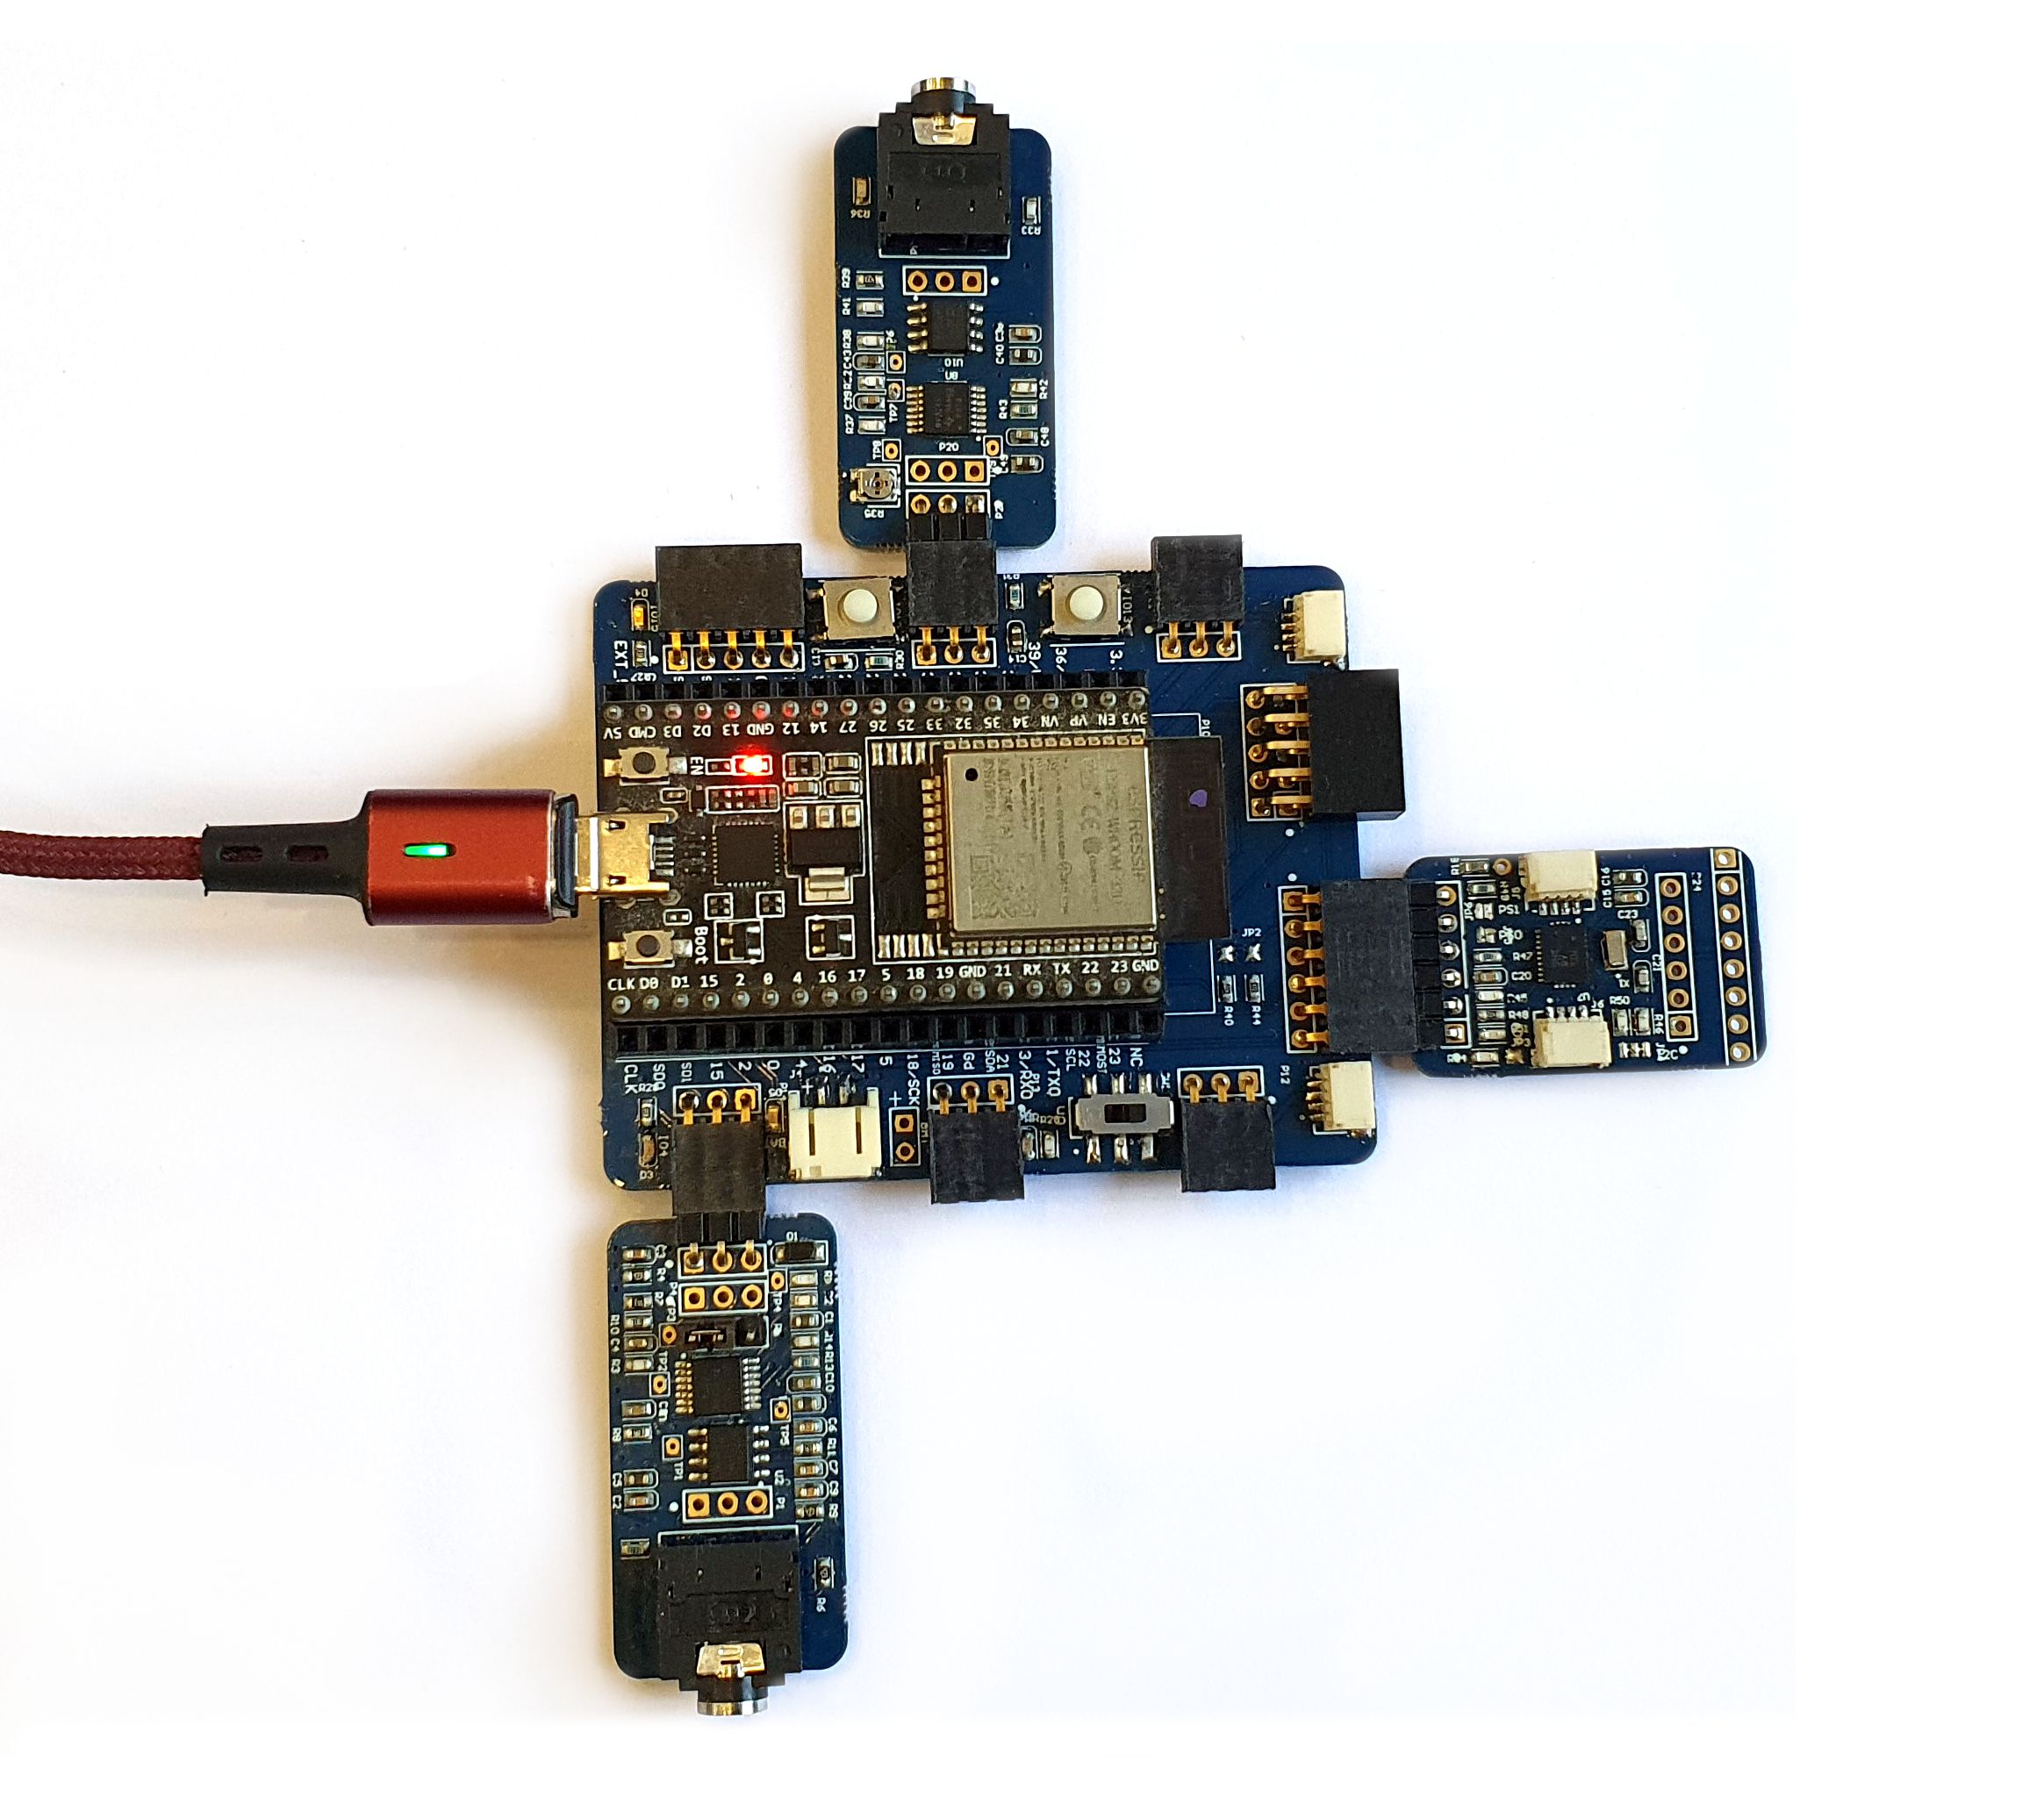
To begin with, we have a Data communication and processing unit (DCPU) which is the heart of the complete platform. The DCPU is based on ESP32 microcontroller which can be programmed easily via USB. We will provide firmware which can be directly loaded on to ESP32. Upon loading this firmware, the DCPU will be able to communicate the sensor data to other devices via Bluetooth, Wi-Fi, or USB.
The DCPU can be powered via micro USB connector from laptop or PC or single cell (or 3.7v) LiPo battery. A battery management circuit is also provided on the board. Therefore, if we connect both USB and battery, the board will be powered by USB and the battery will get charged simultaneously.
DCPU constitutes 6 analog channels, 2 push buttons, 2 LEDs, 1 SPI port, 1 I2C port, 2 Qwiic connectors, and a 38-pin breakout for the ESP32 board. Users can configure all the channels according to their requirement.
ECG sensor & EEG sensor:
This sensor is a dual-function board. Depending on where you place the electrodes, you can measure either ECG (heart signals) or EEG (brain activity).
The 3-lead ECG sensor which works on the principle of differential signal sensing. The ECG sensor has been built with amplifiers and bandpass filters so that signal which is of interest is filtered and amplified. This provides a very good signal to noise ratio resulting in a clear ECG signal.
In order to measure the ECG, connect the 3 lead cables to the ECG sensor via 3.5 mm jack. Place electrodes at appropriate positions on the body and connect the sensor through any one of the channels.
When this method of data collection is applied to signals from the brain, it’s called EEG. Some of the most complicated signals are the one which are generated by our brain. The EEG sensor is used to capture these signals by placing electrodes on the scalp.
EMG sensor:
This sensor is used to measure the electrical signal generated by the muscle group. This also uses 3 leads, 1 for reference which needs to be put on near the bone area. Other 2 electrodes are placed on the muscle group of interest. Once the muscle is made to move, electrodes capture the signal and send it to EMG Sensor. EMG sensor has 2 output options, namely raw and integrated.
IMU sensor:
Along with bio-sensors, the IMU sensor can be used for tracking. The E3K IMU sensor hosts 3 sensors internally viz. Gyroscope, Magnetometer, and Accelerometer. Using these, one can sense the motion of the body.
GUI:
An easy-to-use essential UI is provided along with the hardware. Users can configure the channel transmission speed, mode of data transmission and sampling rate. All these can be done using UI controls.
As the firmware and UI code are open source, users can tweak these as per their requirement.
Watch out for more explanation and example experiments using each of the sensors coming in subsequent updates.