Project update 2 of 11
iPad Application Overview
In this update we are going to review some of the basic features and functionality of Aeroscope’s iPad application. This "getting started" tutorial will demonstrate how to connect to an Aeroscope, use the trigger functionality, and use some of the basic menu operations.
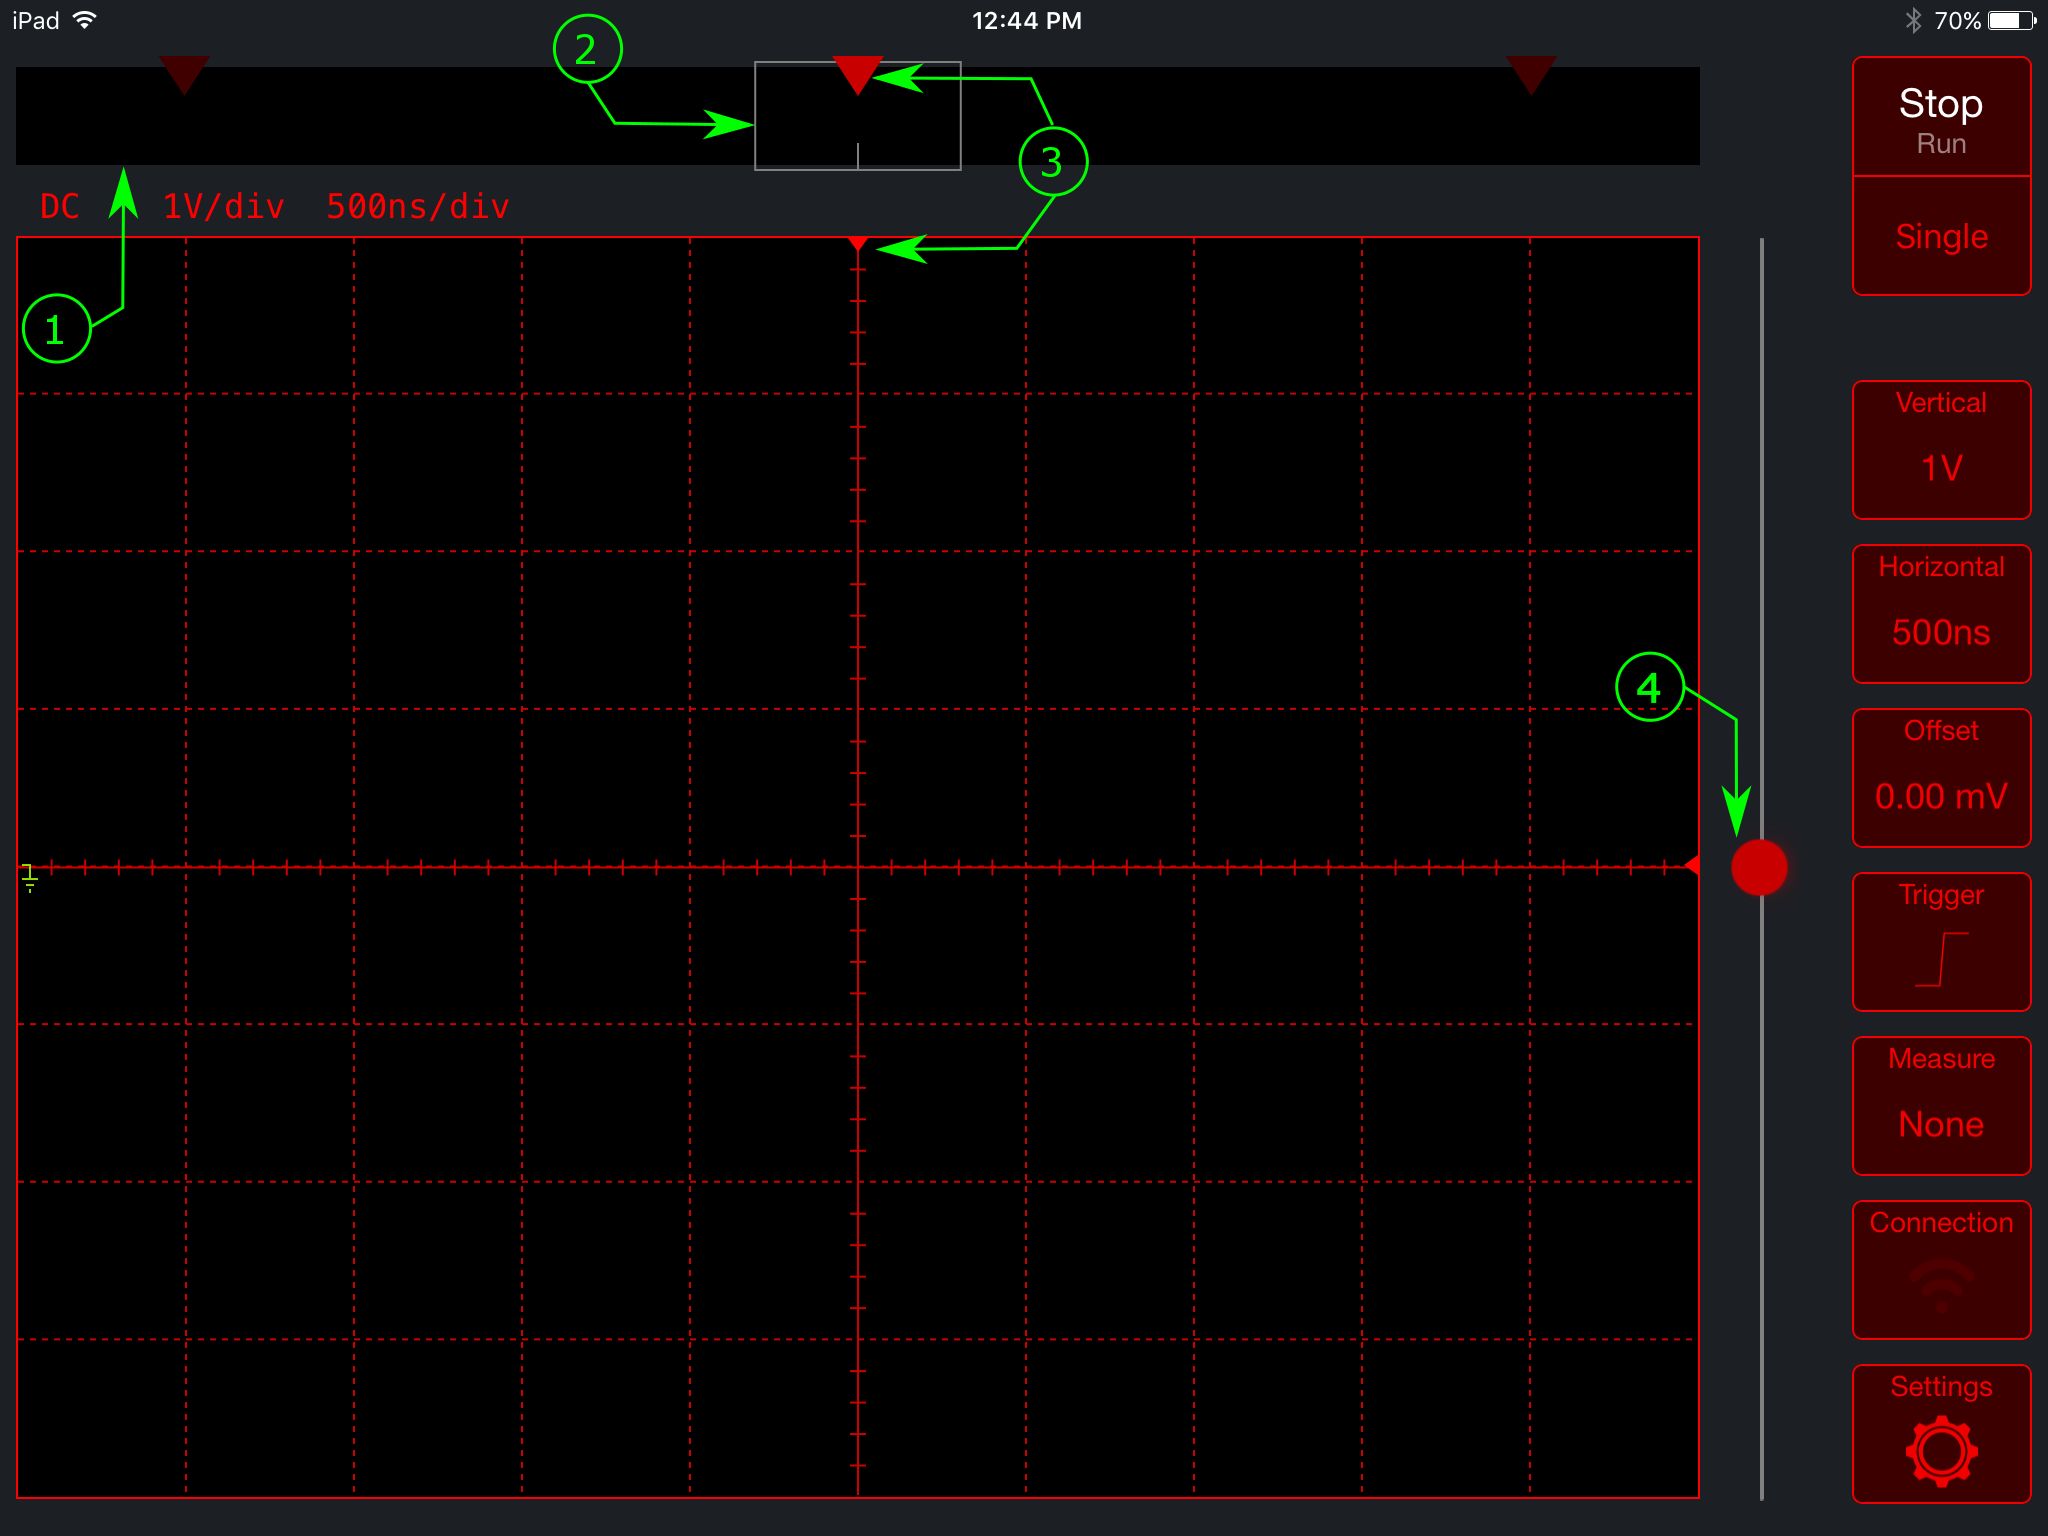
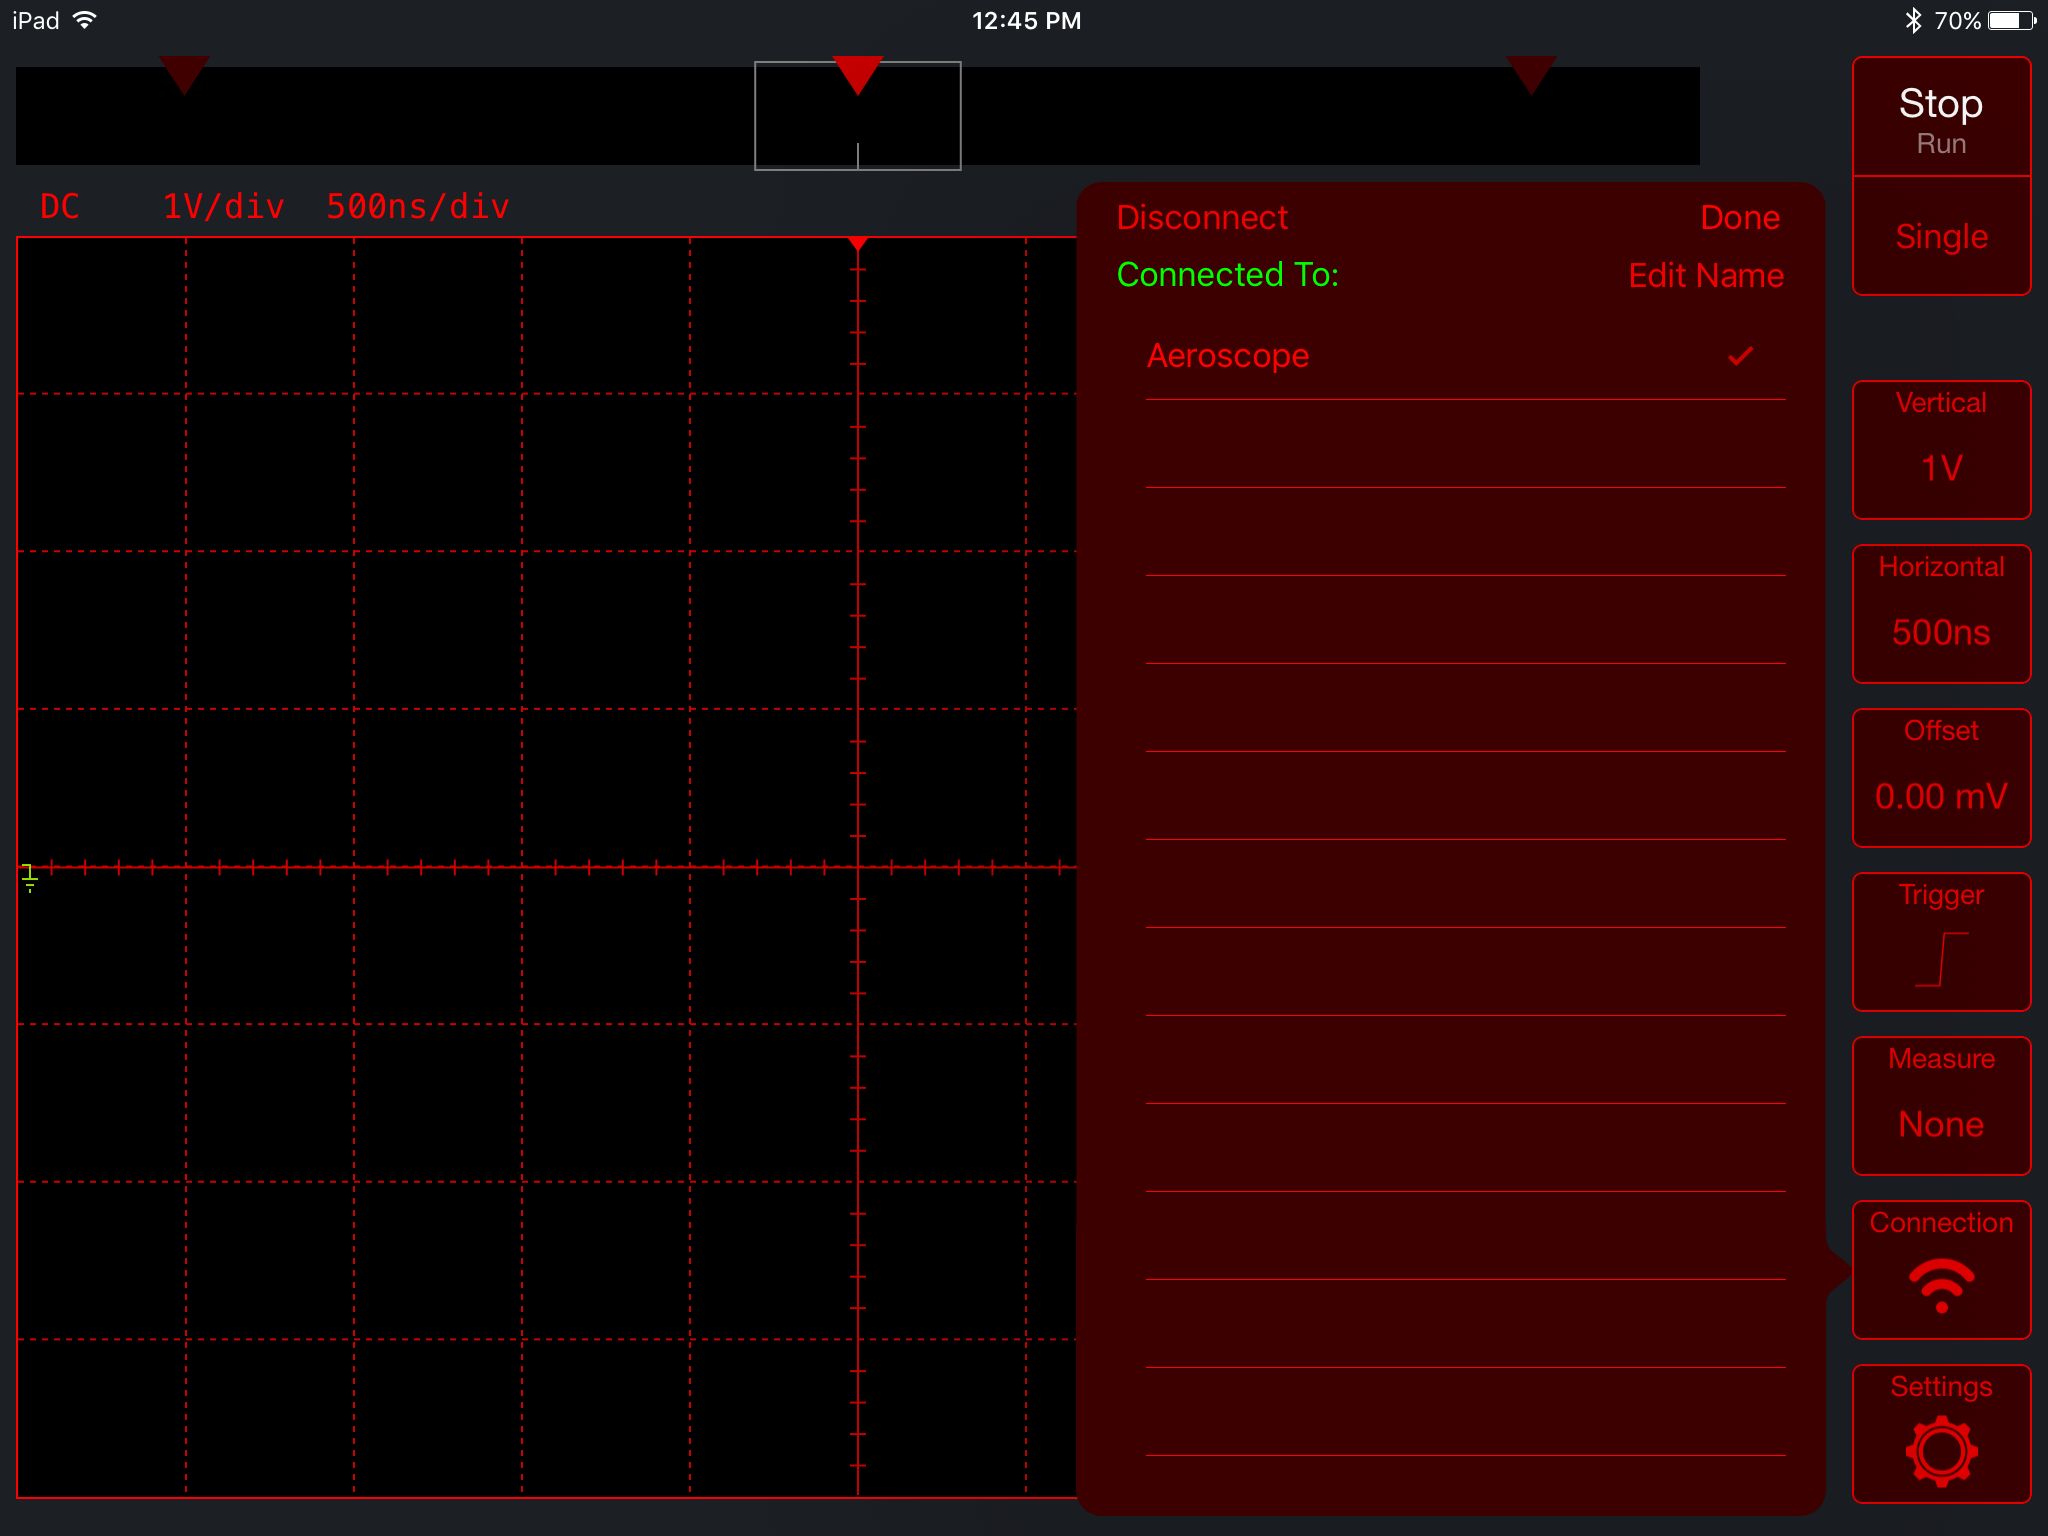
In Figure 1 above the app is shown in the unconnected state, ignore the annotations for now. To connect to an Aeroscope, press the connection button in the lower right corner. The connection menu will pop open and display all of the Aeroscopes that are available to connect to. Select an Aeroscope and the menu will indicate when the device has connected as shown in Figure 2 below. Notice that once you are connected the menu displays "Connected To:" and the graphic on the connection button changes. From this connection menu you can also change the name of your Aeroscope by tapping "Edit Name," or disconnect from the currently connected device by tapping "Disconnect."
Once you are connected, you can control Aeroscope in a number of ways. You can use the buttons on the right side of the screen to change the time and voltage scales, the offset, the trigger mode, or to add measurements. You can also use touch gestures to control Aeroscope. Pinch gestures in the horizontal direction change the time scale, and in the vertical direction direction change the voltage scale. A single finger drag in the horizontal direction will change the trigger delay or in the vertical direction will change the offset. The currently set voltage and time scales are shown on the buttons as well as in the upper left corner just above the plot area. The current input coupling, AC or DC, is also shown in the upper left corner just above the plot area.
Aeroscope can be set to run, stop, or single mode by tapping the buttons on the upper right side of the screen. The button on Aeroscope itself can also be used to start or stop acquisition. This is especially handy when you are probing and get a waveform that you would like to look at in more detail. With a traditional oscilloscope you would have to reach across the bench to push the stop button. Often times it is precisely at this moment that the probe slips and you lose your waveform, with Aeroscope’s start/stop button literally at your fingertip this problem is avoided.
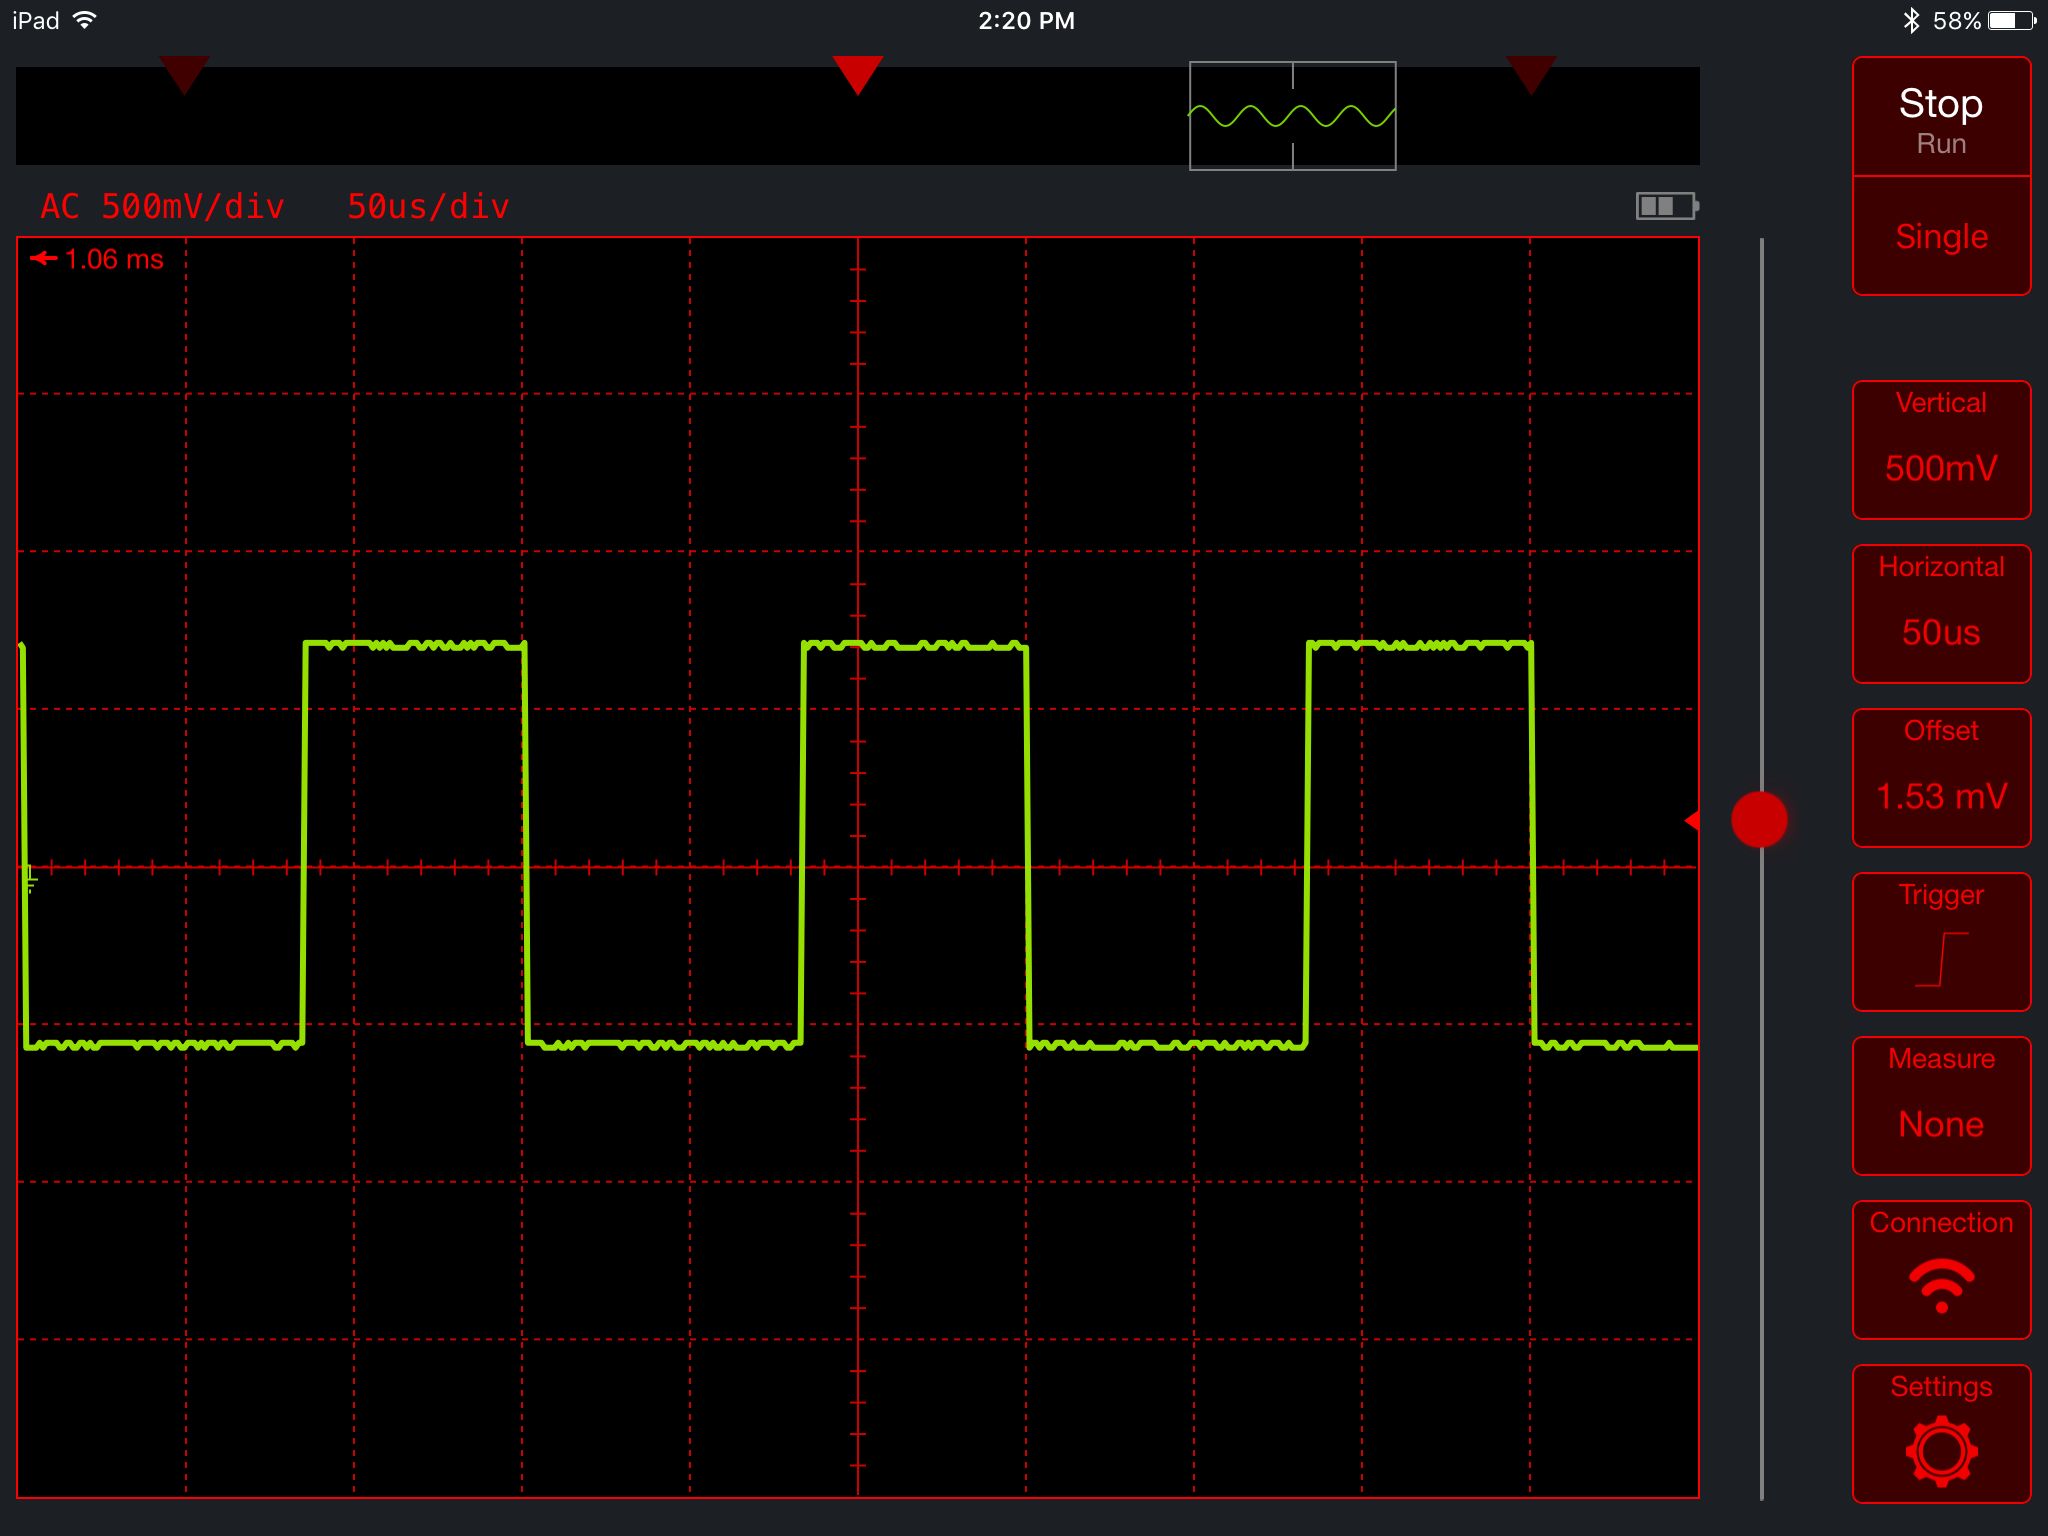
Aeroscope’s full memory is represented by the strip view, annotated as "1" in Figure 1, at the top of the screen. The portion of memory that is currently being displayed on screen is represented by the rectangle in the strip view, annotated as "2" in Figure 1. You can move the location of memory that is being viewed by dragging your finger in the plot area or by dragging your finger on the rectangle in the strip view. This allows you to view data at various points in time relative to the trigger point. The trigger location in time is represented by the red carrots in both the strip view and the plot area, annotated as "3" in Figure 1. If the trigger location is outside of the current memory that is being viewed, the time delay to the trigger is shown in either the upper left or upper right corner of the plot area. The delay will be shown in the upper left if the data being viewed is after the trigger event or shown in the upper right if the data being viewed is before the trigger event. An example of data being viewed after a trigger event is shown below in Figure 3. The trigger location in time can be set to three different points as represented by the three carrots in the strip view. The three locations are 10%, 50%, or 90% of the total capture memory.
Aeroscope’s trigger voltage is set by moving the slider on the right edge of the plot area, annotated as "4" in Figure 1. The trigger mode is set by tapping the trigger button. The mode can be set to trigger on a rising, falling, or any edge. Aeroscope’s auto trigger can also be enabled or disabled from this trigger menu.
Aeroscope comes equipped with a noise reject trigger that can be enabled or disabled from the trigger menu (by tapping the "NR" button). This trigger filter can be used to help you get a stable trigger on noisy signals. It ignores any edges that don’t have at least four samples prior to the trigger event that are below the trigger voltage and four samples after the trigger event that are above the trigger voltage (or vice versa for falling edge triggers). When viewing a noisy signal without this trigger it is much more likely that the oscilloscope will trigger on the signal noise instead of the underlying signal. Since the noise is random it will make the captured signal appear to randomly trigger and be difficult to observe.