Project update 3 of 10
[VIDEO] How to Install WLED on an ANAVI Miracle Emitter via Web Browser
by ANAVI TechnologyWLED is powerful, open-source firmware designed to control addressable LED strips such as the WS2812B (NeoPixels), WS2811, TM1809, and others. Compatible with both ESP32 and ESP8266 microcontrollers, it provides an intuitive, web-based interface and integrates seamlessly with Home Assistant for advanced smart home setups.
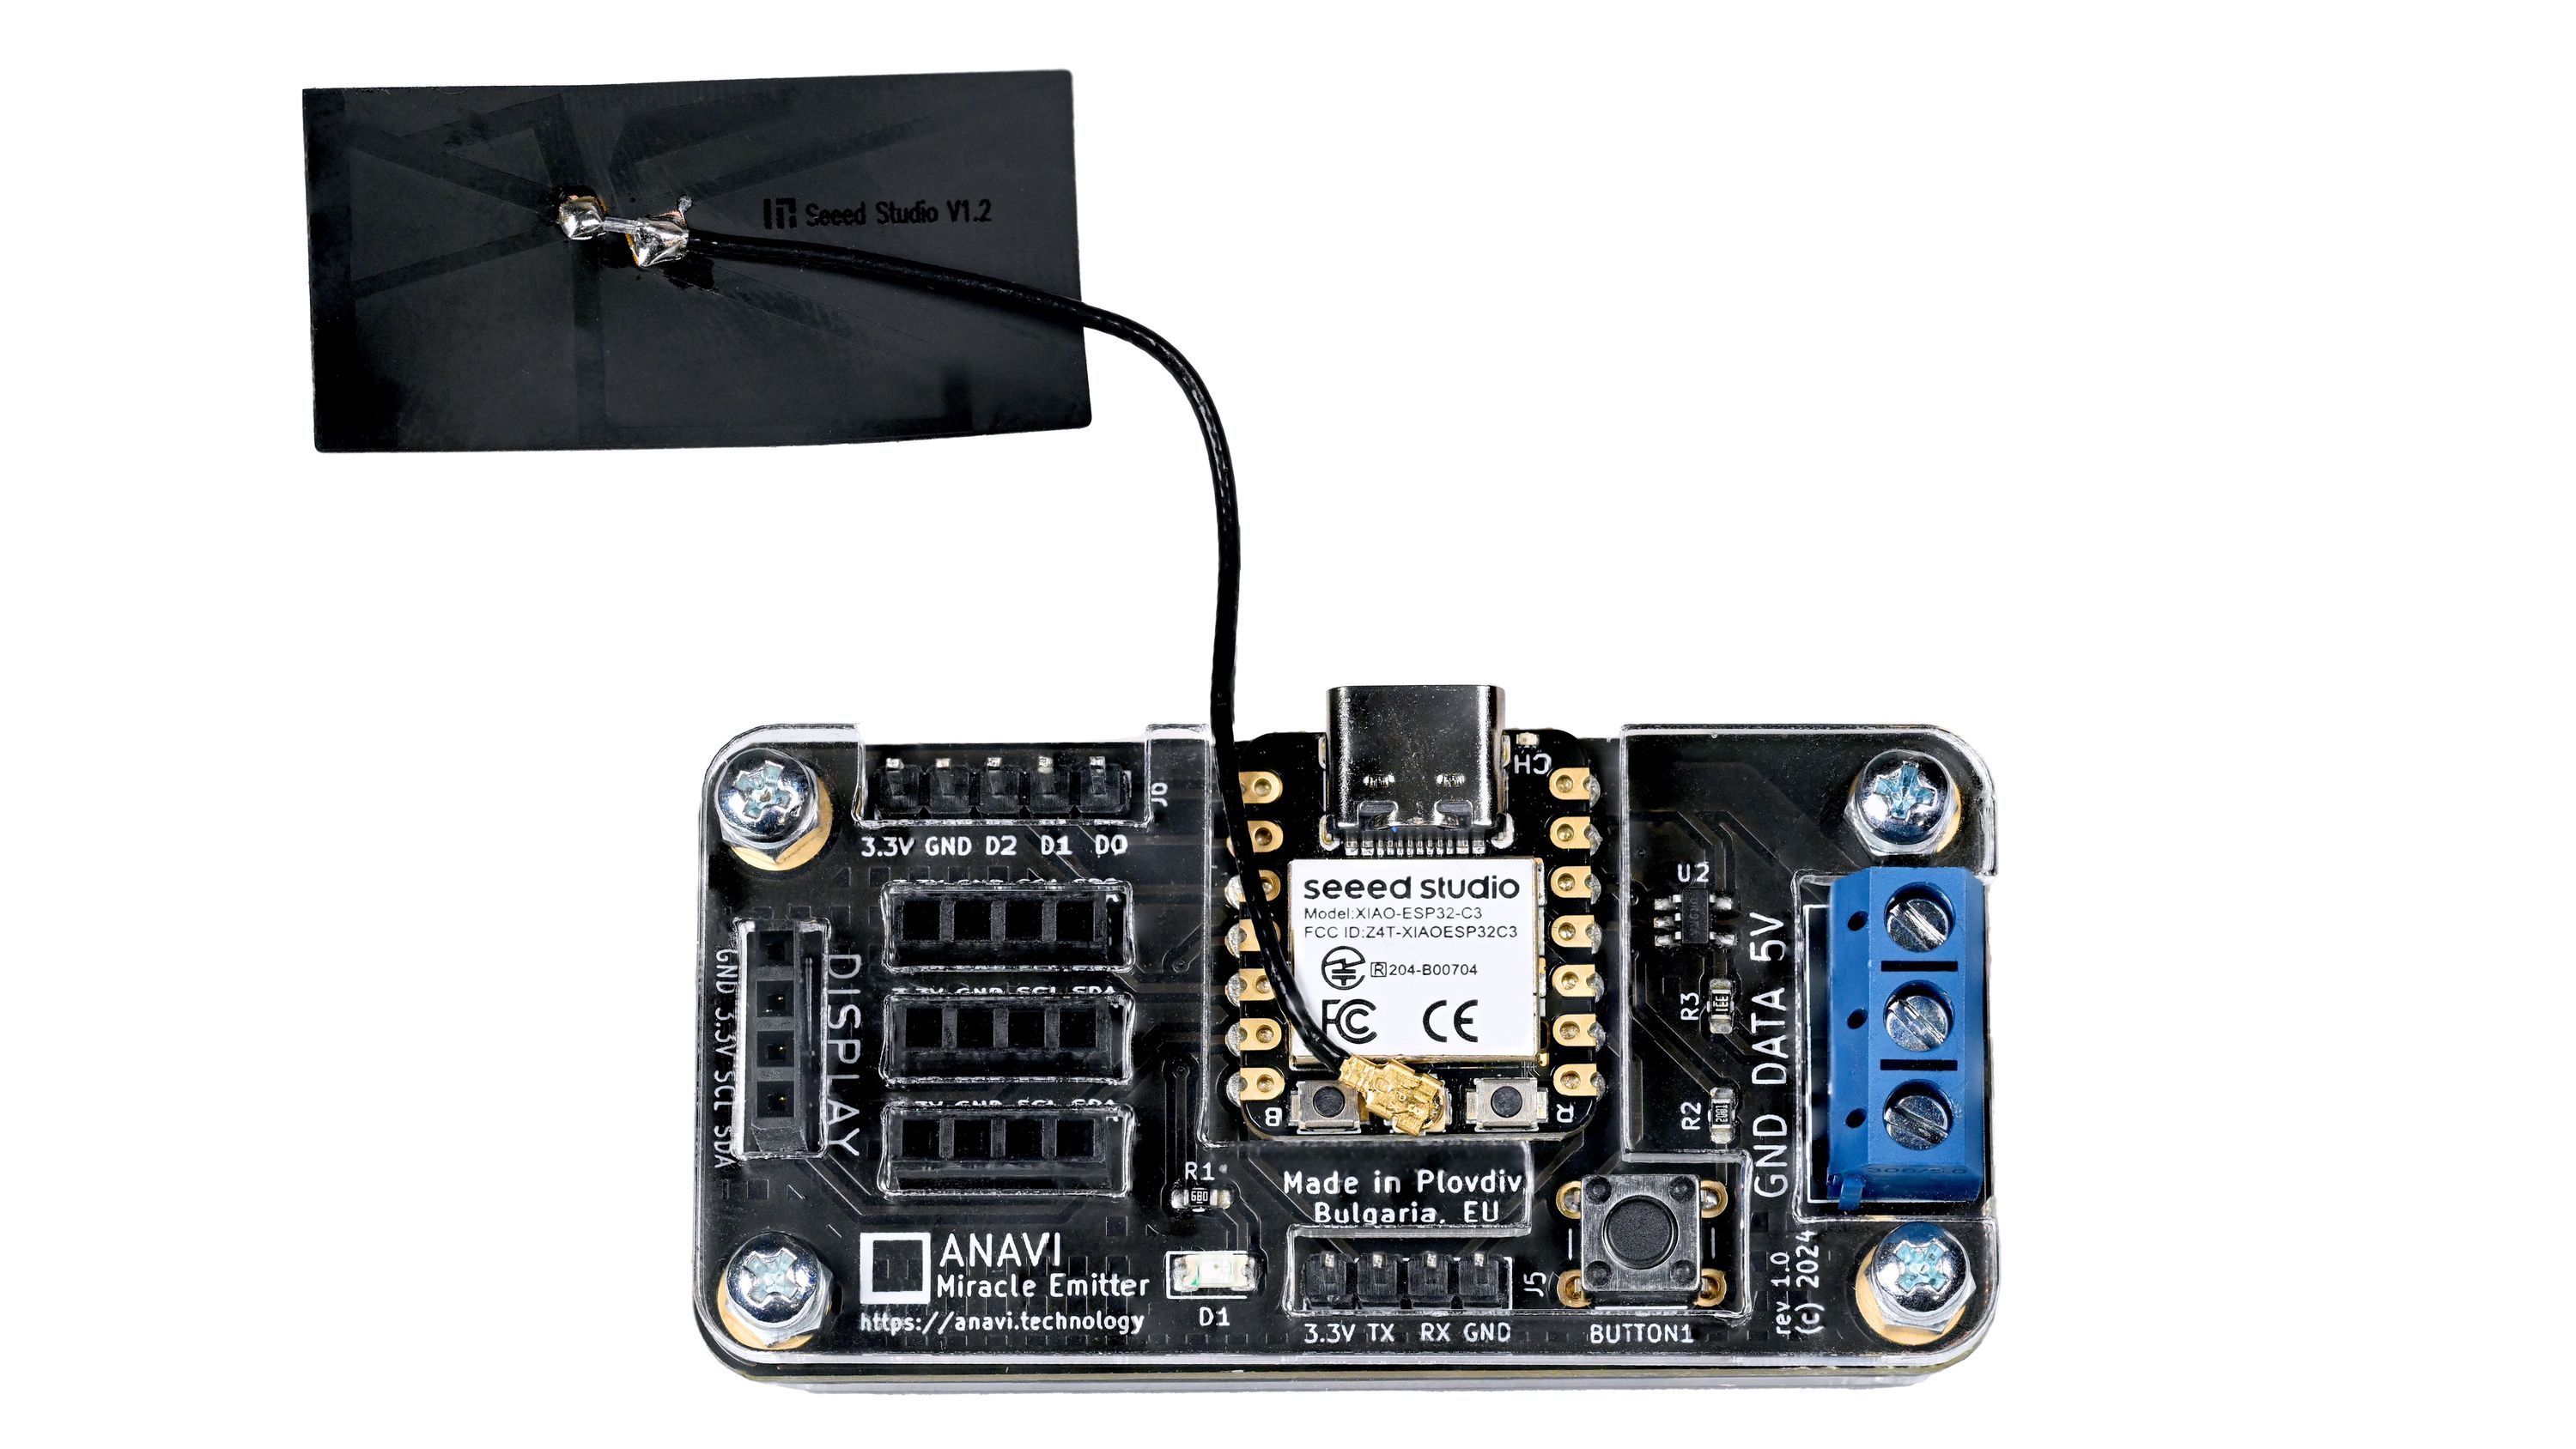
Out of the box, ANAVI Miracle Emitter comes with our default open source firmware. However, you have the freedom to easily change it. This tutorial walks you through the process of flashing WLED firmware onto an ESP-based development board using only a web browser, no specialized software or command-line tools required. The steps are demonstrated using the ANAVI Miracle Emitter, an open-source hardware board based on the ESP32-C3, but they are applicable to nearly any ESP32 or ESP8266 board with minor modifications.
Requirements
Before you begin, make sure you have the following:
- A computer with Google's Chrome browser installed
- Your ANAVI Miracle Emitter
- A USB cable (e.g., USB-C to USB-A or USB-C to USB-C)
- A short, NeoPixel-compatible LED strip (like the 10 NeoPixel LED strip from the Starter and Developer kits)
- Your Wi-Fi network credentials (SSID and password)
⚠️ Important: Do not power long LED strips directly from your USB port. For longer strips, use an external 5 V power supply after flashing.
Installation Guide
Step 1: Connect the ESP Board to Your Computer
Plug your ESP32/ESP8266 board into your computer using the USB cable. Ensure the device is recognized. On Linux systems, it may show up as /dev/ttyUSB0 or /dev/ttyACM0. On Windows, it usually appears as COM3 or higher.
Step 2: Open the WLED Installation Web Page
Launch Chrome and navigate to: https://install.wled.me
This website provides an easy interface to flash the latest version of WLED firmware onto your device.
Step 3: Select the Firmware and Begin Installation
From the dropdown menu, choose the desired WLED firmware version. Click Install. When prompted, the browser will ask for access to the serial port.
Step 4: Choose the Correct Serial Port
Select the serial port associated with your ESP device.
- Example (Linux): /dev/ttyACM0
- Example (Windows): COM3
This step may vary depending on your operating system. If you’re unsure, try unplugging the device and noting which port disappears from the list.
Step 5: Wait for the Firmware to Flash
The installation process will begin. This typically takes a couple of minutes. Do not disconnect the board during this process. Once completed, the device will automatically reboot.
Step 6: Configure Wi-Fi Credentials
After flashing, you will be prompted to enter your Wi-Fi SSID and password. This allows your ANAVI Miracle Emitter to connect to your local network and be accessible from any device on it.
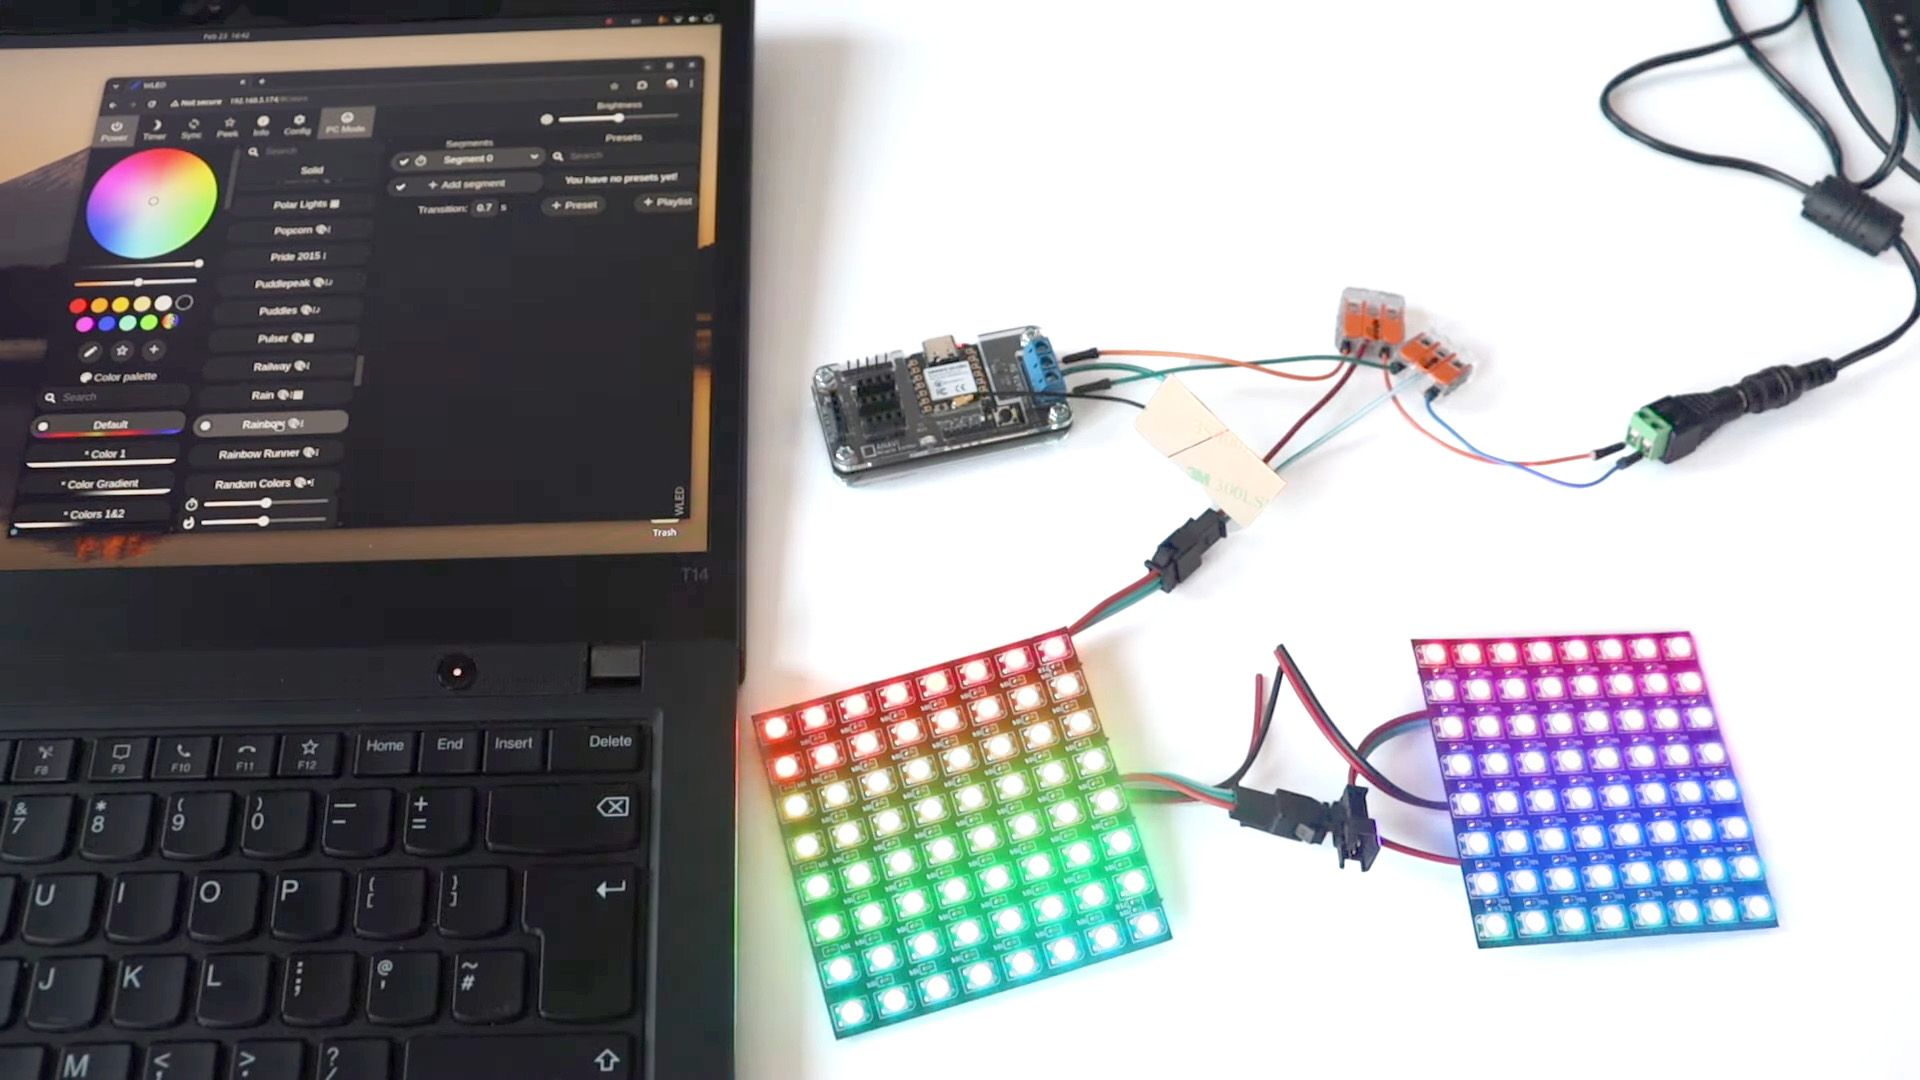
Initial Device Setup in WLED
Once your ESP board connects to the network, open a browser and access the WLED interface via its local IP address (displayed after Wi-Fi setup). Then, the last step is to configure the GPIO pin and the number of LEDs.
Step 7: Configure LED Settings
- From the WLED UI, click the Config menu.
- Select LED Preferences.
- Set the number of LEDs in your strip (e.g., 10).
- Set the GPIO pin used for LED control to 10, a.k.a GPIO10 based on the wiring on the ANAVI Miracle Emitter printed circuit board.
- Click Save to apply changes.
Support Open Source
On the back of the ANAVI Miracle Emitter, you will find a powerful message: "Open source hardware gives the people the freedom to control their technology." As you have seen, this philosophy comes to life with your Miracle Emitter: flashing WLED and customizing it to your needs is simple and empowering.
OSHWA Certified!
One more thing: a few days ago, the ANAVI Miracle Emitter received official certification from the Open Source Hardware Association (OSHWA) with the ID BG000150. You can support this fully open-source initiative by ordering your ANAVI Miracle Emitter today and be part of a movement that puts control back in your hands!