Project update 4 of 10
[VIDEO] Using WLED with a 2D NeoPixel LED Matrix and External Power Supply
by ANAVI TechnologyIn the previous tutorial, we explored how to install WLED firmware directly from a web browser onto the ANAVI Miracle Emitter. We also demonstrated how to configure the firmware for use with a short LED strip. Building on that foundation, this tutorial explains how to extend WLED functionality to support 2D LED panels, also known as addressable LED matrices, while safely using an external power supply.
2D NeoPixel LED Matrices
Addressable LED panels, often referred to as 2D matrices, are composed of individually controllable LEDs arranged in rows and columns. These panels are functionally similar to addressable LED strips but require special consideration for wiring and power due to the higher number of LEDs involved.
In this demonstration, two stackable 8x8 NeoPixel-compatible LED panels are used, totaling 64 LEDs per panel or 128 LEDs in total. This significantly increases the power requirements, making an external 5V power supply essential for stable operation. While the ANAVI Miracle Emitter ships with our default open source firmware, as outlined in the previous weekly update, it can easily be re-flashed with WLED, which offers robust support for 2D NeoPixel LED matrices.
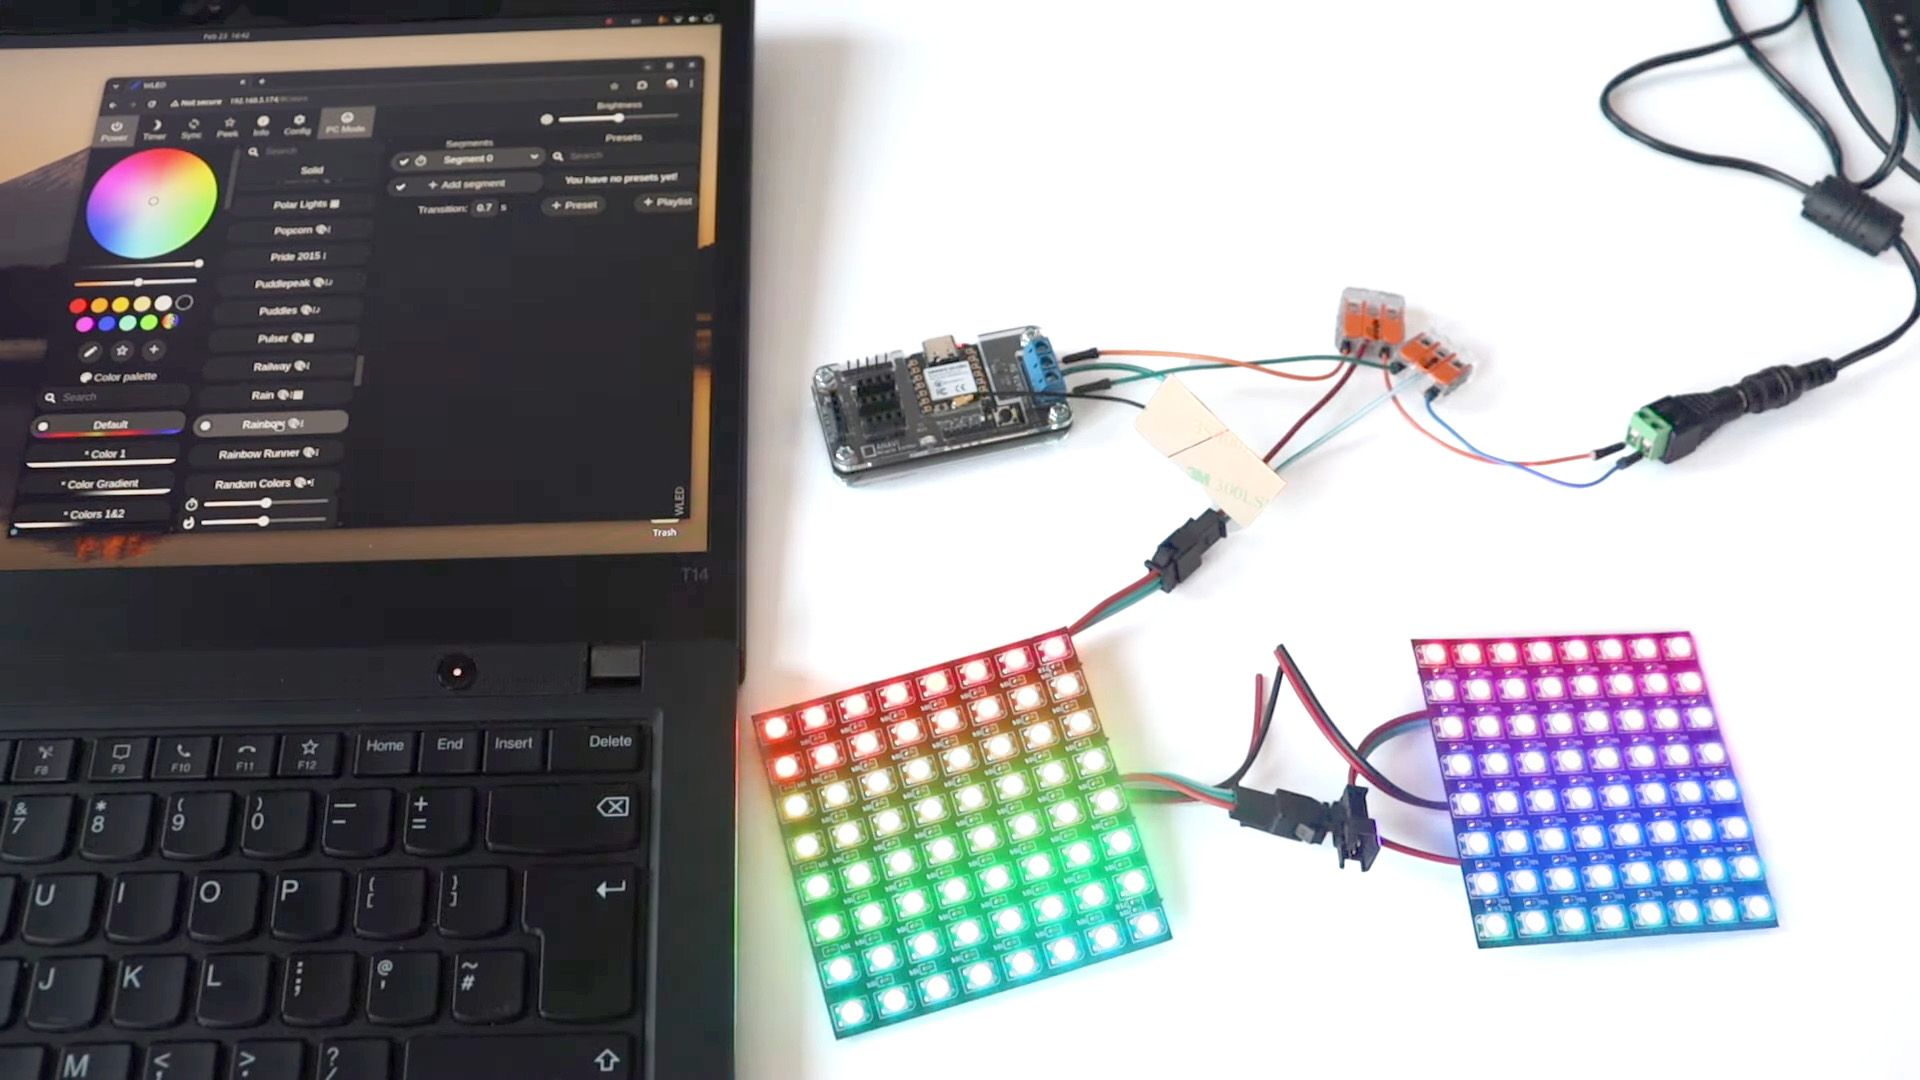
Required Hardware
To set up and power the LED matrix with WLED, the following components are used in this demonstration:
- 8x8 addressable LED matrix panels
- ANAVI Miracle Emitter ESP32-C3-based development board
- 5 V power supply
- DC barrel jack adapter with screw terminals
- Wago 3-conductor splicing connectors (for ground and power distribution)
- Wire
It is critical to observe the data direction on the LED panels. Panels should be connected with the data out pin of the first panel wired to the data in pin of the second. The signal wire is then connected to the correct GPIO pin on the controller.
Power Supply Considerations
Given the high current draw of 128 addressable LEDs, a reliable and properly rated power supply is necessary. In this setup, power is distributed using splicing connectors:
- Ground Connection: A Wago connector is used to connect three ground wires—one each from the power supply, the LED panels, and the ANAVI Miracle Emitter.
- 5 V Line: A second connector is used to split the 5 V line from the power supply to simultaneously power the LED panels and the microcontroller.
Important: When powering the ANAVI Miracle Emitter through the 5 V pin, ensure the USB-C connector is not simultaneously providing power. Do not mix power sources. To safely support scenarios where both power sources might be connected, you must add a diode (Schottky, signal, power) between your external power source and the 5 V pin. The anode of the diode should connect to your external power source (+), and the cathode to the XIAO 5 V pin. The main reason for this diode is to prevent potential backflow issues that can damage the board and/or power supply.
Configure 2D Panel Settings
After successfully wiring the hardware and powering the setup, open a web browser and navigate to the IP address of ANAVI Miracle Emitter running WLED:
- Navigate to Config > LED Setup > 2D Configuration.
- Select "Matrix" from the layout options.
- Set the matrix dimensions based on the combined panel size (e.g., 16x8 for two 8x8 panels).
- Specify the number of panels (in this case, two).
- Click Save.
- Go to Config > LED Preferences.
- Set LED count to the total number of LEDs (128).
- Specify the GPIO pin used for the data line (e.g., GPIO 10 for ANAVI Miracle Emitter).
- Optionally, increase maximum PSU current configuration depending on the hardware capabilities of the power supply.
- Click Save to apply changes and reboot the device if necessary.
You should now be able to use WLED and the Miracle Emitter to control your LED panels.
If you are interested in supporting the development of fully open-source hardware, consider ordering ANAVI Miracle Emitter during our campaign on Crowd Supply. Your support helps fund the continuation of open-source innovation and ensures that powerful, accessible hardware remains available to the global maker community.