Project update 16 of 28
Using ANAVI Thermometer with OpenHAB 2
OpenHAB is a popular free and open source home automation software. Major version 2 of OpenHAB is significantly different for version 1. It is written in the JAVA programming language using the Eclipse Smart Home framework. Version 2.4 of OpenHAB adds several new MQTT features. Recently I have published a YouTube video that explains the exact steps how to integrate ANAVI Thermometer in OpenHAB 2.
The whole process took me less than 10 minutes. There are 3 mandatory prerequisites:
- Up and running OpenHAB 2
- Up and running MQTT broker
- Up and running ANAVI Thermometer connected to the Wi-Fi network and to the MQTT broker
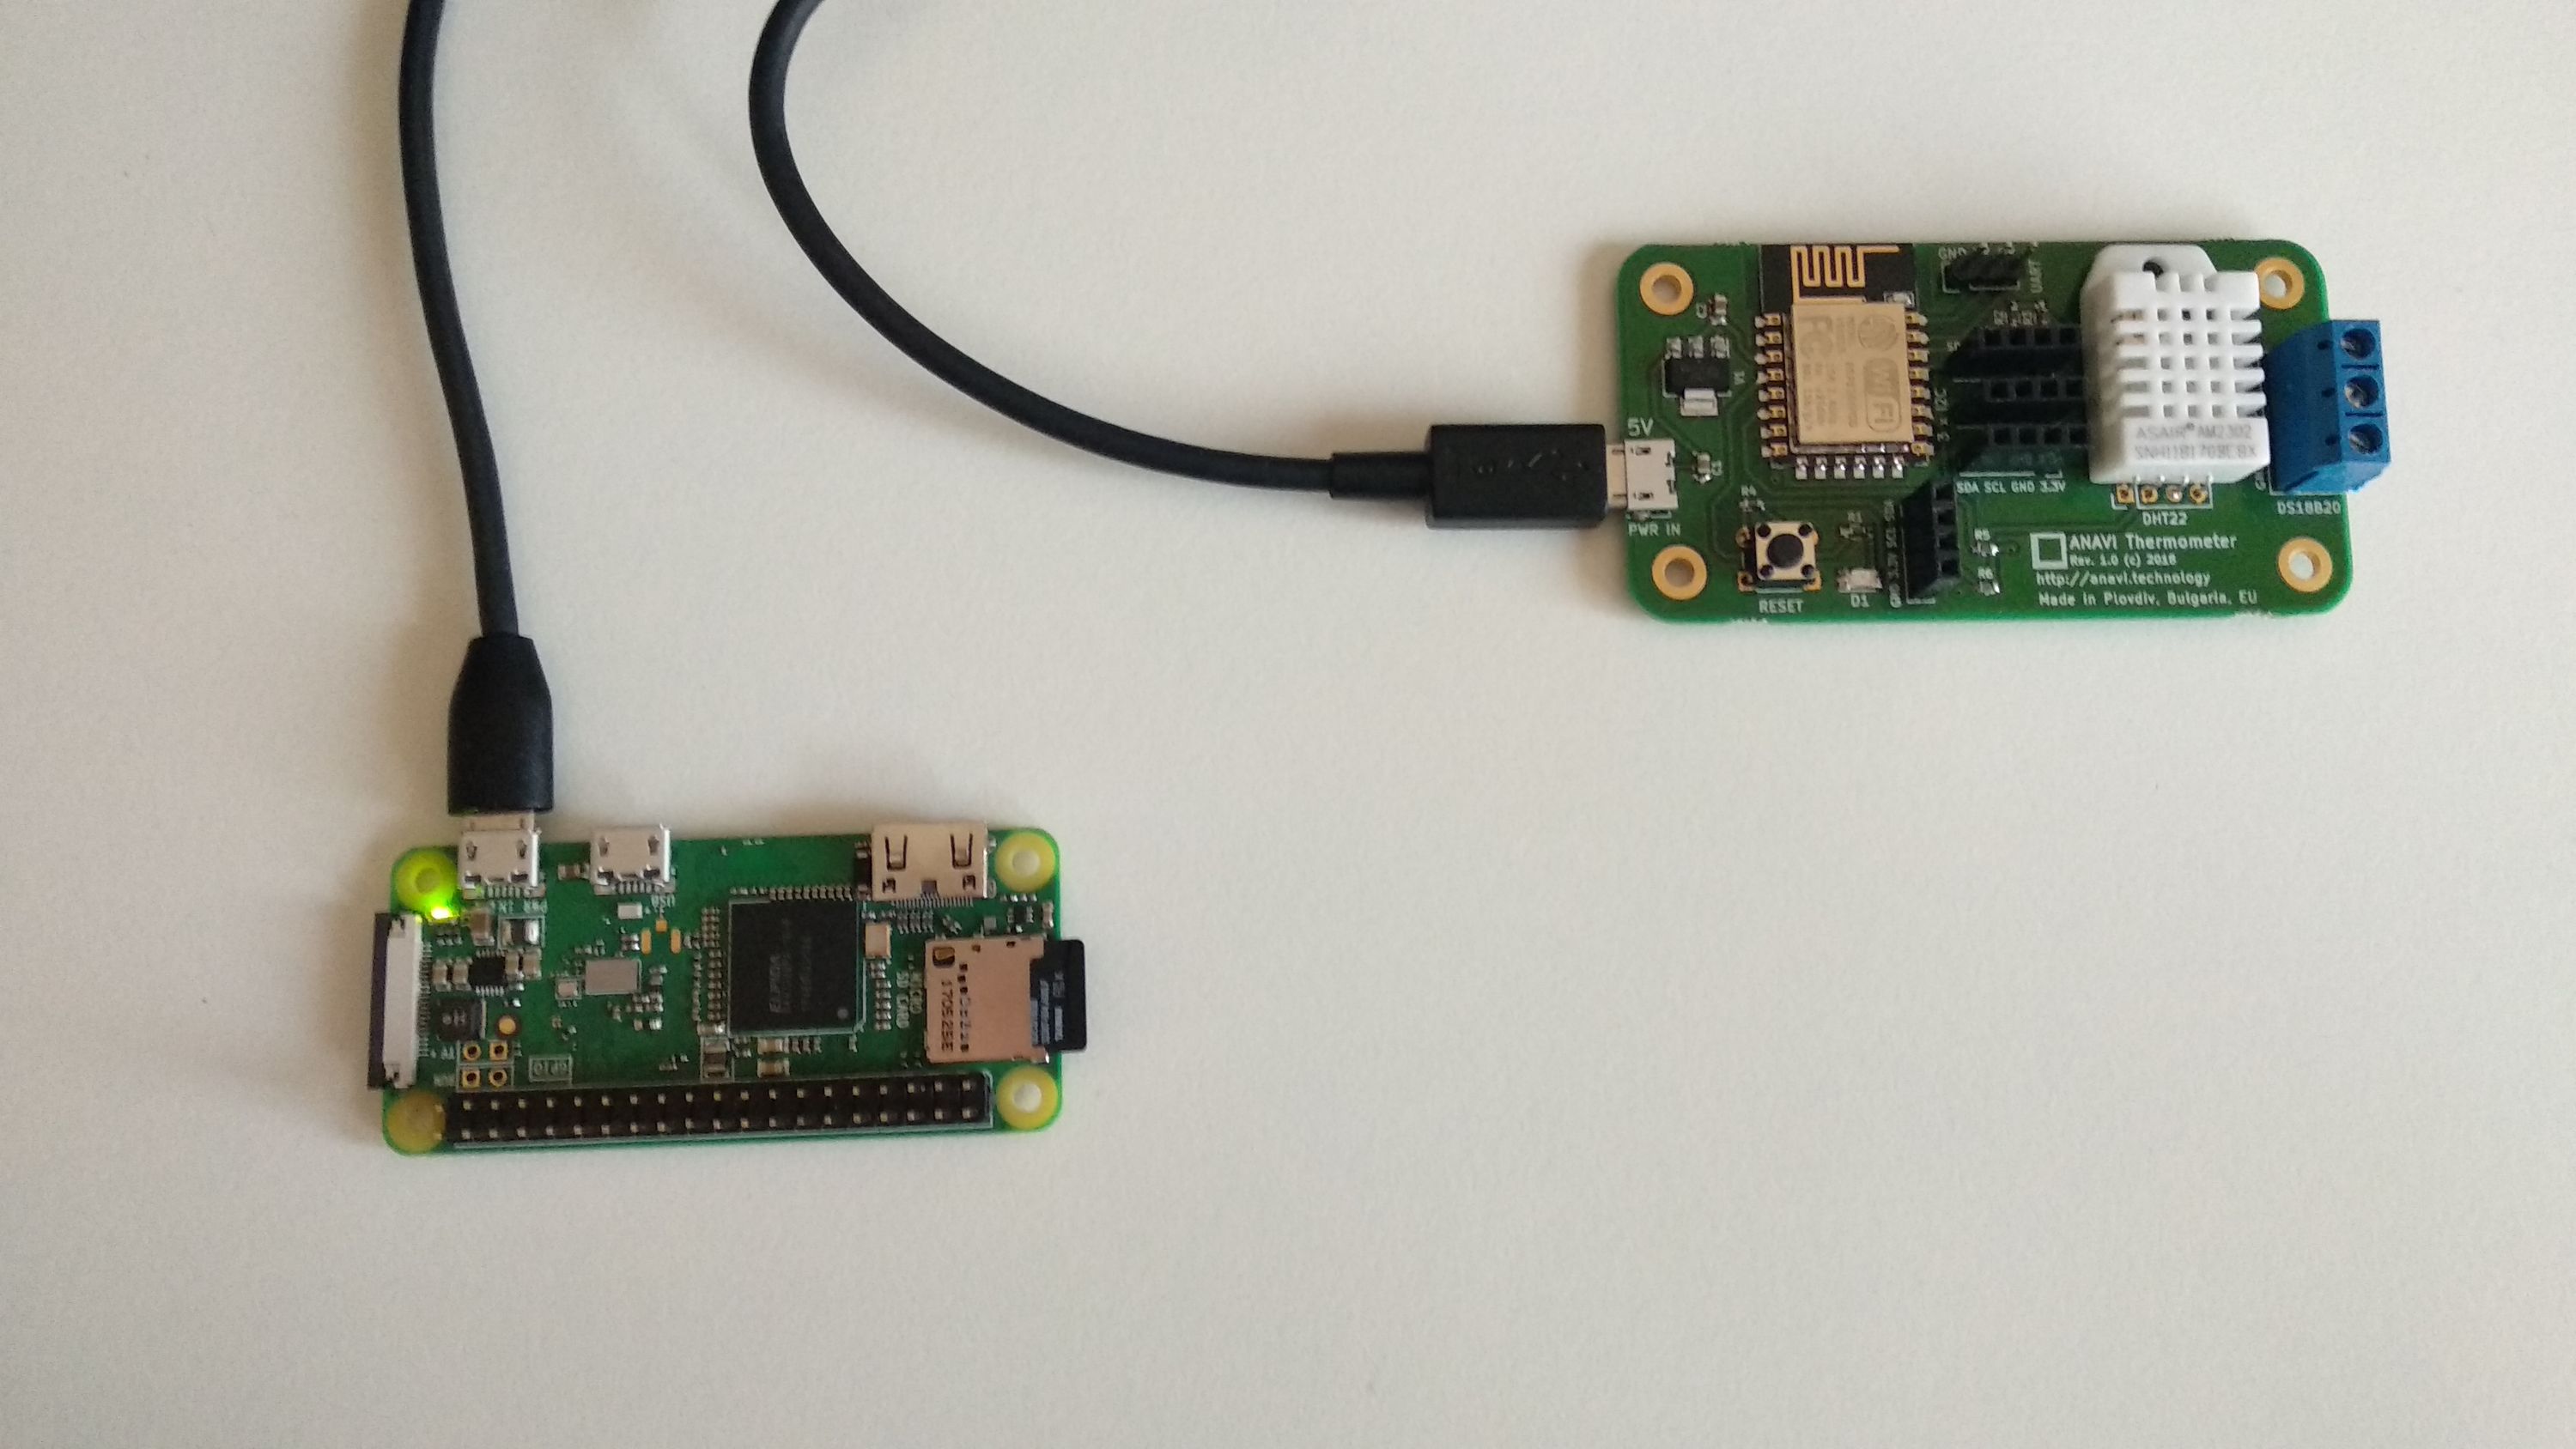
As you can see in the video, I have already installed OpenHAB 2 and Mosquitto, an open source MQTT broker, on Raspberry Pi Zero W. I used the OpenHABian GNU/Linux distribution which is based on Raspbian. There are countless tutorials for installing OpenHAB 2 therefore I will skip the details and focus on the integration of ANAVI Thermometer.
The default open source Arduino sketch for ANAVI Thermometer is designed to be compatible with another open source home automation platform Home Assistant. I will use the default firmware of ANAVI Thermometer as is, without any changes. Although OpenHAB supports the Home Assistant discovery in this tutorial I will add ANAVI Thermometer as MQTT Generic Thing.
Step 1: Install MQTT Binding
Open the Paper UI web interface of OpenHAB 2. Go to Add-ons > Binding. Find MQTT Binding and click Install
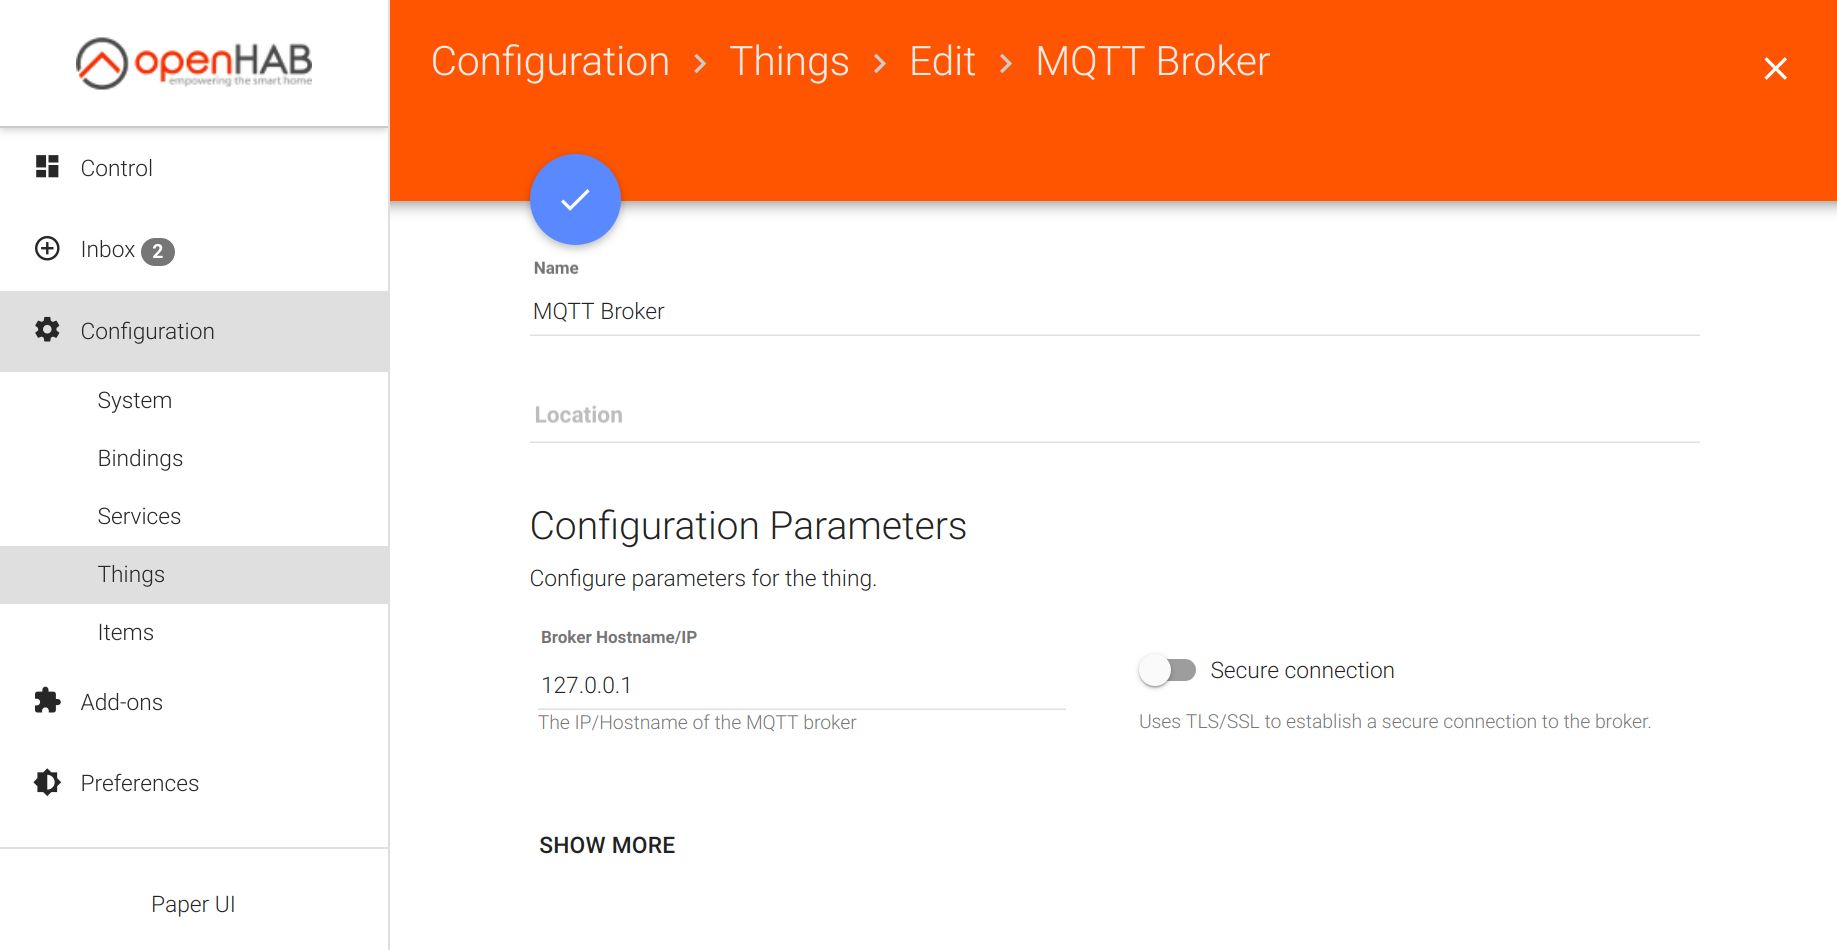
Step 2: Configure MQTT Broker
Again in Paper UI of OpenHAB 2, go to Configuration > Things. Click the button to add a new thing. Select MQTT Thing Binding. After that click ADD MANUALLY. Click MQTT Broker. Enter the domain or the IP address of the MQTT broker, the port and any other needed credentials.
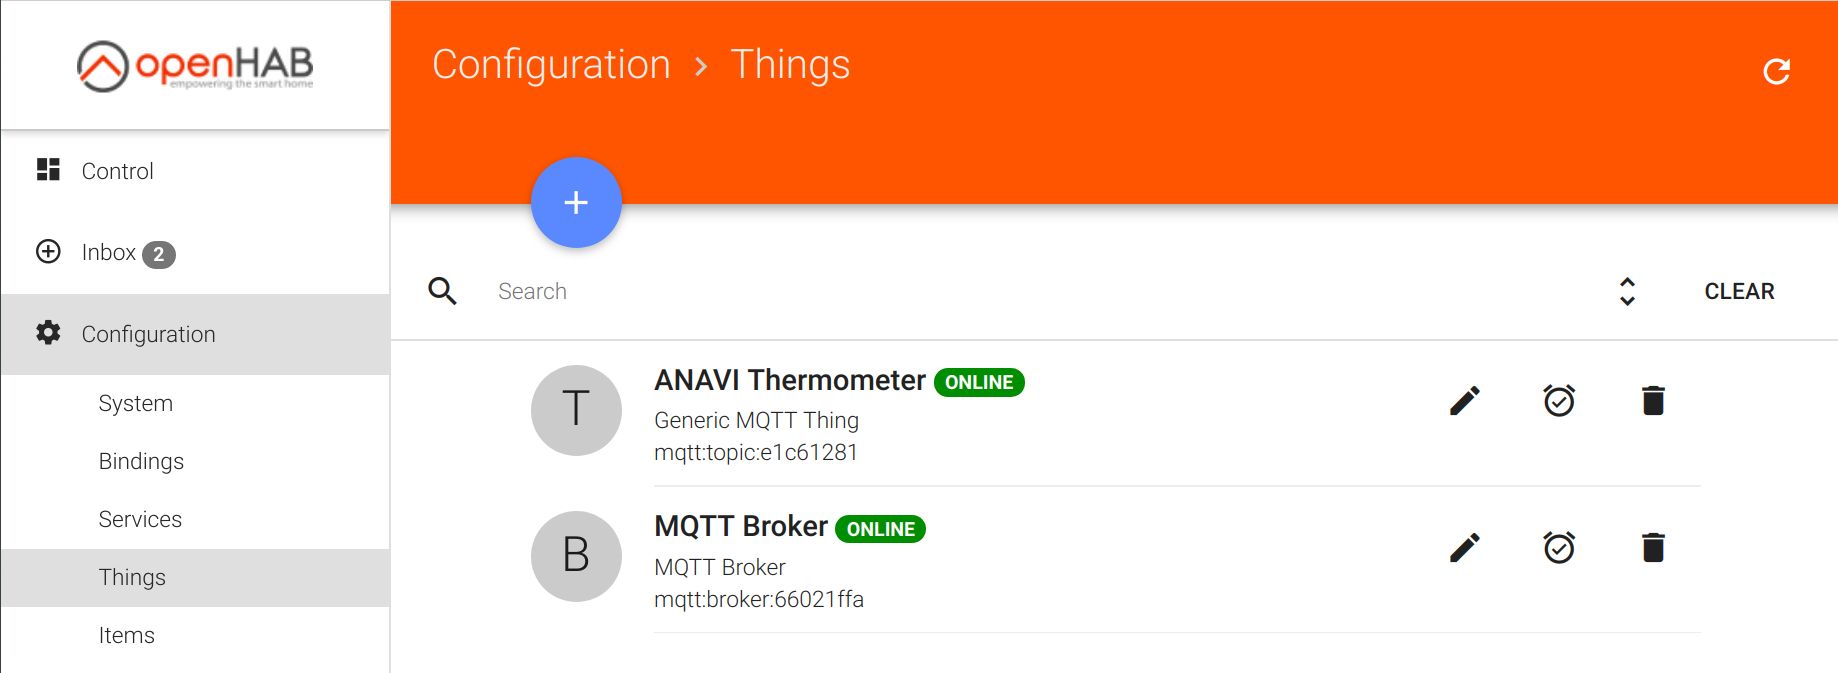
After adding the MQTT Broker to OpenHAB go to Configuration > Things and verify that the broker appears as online. If it is not online double check the configuration and try again.
Step 3: Install JavaScript Transformations
Go to Add-ons > Transformations. Find JavaScript Transformation and click Install
Step 4: Download JavaScript Files
Download temperature.js and humidity.js from GitHub and deploy both files in directory $OPENHAB_CONF/transform.
For example, on Raspberry Pi with OpenHABian variable $OPENHAB_CONF is set to /etc/openhab2 so the whole path is /etc/openhab2/transform:
cd $OPENHAB_CONF/transform
wget https://raw.githubusercontent.com/AnaviTechnology/anavi-examples/master/openhab2/transform/temperature.js
wget https://raw.githubusercontent.com/AnaviTechnology/anavi-examples/master/openhab2/transform/humidity.js
Note: If you prefer the temperature in Fahrenheit, set variable celsius to false in the first line of temperature.js. This way the JavaScript will automatically convert the temperature from Celsius to Fahrenheit when showing it in the user interfaces of OpenHAB.
Step 5: Add ANAVI Thermometer as MQTT Generic Thing
In Paper UI web interface go to Configuration > Things. Click the button to add a new thing and select MQTT Thing Binding.
On the next screen it is very important to click ADD MANUALLY. After that select Generic MQTT Thing. Set the name, for example to ANAVI Thermometer. Set the MQTT broker configured on step 2 for Bridge Selection.

After creating the Generic MQTT Thing, open it and add two channels:
A channel with type Text value, label Temperature and Incoming value transformation set to JS:temperature.js. Set the MQTT State Topic to <workgroup>/<machine id>/air/temperature (replace <workgroup> and <machine id> with the actual values)
A channel with type Text value, label Humidity and Incoming value transformation set to JS:humidity.js. Set the MQTT State Topic to <workgroup>/<machine id>/air/humidity (replace <workgroup> and <machine id> with the actual values)
IMPORTANT NOTE: In both topics replace <workgroup> and <machine id> with valid values! You have set <workgroup> during the initial configuration of ANAVI Thermometer, the default value is workgroup. The <machine id> is MD5 hash generated based on the ESP8266 chip ID of ANAVI Thermometer. The machine ID is displayed in the web interface during the initial configuration of ANAVI Thermometer. It is also printed it serial console output on each boot of ANAVI Thermometer therefore you can also see it through Arduino IDE.
Finally, Link channel to the default profile of a new item. As shown in the video this has to be done for both the temperature and the humidity.
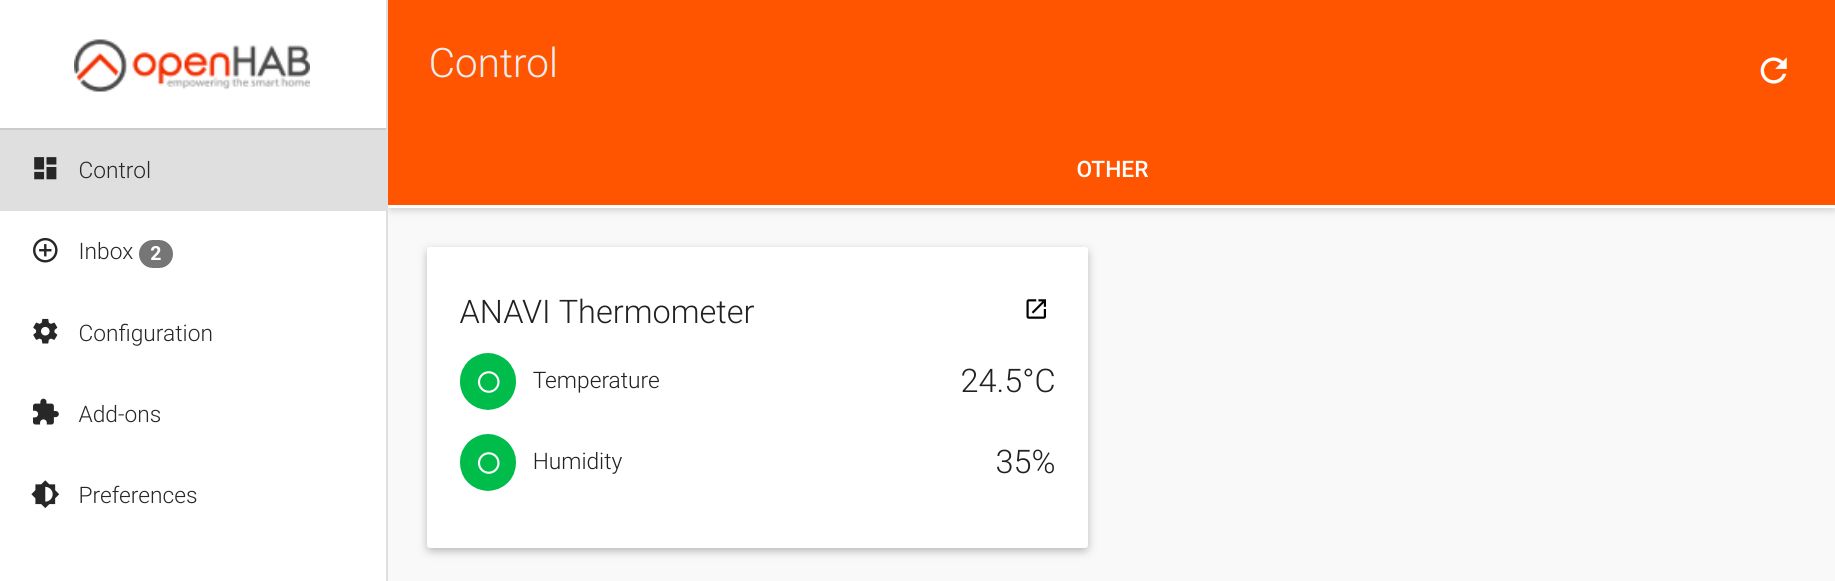
If everything works fine you will see the temperature and the humidity reported from ANAVI Thermometer in the Control section of Paper UI as well as in the Basic UI of OpenHAB 2 (and newer).
The same approach can be used for adding another Generic MQTT Thing in OpenHAB. I will be also using for monitoring the air quality with my new open source hardware product ANAVI Gas Detector.
Thank you again for supporting the crowdfunding campaign of ANAVI Thermometer. Together we brought the project to life and now Crowd Supply has ANAVI Thermometer in stock. As an entirely open source development board ANAVI Thermometer is flexible and supports various platforms. OpenHAB is a great open source home automation solution. I hope this tutorial and video were useful and you will have a lot of fun with OpenHAB.
Thanks,
Leon