Project update 8 of 16
Gliss Design Deep Dive
by Robert JTaking a closer look at the Gliss open source hardware
Just two weeks left of the campaign and we’ve almost hit the 300% mark! Thank you all for the support so far, we can’t wait to get this module out into the world. In this update we are going to have a closer look at the Gliss hardware and explain some of the engineering decisions we made when designing the module.
A module in 3 parts
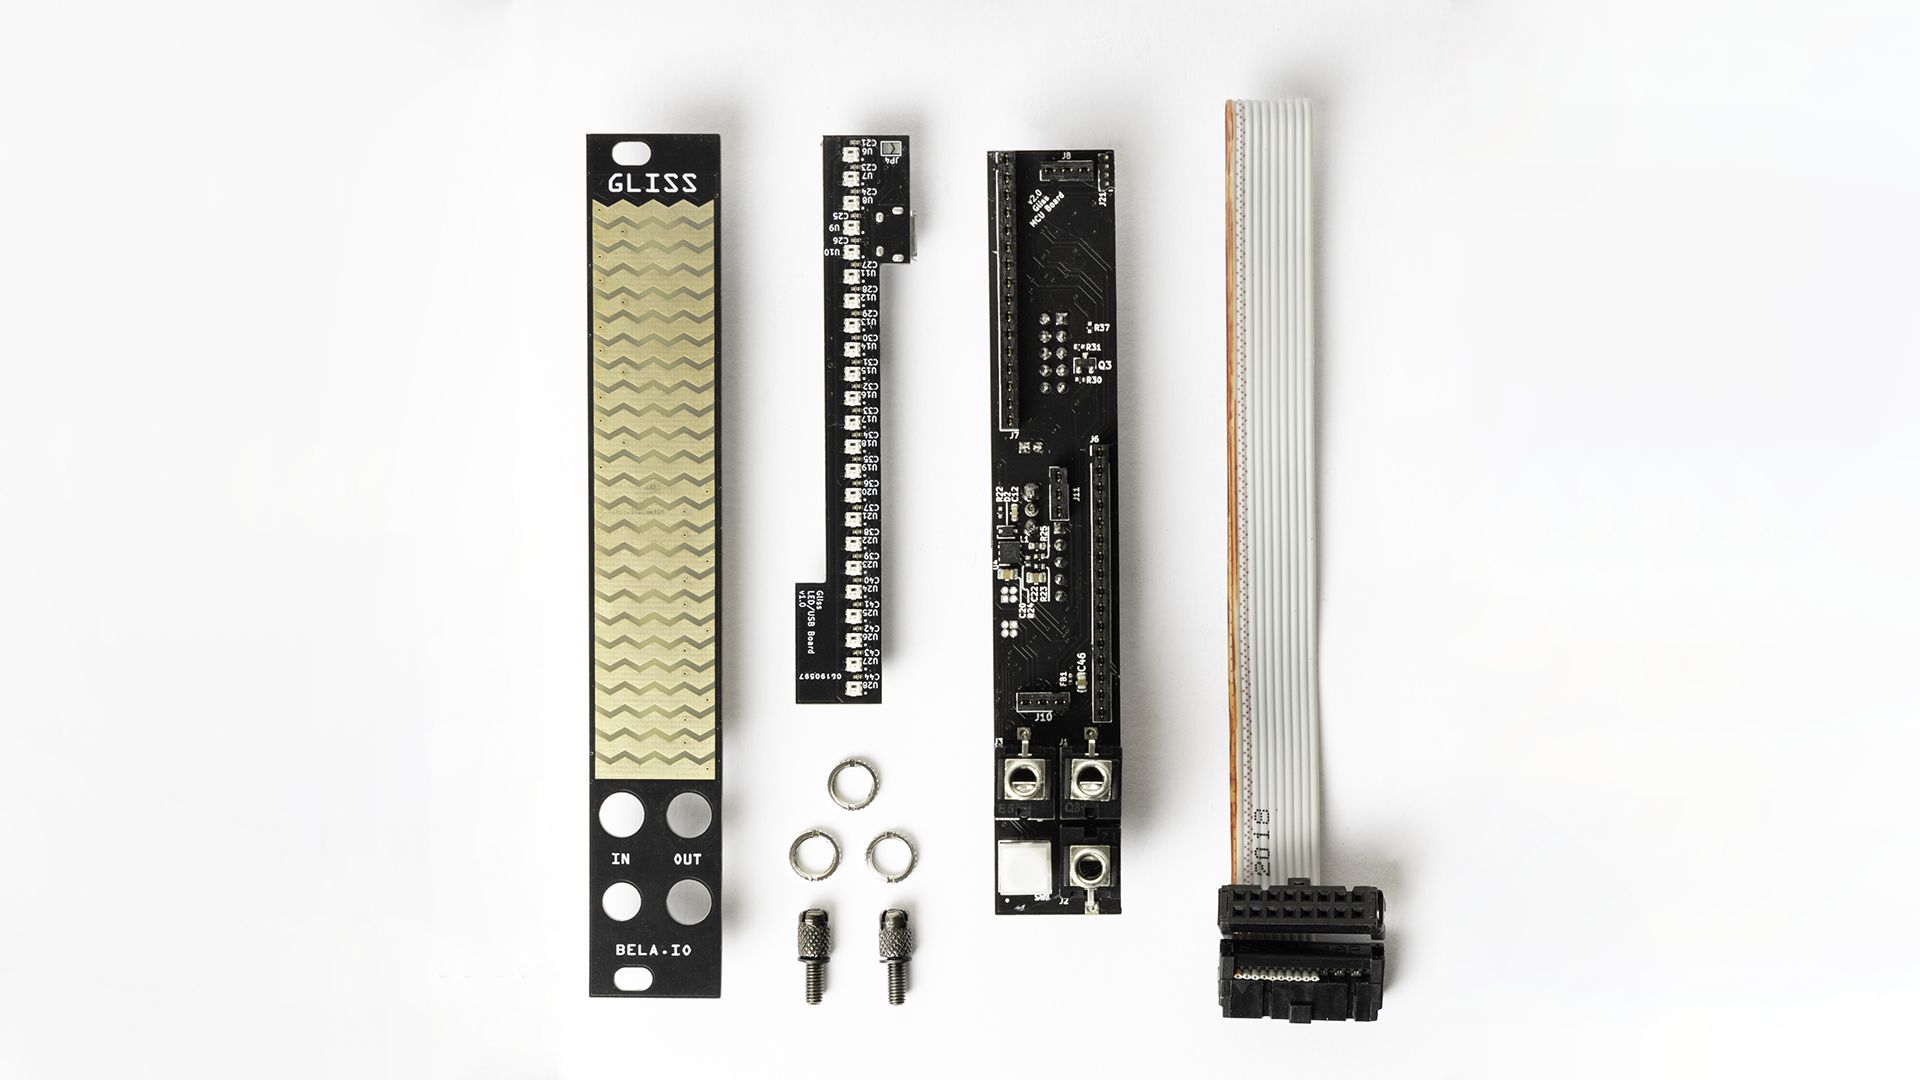
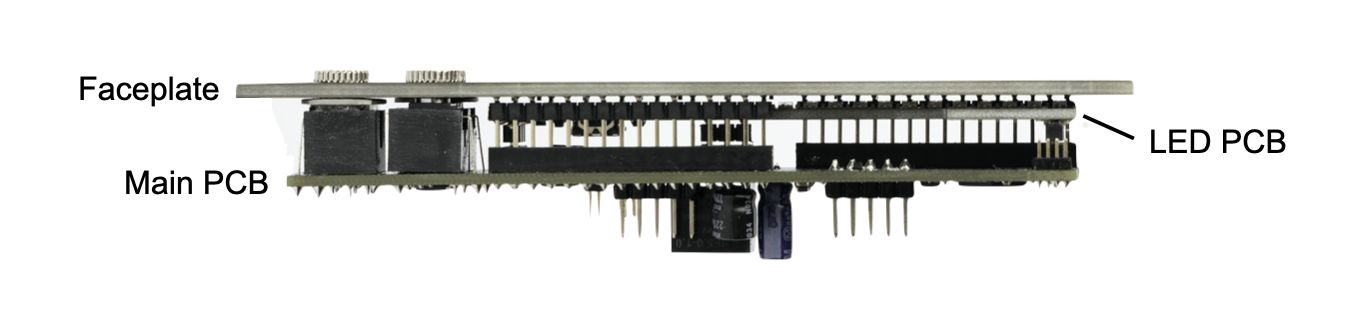
With Gliss we’ve managed to squeeze a lot of useful features into a slender 4HP module. After multiple revisions we have arrived at a design which consists of 3 stacked PCBs. Front to back, these are:
- the Faceplate PCB which acts as the main input surface for the module with the capacitive sensing pads
- the LED PCB, which is sandwiched between the other two, holds the RGB LEDs and the micro USB programming port
- the Main board with microcontrollers for DSP, UI management and capacitive sensing, as well as the jack, sockets, and button
Faceplate and touch interface
Let’s start from the top of the stack with the faceplate. As well as being the part of the module which is visible when mounted in a rack, the faceplate is also the main sensing surface of the module. The majority of the surface area is used as a capacitive touch sensor, where each of the golden zigzag shapes is a separate sensing pad. The faceplate is a printed circuit board (PCB) made from an FR4 substrate. These days, it is increasingly common to encounter Eurorack module faceplates made out of PCB, as this fabrication process can achieve different results from that of more traditional aluminum faceplates, plus it’s usually cheaper to manufacture. In the case of Gliss, using PCB was the only option, as the faceplate itself is a part of our circuit, and it has headers soldered on the back which connect each of the capacitive pads to the main board below.
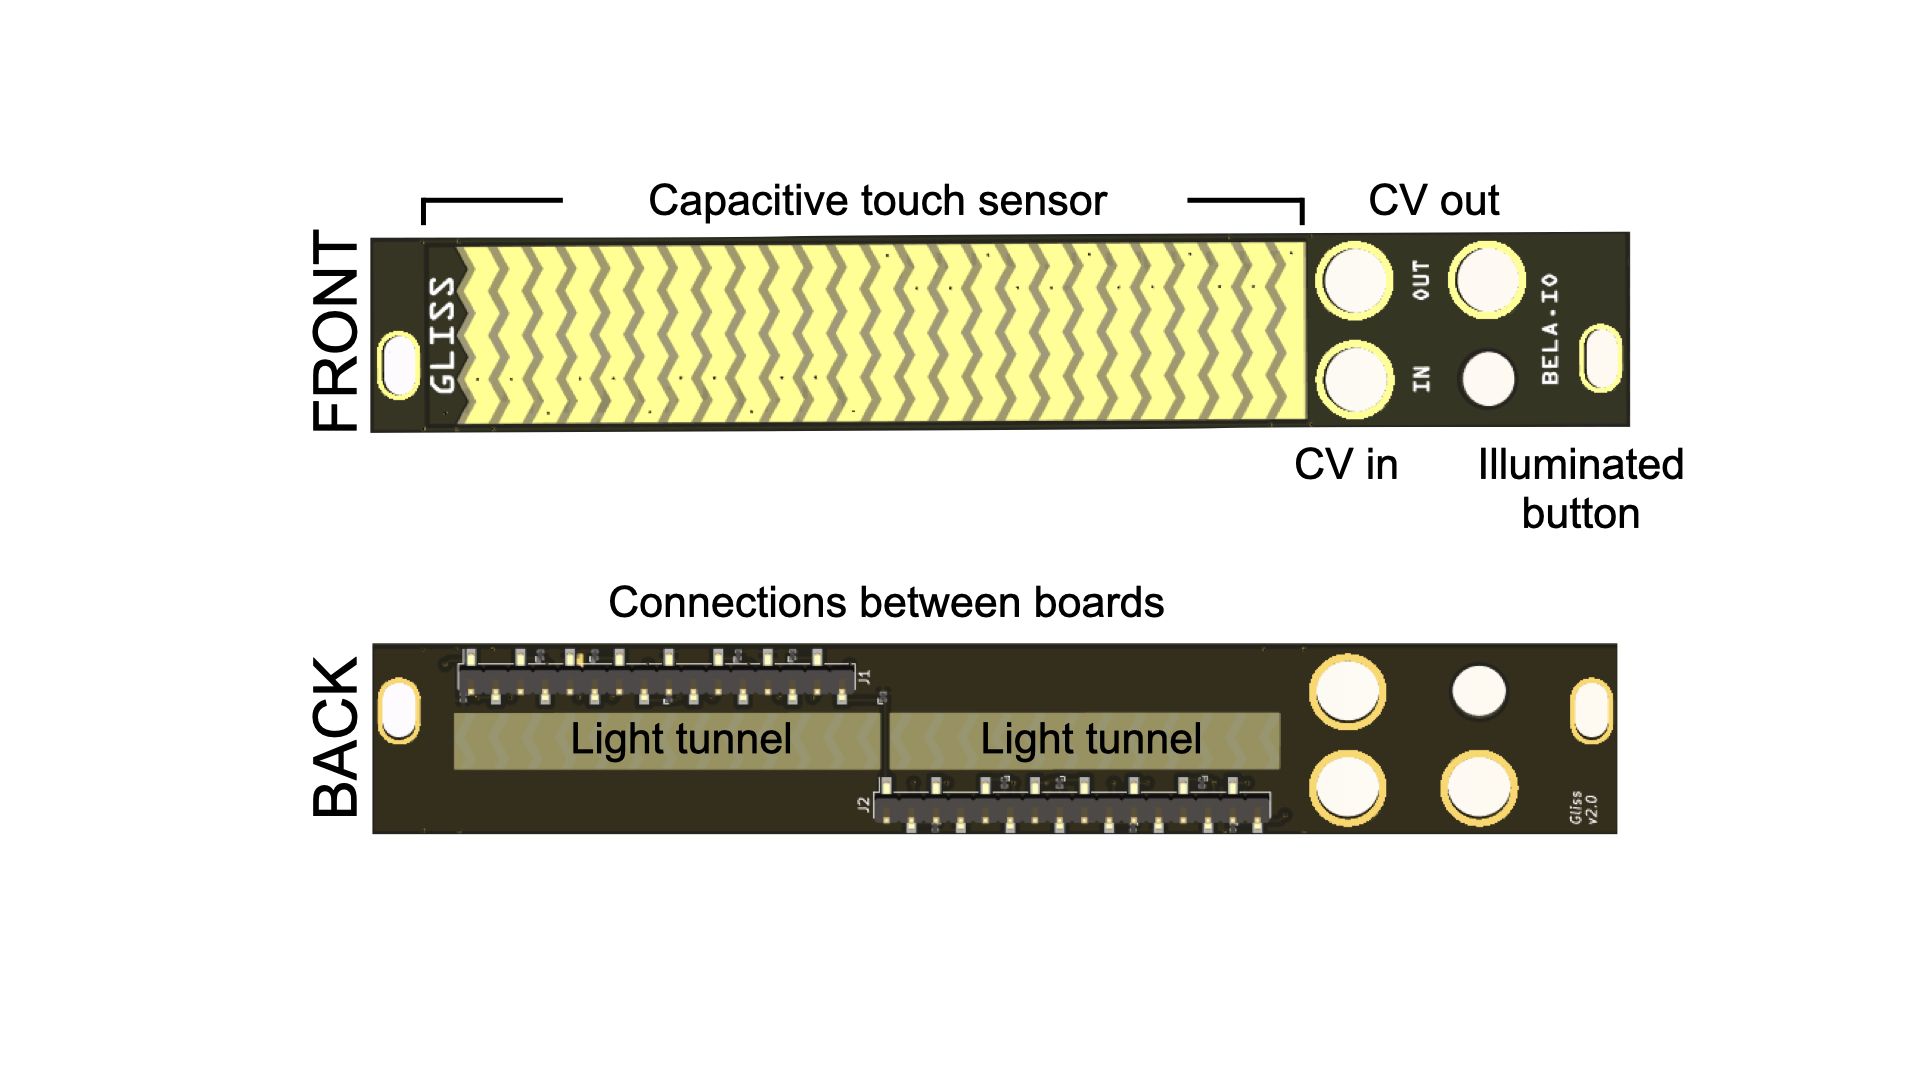
As mentioned in our previous post, Gliss builds on the technology we developed for Trill, our family of capacitive touch sensors. During the development of Trill we learned many lessons about how to best design touch sensors, and we’ve distilled all this knowledge into Gliss. Gliss has 26 individual capacitive pads which make up the touch interface. Each pad can produce a reading that is roughly proportional to the contact surface between the finger and the pad. By interpolating between the readings from each pad, we are able to get a highly precise touch location reading. This allows us to closely track the position and contact area (which is a proxy for pressure) of a finger on the slider, and detect multiple touches at once.
Let there be light!
Sandwiched in between the faceplate and main PCB is the LED PCB. During our prototyping process we experimented with mounting the LED PCB at different distances from the back of the faceplate to see the effect on light diffusion through the FR4. We also experimented with different patterns of cutouts in the ground plane of the Main board to act as the light tunnel, channeling the LED light to the faceplate. Shifting the LED PCB a millimeter closer or further away from the faceplate makes a big difference in the quality of the light as seen from the front so we had to take a lot of care when selecting the height of our headers.
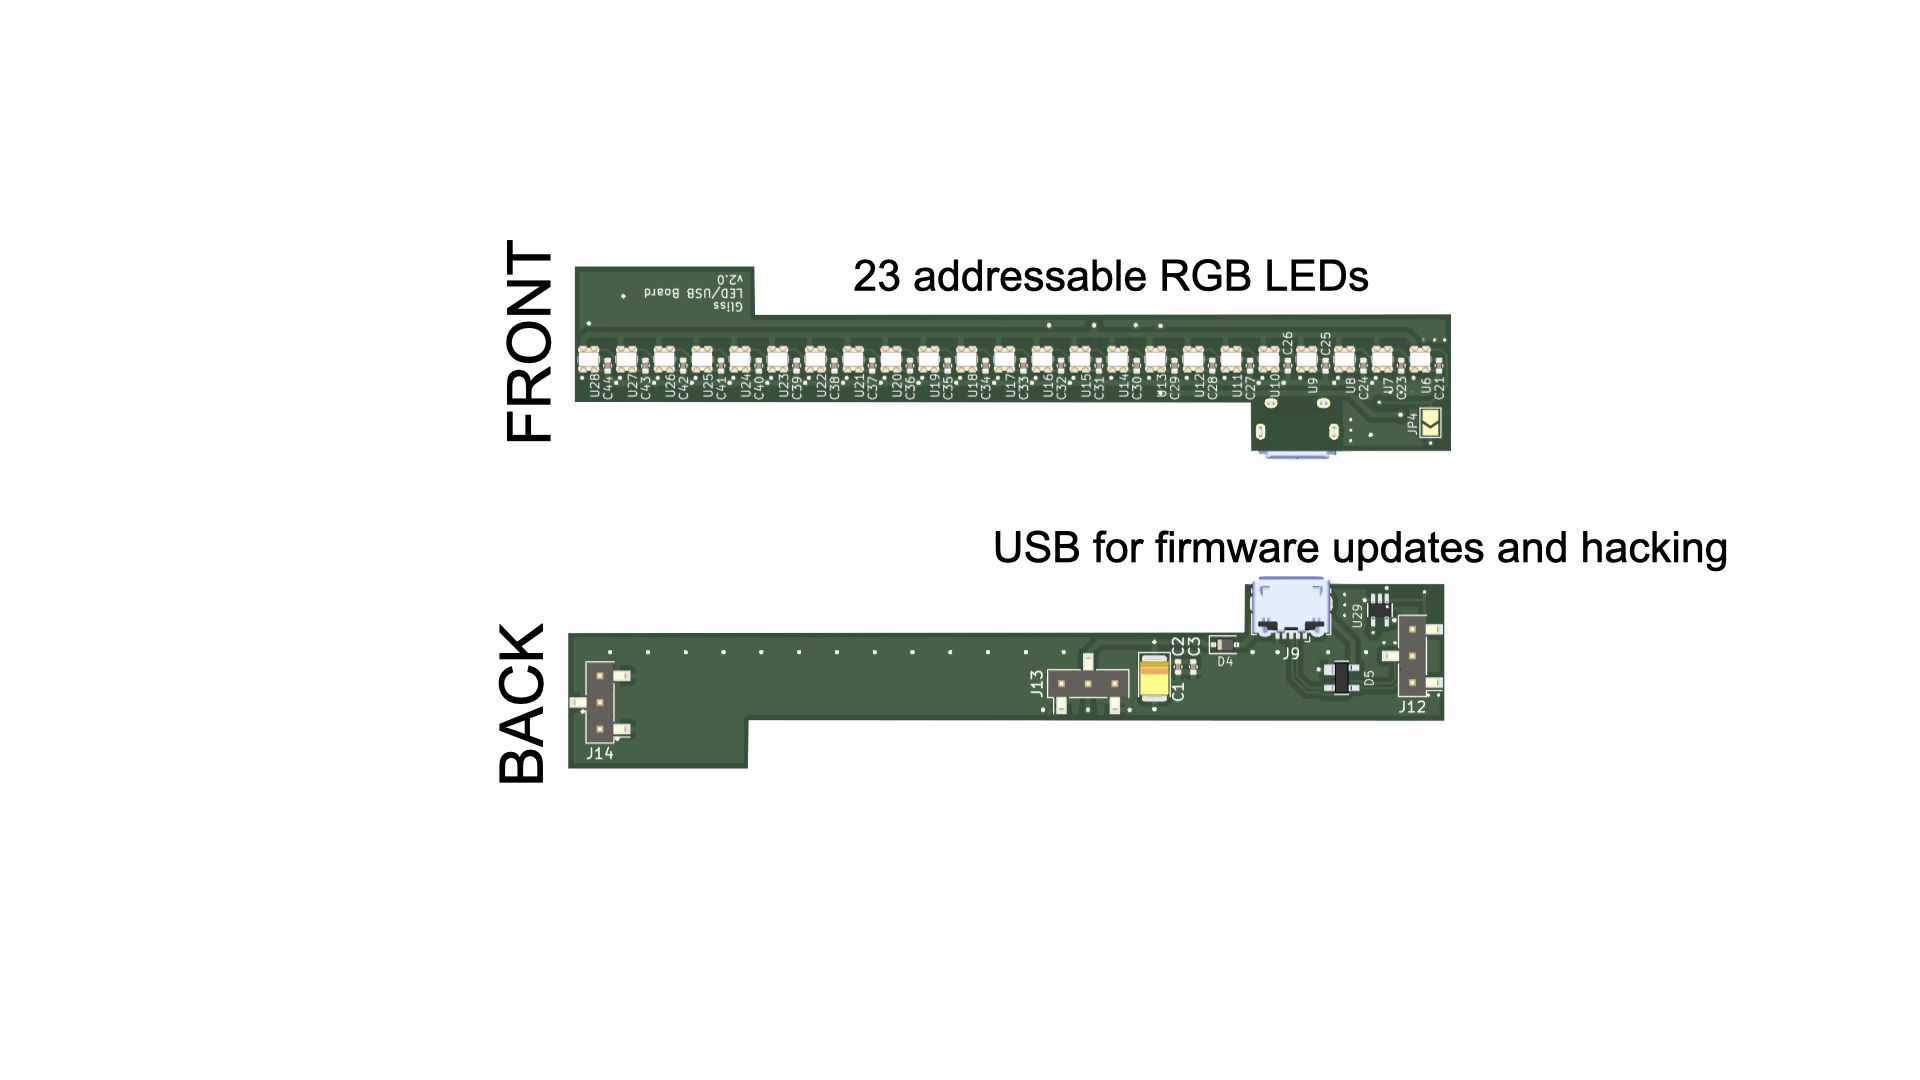
Each of the 23 RGB LEDs are individually addressable allowing us to add animated and accurate visual feedback to the module. This PCB also holds the micro USB port for firmware updates. This port will probably never be needed by the majority of Gliss users and is very much for advanced hackers. Rest assured that there will be no need to do any programming to use the module to its full potential!
The brain of the module
The main PCB packs in the STM32G4A1, a Cortex-M4F microcontroller used for DSP and UI management, and the Infineon CY8C20636A, a chip dedicated to capacitive sensing, the op-amps for the analog CV signals, alongside all the power management. Connections run through from the capacitive pads on the faceplate and from the LED board.
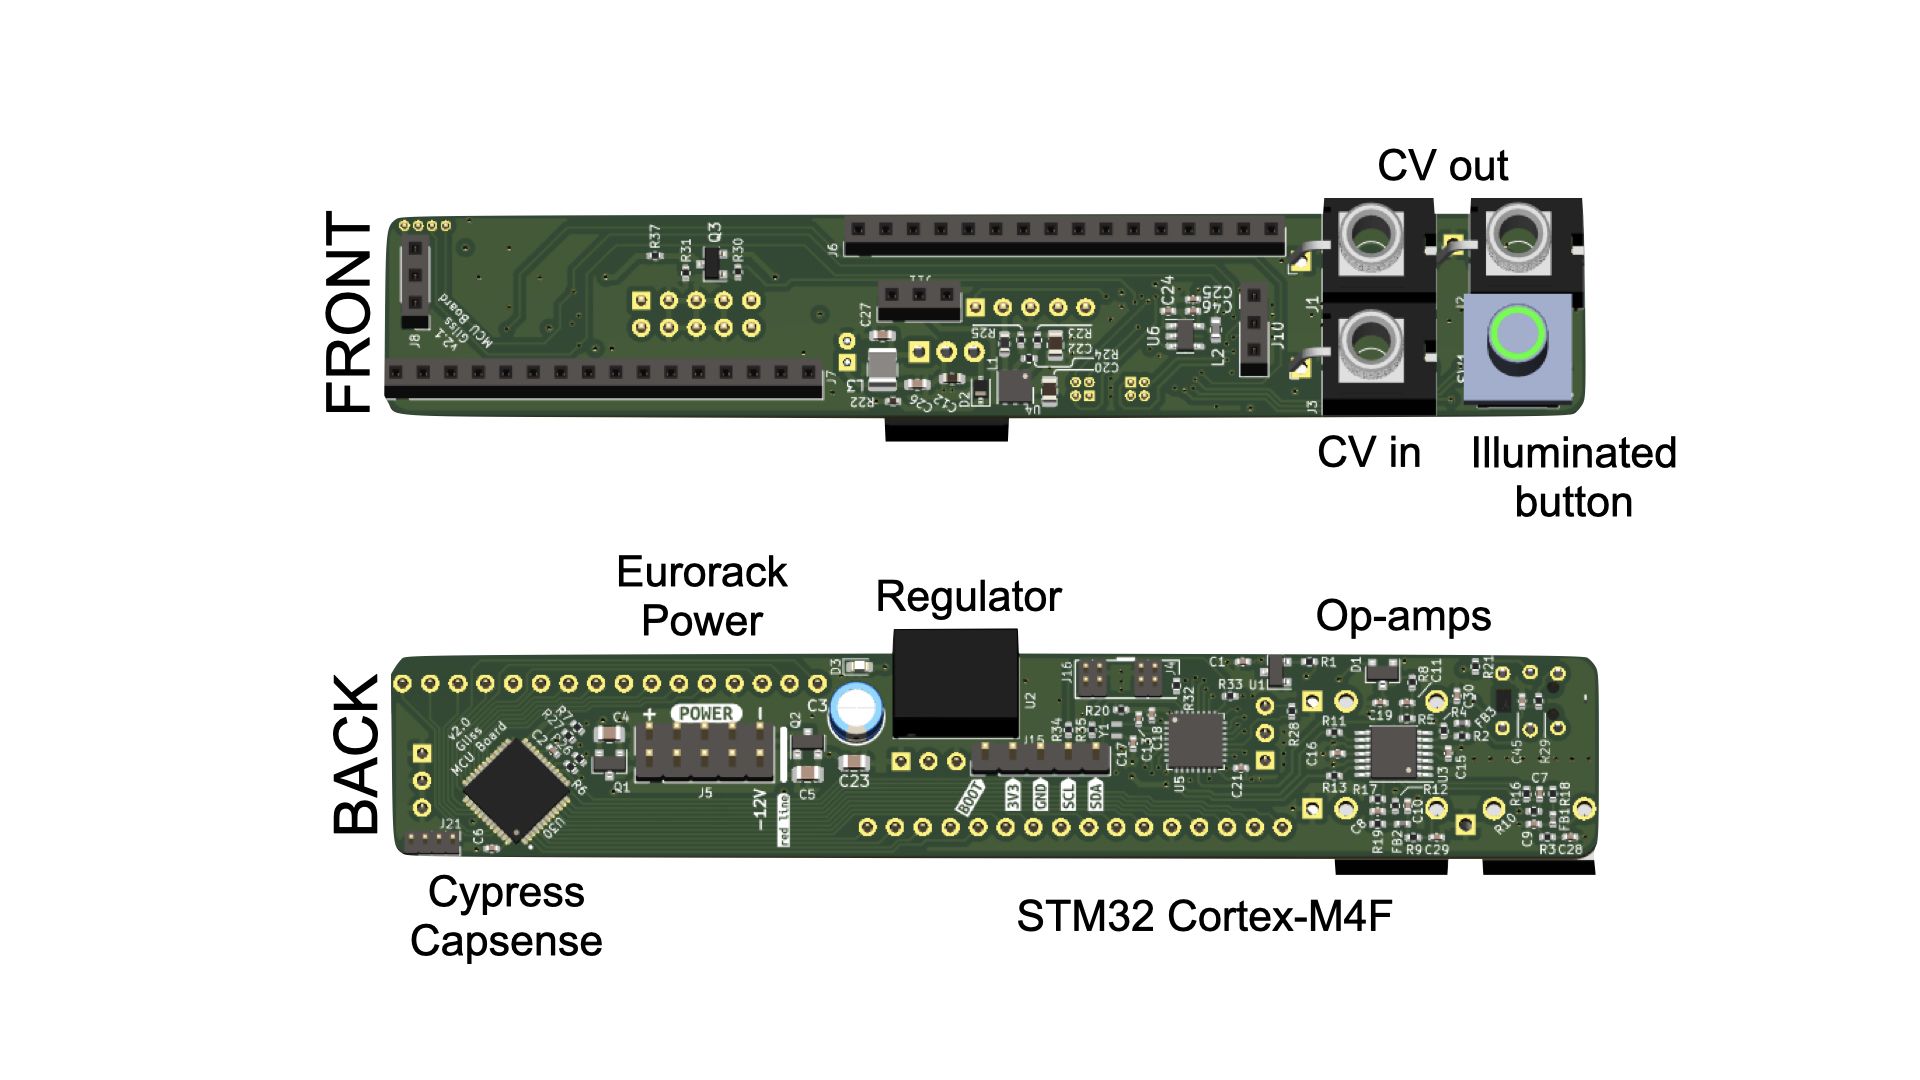
This board also hosts the jack sockets for Gliss’s CV inputs and outputs, which have a full scale range of -5V to 10V. The ranges can be configured in real-time from the touch sensor so that you can achieve any of the common ranges of ±5V, 0V:5V or 0V:10V or any custom range. This means you can find the perfect voltage ranges for controlling your other modules. In addition to this there is the illuminated button with a built-in bicolor LED which is used in combination with touches on the capacitive slider for several functions, such as triggering envelopes, holding signals and entering the menu.
Open source and us
For the hardware enthusiasts out there you’ll be able to open up these designs in KiCad and experiment with them as soon as the modules are shipping out to the world. At Bela we are huge believers in open source, and in fact the vast majority of the products we release use open source licenses for both the hardware and software.
As ever, thank you for the ongoing support.