Project update 3 of 11
A Closer Look at Our Enclosure Design
by Jaydeep DHi everyone,
This week, I’m excited to share something we haven’t delved into before - the enclosure design of WiSer.
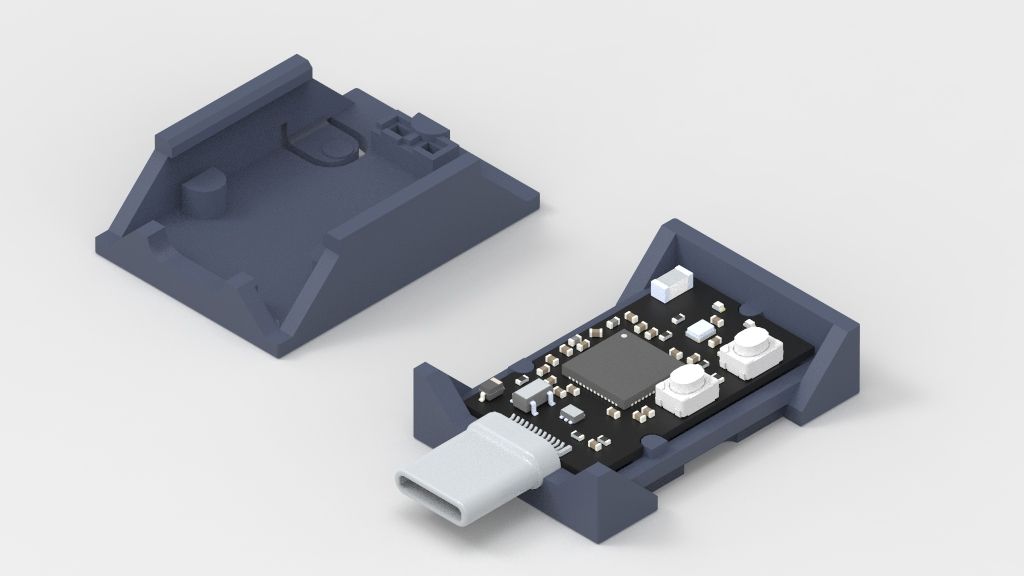
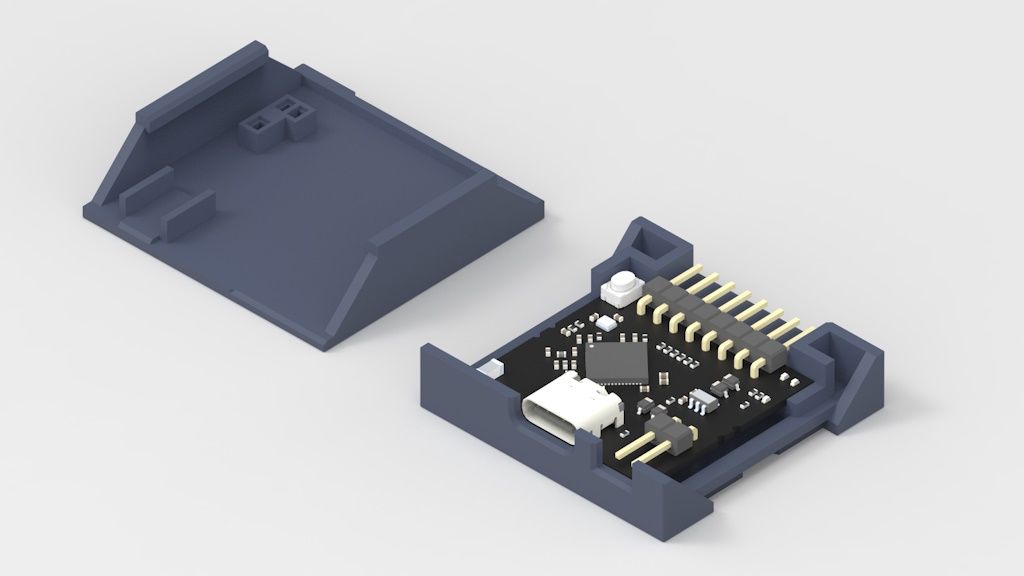
Most of the time, you’ve seen WiSer fully assembled or just the PCB in our videos and photos. Today, let’s go beyond that and explore how the PCB fits inside the enclosure. The snap-fit design ensures ease of access without the need for any special tools to open the enclosure.
While you might not need to open the enclosure under normal circumstances, we understand that some of you love to tinker and customize. Ever wondered how to load custom firmware? For this scenario, you’d need to press the boot button tucked away inside the enclosure, or let’s say you want to tweak the hardware a bit? Well, that’s when you will need to open the enclosure.
To open it, simply use the notch provided on either side and gently pull the enclosure parts apart. It’s that simple!
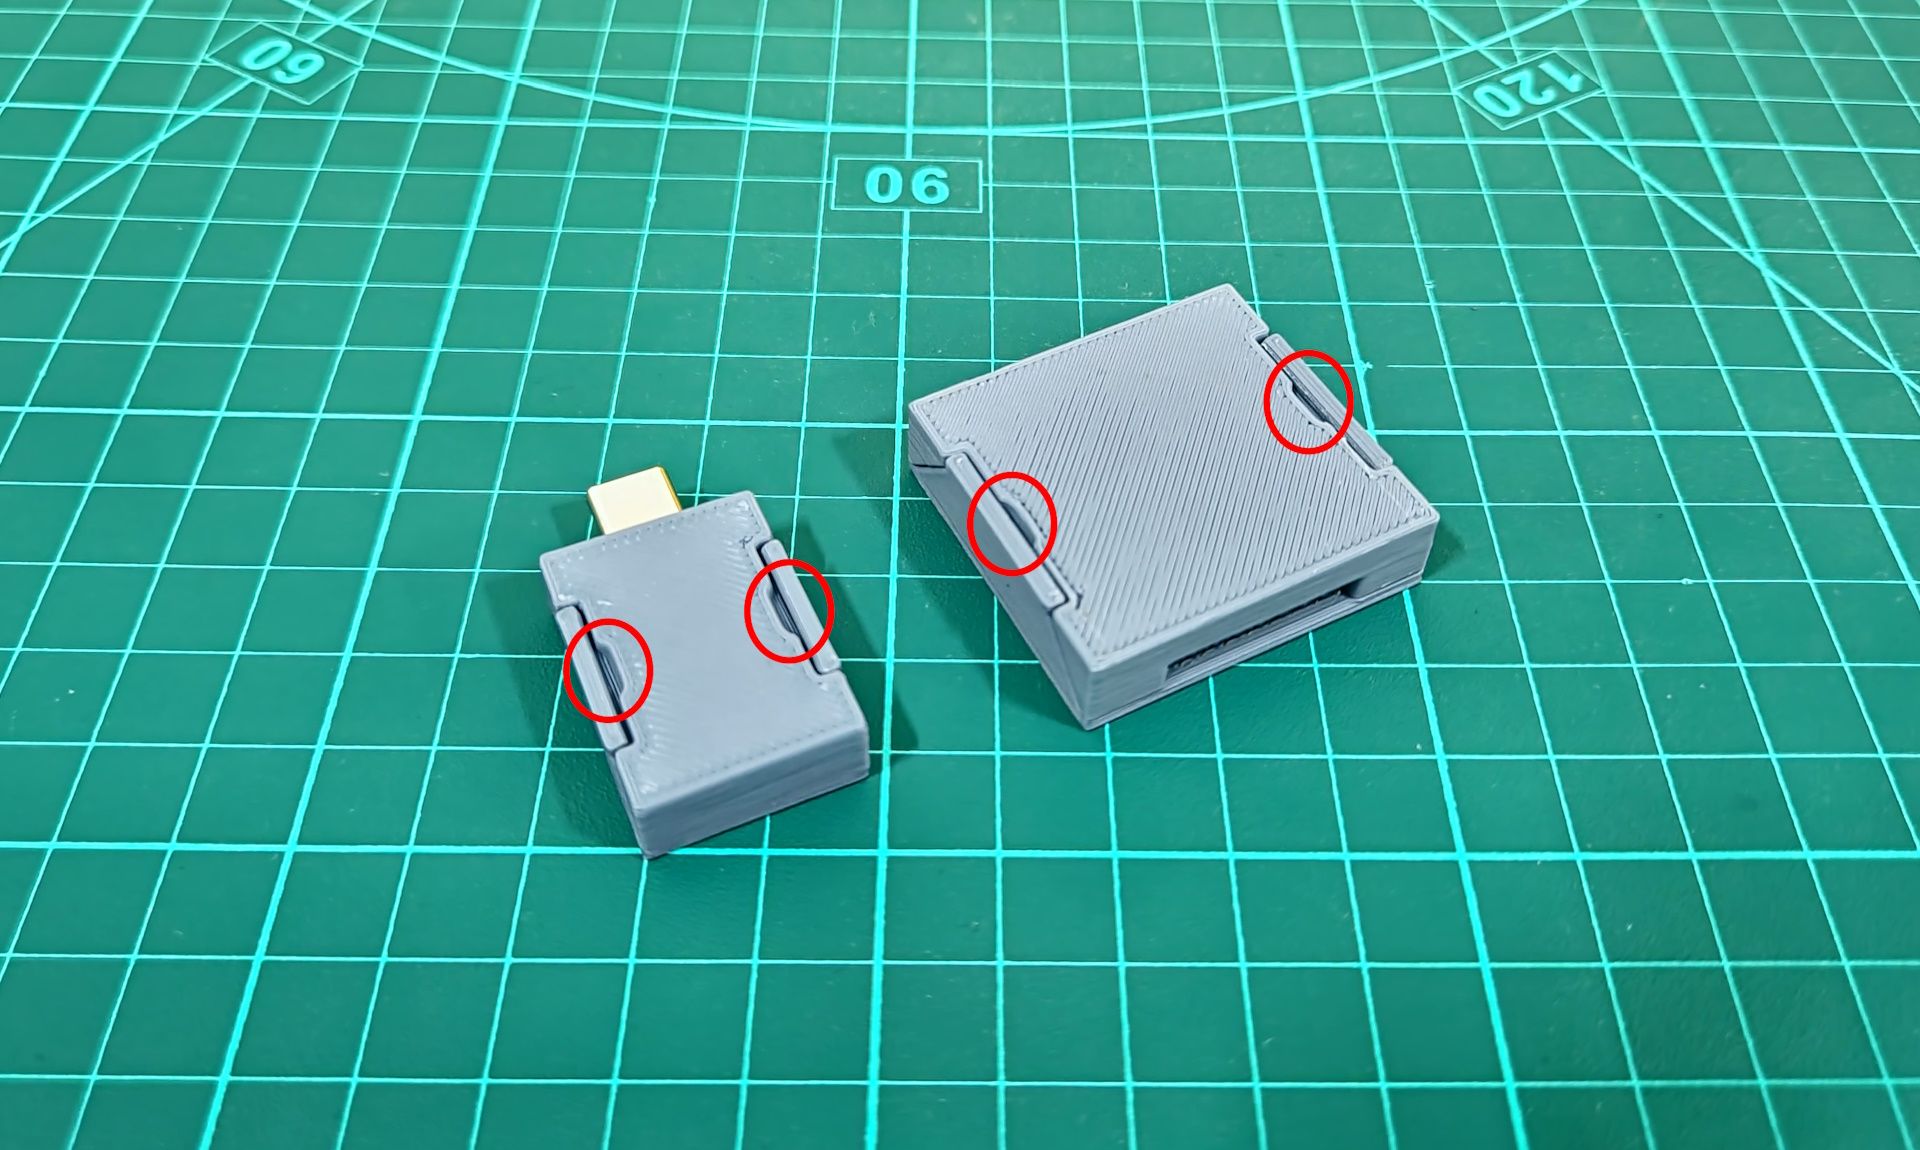
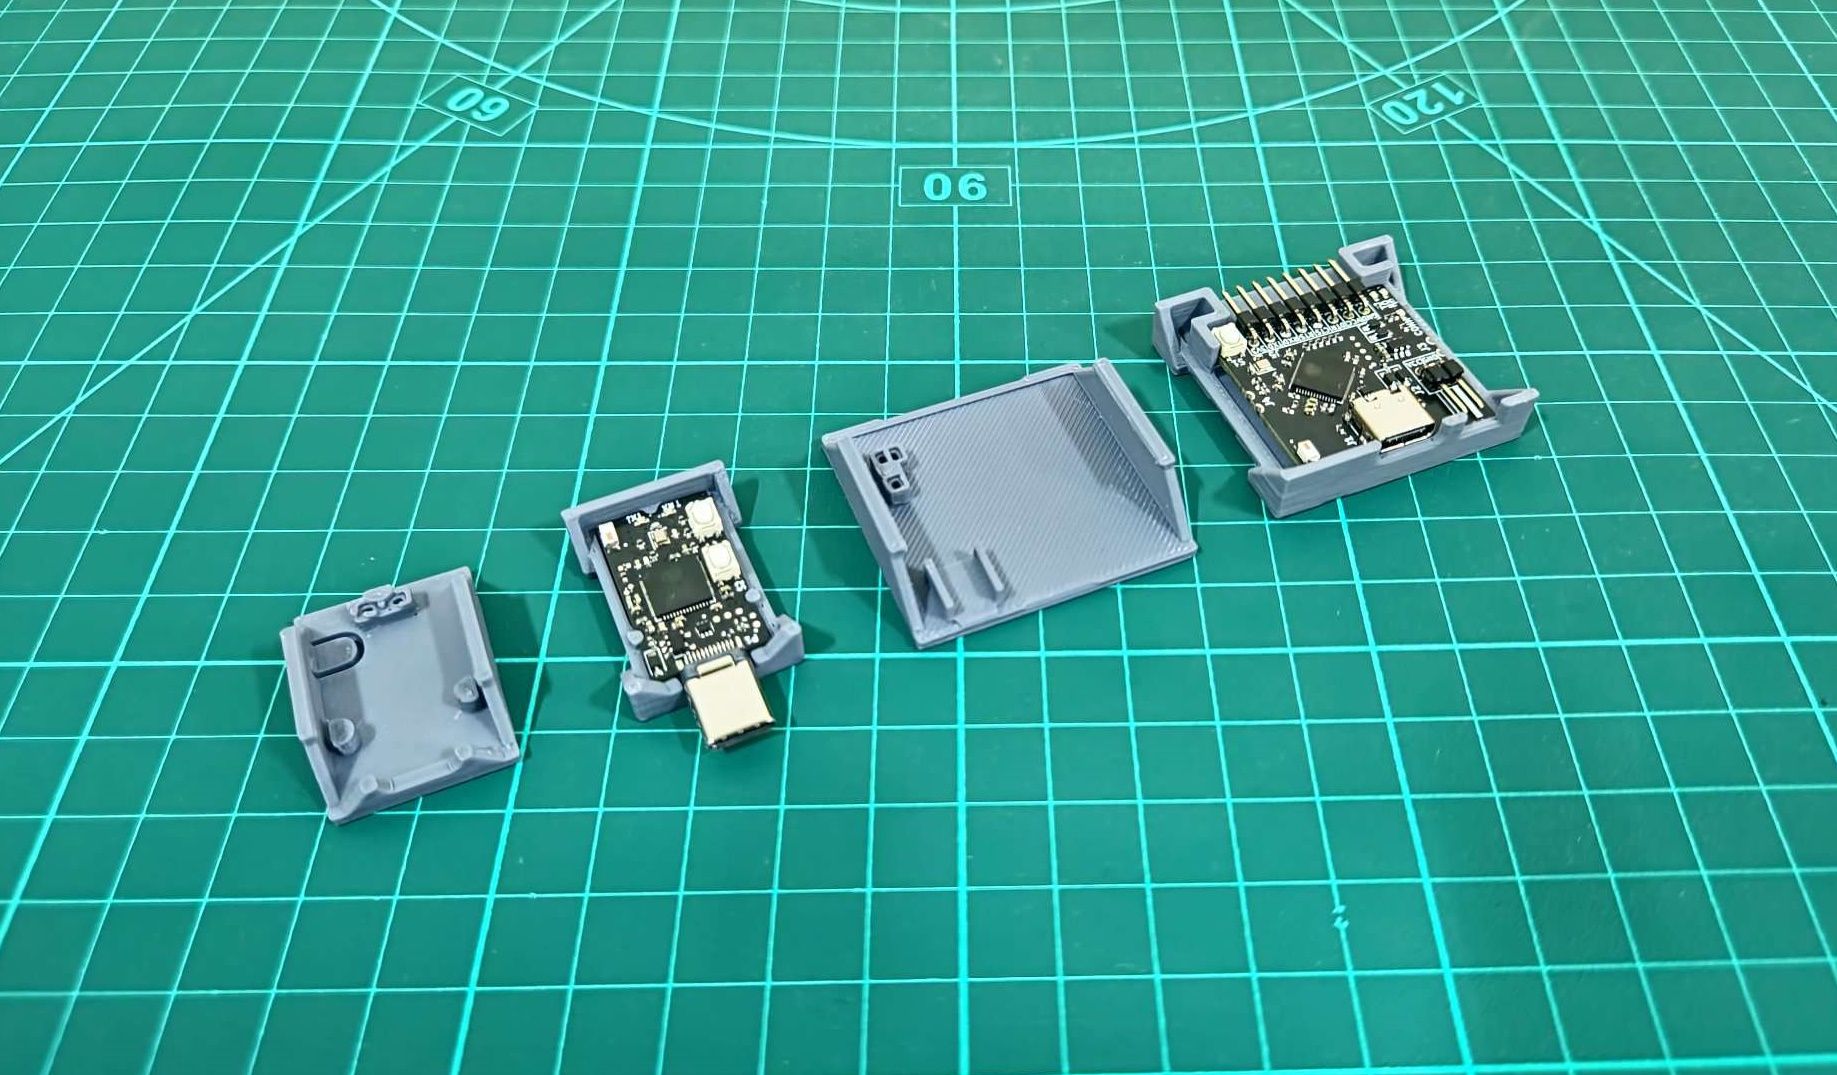
Here are the pics showing how WiSer enclosures look inside.
Also, check out this brief video clip demonstrating the process of opening and closing the enclosures.
🌟 Extra Tidbit: The enclosures are crafted using high-quality 3D prints made from ABS material instead of PLA to provide more flexibility.
Your curiosity and enthusiasm drive us forward. Feel free to share your thoughts or questions; we’d love to hear from you!