Project update 6 of 11
Video Demos: WiSer in Action!
by Jaydeep DHi everyone,
This week, we decided to create a few video demos of applications showcasing the versatility of WiSer. Our first question was: How could we achieve this? Fortunately, we had a few components readily available from our past projects. Consequently, we decided to create video demos around them. So, here we go!
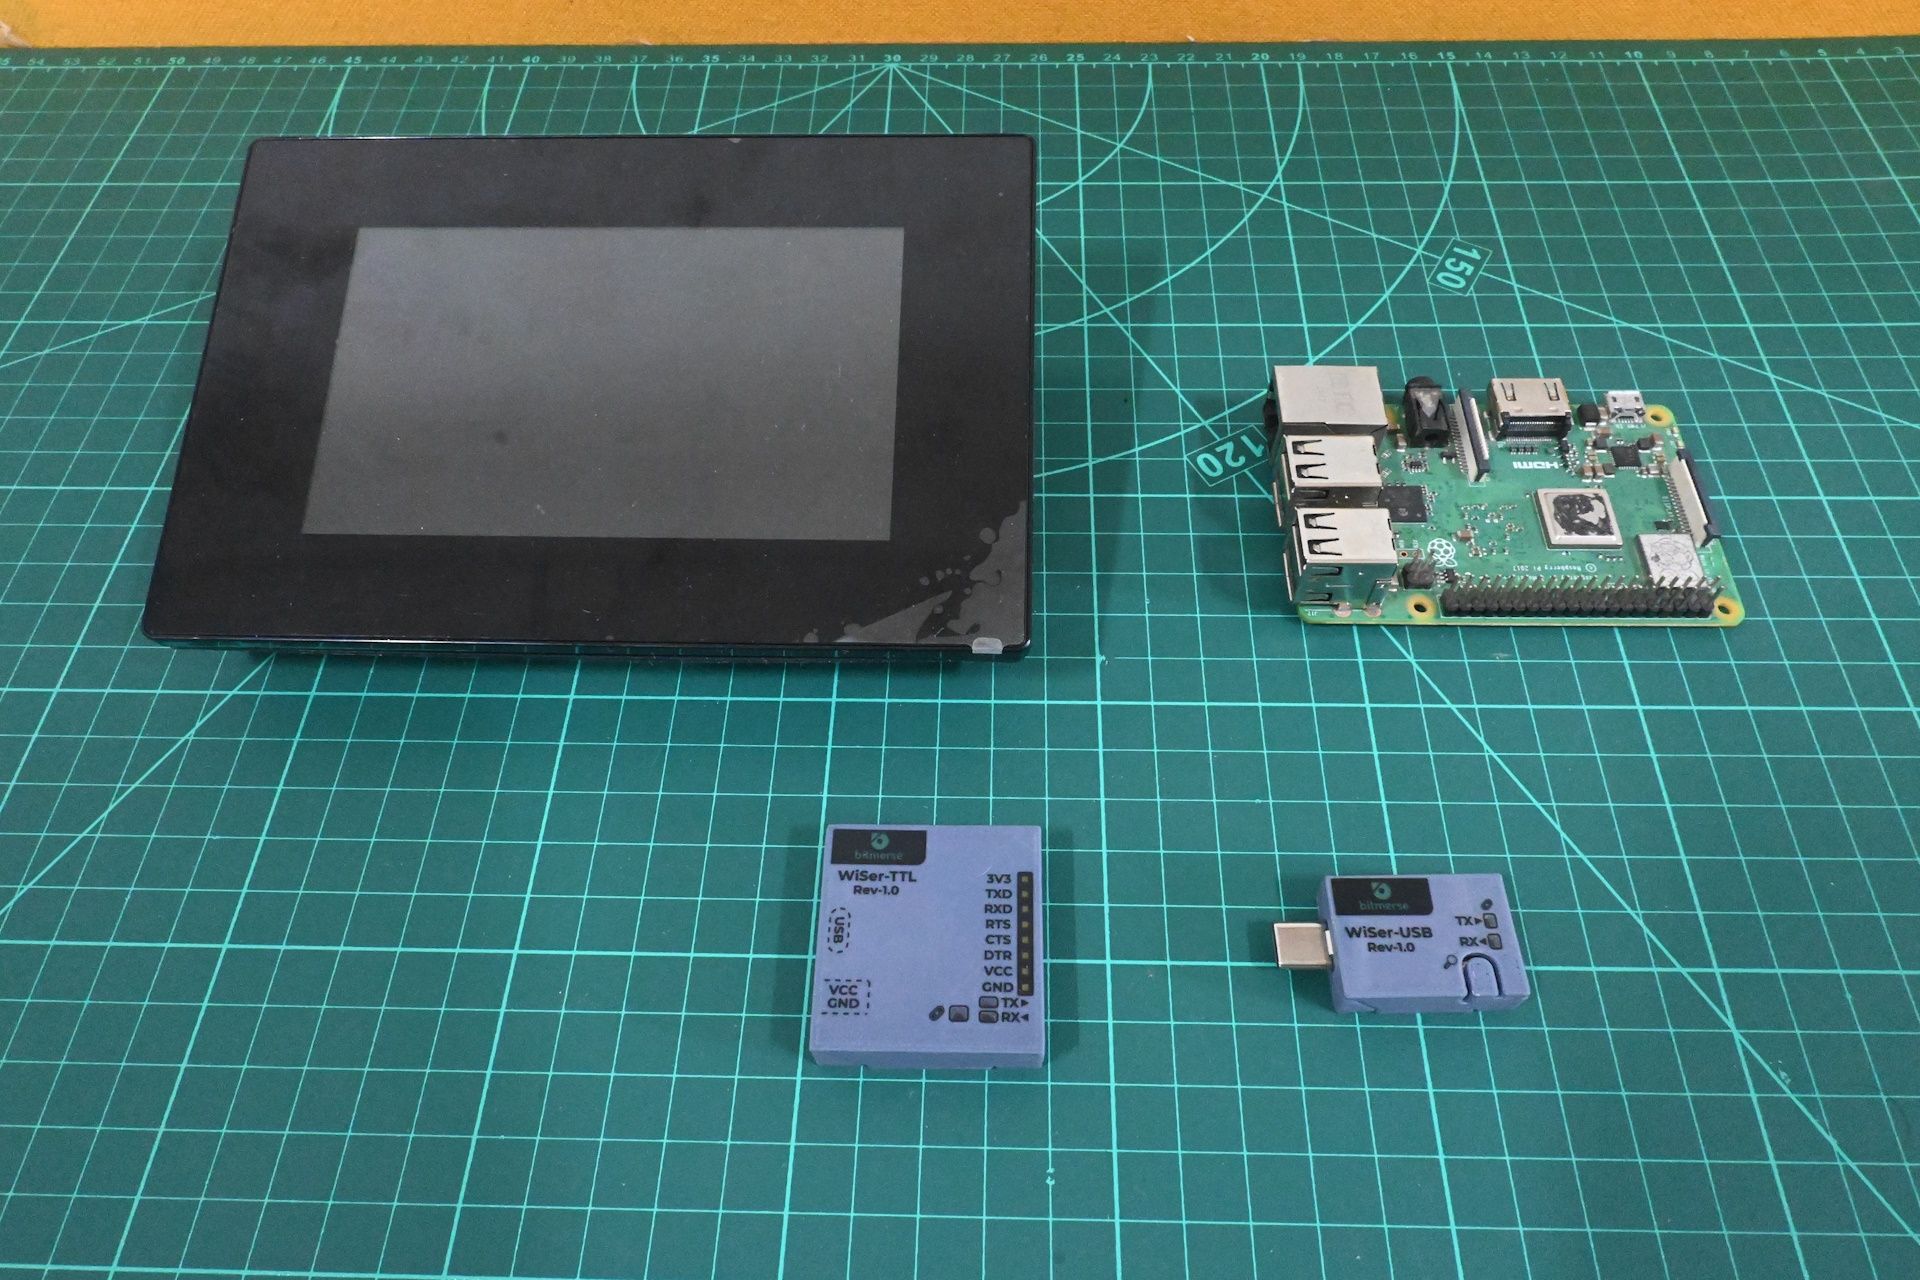
One of these components was a five-inch Nextion display (NX8048P050-011C-Y) that can be controlled through UART pins. So this demo comprises the Nextion display with WiSer-TTL connected to one end and, on the other end, we have a Raspberry Pi with WiSer-USB plugged into it.
The demo is divided into two parts:
- Programming the Nextion display wirelessly from a PC using WiSer
- Displaying the CPU temperature value of Raspberry Pi on the Nextion display using WiSer
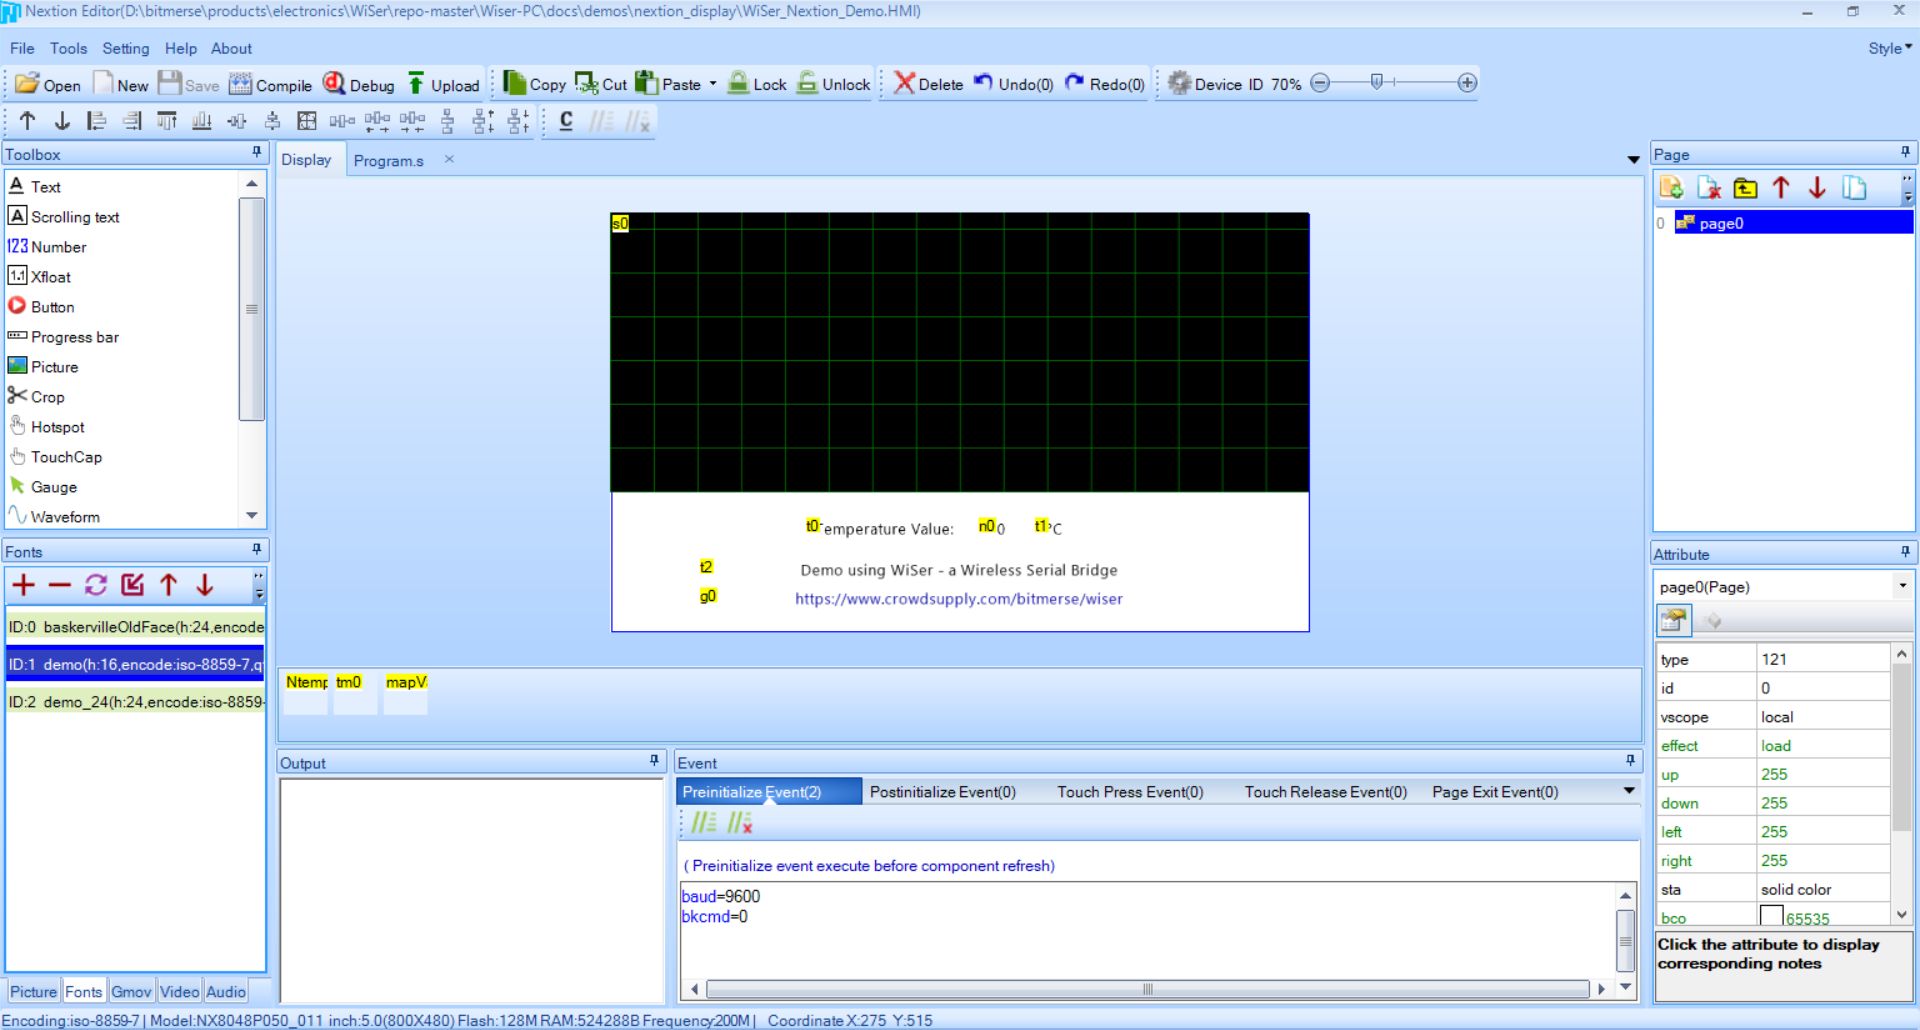
To create the demo GUI on the Nextion display, we used Nextion Editor tool, which can be downloaded from their website. We utilized graphs and other GUI elements to indicate the CPU temperature, as seen below. This demo code can be downloaded from our GitHub repo.
To fetch the CPU data and update the GUI, we wrote a small Python script on the Raspberry Pi.
from gpiozero import CPUTemperature
from nextion import Nextion
import time
import asyncio

#temperature variable
tempGraph=0
#setup connection
client = Nextion('/dev/ttyUSB0', 9600, None)
async def update_nextion():
    global client
    await client.connect()

    while True:
        tempGraph = int(CPUTemperature().temperature)
        print("tempGraph: ",tempGraph)
        await client.set('NtempGraph.val', tempGraph)
        time.sleep(0.05)

loop = asyncio.get_event_loop()
asyncio.ensure_future(update_nextion())
loop.run_forever()
To artificially increase the CPU temperature, we used the stress-ng command on Raspberry Pi, which puts the CPU on a treadmill and raises the CPU temperature. But enough about the technical details… Let’s see it in action!
Apart from this, we have a few other demos that showcase WiSer’s capabilities. The video below includes:
- Printing a "Thank you" message to our backers using an RP2303 thermal printer and WiSer
- Retrieving logs from Arduino using WiSer
- Connecting to a GSM modem, sending AT commands, and receiving its responses through WiSer
In addition, we also have a demo accessing the Raspberry Pi serial logs and programming the ESP32 board using WiSer:
Another great piece of news that we wanted to share with you is: The WiSer project is now officially OSHWA certified!.
I hope you thoroughly enjoyed this update. Feel free to share your thoughts or questions; we’d love to hear from you!