Hey everyone!
Daniel (ailurux) here. We’re in the last day of the campaign now, and we’re all so thankful for your support. We’re very excited to begin production and start getting Tangaras into your hands.
This week we’ll be talking about how you can customize your Tangara, which is, if you ask me, one of the best parts of open hardware. I’ll be talking about the professionally manufactured cases that Tangara will be shipping with, then guest writer Erin will talk about the absolutely incredible work she’s been doing to make the case easy to machine or 3D print (even at a hobbyist level). Finally, I’ll be showing off Tangara’s CSS-inspired UI themes.
Polycarbonate Case
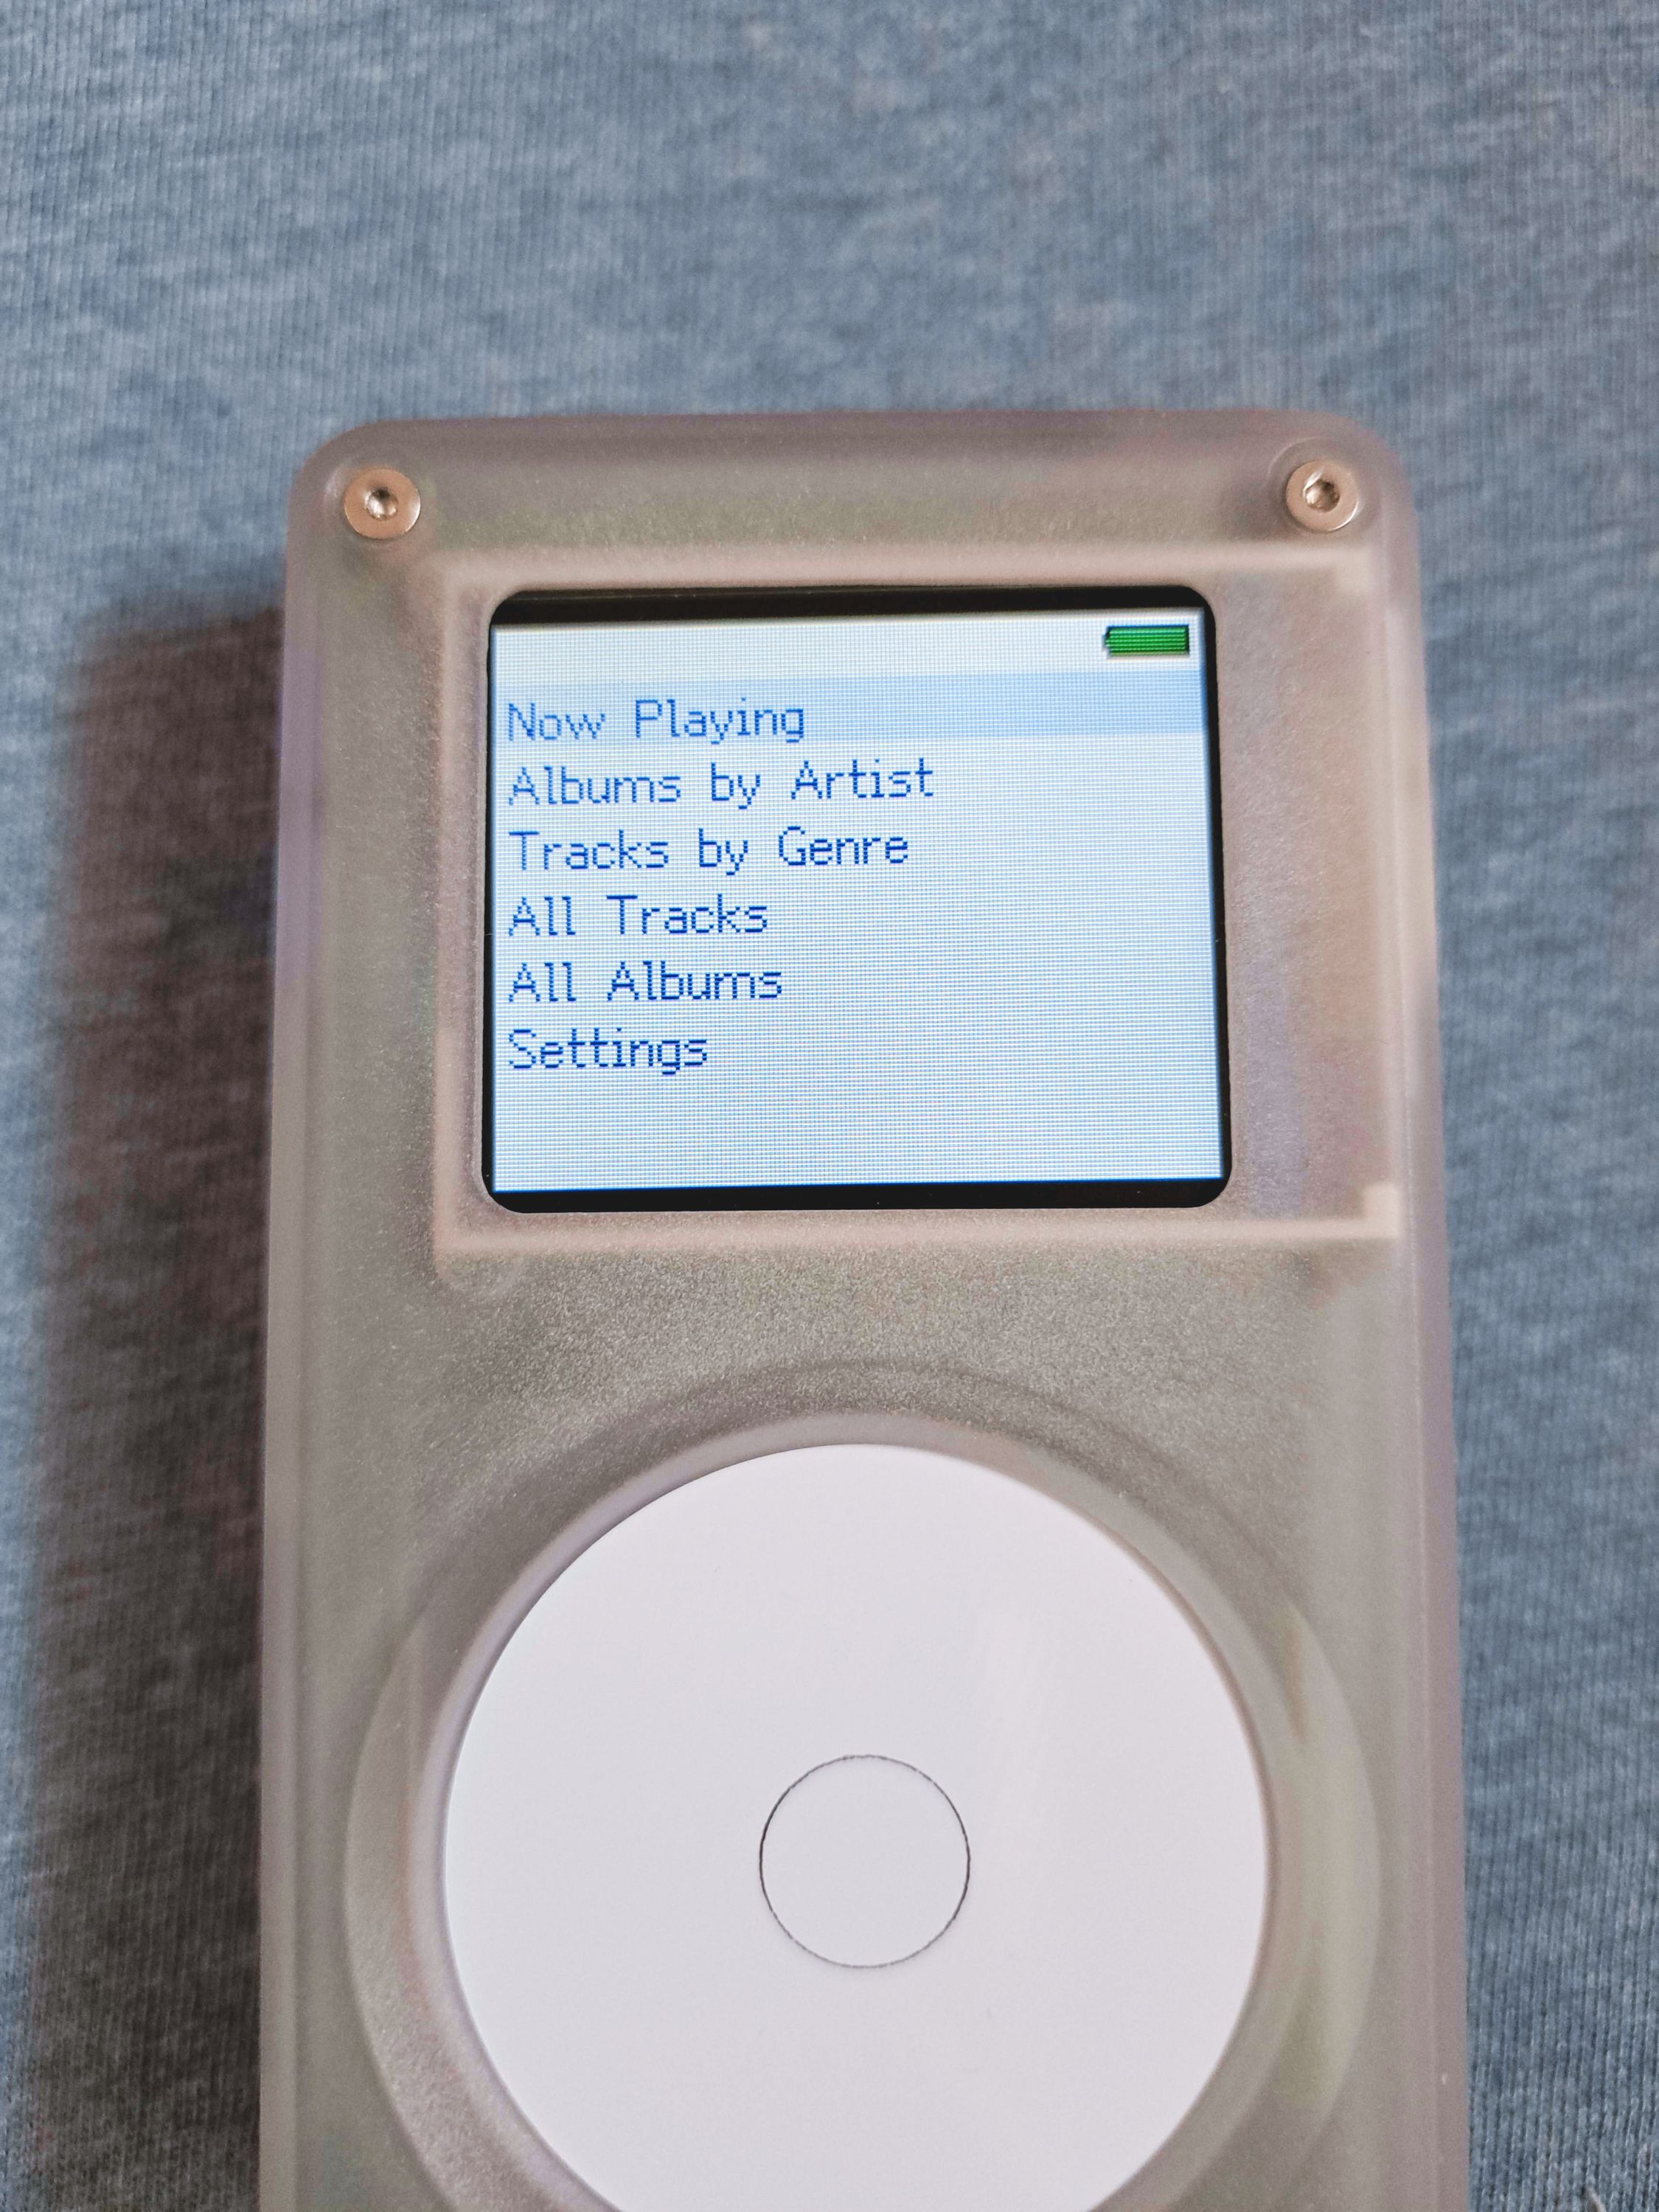
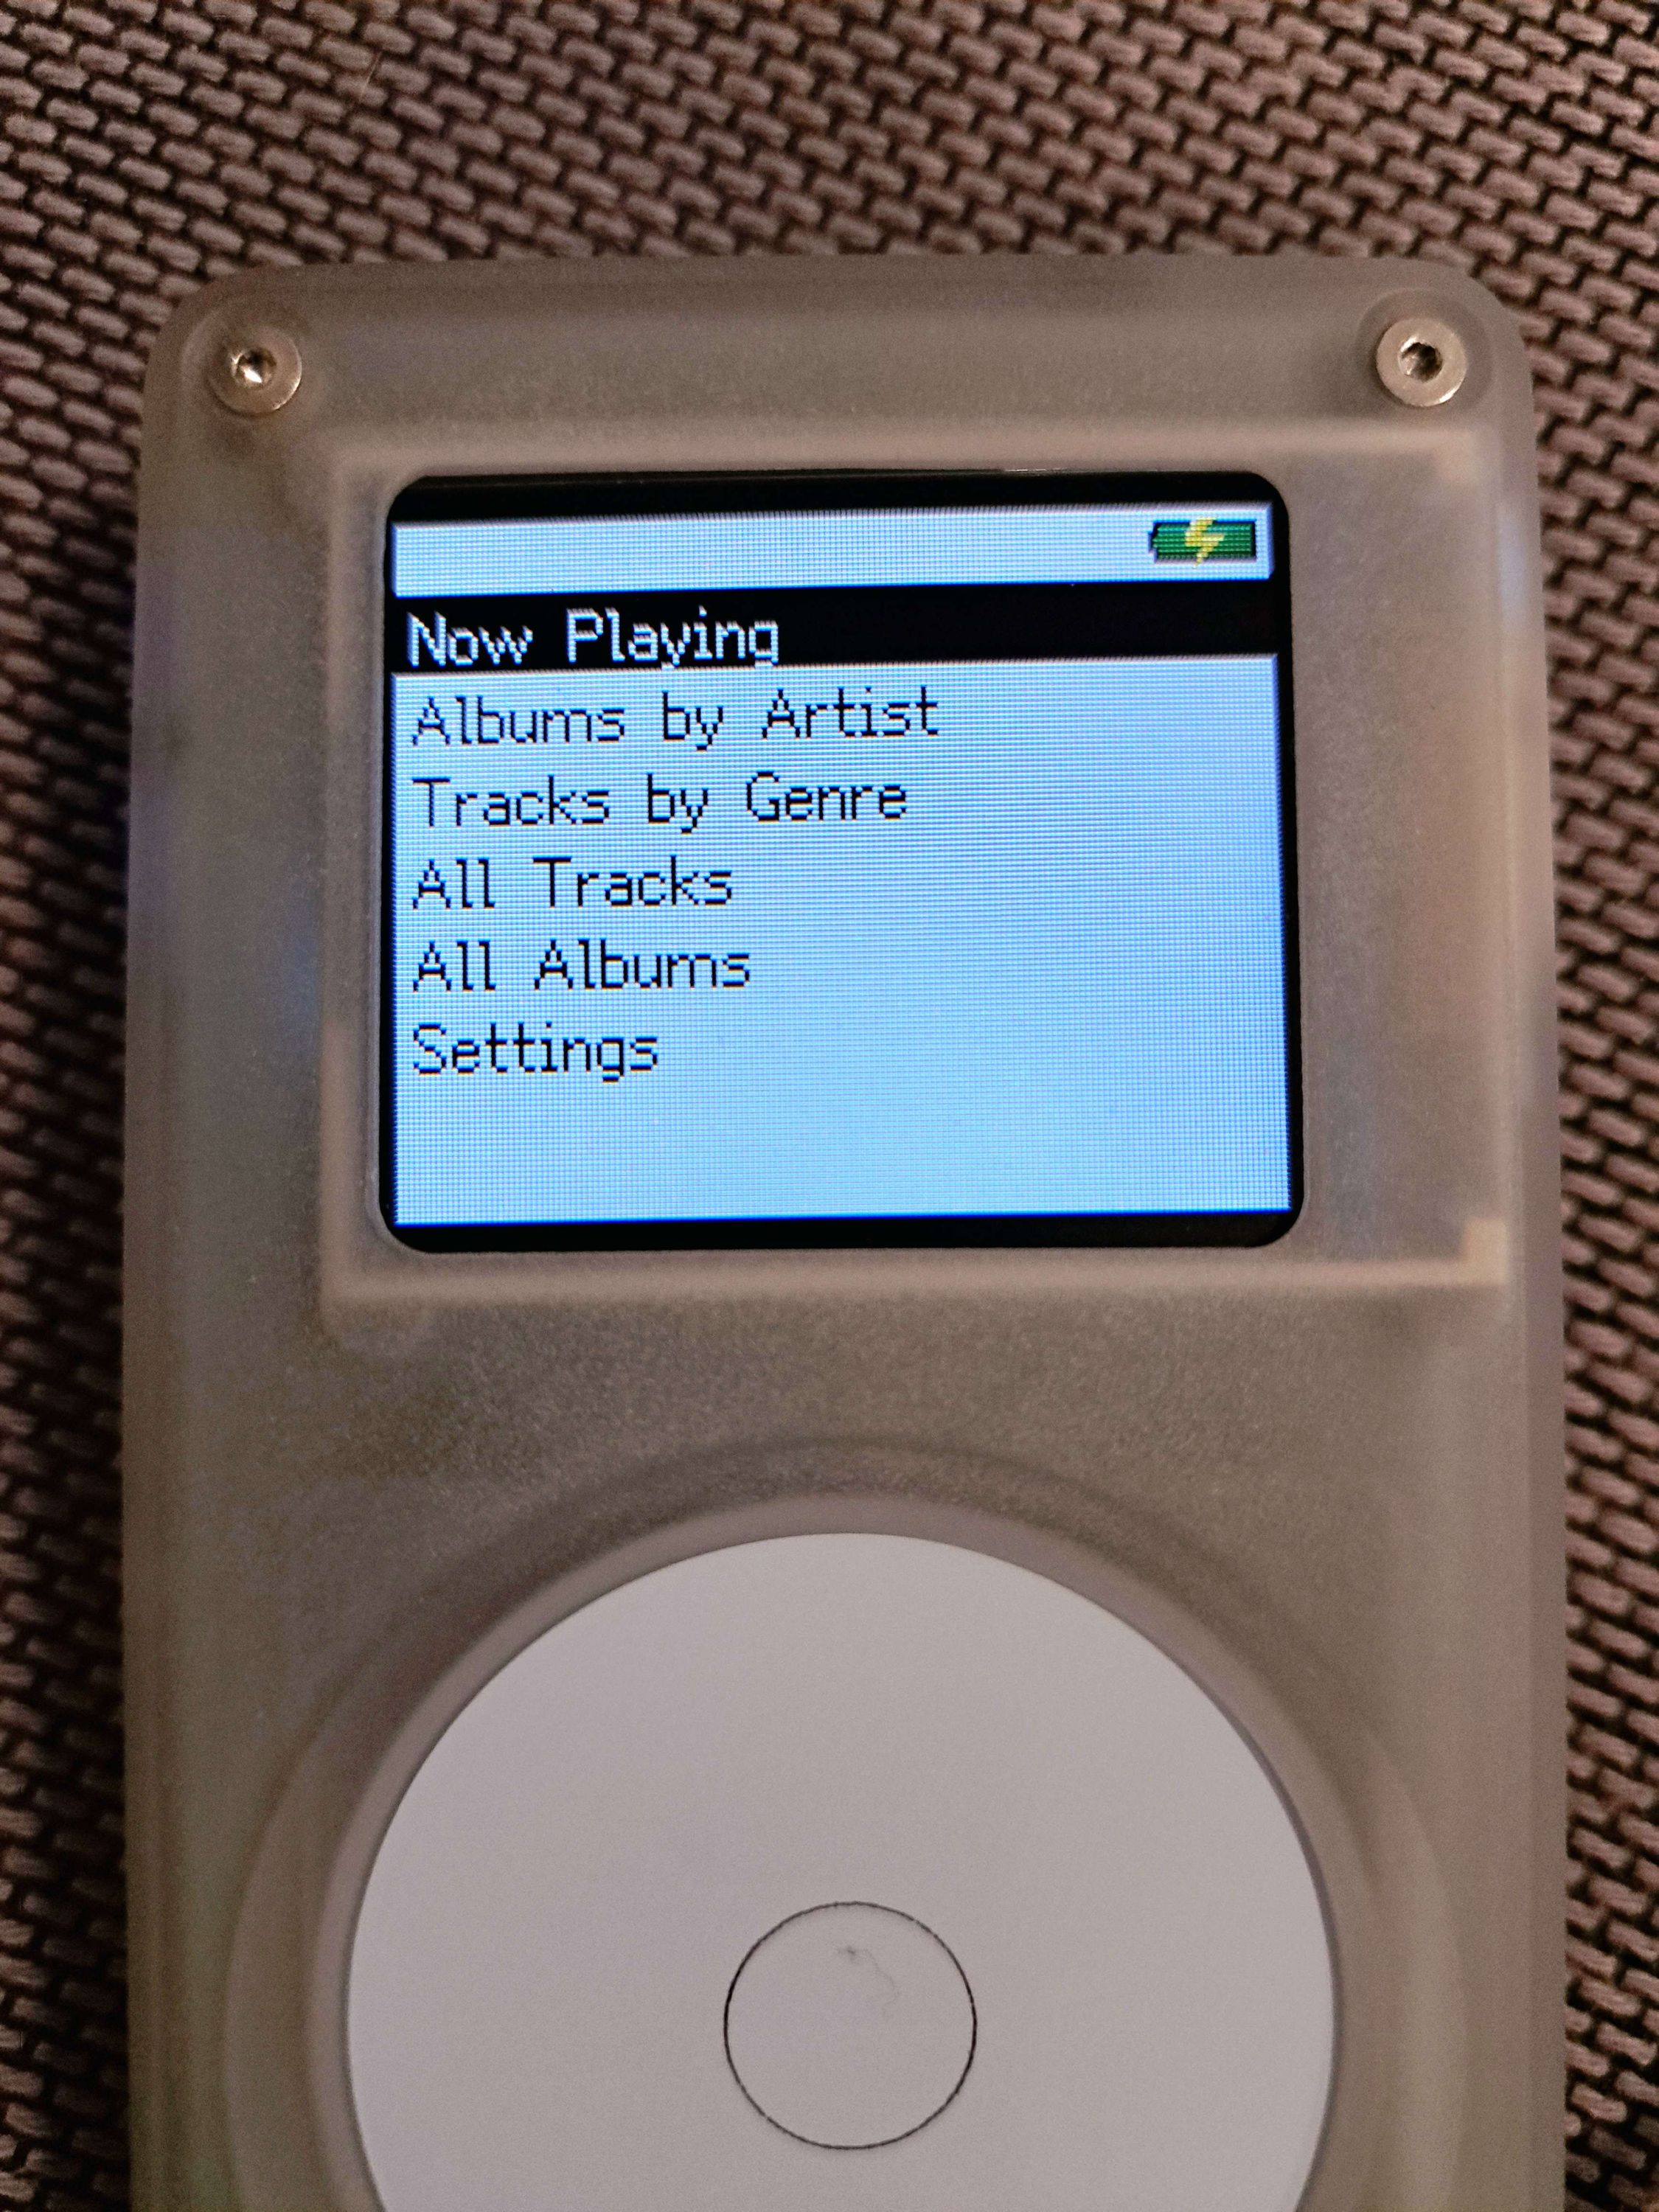
The case we’ll be shipping Tangaras with will be CNC machined polycarbonate with a bead blast finish. The result is this beautiful semi-transparent frosted glass effect. This week our new prototype case arrived, and we’re so pleased with how this design is coming along.
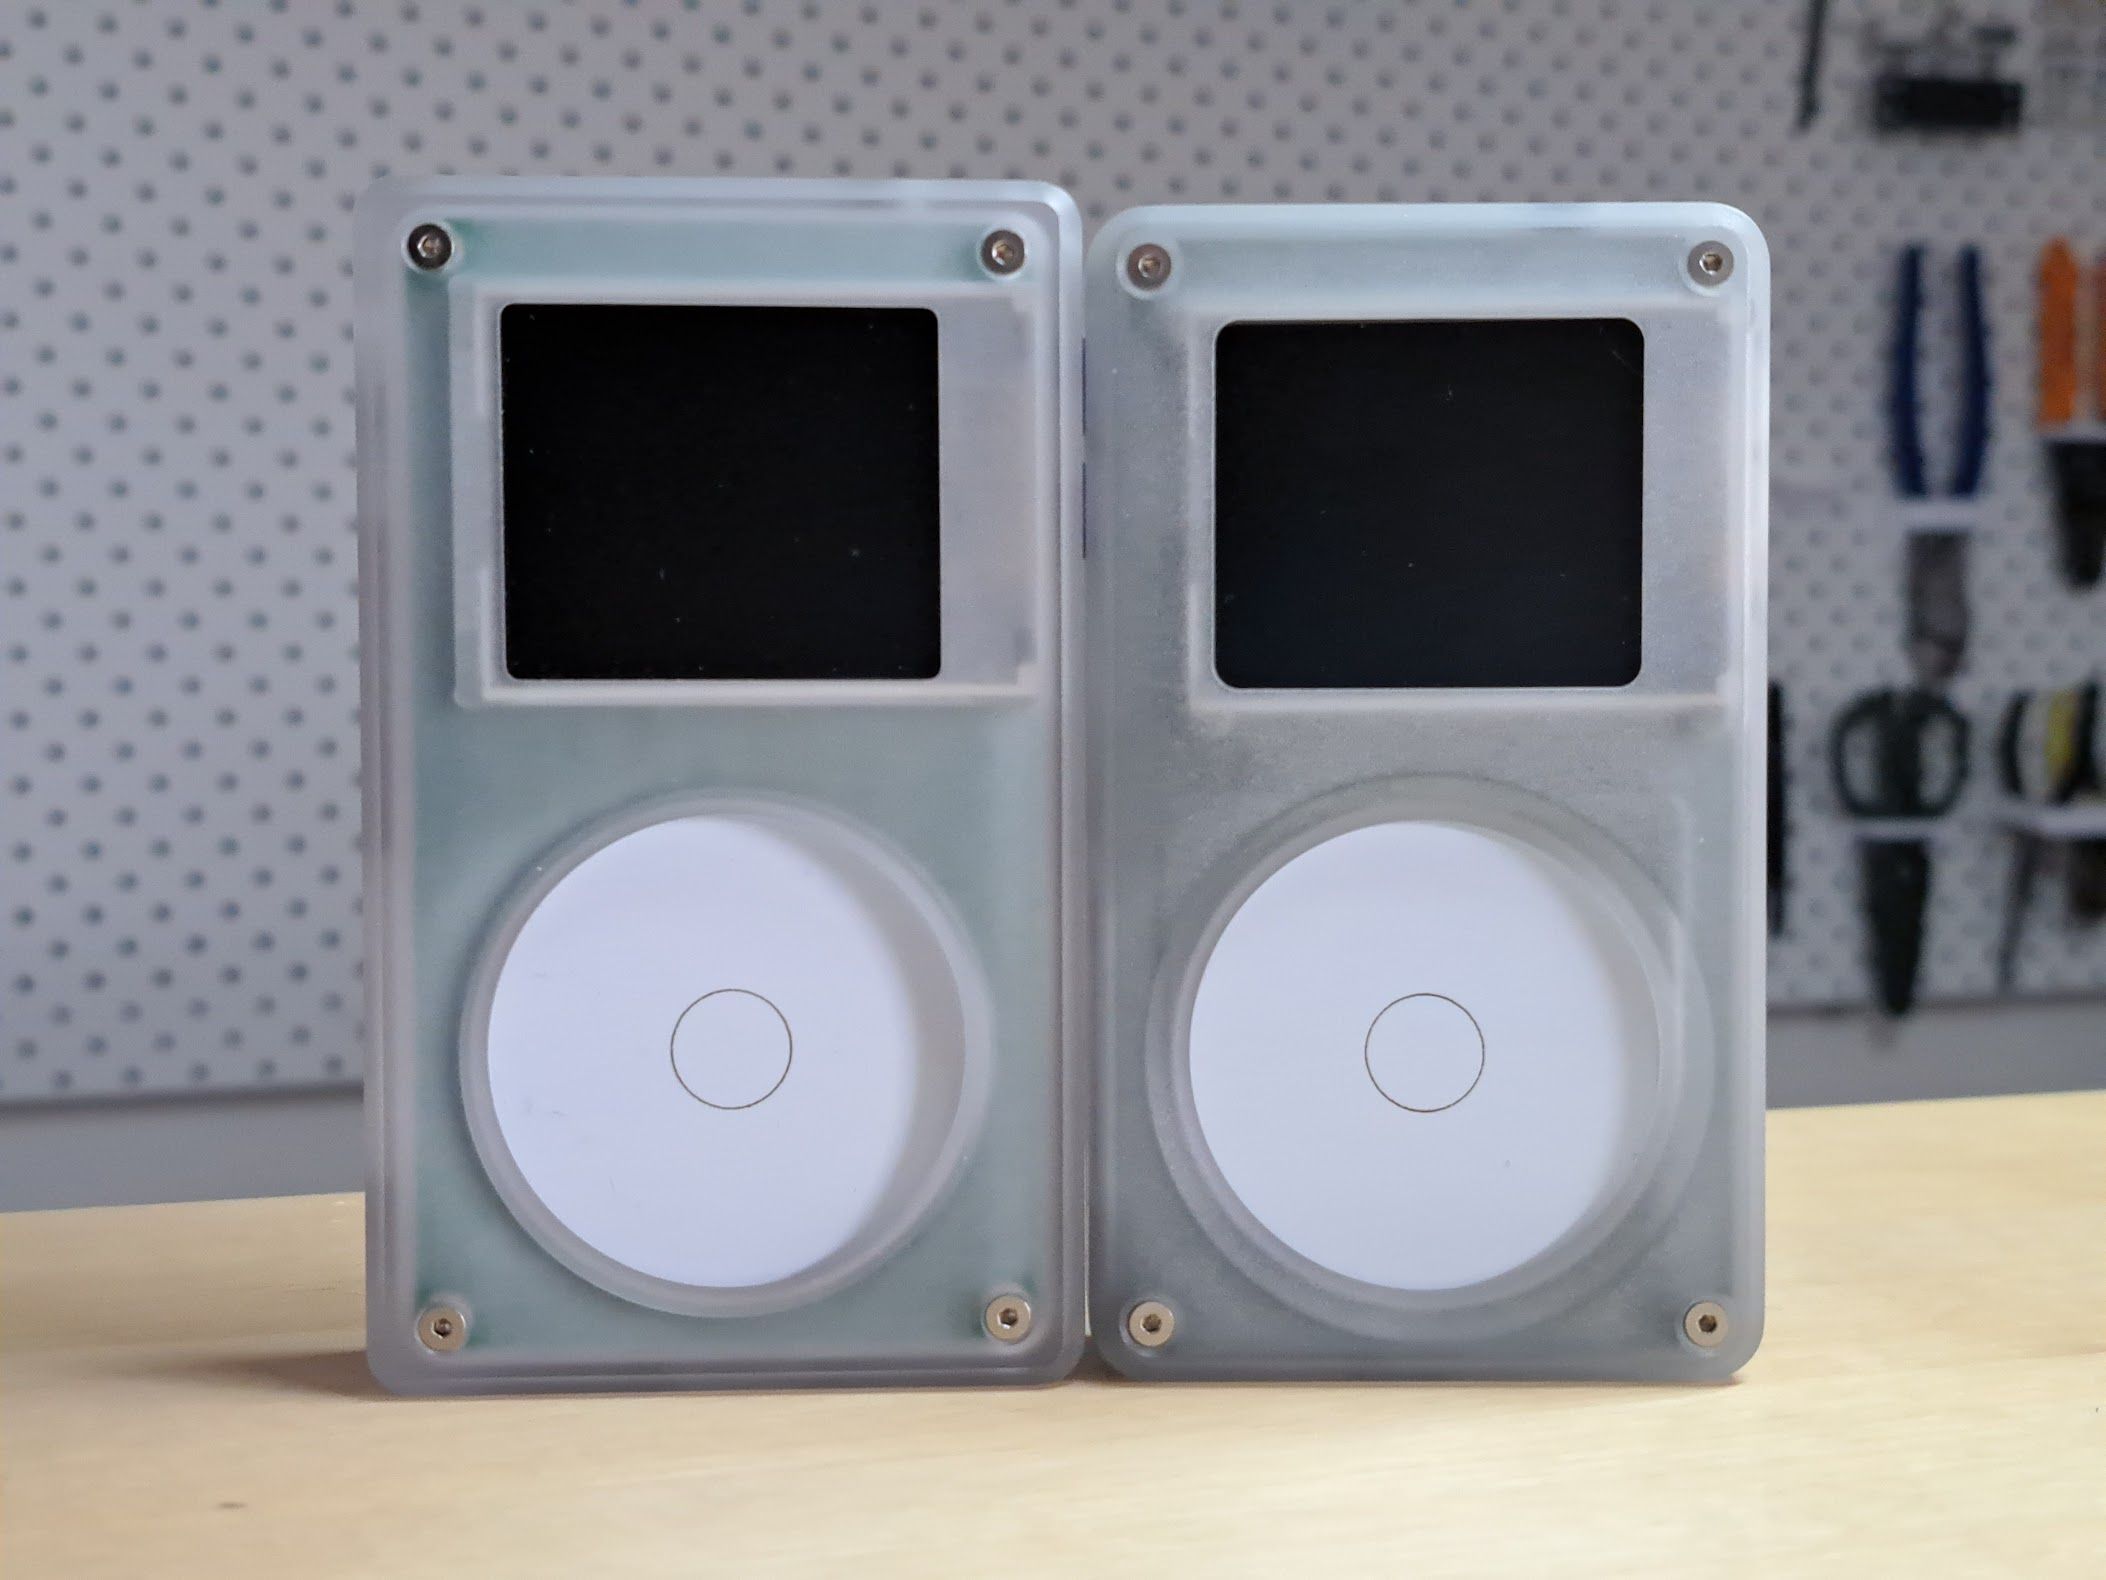
You can see how the new case is a little shorter and a little slimmer than its older counterpart, as well as a little more rounded. Visually, it’s a subtle change, but it really makes a difference in the way the device feels.
Polycarbonate is a very durable material that can be painted as well as dyed for opaque or translucent finishes. It also takes stickers really well too. Unlike some plastics, polycarbonate is chemically resistant to isopropyl alcohol and is therefore easy to clean.
Erin has done so much work to improve the case design making it easier and cheaper to manufacture, which is great for those of you who want to make or order your own custom cases. So, I’ll hand it over to her to talk more about it.
Case Manufacturability Improvements
Thanks Daniel!
We want anyone with a 3D printer or CNC machine to be able to make Tangara’s case, with as much flexibility in material choice as possible. We also need to optimise for scale manufacturing, and happily both of these goals mostly align!
Early on we decided the case shouldn’t require specialist tooling to machine; the shell now only requires two 3 mm cutters (flat + ball), a 2 mm drill, and (optionally) a chamfer cutter. As a result, the front shell is filled with features to accommodate the relatively large cutter diameter.
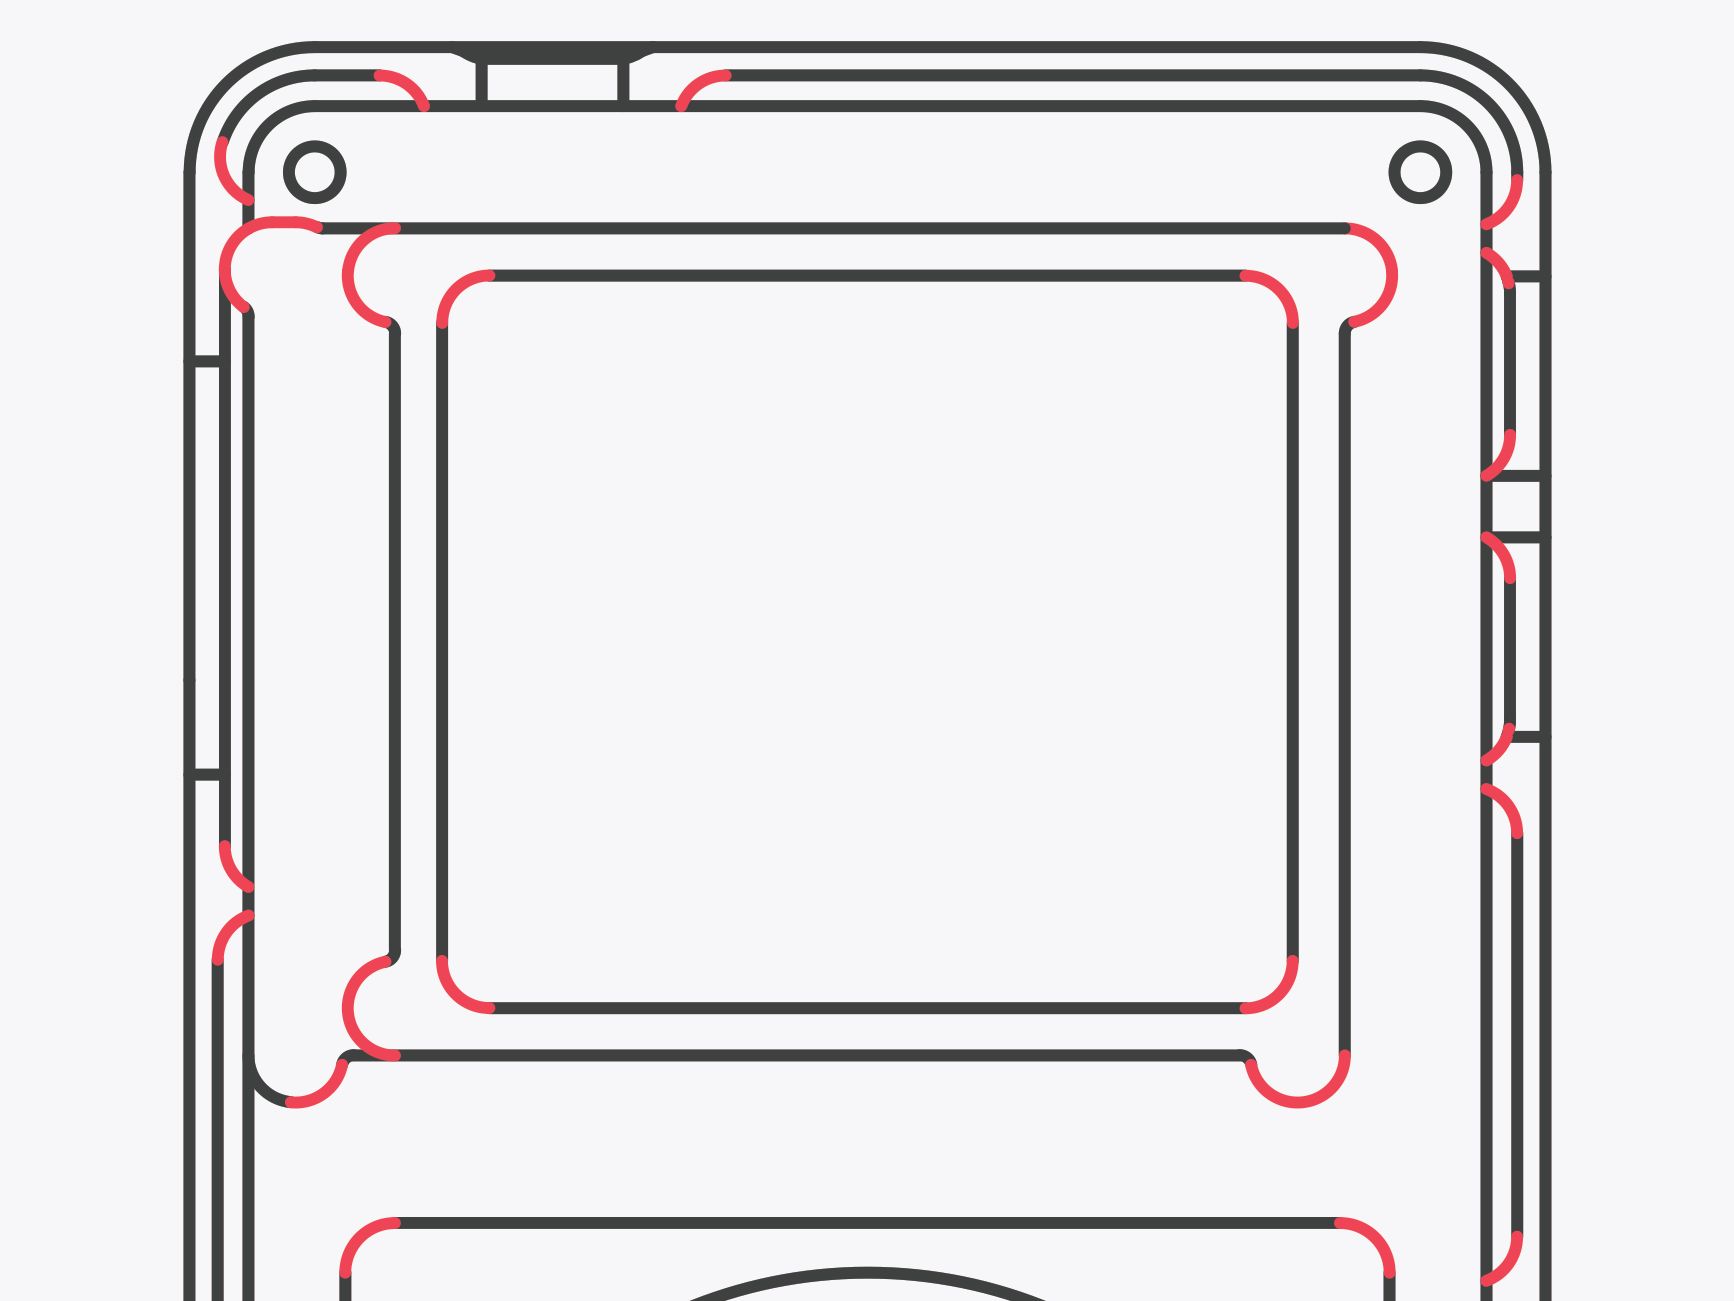
Top down views of the front shell showing the features highlighted in red
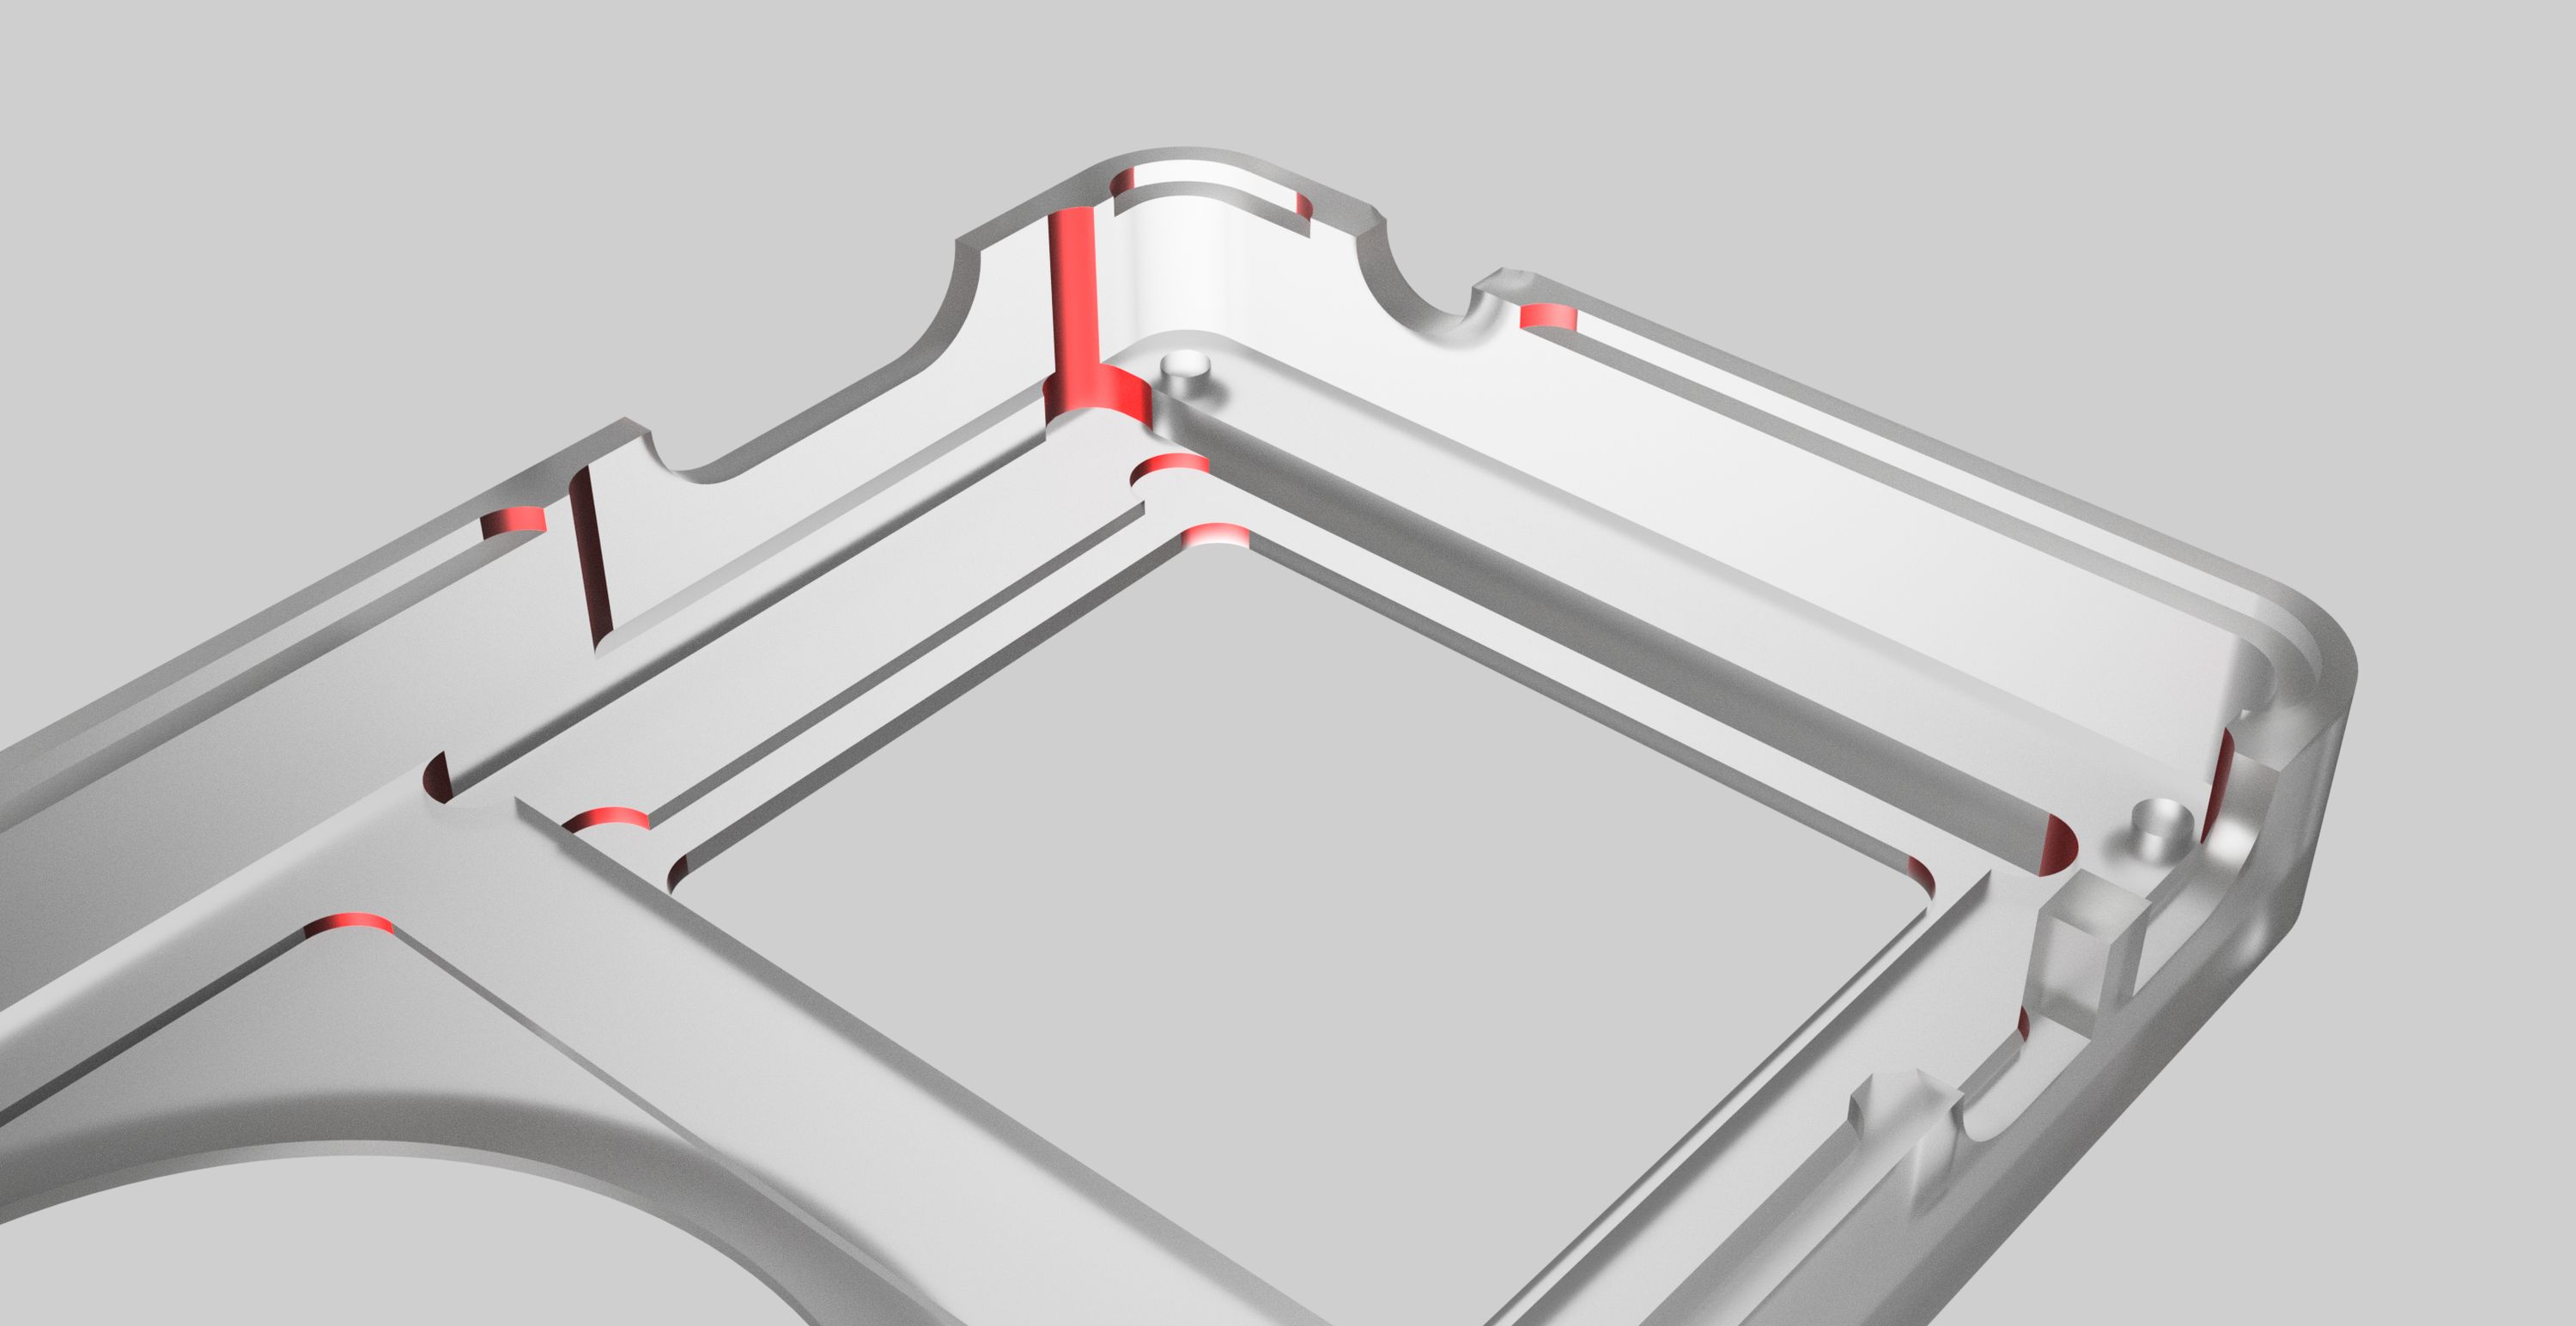
Tangara’s initial case design required six-sided machining, which made manufacturing complex and somewhat inaccessible to hobby machinists.
We’ve simplified it to two-sided machining by rethinking our button/switch designs and making slight alterations to the ports. The button cutouts can now be machined entirely top-down, eliminating the need for side milling operations.
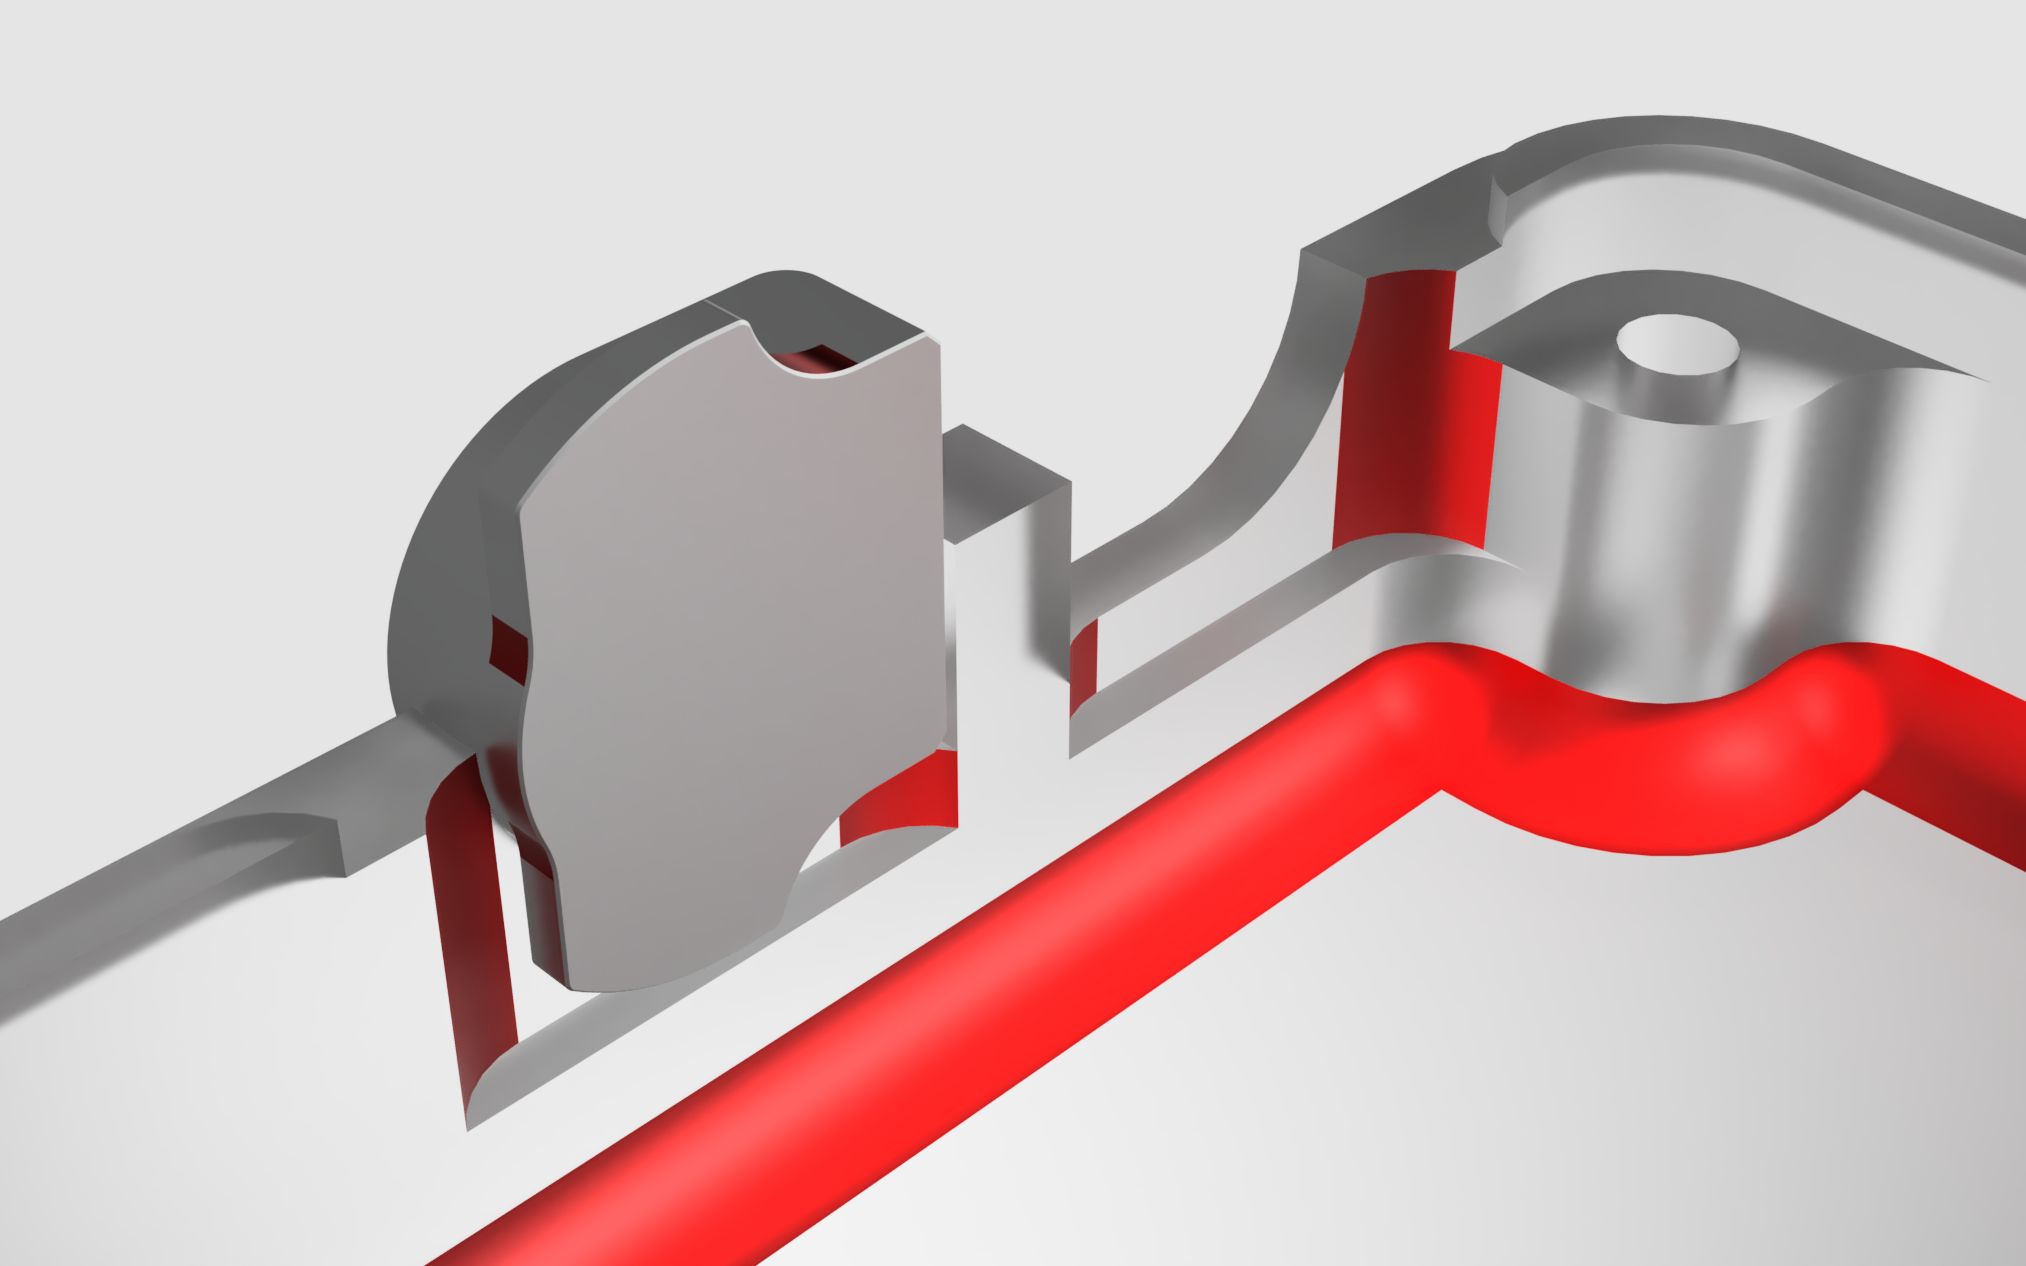
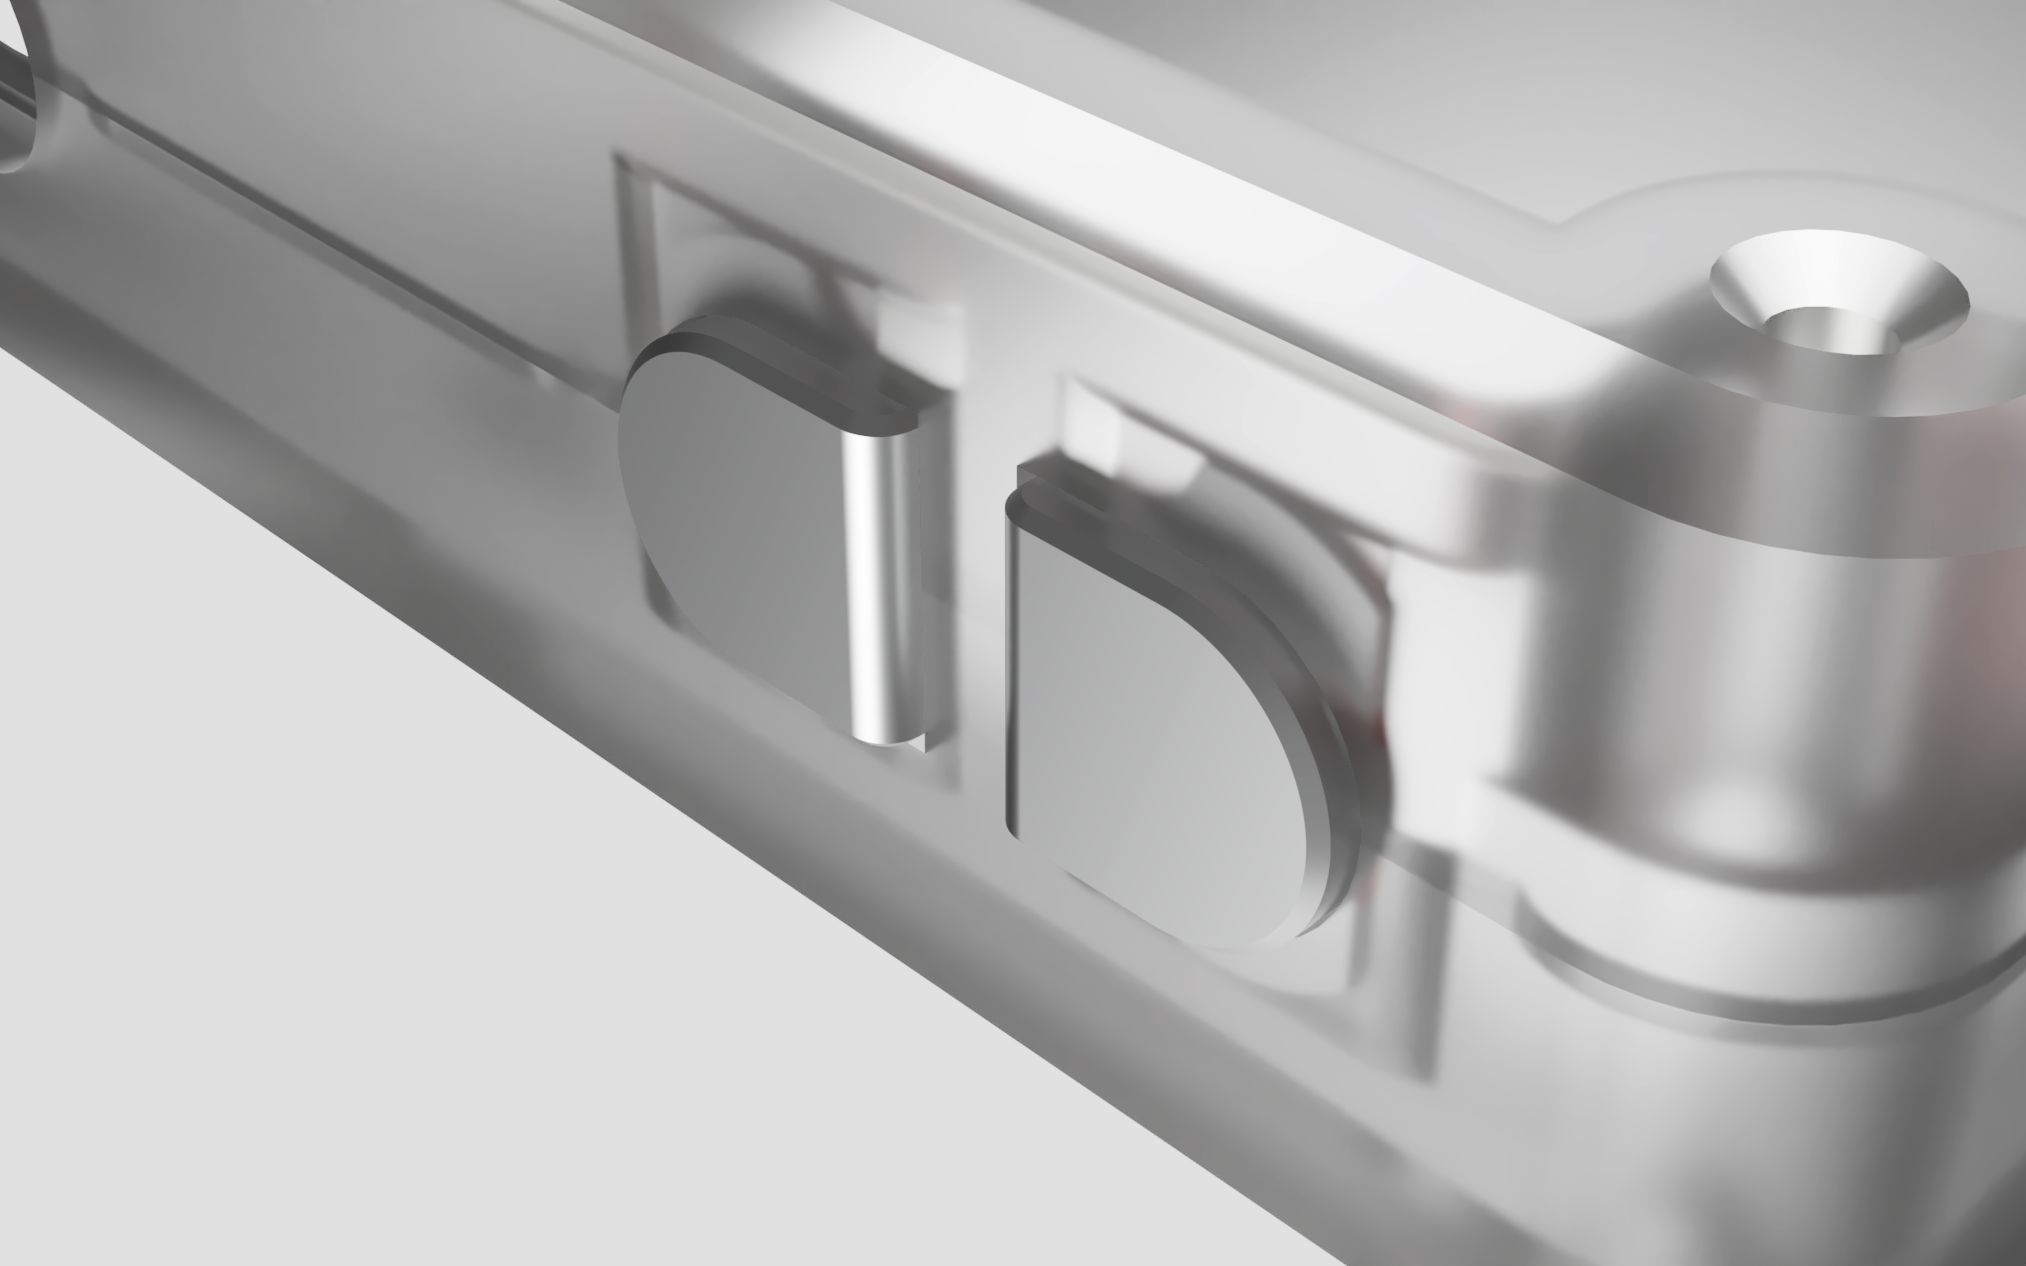
A render of the buttons when assembled (right) and of the inside of the case showing cutouts and an aluminum button (left)
A few people have said they’d like to machine cases from wood, aluminum, and even stone (okay, maybe that one is just me). With the changes we mentioned and parametric adjustment in the FreeCAD and Fusion models, all of these should be possible!
The new case design will be available as STEP, STL, FreeCAD, and Fusion 360 (with timeline) files, along with a few clearance-tuned variants for FDM, resin, and possibly SLS 3D printing.
Themes
Another way to customize Tangara is by using themes. Tangara themes are written in Lua and are used by the firmware to determine the look of the UI. We’ll be making a few themes to include with the firmware, plus we plan to make it easy to add custom themes using the SD card storage. We’re really excited to see what people come up with.
The way themes work is inspired by CSS stylesheets; it maps style names and selectors to styles that can be applied to any UI element. This makes it easy to write and/or edit a theme that’s applied consistently through the UI, whilst also being extensible enough to support more complicated styles. Our UI is written using LVGL, so we can use themes to change the appearance of in-built LVGL widgets (i.e., buttons, dropdowns, sliders) consistently, as well as define custom styles for particular aspects of the UI.
As an example, here is a simple theme to change the color of the text to blue:
local simple_theme = {
  root = {
    {lvgl.PART.MAIN, lvgl.Style {
      text_color = "#0000FF",
    }},
  },
}
The root class refers to the current screen’s root, you can think of this as being like the body of a page in HTML/CSS. Here we define a style that will be applied to the main part of the root object. Some objects have multiple parts that can be styled independently of each other, but every object will have at least a main part.
The lvgl.Style type can contain a number of properties that describe the appearance of UI elements. A full list of properties avalable can be found in the LVGL docs. Properties are inherited, so setting the text_color property on the root object is enough to change the color for all text.
As a more complex example, let’s try changing the text color of just the selected menu item to white and its background to black for a sort of "high contrast" look.
To do this, we can combine the lvgl.PART with an lvgl.STATE, to specify that the style should only be applied when the object is focused. The LVGL class used by the menu items is a listbutton, so we’ll add styles for that class to the theme.
local theme_example2 = {
  root = {
    {lvgl.PART.MAIN, lvgl.Style {
      text_color = "#0000FF",
    }},
  },
  listbutton = {
    {lvgl.PART.MAIN | lvgl.STATE.DEFAULT, lvgl.Style {
      text_color = "#000000",
    }},
    {lvgl.PART.MAIN | lvgl.STATE.FOCUSED, lvgl.Style {
      text_color = "#FFFFFF",
      bg_color = "#000000",
      bg_opa = lvgl.OPA(100),
    }},
  }
}
And the result:
You can see that even though the root object specifies the text color to still be blue, it’s overridden by the nearest parent object, in this case the listbutton. For this class, we give it two styles, one to use for the default state and another to use when the object is focused.
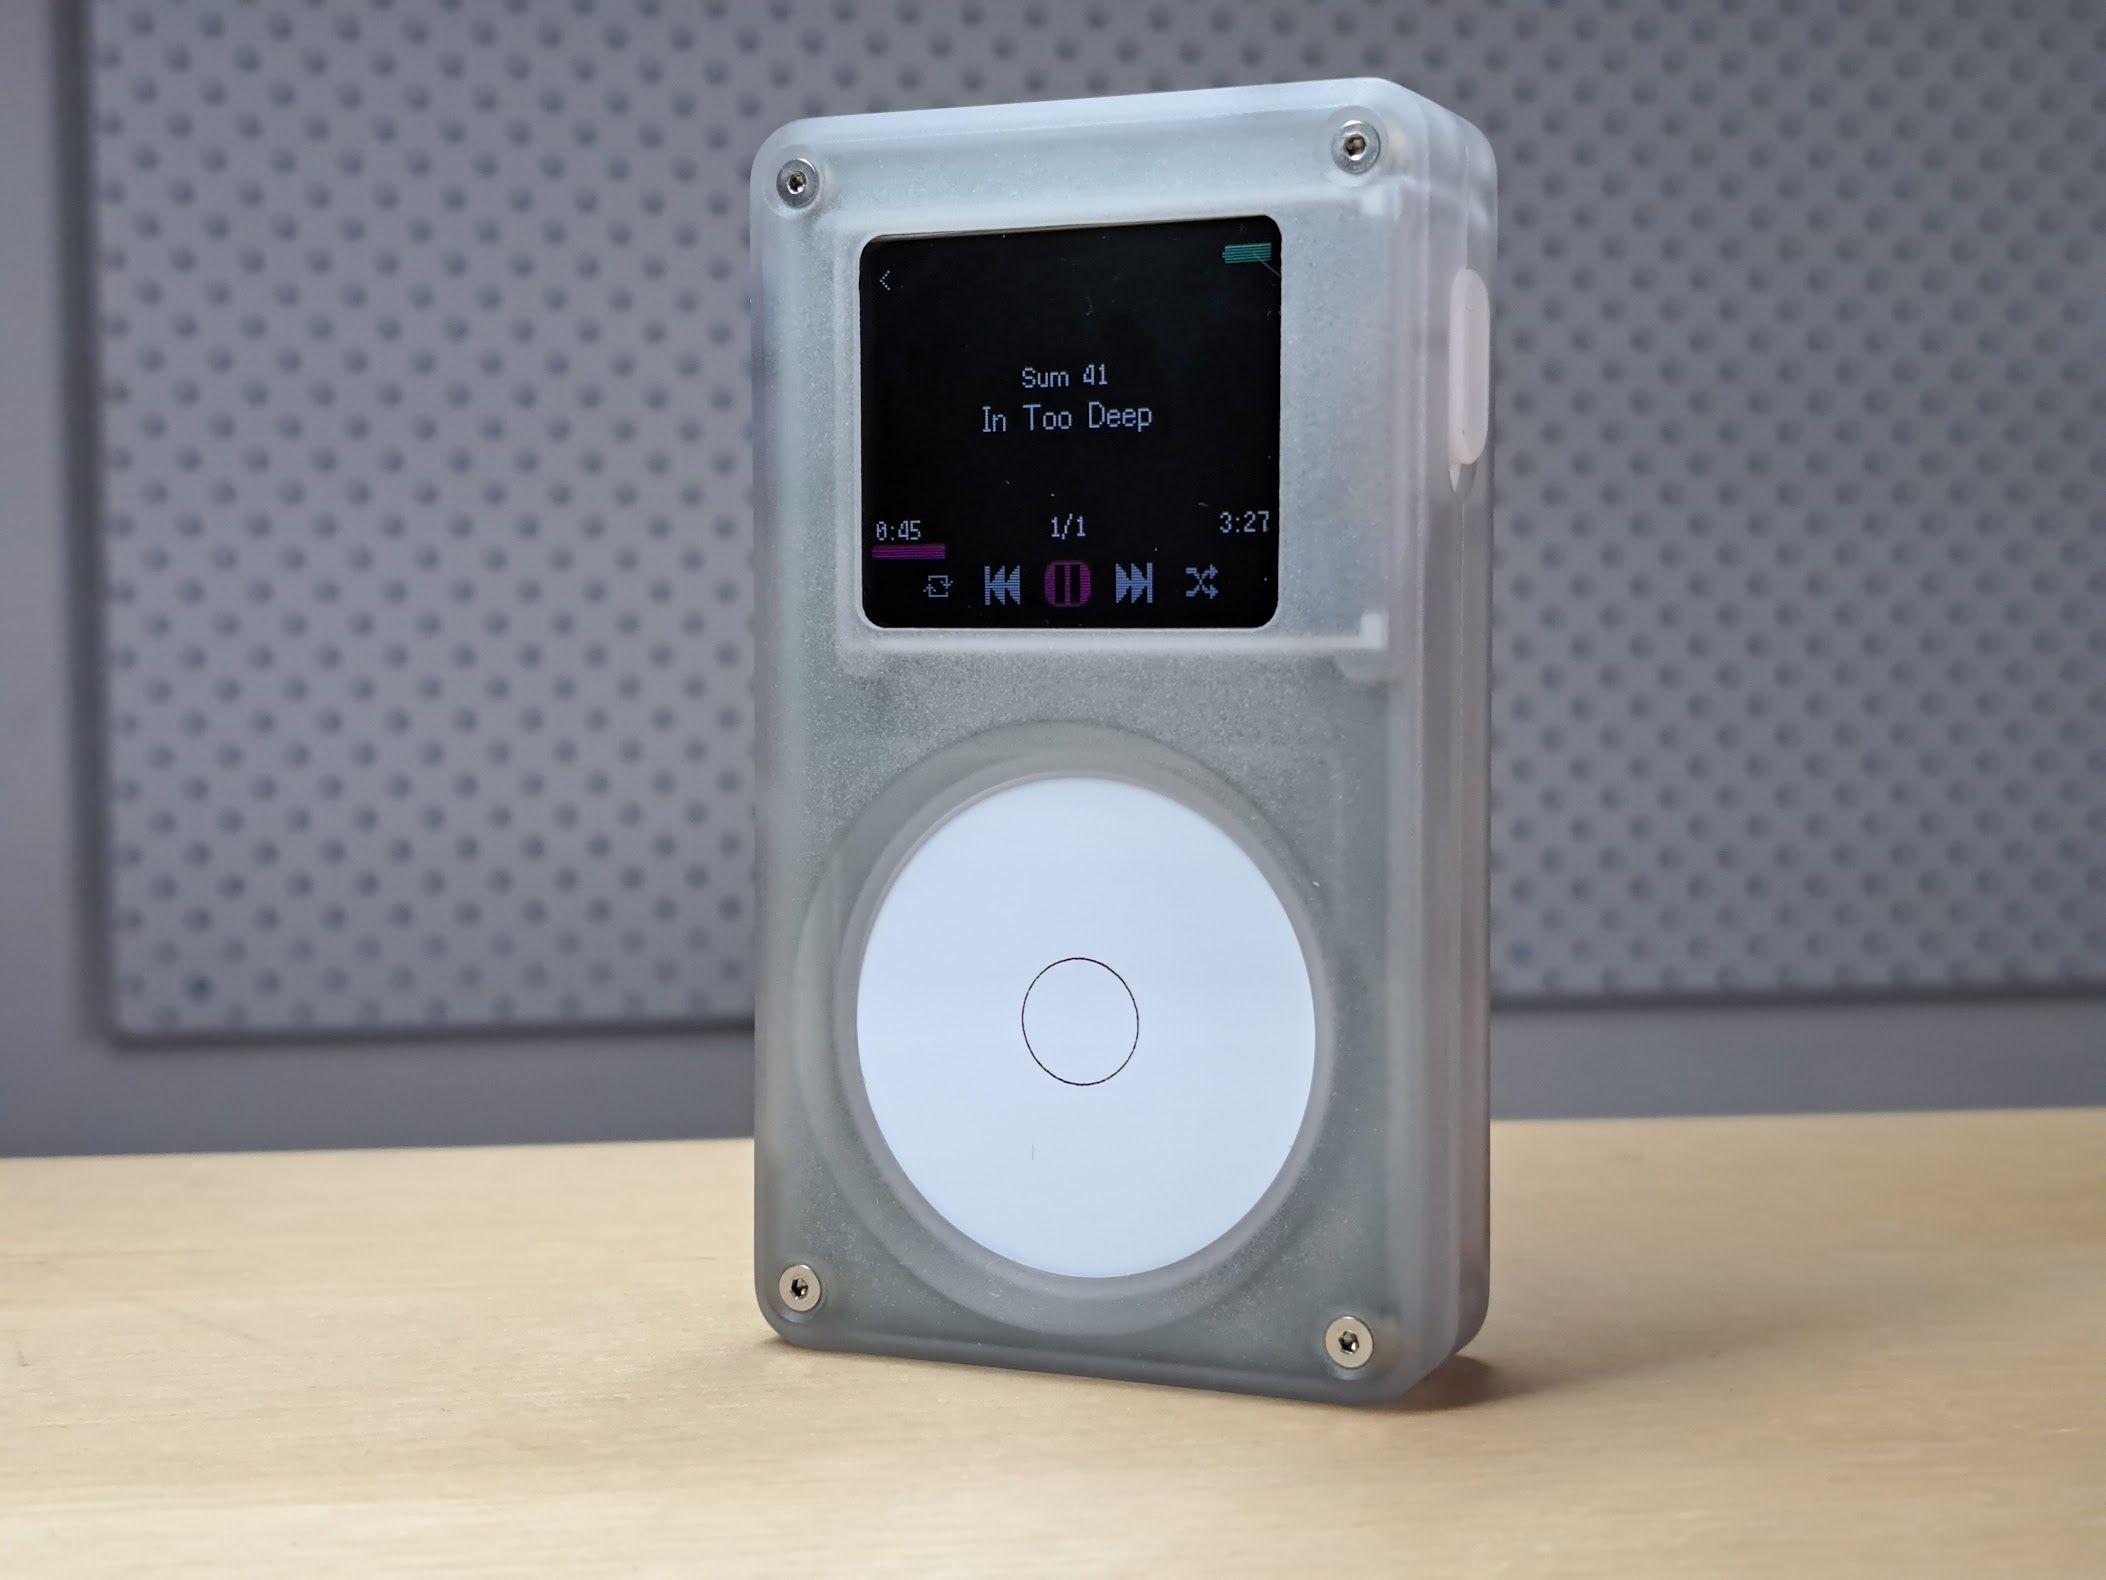
Finally, here’s a photo of my Tangara with a dark theme I’ve been working on:
That’s all from us this week! Happy Hacking!