Project update 6 of 8
RFID and GGTag
by Georgi GerganovGreetings, everyone!
In this week’s update, we will explain how GGtag supports RFID emulation and how to clone RFID cards.
RFID support
GGtag uses an ATtiny85 microcontroller and the avrfid firmware to emulate 125kHz RFID cards. The firmware has a hardcoded ID which is transmitted when GGtag approaches an RFID reader. You can change the ID by using the RFID command in the web interface. When a new ID is set, GGtag will generate avrfid firmware with the new ID and program the ATtiny85 with it. Once the ATtiny85 is programmed, you don’t need to keep GGtag powered on to use it as an RFID card. The ATtiny85 will be powered by the RFID reader and will transmit the ID when you approach a card reader.
GGtag can emulate both EM4100 and HID prox cards. Read below to learn how to clone them.
Cloning EM4100 cards
The EM4100 cards contain a 40-bit ID — 8-bit manufacturer ID and 32-bit unique ID. In order to clone an EM4100 card, you need to read the 40-bit ID and write it to GGtag. Here I am using Flipper Zero to read an EM4100 tag used for access control:
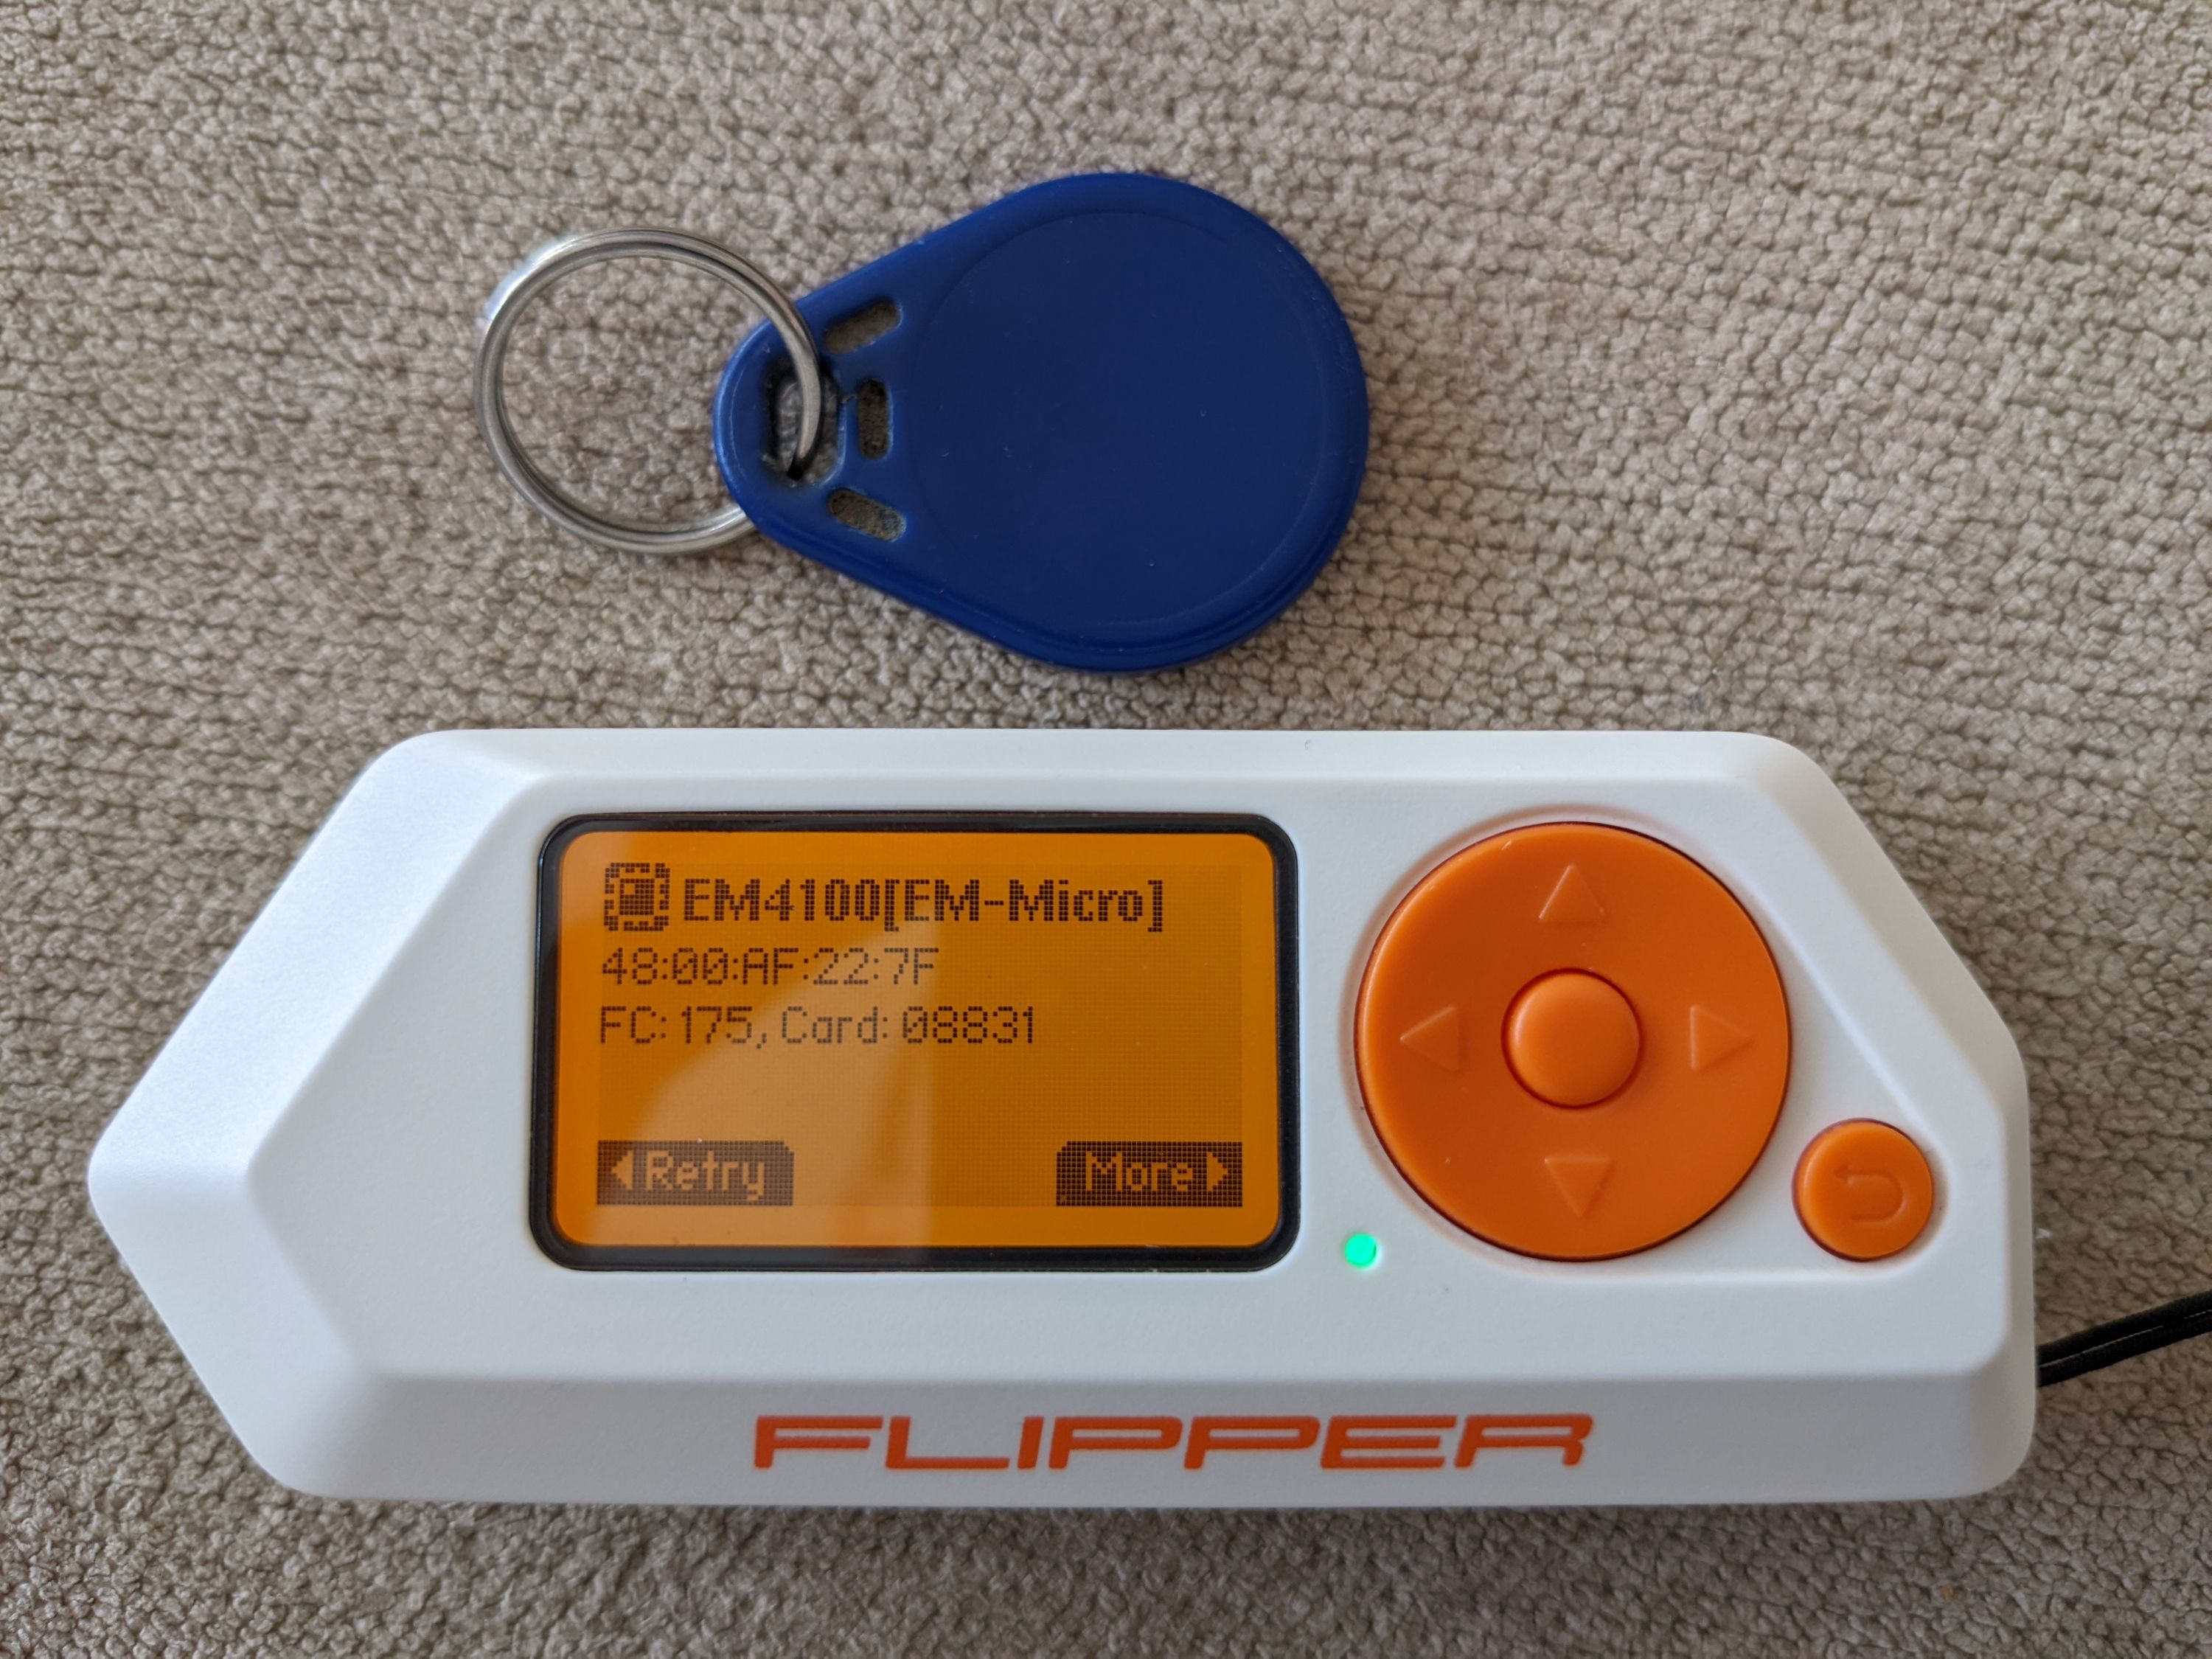
The manufacturer ID is 0x48 and the unique ID is 0xAF227F. We can program GGtag to use these credentials with the RFID command with the following parameters:
em,48,AF227F
The first parameter is em for EM4100, the second parameter is the manufacturer ID in hex, and the third parameter is the unique ID in hex. I have put together a demo tag with this ID. After programming GGtag with these parameters, we can verify it is identical to the original tag:
Cloning HID prox cards
The HID prox cards contain a 45-bit ID. The interpretation of these bits is not very important for us, we just need to read them somehow. Here I am using Flipper Zero to read an HID prox card used for access control:
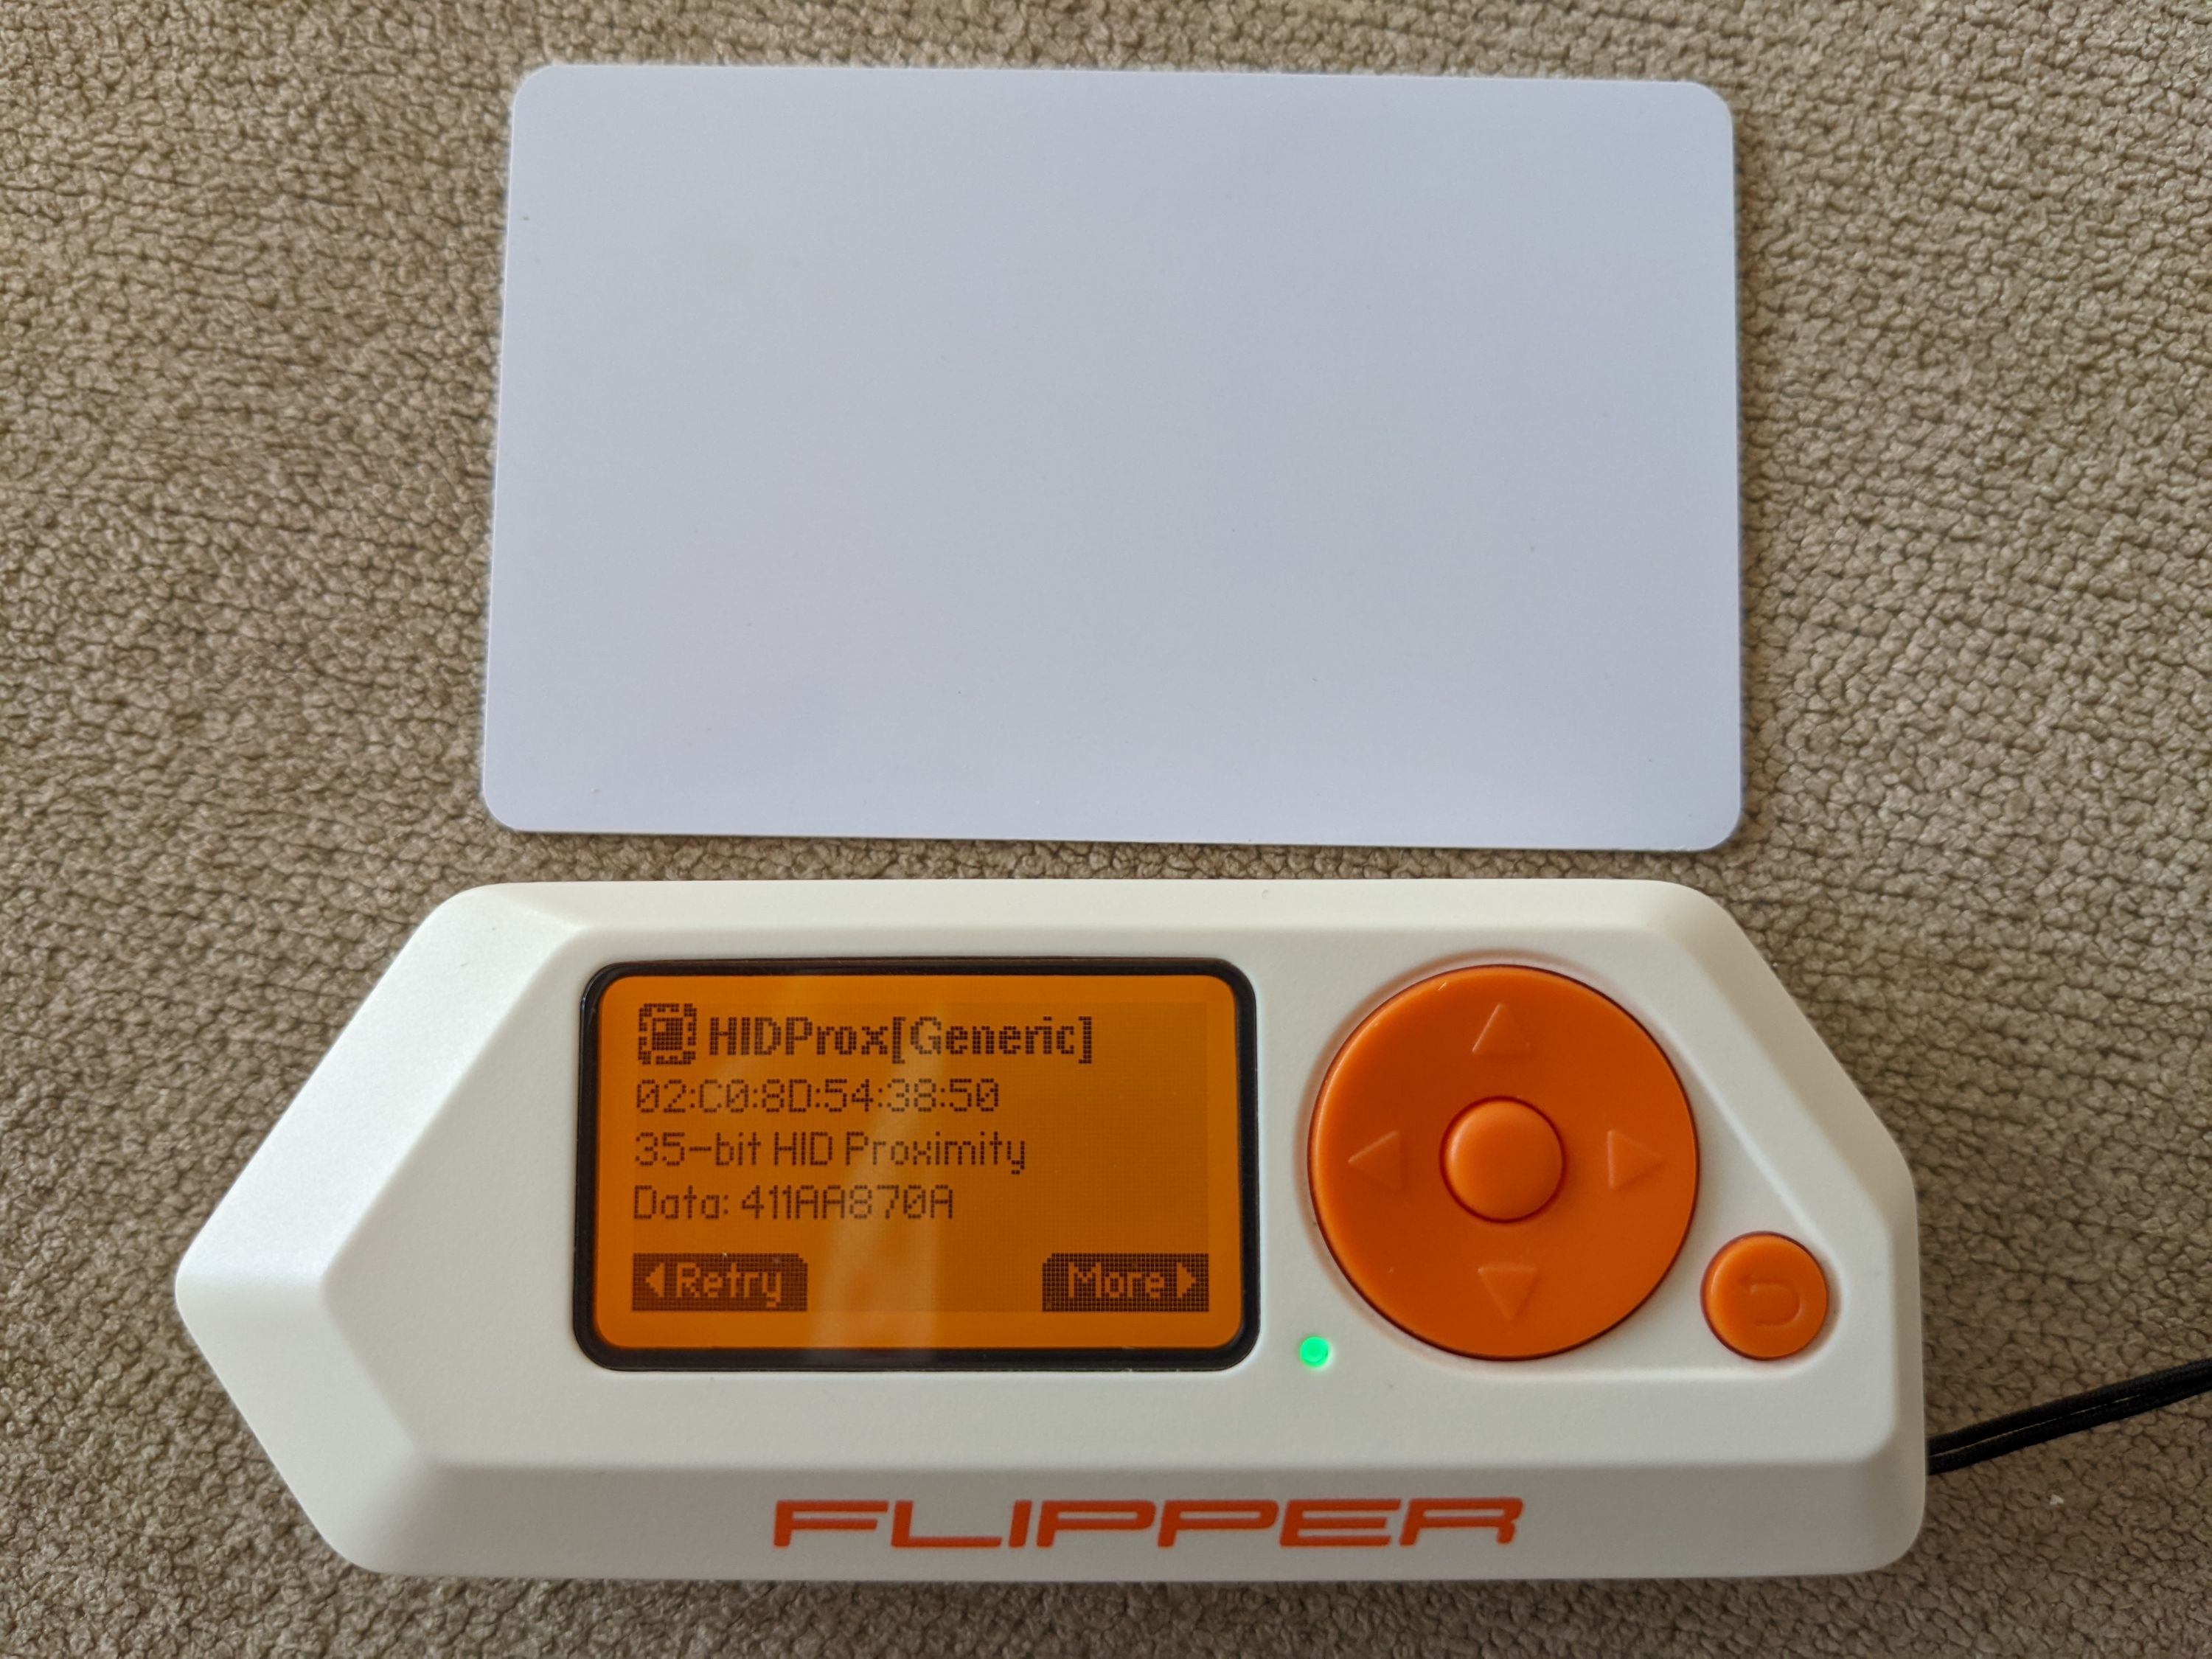
The ID is 0x2C08D54385 (ignore the last hex digit shown by Flipper). Again, we can program GGtag to use these credentials with the RFID command:
hid,2c,8d54385
The first parameter is hid for HID prox, the second parameter is the first 13 bits of the ID in hex, and the third parameter is the last 32 bits of the ID in hex. I have put together a demo tag with this ID. After programming GGtag with these parameters, we can verify it is identical to the original card:
Caveats
GGtag doesn’t behave exactly like an RFID card. Sometimes you may need to hold it at 1cm distance from the reader. Sometimes you may need to move it around a bit. It really depends on the RFID reader, so you may need to experiment some.
Should you have any questions, please feel free to reach out to us using the "Ask a technical question" link on our campaign page or participate in our GitHub discussions! And, if you haven’t claimed your own GGtag yet, there’s still time while our campaign is live!
Until next time!
- GGtag team