Project update 5 of 8
Creating Badges from GitHub Users
by Radoslav GerganovGreetings, everyone!
In this week’s update, we will show you how to create a badge for a GitHub user, using their public profile information, and then program it to display on GGtag.
Getting started
We’ve written a Python script called badge.py which does the entire job for you. It resides in the examples folder in our GitHub project. Clone it as follows:
$ git clone https://github.com/rgerganov/ggtag
$ cd ggtag/examples
After cloning the repo, create a virtual environment and install the ggtag module like this:
$ python3 -m venv venv
$ source venv/bin/activate
$ pip install ggtag
Before running the script, you may want to create a personal access token on GitHub. This token is used for authentication to GitHub and allows API access for fetching user information. Once you create the token, you should export it as an environment variable like this:
$ export GITHUB_TOKEN=<your-github-token>
If you don’t specify a token, the script will try to fetch and parse the user’s public profile page, which is not very reliable and may break in the future.
Examples
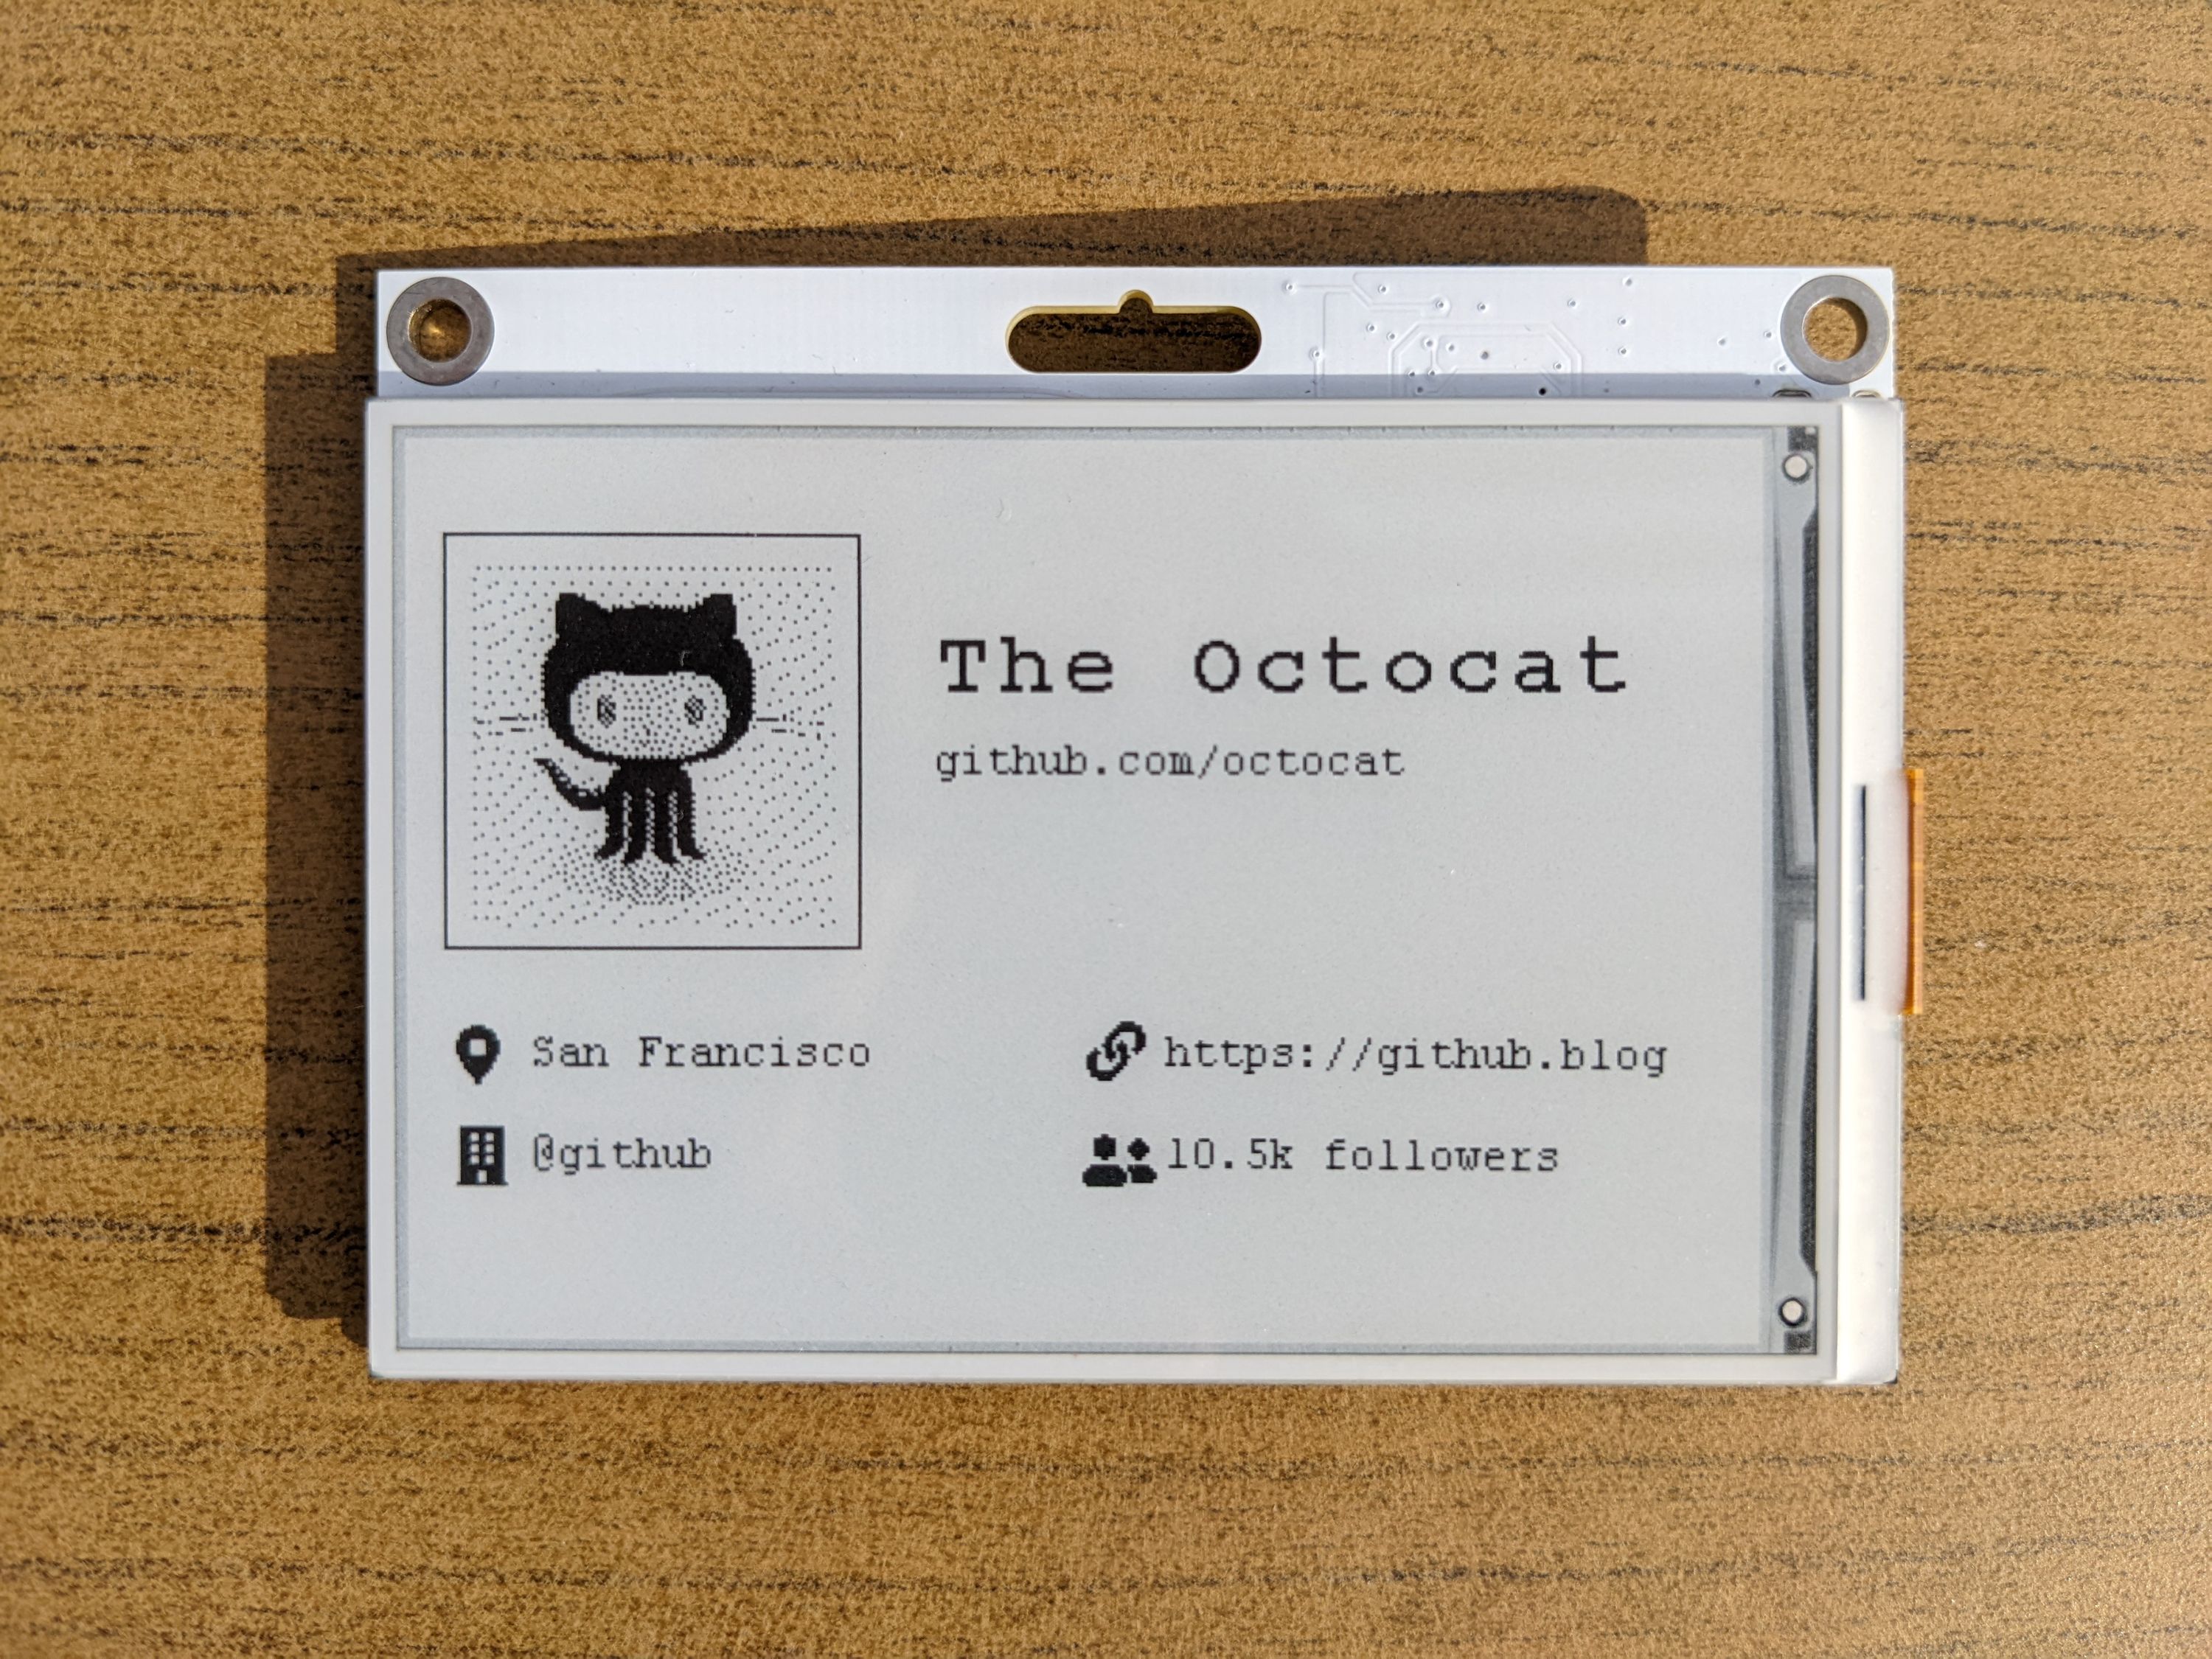
You can now run the script with the GitHub username as an argument:
$ ./badge.py octocat
The script will open a browser window and show you the badge in the GGtag web interface. You can then load it onto your GGtag device.
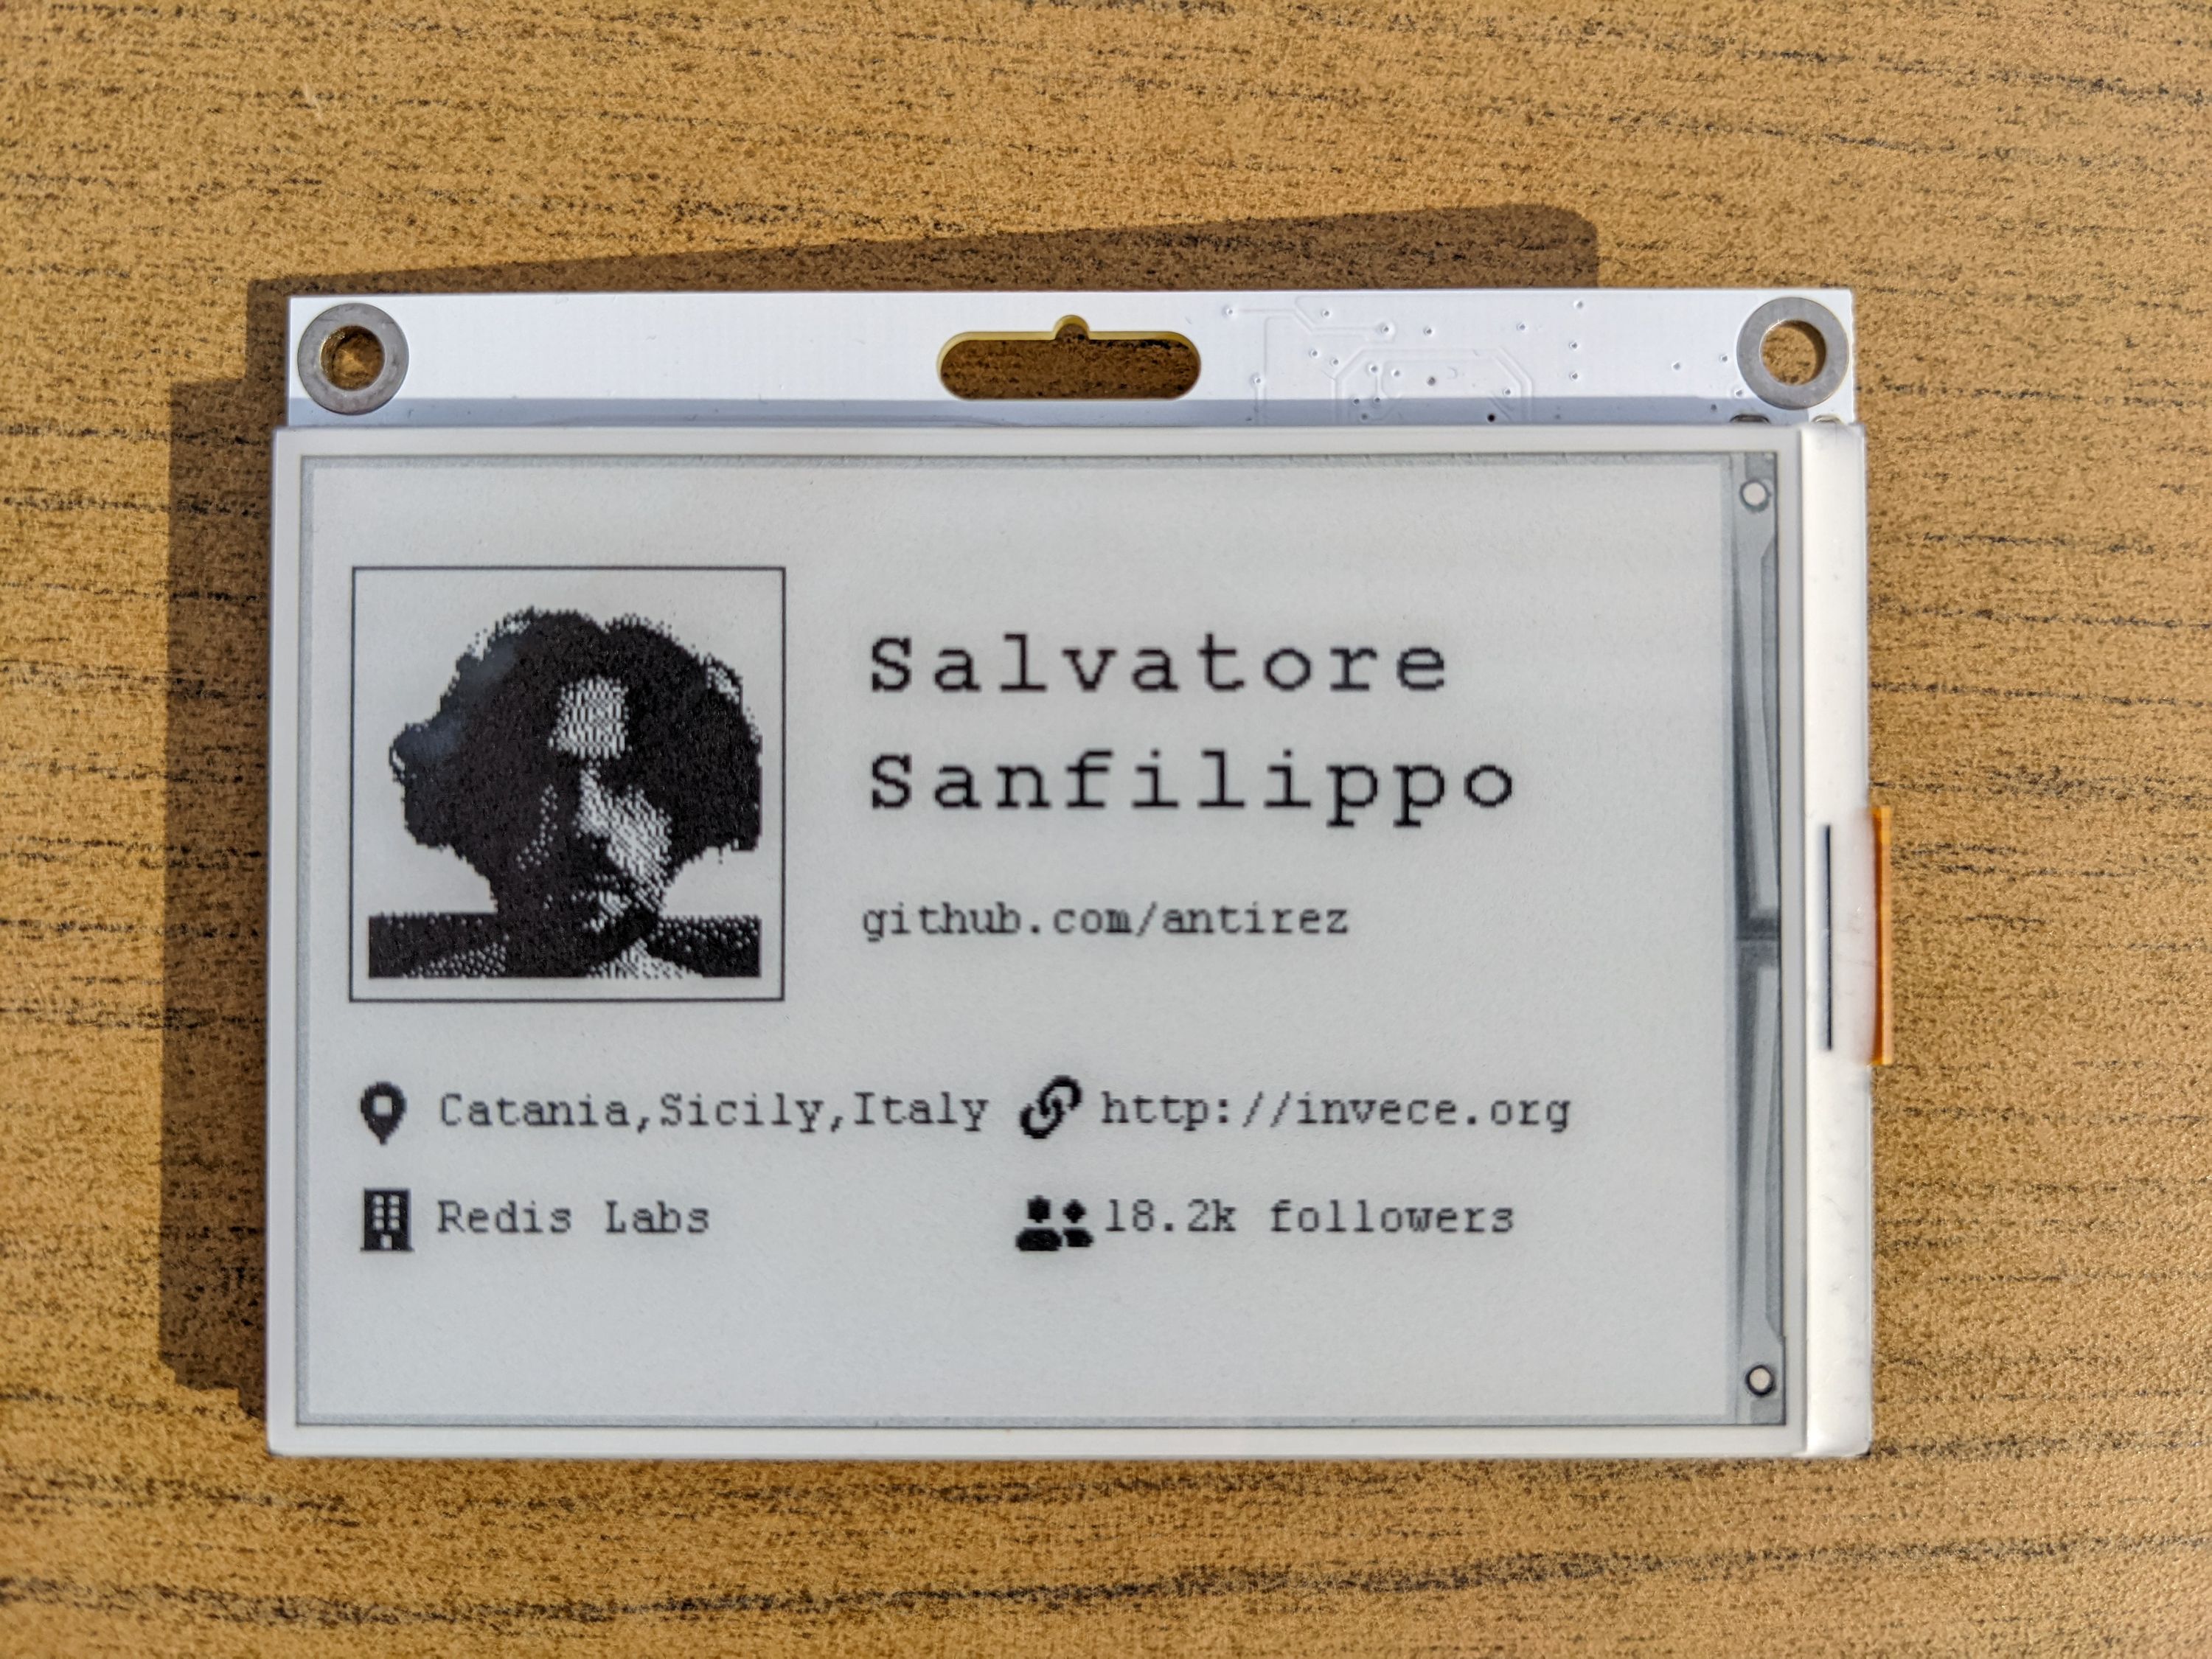
Here is another example badge:
$ ./badge.py antirez
Should you have any questions, please feel free to reach out to us using the "Ask a technical question" link on our campaign page or participate in our GitHub discussions! And, if you haven’t claimed your own GGtag yet, there’s still time while our campaign is live!
Until next time!
- GGtag team