In this update, we want to demonstrate how easy it is to get common devices up and running on Giant Board. By using a U-Boot device tree overlay that enables common interfaces like I²C and SPI, you can easily leverage CircuitPython to communicate with a great number of devices. In this brief overview, we will pull data from an Adafruit BMP280 sensor and render it on an Adafruit OLED FeatherWing display.
Bringing up I²C
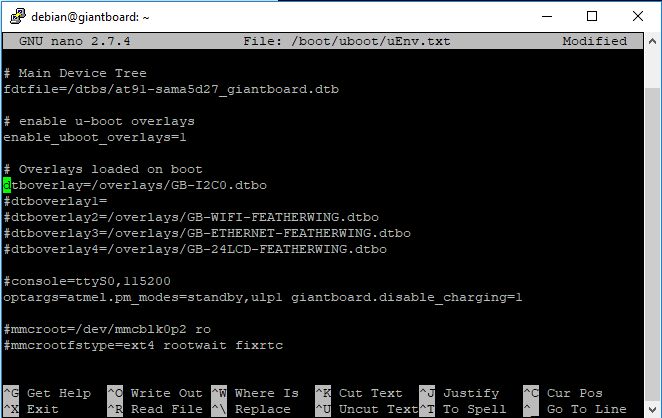
The display is a 128x32 OLED screen and the BMP280 is a temperature and barometric pressure sensor. We plan to use both devices via I²C, which is easy to setup. All Giant Board images come with most of the interfaces disabled, so we’ll need to enable I²C using one of the provided device tree overlays. You can do that simply by editing the text file located at /boot/uboot/uEnv.txt. You will want to:
- Uncomment the
enable_uboot_overlays=1line, - Uncomment one of the
#dtboverlay...lines, and - Append
/overlays/GB-I2C0.dtboto it.
When you’re done, it should look something like the image below.
Once you have made those edits, a simple reboot will bring up the I²C interface. To verify this, you can type ls /dev/i2c-*. You should see two I²C buses: I2C-0 and I2C-1. If you see both buses, everything should be set for the CircuitPython steps below.
Talking to Your Hardware
We went over to Adafruit’s learning guides to get some basic sample code. We recommend testing each of these examples individually, to verify that both devices are working, before you combine them into a single project.
The basic code pulled from Adafruit’s BMP280 CircuitPython examples should produce the following output:
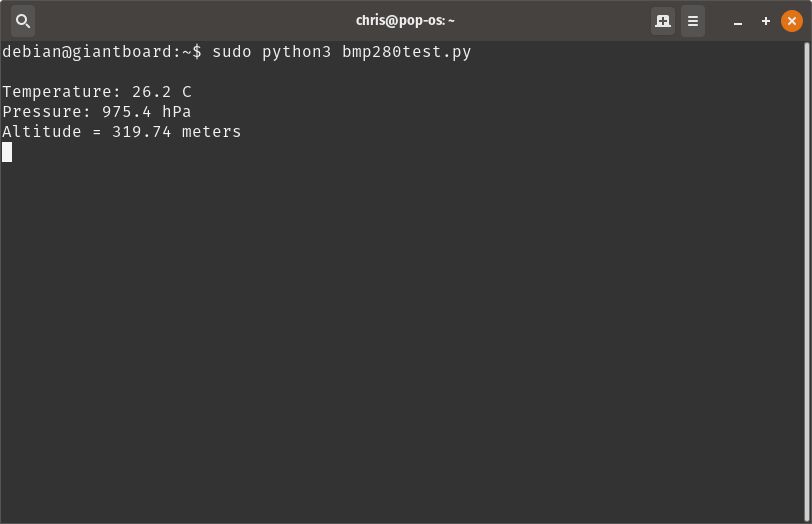
That code should be nearly identical to the following:
from time import sleep as wait

import board
# import digitalio # For use with SPI
import busio

import adafruit_bmp280

# Create library object using our Bus I2C port
i2c = busio.I2C(board.SCL, board.SDA)
bmp280 = adafruit_bmp280.Adafruit_BMP280_I2C(i2c)

# OR create library object using our Bus SPI port
#spi = busio.SPI(board.SCK, board.MOSI, board.MISO)
#bmp_cs = digitalio.DigitalInOut(board.D10)
#bmp280 = adafruit_bmp280.Adafruit_BMP280_SPI(spi, bmp_cs)

# change this to match the location's pressure (hPa) at sea level
bmp280.sea_level_pressure = 1013.25

while True:
    print("\nTemperature: %0.1f C" % bmp280.temperature)
    print("Pressure: %0.1f hPa" % bmp280.pressure)
    print("Altitude = %0.2f meters" % bmp280.altitude)
    wait(2)
The next step is to test the OLED FeatherWing to make sure that it, too, is working as intended. We used the sample code here, which should display three dots on the screen, as shown below:
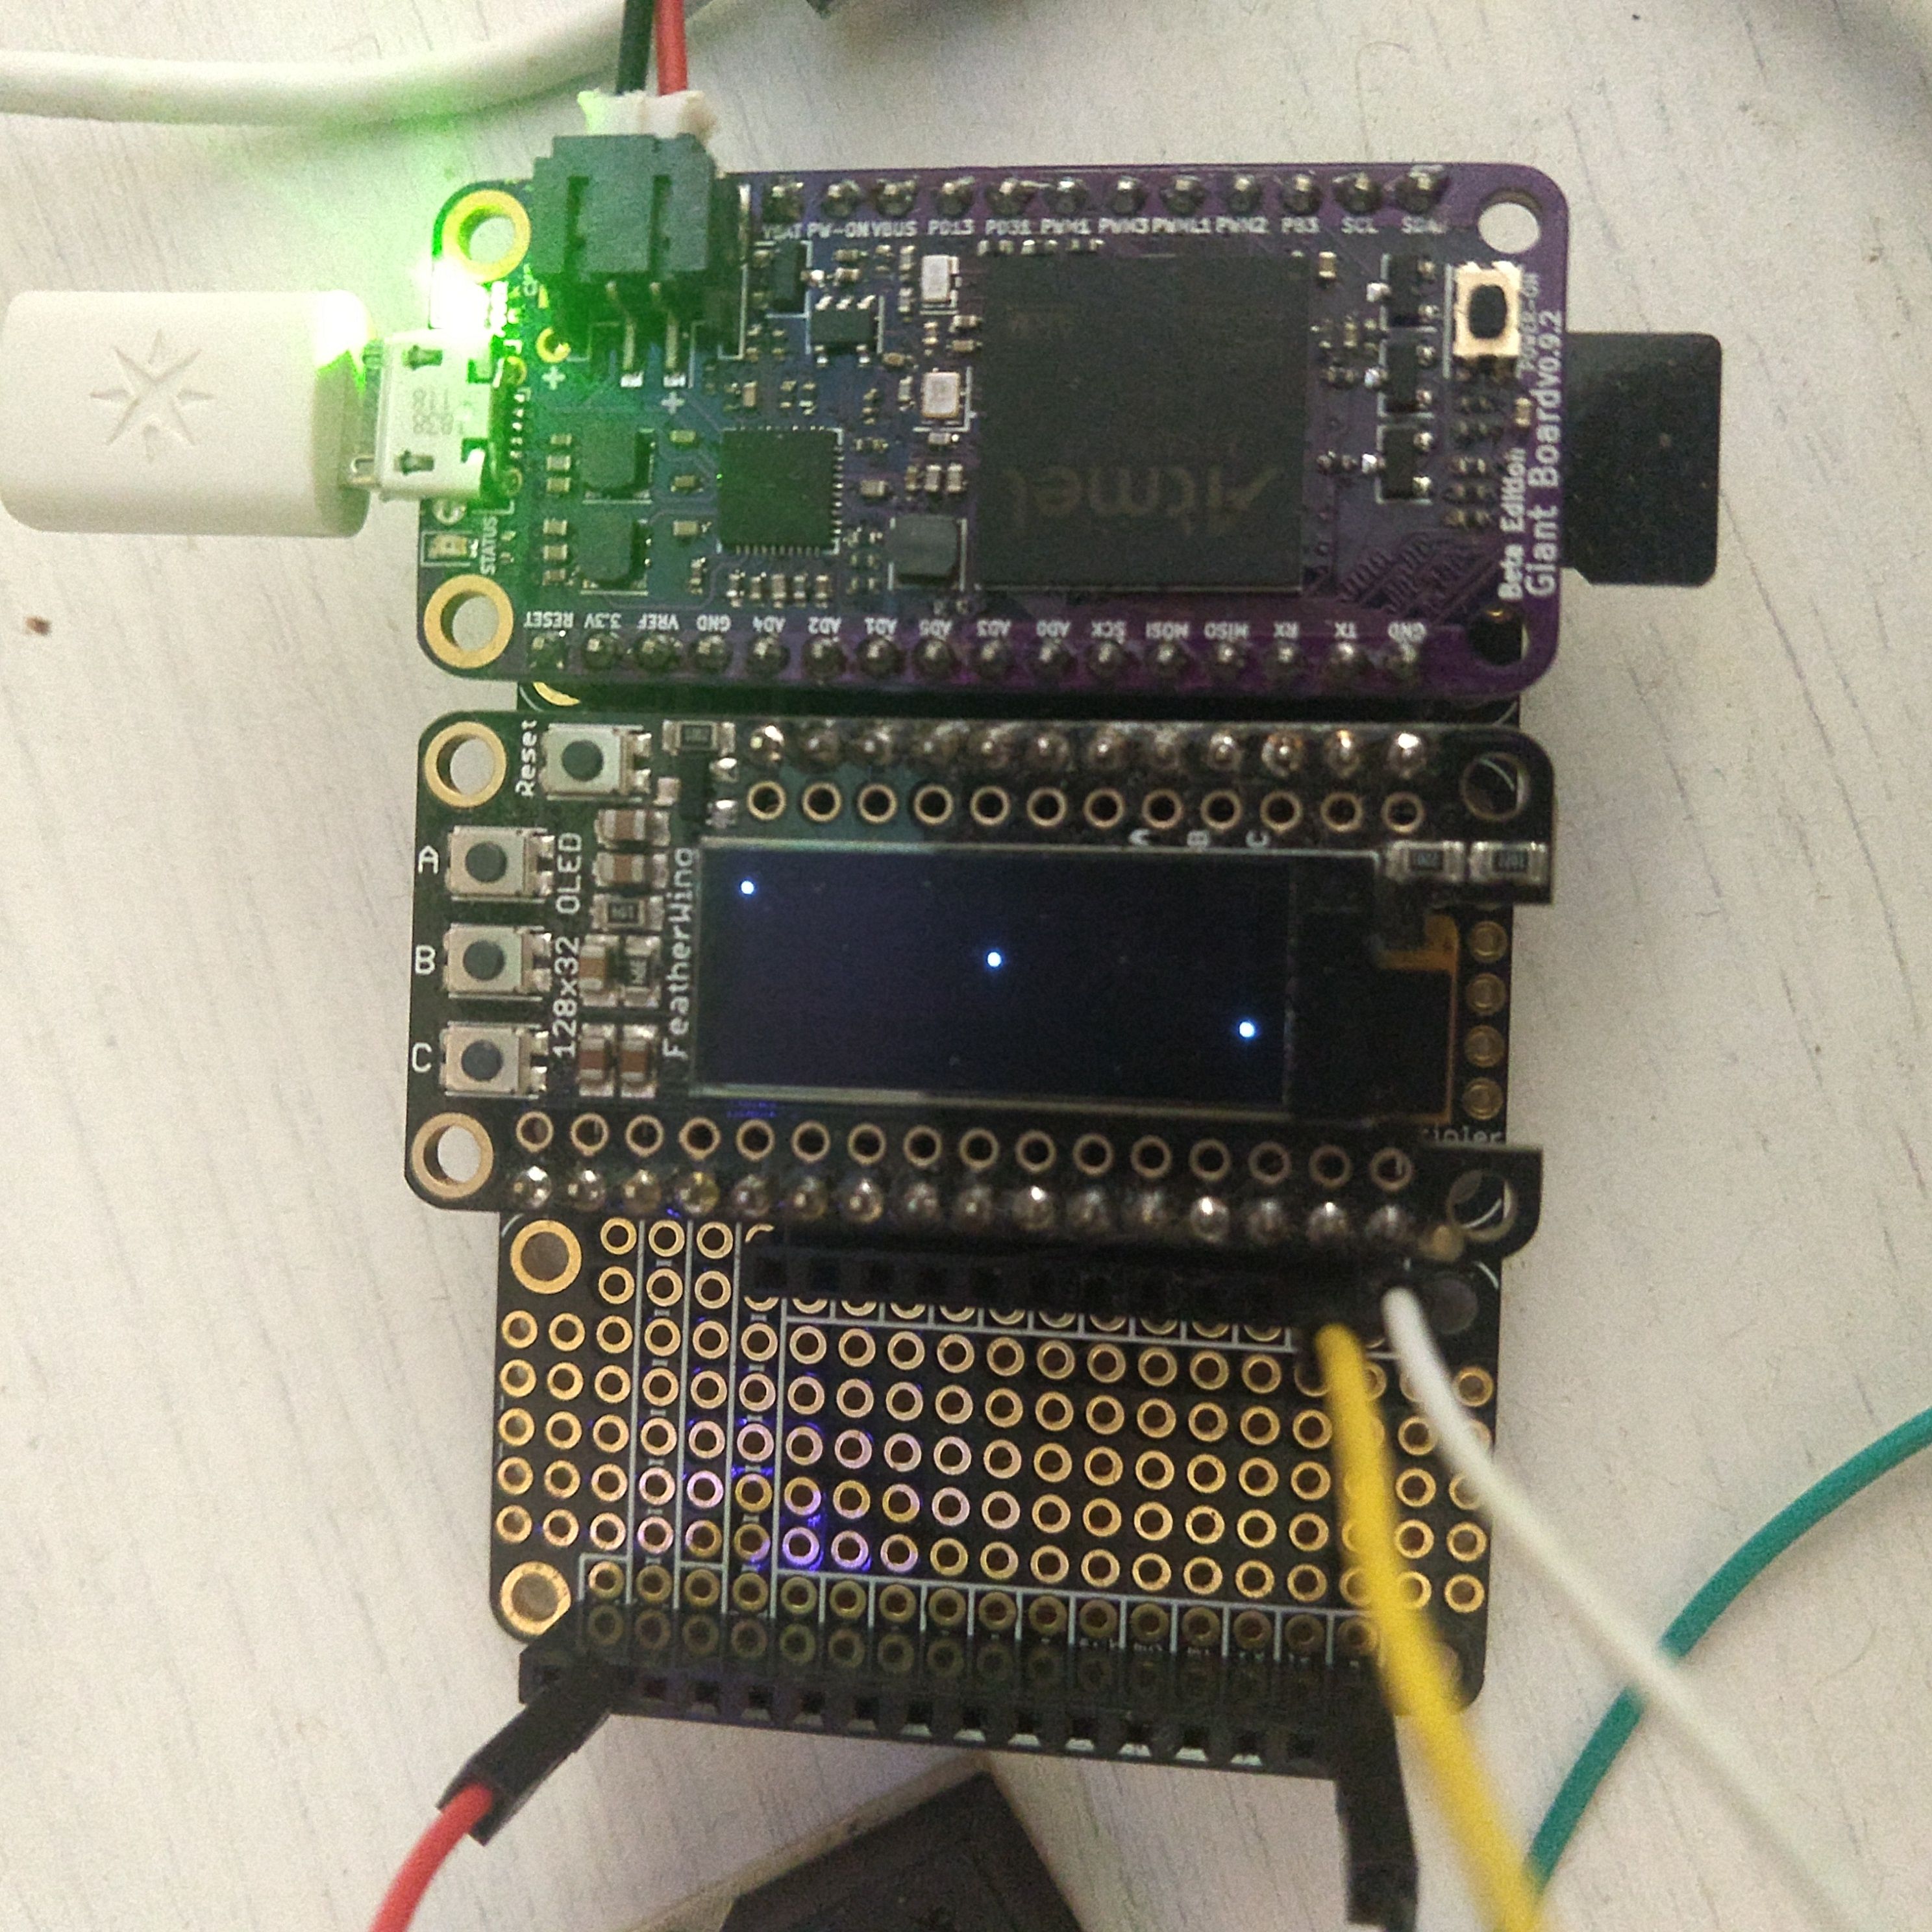
The code itself looks like the following:
# Basic example of clearing and drawing pixels on a SSD1306 OLED display.
# This example and library is meant to work with Adafruit CircuitPython API.
# Author: Tony DiCola
# License: Public Domain

# Import all board pins.
from board import SCL, SDA
import busio

# Import the SSD1306 module.
import adafruit_ssd1306

# Create the I2C interface.
i2c = busio.I2C(SCL, SDA)

# Create the SSD1306 OLED class.
# The first two parameters are the pixel width and pixel height.  Change these
# to the right size for your display!
display = adafruit_ssd1306.SSD1306_I2C(128, 32, i2c)
# Alternatively you can change the I2C address of the device with an addr parameter:
#display = adafruit_ssd1306.SSD1306_I2C(128, 32, i2c, addr=0x31)

# Clear the display.  Always call show after changing pixels to make the display
# update visible!
display.fill(0)
display.show()

# Set a pixel in the origin 0,0 position.
display.pixel(0, 0, 1)
# Set a pixel in the middle 64, 16 position.
display.pixel(64, 16, 1)
# Set a pixel in the opposite 127, 31 position.
display.pixel(127, 31, 1)
display.show()
Once you have confirmed that both devices are working, you can use them together to display sensor data – pulled from the BMP280 – on the OLED FeatherWing. To make this easier, we found another example from Adafruit that shows how to display text on the OLED FeatherWing. Using that code as a guide, we ended up with the Python program at the very end of this update. That program displays nicely formatted temperature, pressure, and altitude information on the FeatherWing’s OLED screen:
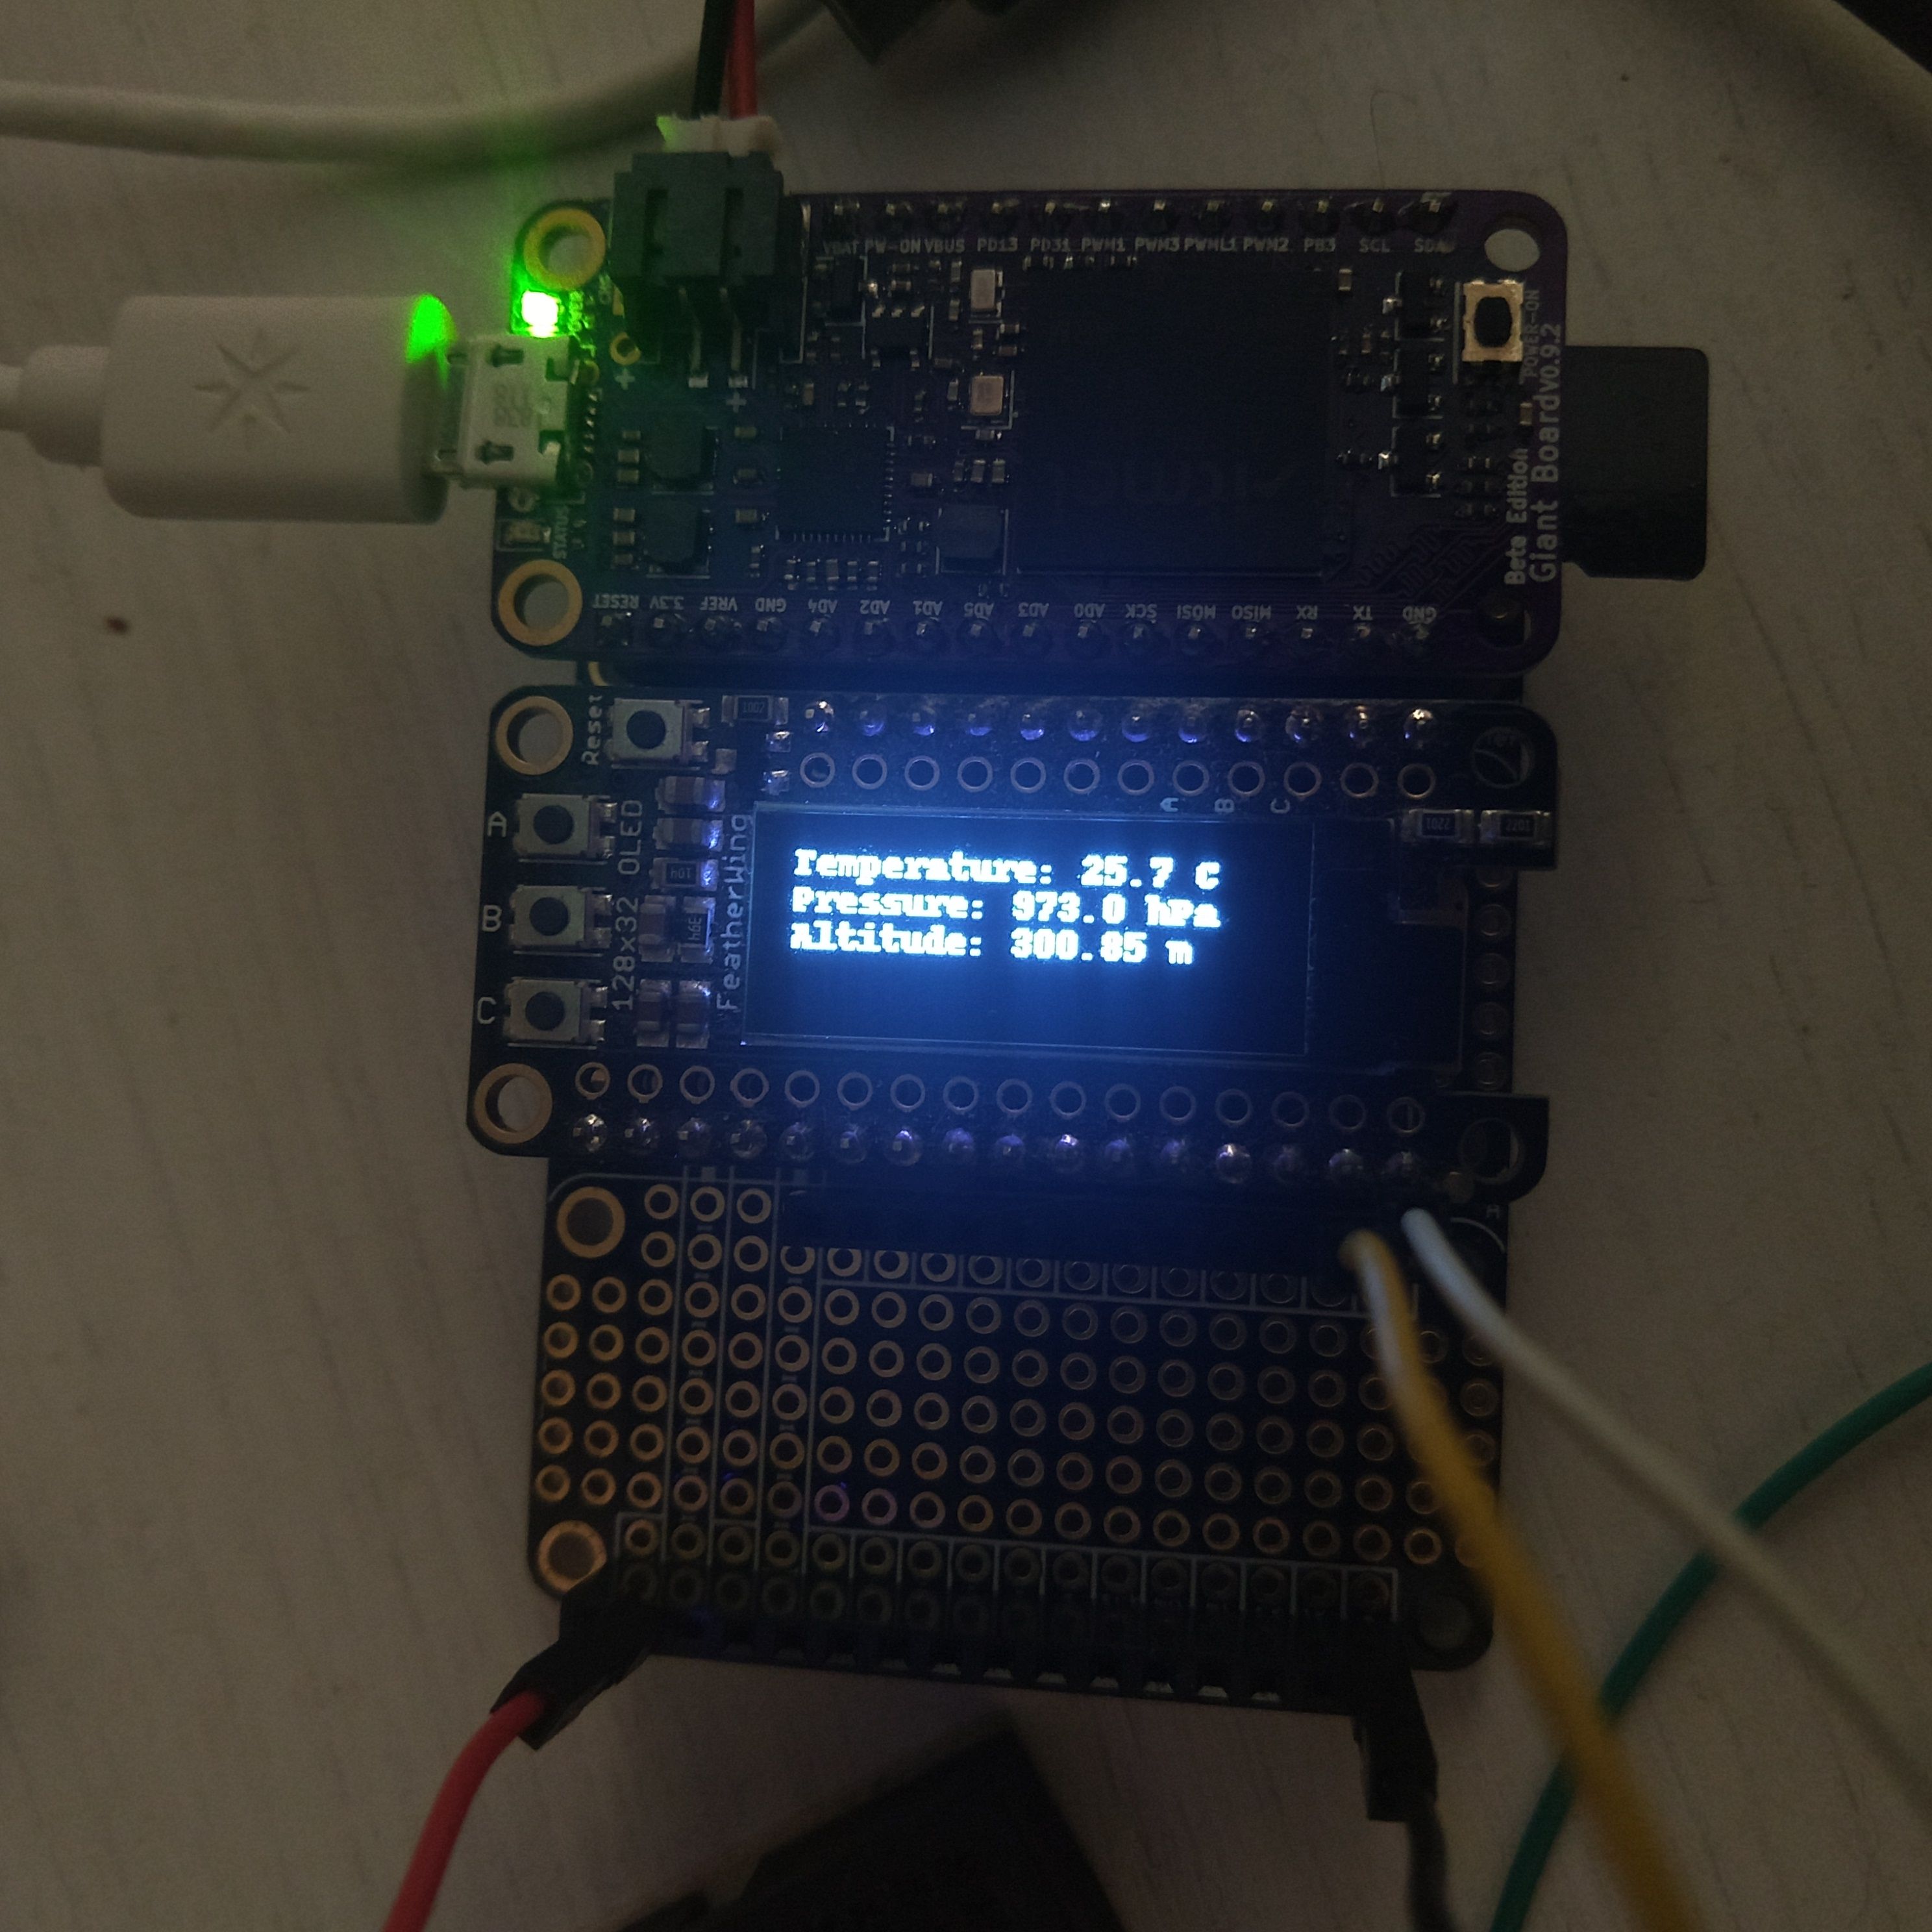
From here you can customize the program to include the time, CPU usage, RAM usage, or anything else you’d like to display. CircuitPython simplifies the use of external hardware so that you can stay focused on your actual project. When prototyping, this allows you to make a great deal of progress in a short period of time.
The Campaign!
Thanks to all of our backers and supporters! It has been another great week for the campaign, and we are nearing 80% of our funding goal. With just over a week left, we are excited to see how far we have come. It has been super amazing to see how many people have offered up their support and backed the campaign. We look forward to reaching our funding goal, and we hope everyone else is as excited as we are!
The Code
from time import sleep as wait
import subprocess
from PIL import Image, ImageDraw, ImageFont

# Import all board pins.
from board import SCL, SDA
import busio

# Import the SSD1306 module.
import adafruit_ssd1306

# Import the BMP280 module
import adafruit_bmp280


# Create the I2C interface.
i2c = busio.I2C(SCL, SDA)

# Create the SSD1306 OLED class.
# The first two parameters are the pixel width and pixel height.  Change these
# to the right size for your display!
display = adafruit_ssd1306.SSD1306_I2C(128, 32, i2c)
# Alternatively you can change the I2C address of the device with an addr parameter:
#display = adafruit_ssd1306.SSD1306_I2C(128, 32, i2c, addr=0x31)

# bmp280 class
bmp280 = adafruit_bmp280.Adafruit_BMP280_I2C(i2c)

# change this to match the location's pressure (hPa) at sea level
bmp280.sea_level_pressure = 1008.46

# Clear the display.  Always call show after changing pixels to make the display
# update visible!
display.fill(0)
display.show()

# Create blank image for drawing.
# Make sure to create image with mode '1' for 1-bit color.
width = display.width
height = display.height
image = Image.new('1', (width, height))

# Get drawing object to draw on image.
draw = ImageDraw.Draw(image)

# Draw a black filled box to clear the image.
draw.rectangle((0, 0, width, height), outline=0, fill=0)

# Draw some shapes.
# First define some constants to allow easy resizing of shapes.
padding = -2
top = padding
bottom = height-padding
# Move left to right keeping track of the current x position for drawing shapes.
x = 0

# Load default font.
font = ImageFont.load_default()

while True:
    draw.rectangle((0, 0, width, height), outline=0, fill=0)
    draw.text((x, top), "Temperature: %0.1f C" % bmp280.temperature, font=font, fill=255)
    draw.text((x, top+10), "Pressure: %0.1f hPa" % bmp280.pressure, font=font, fill=255)
    draw.text((x, top+20), "Altitude: %0.2f m" % bmp280.altitude, font=font, fill=255)

    # Display image.
    display.image(image)
    display.show()
    wait(2)