Project update 2 of 9
A Few of Our Tutorials
by Matthew GutierrezAs we mentioned in our launch announcement, we are striving to provide our future users with strong supporting material to showcase EASE’s capability, versatility, and usability for anything from hobbyist projects to automation industry prototypes and beyond. In this week’s update, we are highlighting three examples tutorials found on our Hackster.io page:
It is worth noting that, although we use Arduino shields in these examples, EASE’s female pin headers support other peripherals as well. Those headers were custom made to fit Arduino shields without any height interference from the Ethernet ports or the base board.
Tutorial 1: EASE with an LCD Shield
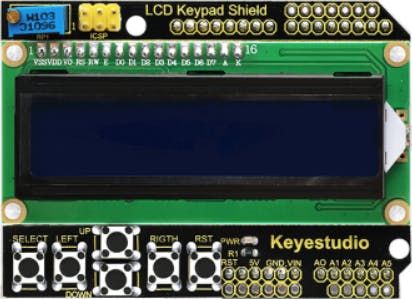
This example’s primary function is to demonstrate how easy it is to transfer input and output data between the master and EASE using a common Arduino shield. In this example, EASE sends the analog value of the button pressed on the LCD shield to the EtherCAT master. The master then determines which button was pressed, prints the button name on the command terminal, and sends a simple one digit value through EASE to the Arduino, which uses it to determine what button was pressed. It then prints which button was pressed on the LCD shield’s display. This technique could also be used in a larger system with multiple subsystems. Data or input (such as a button press) from one subsystem could be printed on the LCD shield of (or used as input to) another.
Tutorial 2: EASE with a Motor Shield
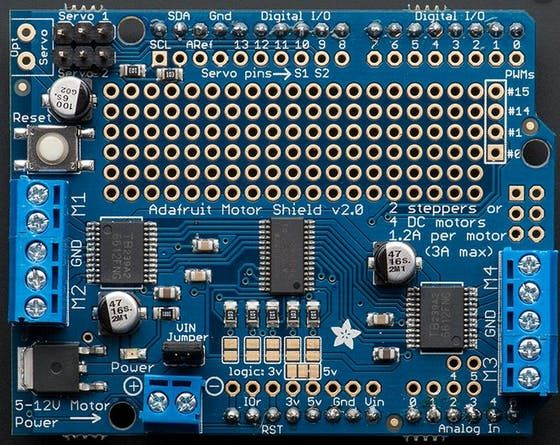
This example showcases EASE in a completely automated system using a common Arduino shield. In this example, the master determines which motor (a DC, servo, or stepper motor) will rotate, at what angle, and at what speed. The master prints the current motor and speed on its command terminal and sends those values to the Arduino through EASE. The Arduino then rotates the determined motor using the Arduino motor shield. The system repeats just like a common automation application. This same technique could be extended to include other slaves of the same kind in order to produce an automatic robotics application.
Tutorial 3: EASE with an LCD and a Motor Shield
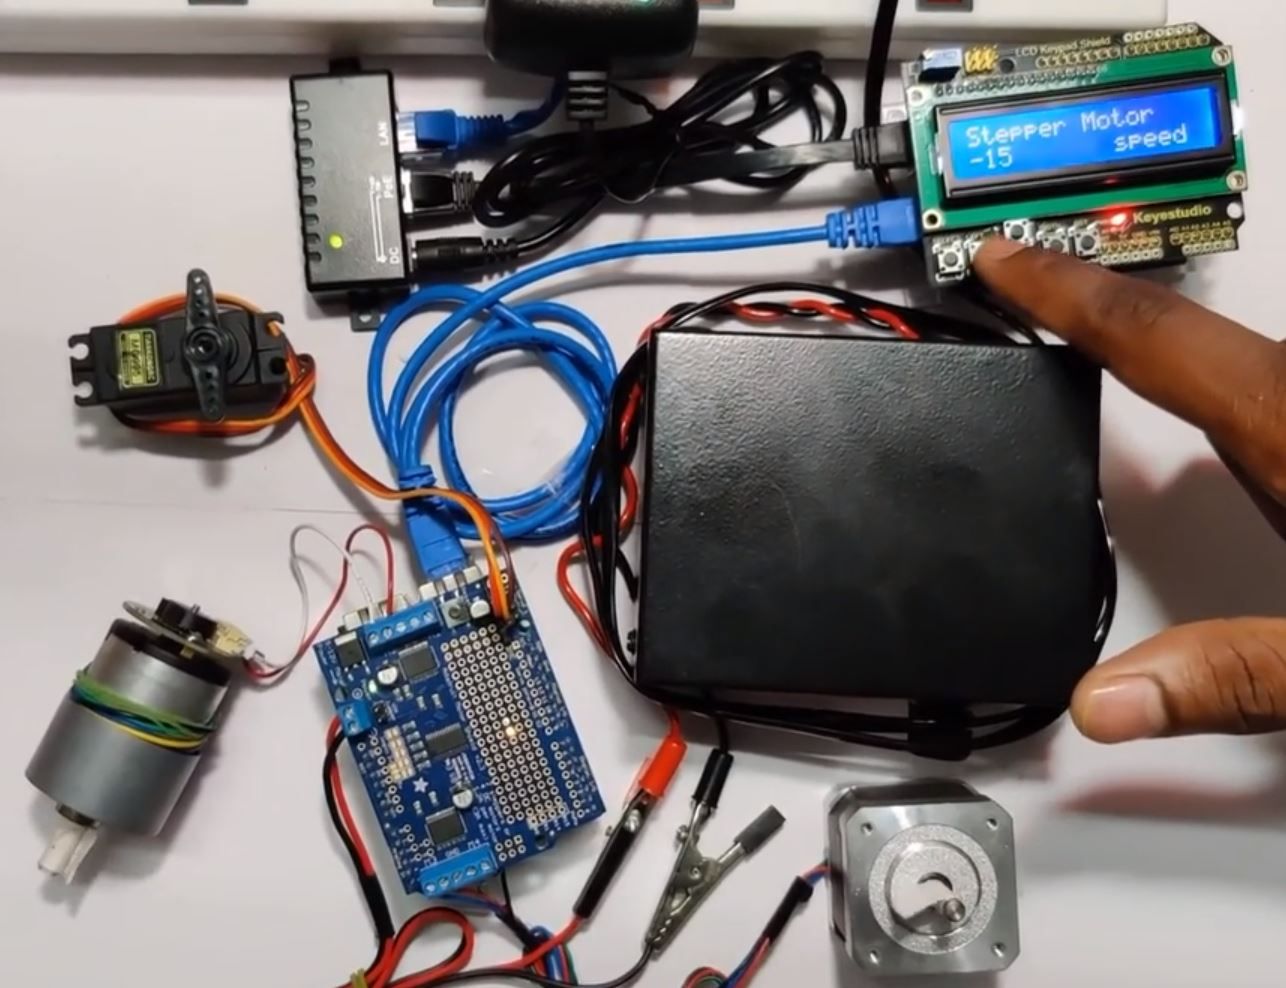
This tutorial combines the two examples above to highlight a use case that incorporates various Arduino boards. In this example, a slave subsystem that includes EASE, an LCD shield, and an Arduino Uno determines which motor will rotate, and at what speed, using the buttons on the LCD shield. The motor itself, however, is on a different slave subsystem that incorporates EASE, a motor shield, and an Arduino Uno. The data is printed on both the EtherCAT master’s terminal and the display on the LCD shield.
The slaves can speak to each other through the EtherCAT master, which we often think of as a Windows or a Linux computer running our open source software. What’s special about this example is that the master is instead a Raspberry Pi with a Linux OS image.
Thank you for taking the time to read our update. We truly look forward to the magnificent projects that our future users will create EASE!
The Esmacat Team