Project update 4 of 9
Deploying Esmacat Master Code; Funding Goal Reduction
by EsmacatIn this update, we will demonstrate how simple it is to build and execute the Esmacat Master software for EASE. You can think of this software as a way for multiple EASE boards (and other EtherCAT slaves) to communicate with one another by reading values from one slave and writing to another. Any EtherCAT master software will work with EASE, but we are focusing here on our own free and open source code.
Building & Executing Esmacat Master Code
Setup
First, let us describe how to set up and run our basic EASE example that is included in master software.
1. Dependencies
- An editor, such as Visual Studio or QT Creator, with which to build the project
- A base board IDE, such as the Arduino IDE, with which to program your Arduino Uno or whatever other board you have attached to EASE
2. Required Software
- The Esmacat Master Software, which you can download from bitbucket.
3. Building the Project
Start up your C++ editor of choice. In this example, we use Visual Studio. Navigate to the project directory. In this example, we are describing the Arduino shield project:
esmacat_applications/project_examples/arduino_shieldBuild the Source Code for this project. In visual Studio this can be done by clicking Build > Build All or by using the keyboard shortcut Ctrl+Shift+B:
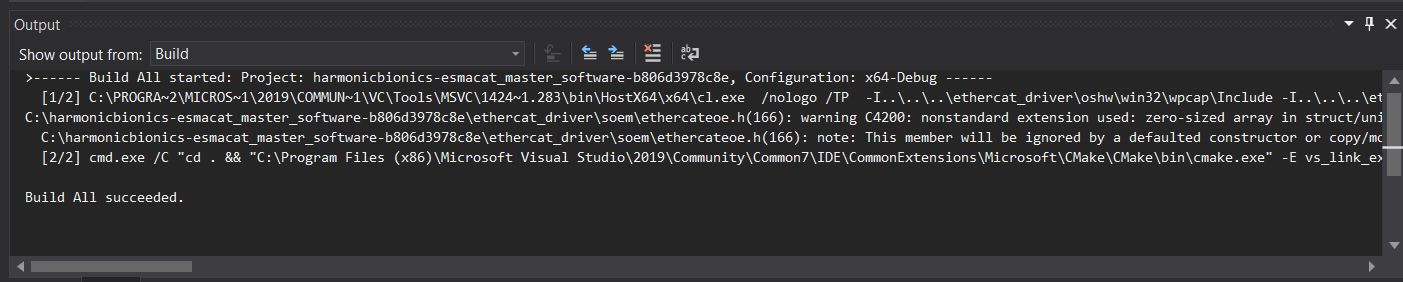
- When the build is successful, you should obtain a result similar to the image below:
4. Running the Application
- To run the application, use the command prompt or Terminal to
navigate to the directory where the output files are saved. They should be somewhere similar to the following directory:
MyRepositories\Esmacat\esmacat-master-software\out\build\x64-Debug\esmacat_applications\project_examples\arduino_shield
- Run the application by typing the
<file_name>.execommand. In this
example, that would be arduino_shield.exe:
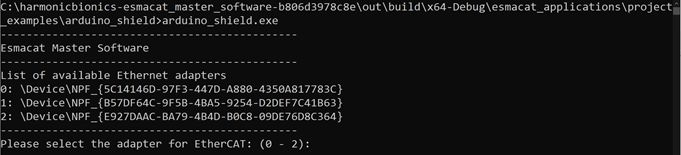
- Select the appropriate Ethernet adapter from the list to begin program execution:
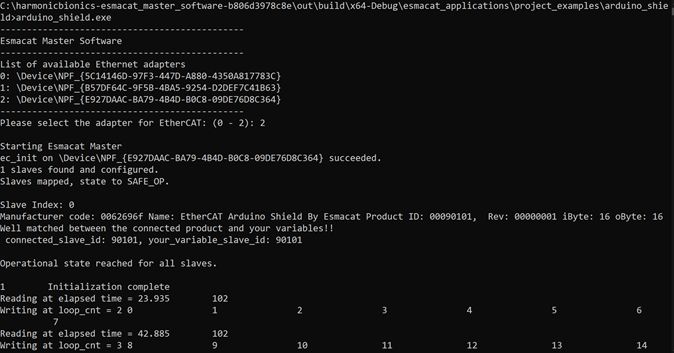
That’s it! It’s that simple to get started with the Esmacat Master software.
Writing a Simple Master Program
Next, we will describe how to code a simple master program with EASE.
1. Dependencies
The only files you will need to edit, when configuring your master software, are my_app.cpp and my_app.h. They are both in the my_project subfolder of the esmacat_applications folder. You can also edit the sample program mentioned above, but we recommend leaving that alone just in case you need it for reference.
2. Editing the Files
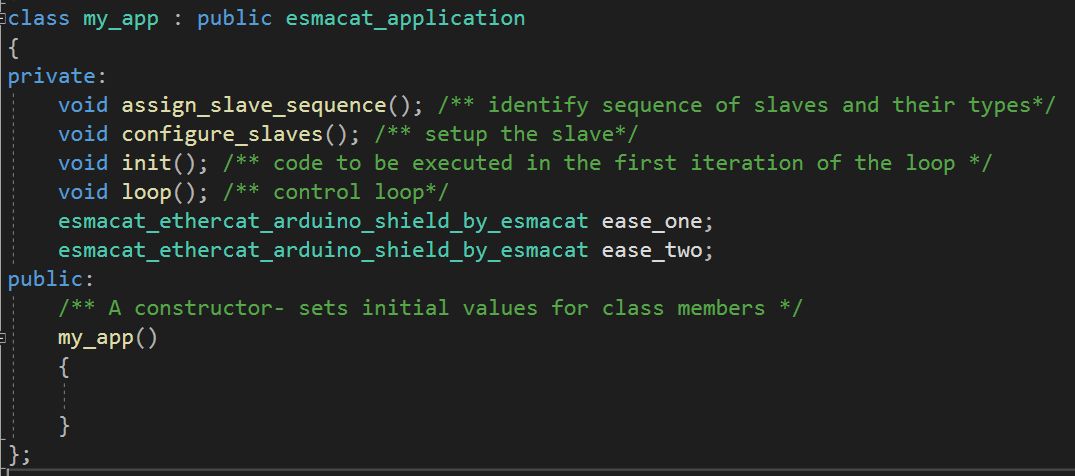
- First edit the
my_app.hfile. In the private class, we will be adding two instances of EASE since we will be using two EASE boards in our example. "ease_one" and "ease_two" are just names and can be changed to whatever you see like:
- Switch to the
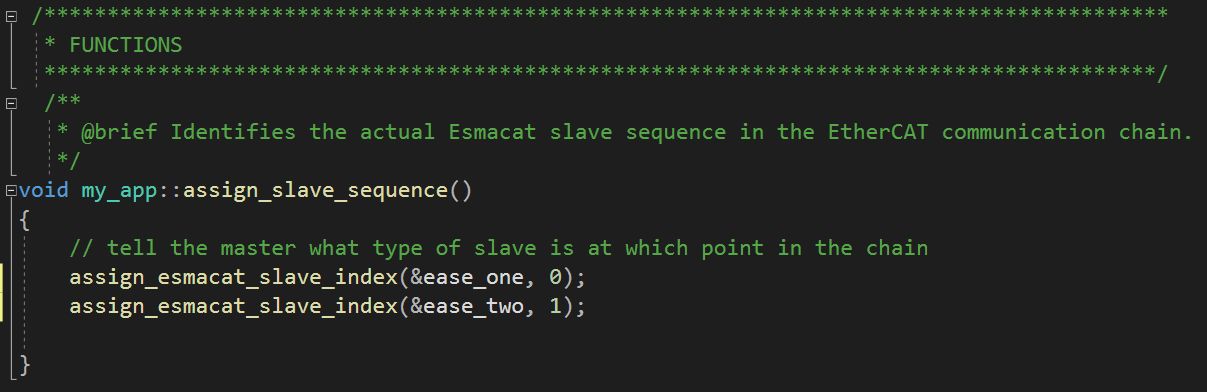
my_app.cppfile to edit the project code. In
assign_slave_sequence, start with 0 and assign increasing numbers to each connected slave. In this example, ease_one is the first slave in the sequence, so it is assigned the number 0, and ease_two is the second, so it is assigned the number 1. These numbers should correspond to the order in which they are connected. Otherwise, the program will not run. This is the only case where order matters. Anywhere else, you can send data to or receive data from any EtherCAT slave, no matter where they are in the sequence.
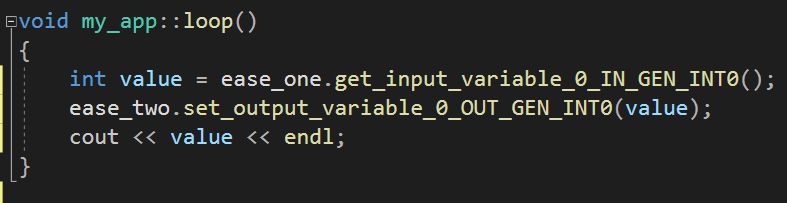
- Next, edit the
loopfunction, which is similar to theloop
function in Arduino. Its code will run repeatedly. (The function labeled init, which is above loop, is similar to the setup function in Arduino. Its code will be run once in order to handle setup. In this example, we do not need to use the init function.) For the loop function, we will get the value of register 0 from ease_one and send that value to the 0 register of ease_two. To simplify debugging, the command terminal will also print the value:
- Build and execute the code, as mentioned above. Because we are using
themy_projectfolder, the folder location will be:MyRepositories\Esmacat\esmacat-master-software\out\build\x64-Debug\esmacat_applications\my_project
You should now be able to send a value from one EASE to another!
More in-depth documentation can be found on our website and on our Hackster.io page. Those documents explain the purpose of each function and lead you through a tutorial to help you get started with EASE!
Reducing our Funding Goal
We are interested in manufacturing and delivering EASE regardless of the outcome of this crowdfunding campaign. As a result, and in consultation with Crowd Supply, we have decided to reduce our funding goal to $1. As a result, those of you who have backed our campaign – or who back it over the next week – will receive your EASE products. Thank you for your support!