Unlike many other “Internet of Things” devices, 1btn does not maintain a continuous connection to the internet. Instead, it sleeps until pressed, and then it connects to the internet, performs the assigned task, tells you the outcome via its multi-colored LED, and returns to rest.
But what if you don’t even want to press that single button? What if you want 1btn to respond to an event by performing its task? This update will explain how to modify your 1btn to do just that.
What’s a use-case for this modification?
Let’s say your pet platypus is very sensitive to the cold and you’re about to leave him in the care of a housesitter for a week. You’ve told the house-sitter to never open the window in the room where the platypus lives. To ensure your wishes are complied with, you’d like to be warned whenever that window is opened.
To do this, we will first modify the 1btn hardware to trigger the device upon an event (window opening) and then we’ll configure the software to send an email alert. You’ll see that it’s easy to modify 1btn’s hardware for all sorts of purposes.
View the Instructable or keep reading:
What’s needed for this modification?
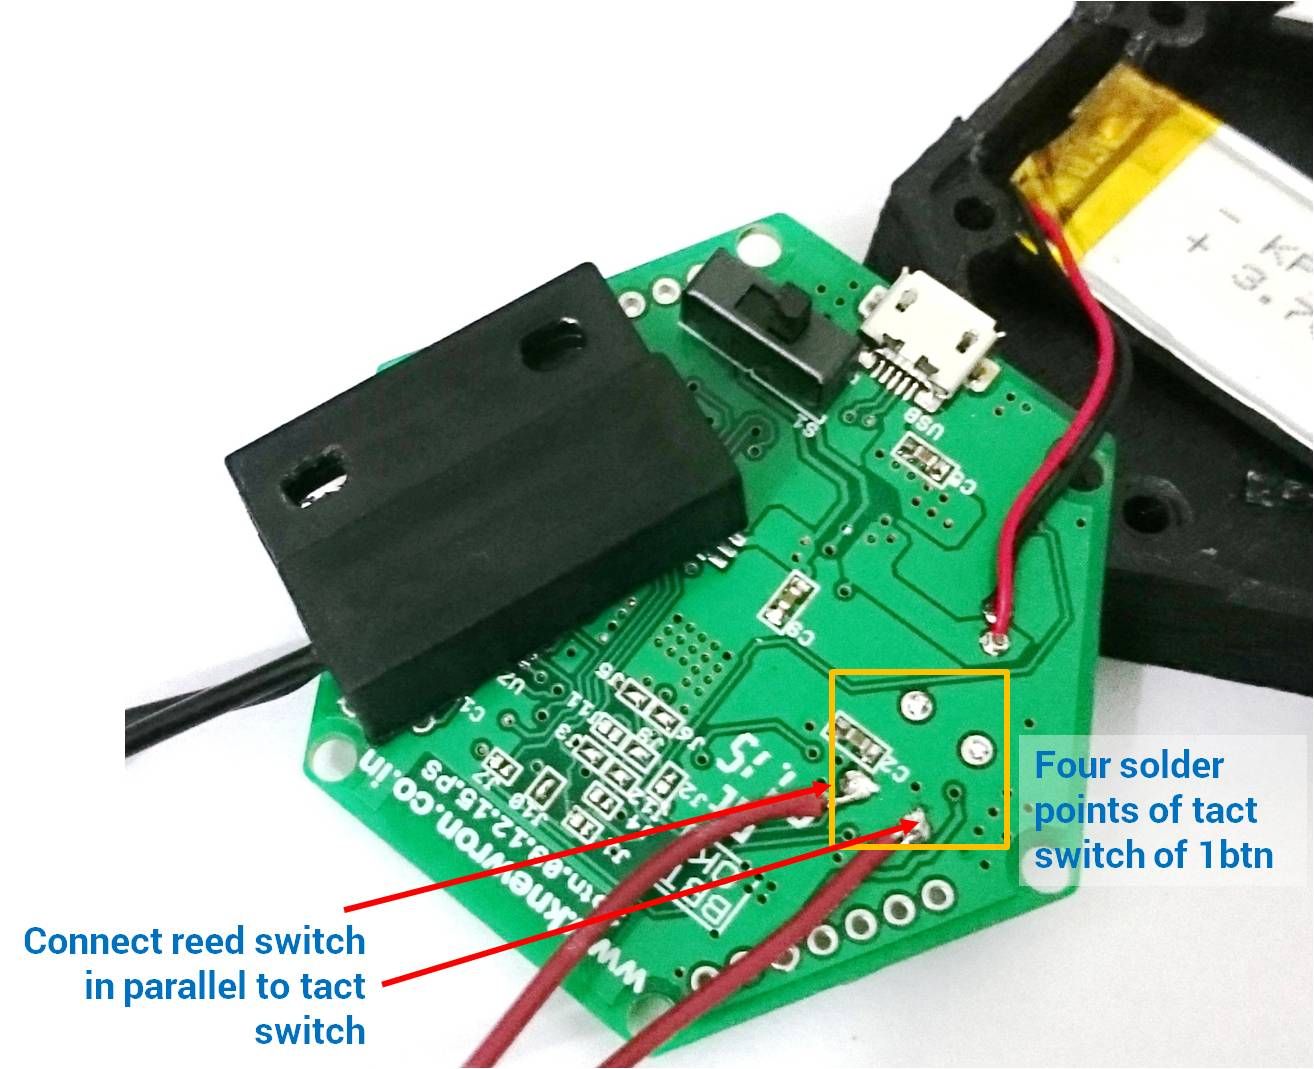
You’ll need a 1btn, obviously, and some sort of sensor. In this case, we’re going to use a basic reed switch. (A reed switch operates when it encounters a magnet.) We will be using a normally open (NO) type reed switch, which is similar to the tactile-switch on the 1btn. This way we can connect the reed switch in parallel with the tactile switch, so we don’t need to remove the existing switch and its functionality. Along with the reed switch, you’ll also need a small magnet and some basic electronic supplies (soldering iron, solder, wire,, etc.)
Step 1: open 1btn and attach reed switch
Carefully pry open your 1btn and then remove the PCB and turn it over. Solder the two wires connected to your reed switch onto the pads of the built-in button as shown in Figure 1. This will connect the reed switch in parallel with the 1btn’s button.
Step 2: reassemble 1btn
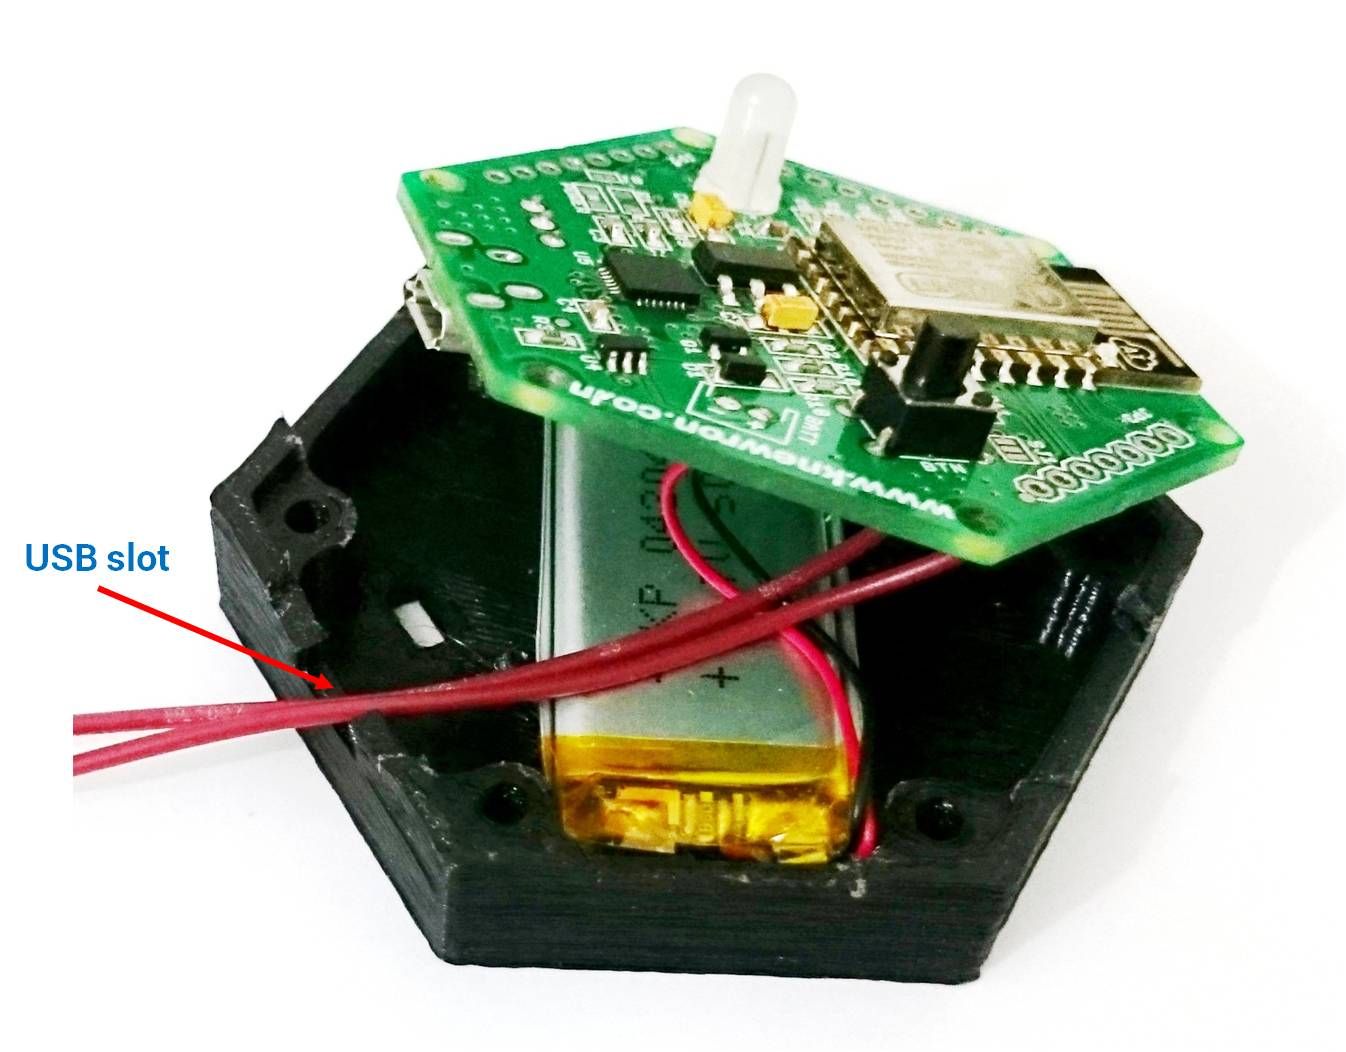
Now we need to route the reed switch’s wires to the outside of the 1btn case. We can use the USB connector’s opening for this purpose, as shown in Figure 2.
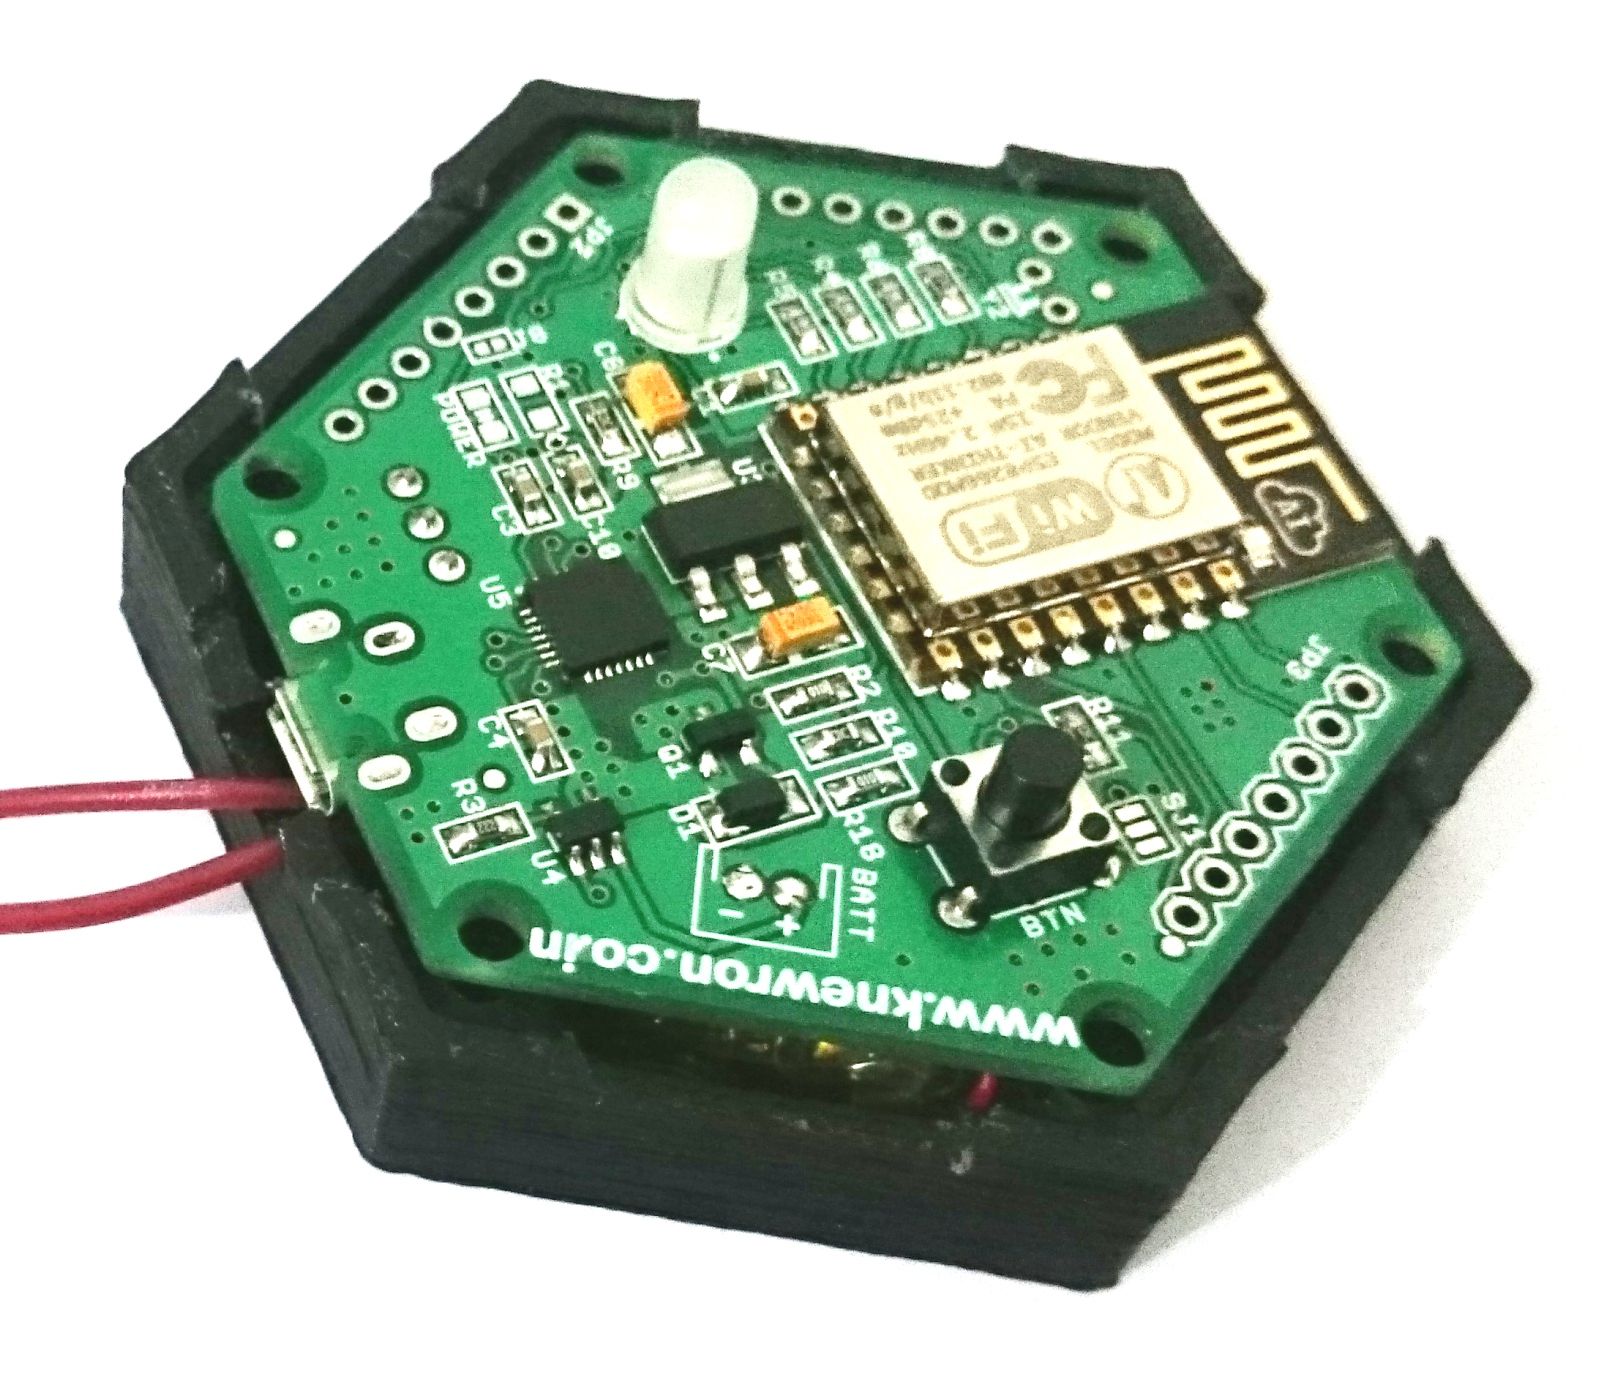
Thread the wires through the opening, re-position the PCB back onto its supports, and close the lid tightly. See Figure 3.
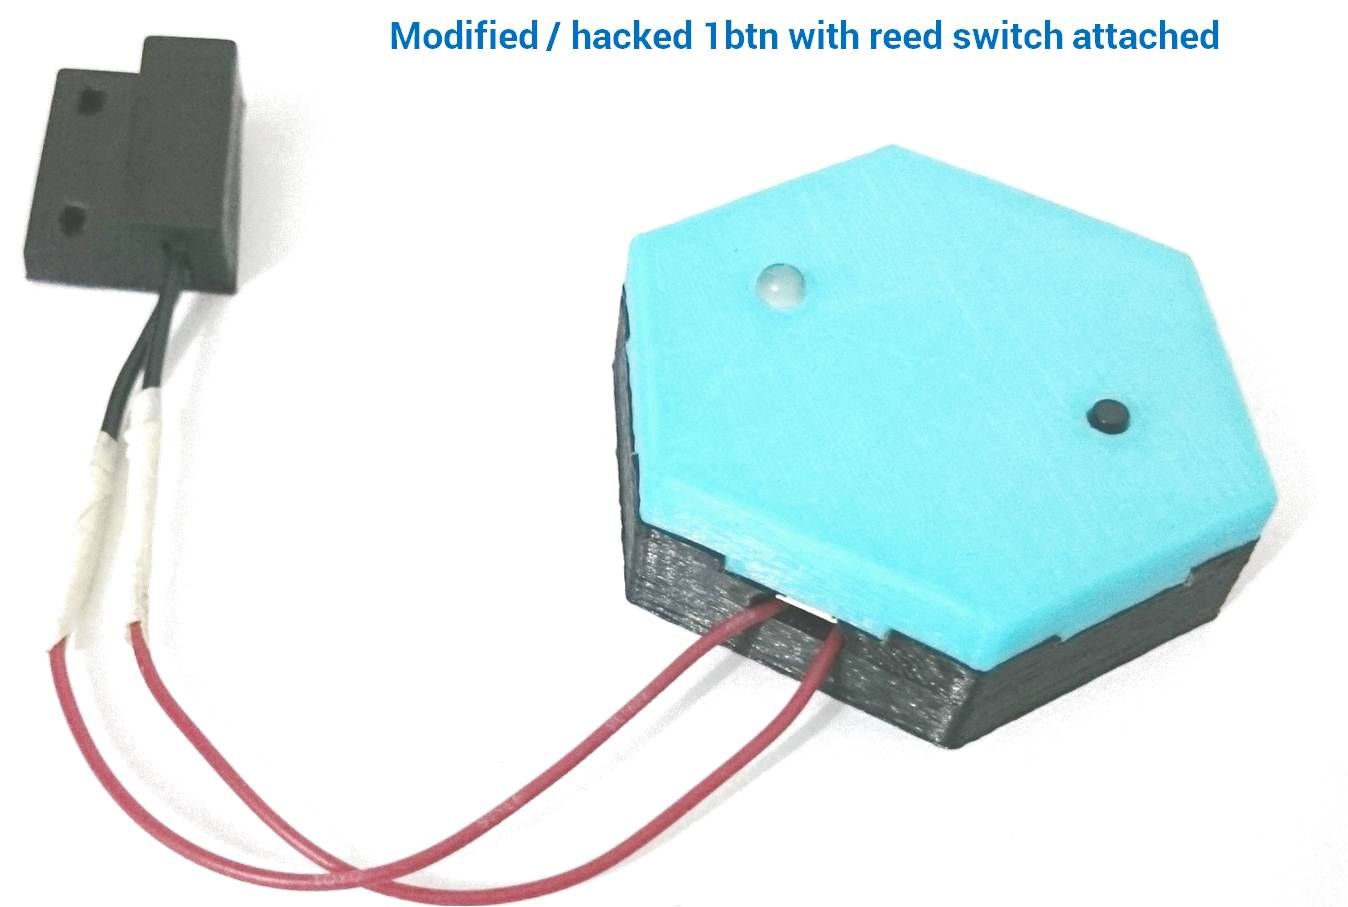
The end result should look something like this:
Step 3: install modified 1btn
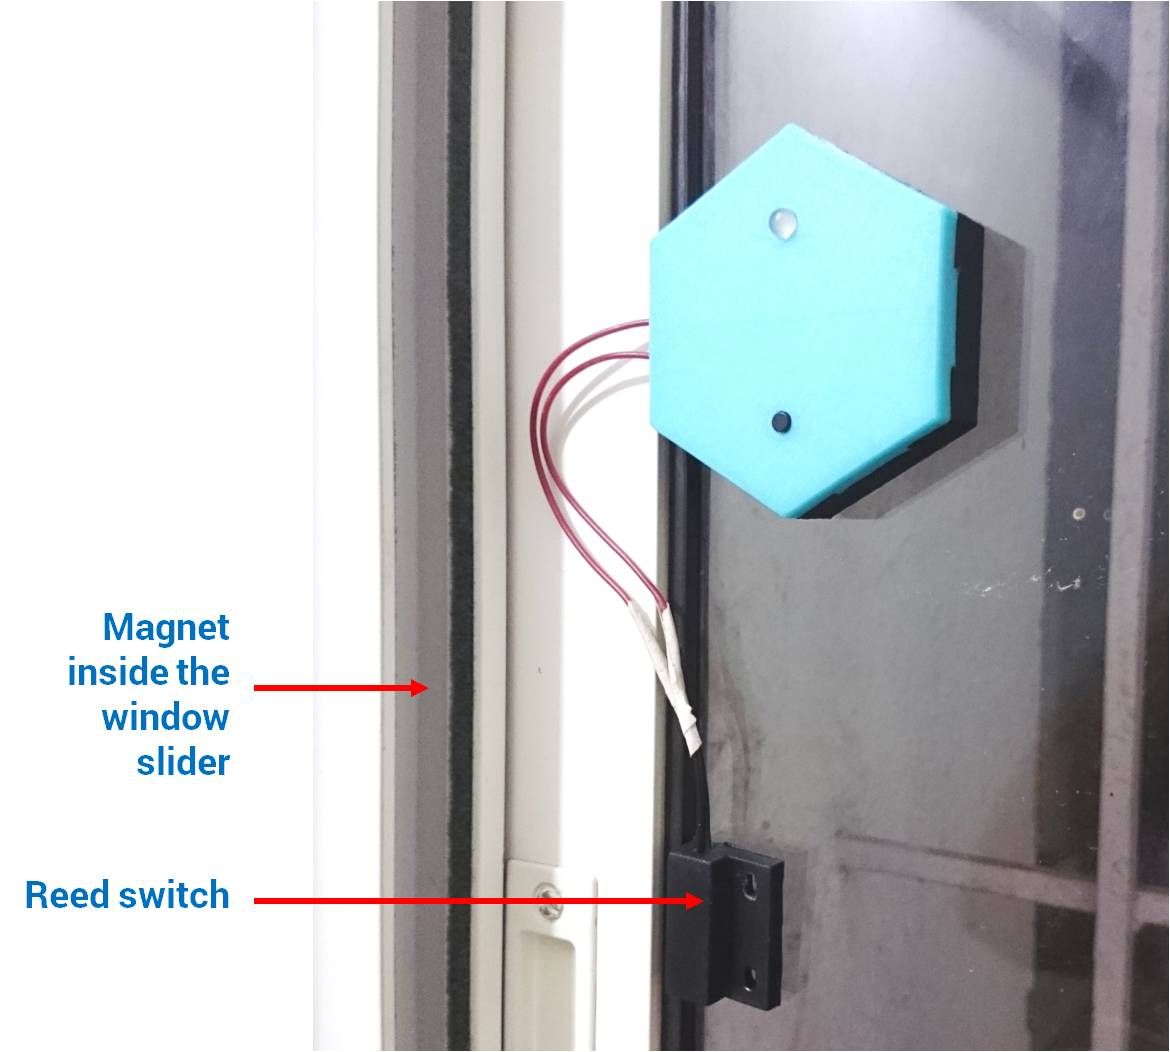
At this point, our modified 1btn is ready for installation. You can use double-sided tape to attach the 1btn and reed switch to the window frame, as shown in Figure 5. The magnet then gets fixed to the window casement.
Step 4: configure the button action with the web-console
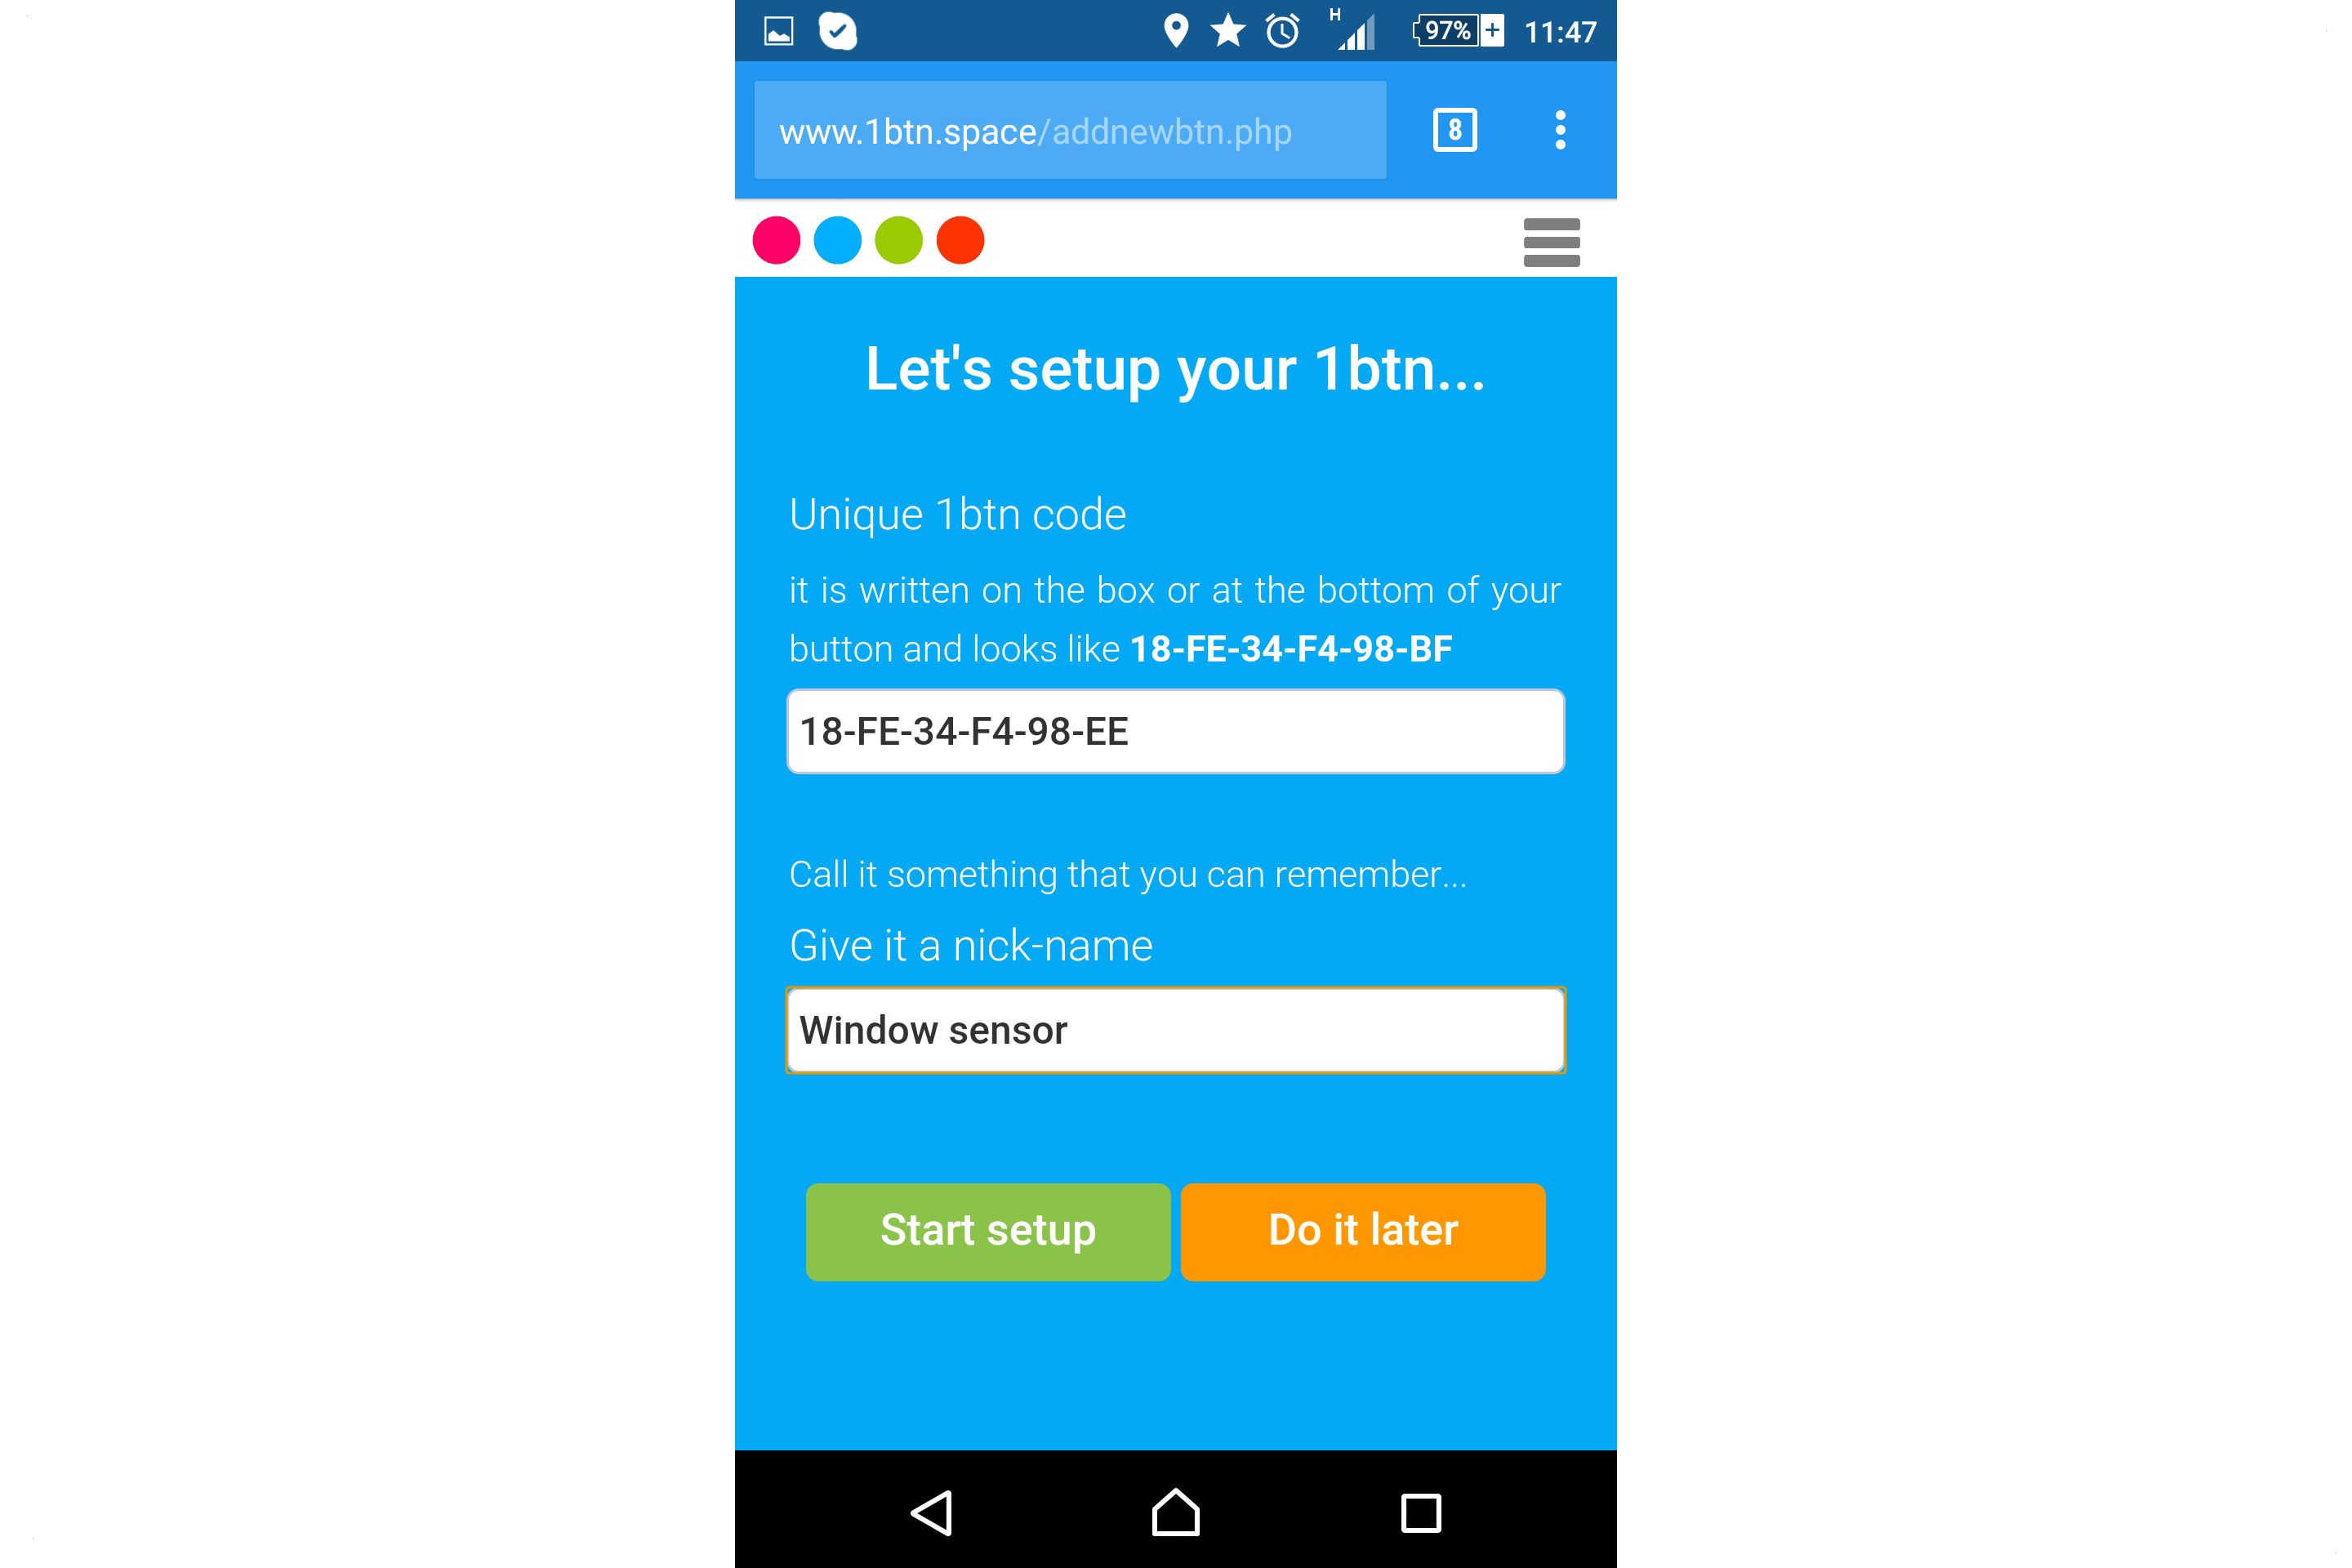
In order to get an email alert when the window opens and activates the reed switch, you’ll need to configure the 1btn using the web-console. Set up the button, either by adding it as new or modifying its existing settings, as shown in screenshot 1. Note how the 1btn gets a meaningful nickname so you can better identify it. If you plan to have multiple such sensors, you may wish to give them each unique names to help keep them straight (window#1, window#2, etc.).
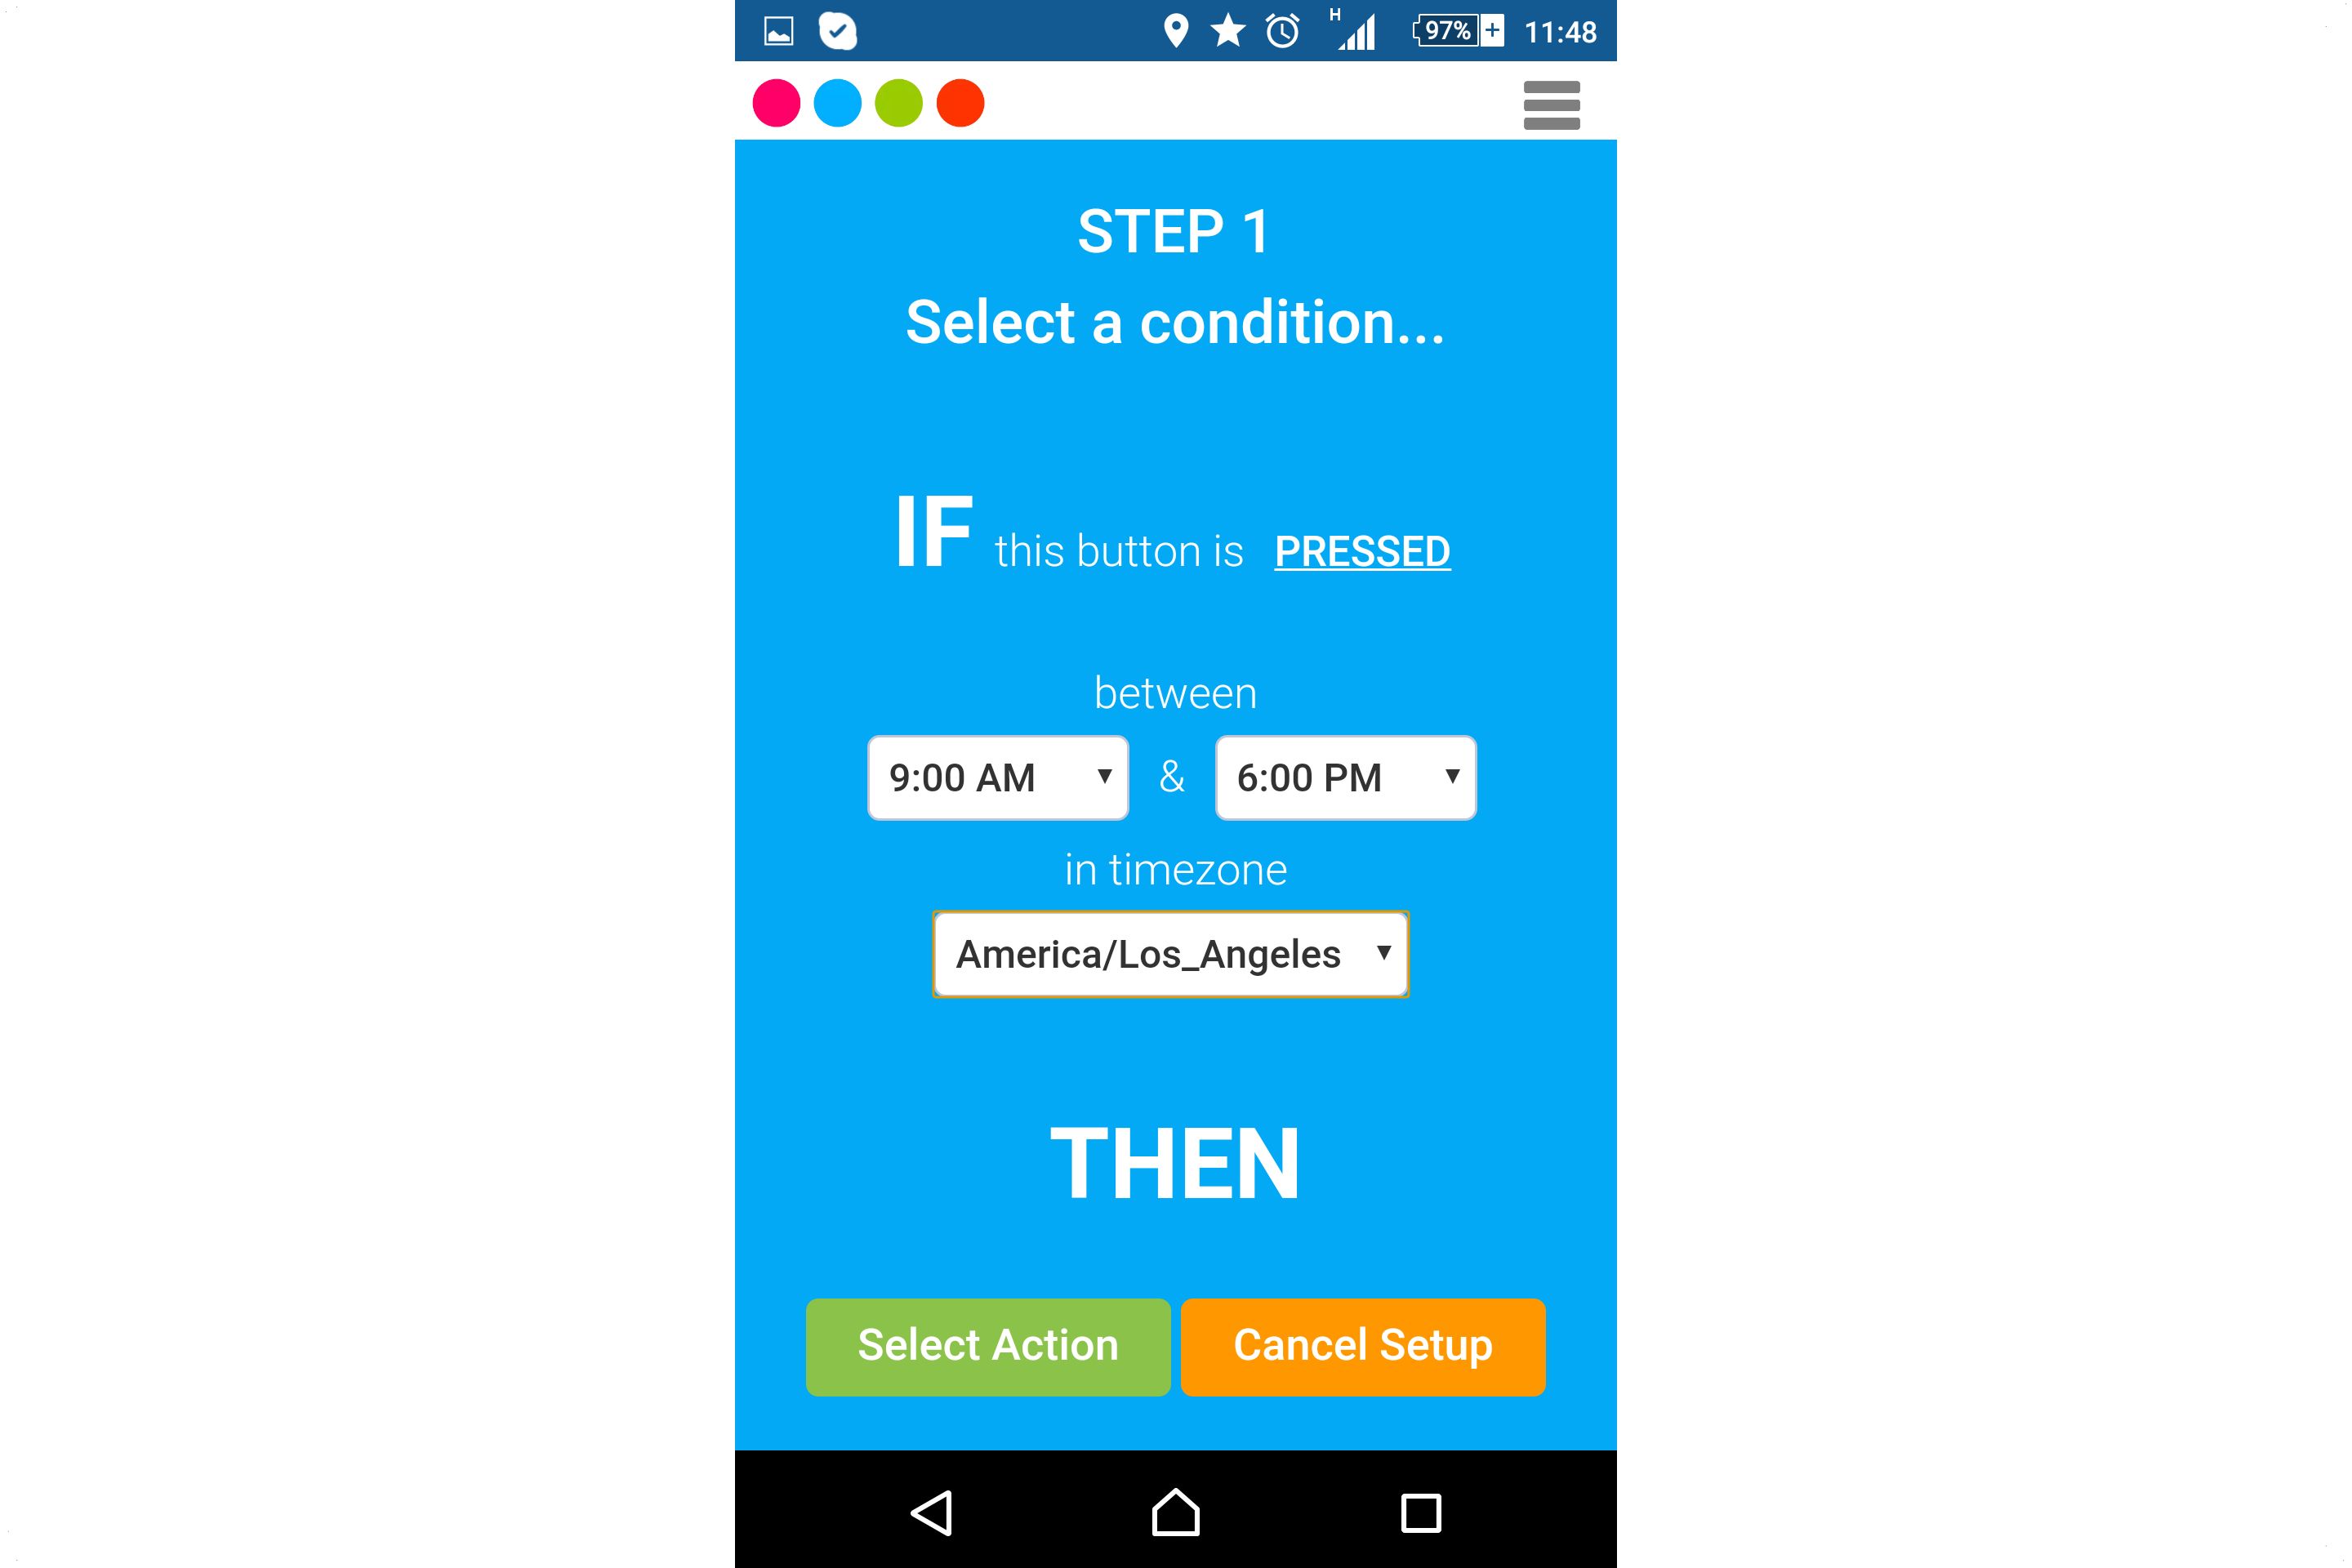
Next, we set up the time of day during which we want the 1btn to be active:
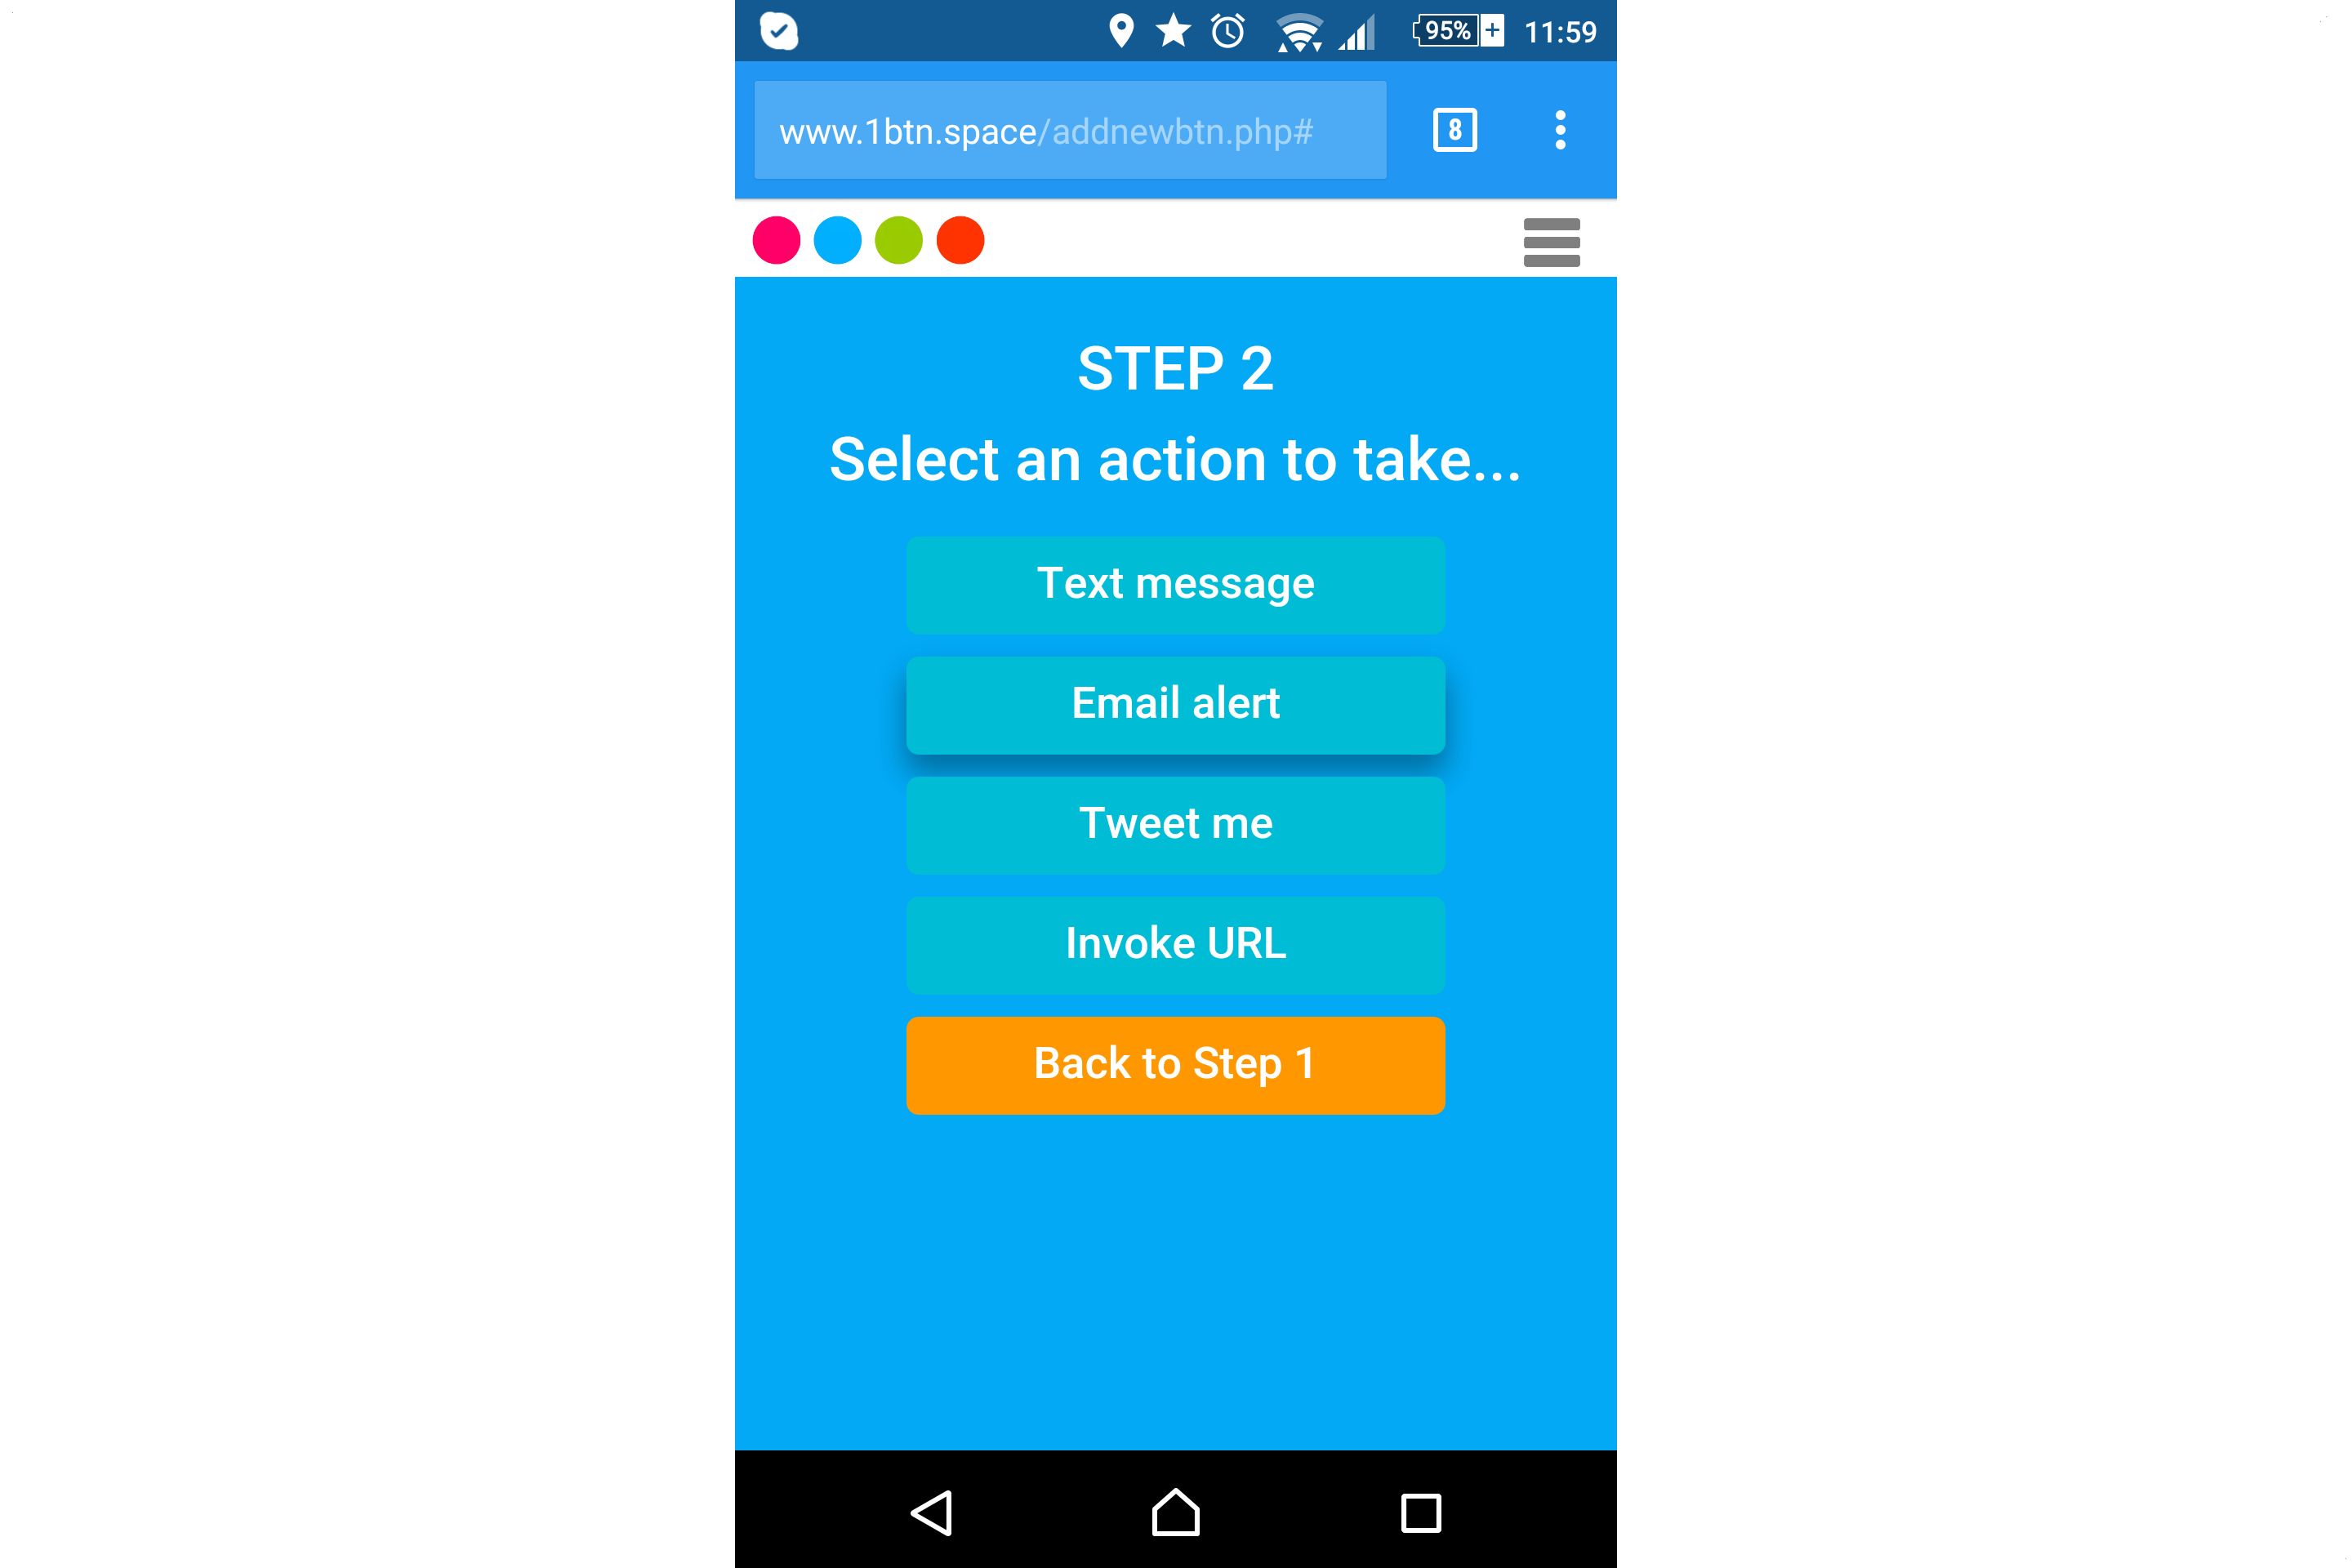
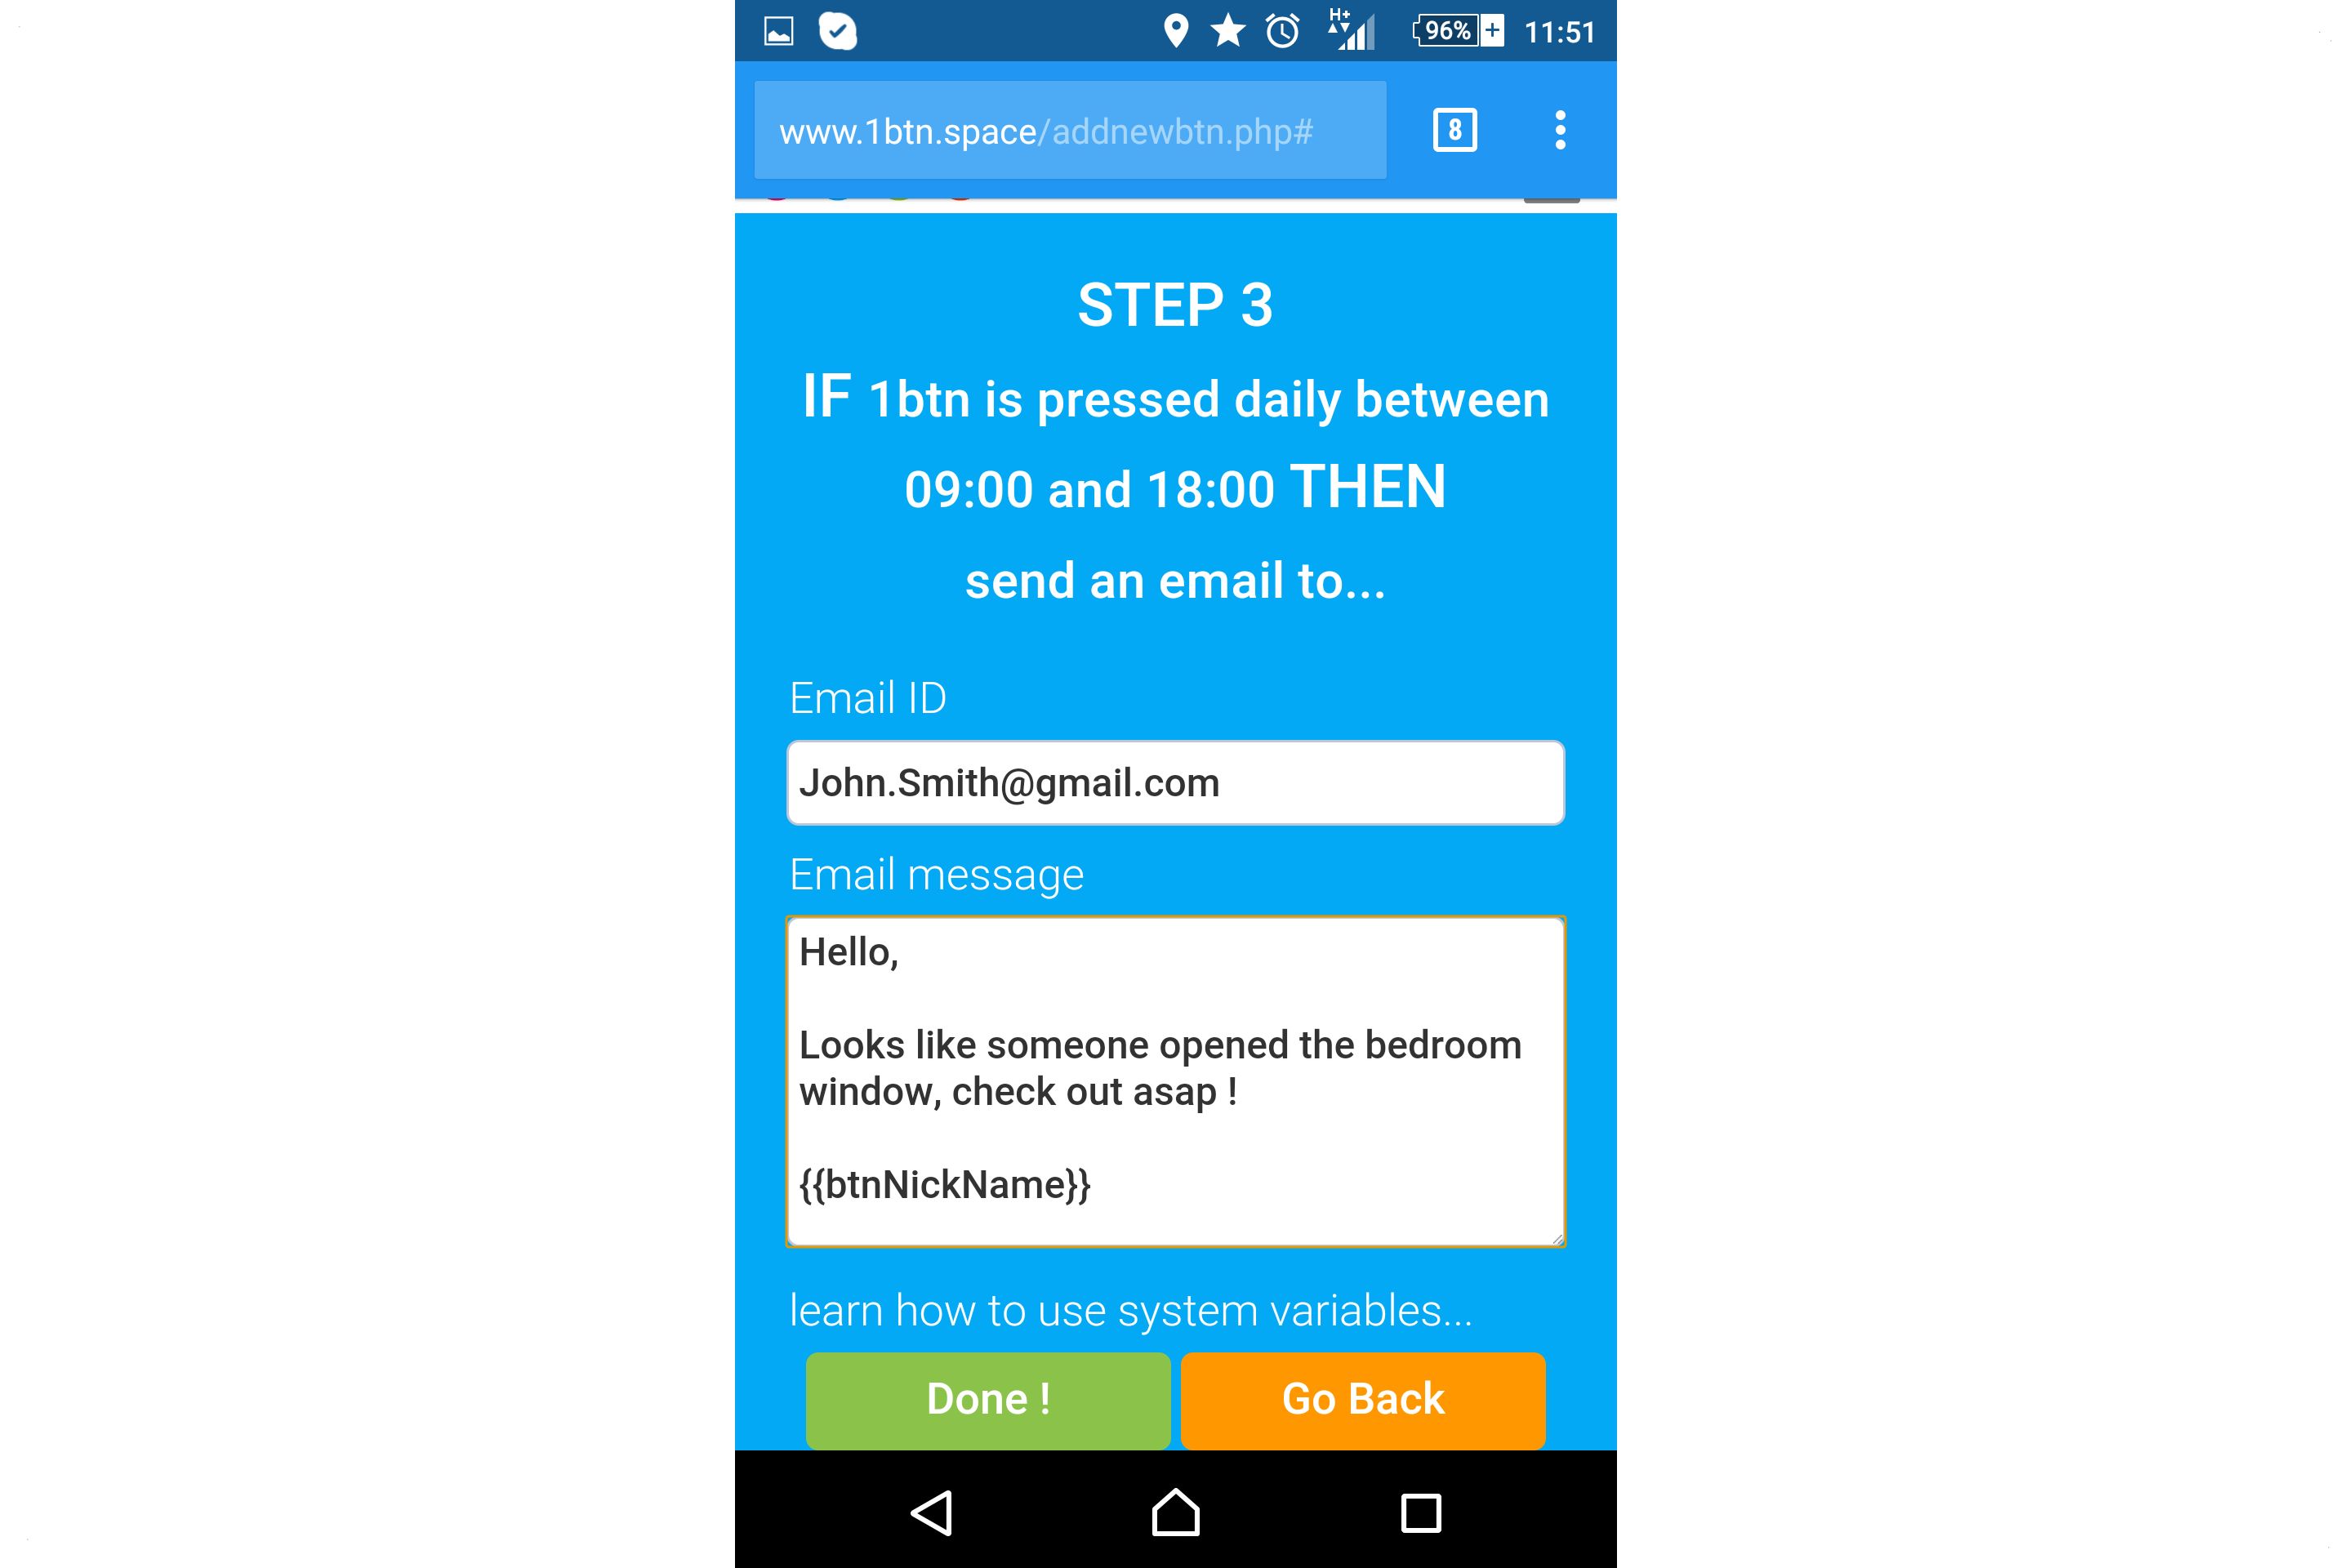
And then we set the “action to take” as an “Email alert” as shown in Screenshot 3:
Next, we provide an “Email ID” (address) where the email alert will be sent, as shown in Screenshot 4 below. Notice the closing signature in the Email message – {{btnNickName}}. This is a system variable which will get replaced with the nickname we provided during configuration ( i.e. “Window Sensor”) when the email is sent.
Note: there are many other system variables you can use in your message. Check out the list on the 1btn web-portal.
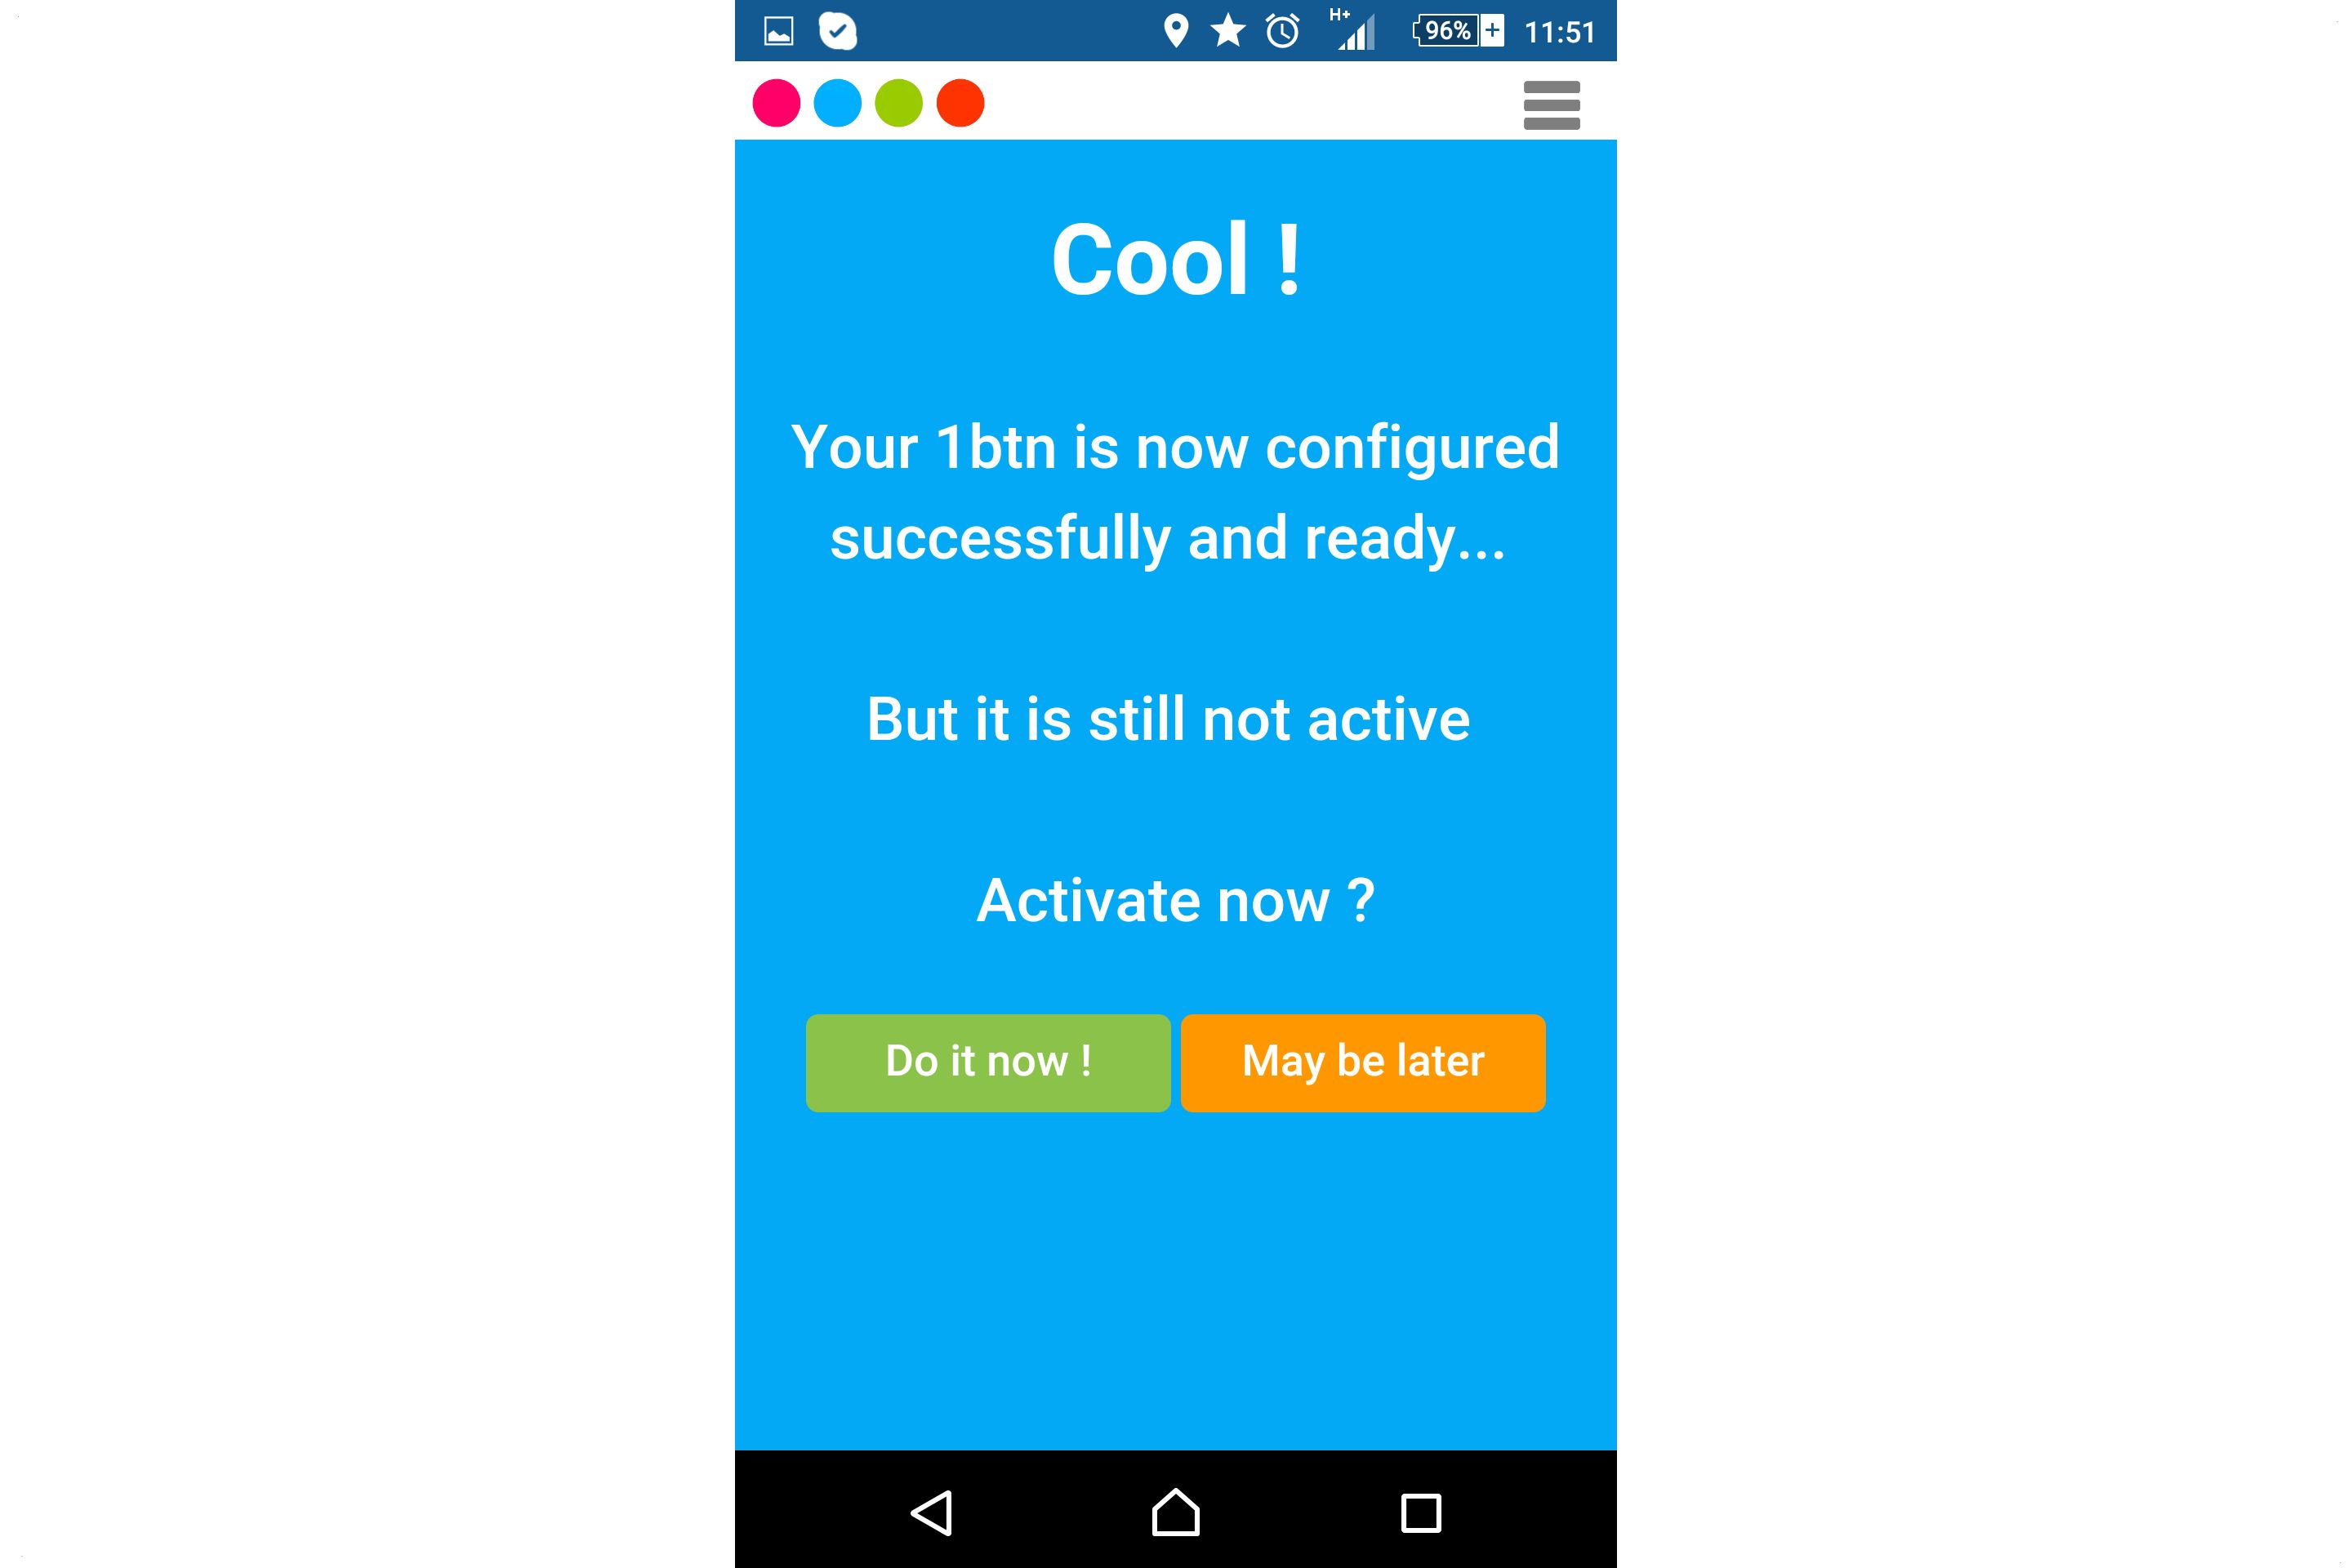
Setup and configuration is now complete. Click the “Do it now!” button to activate your 1btn.
Step 5: test and put it to use
Finally, test your setup and configuration by triggering the action (opening the window) and verifying that you receive the alert email. That’s it! Your modified 1btn is now operational and ready to help you in your daily life.
Happy button hacking!