Project update 5 of 7
Announcing EsPiFF's new Smart Display
by Michael SchmidHello dear EsPiFF supporters and friends,
We hope you all had a merry Christmas and we wish you a happy New Year where all your dreams come true.
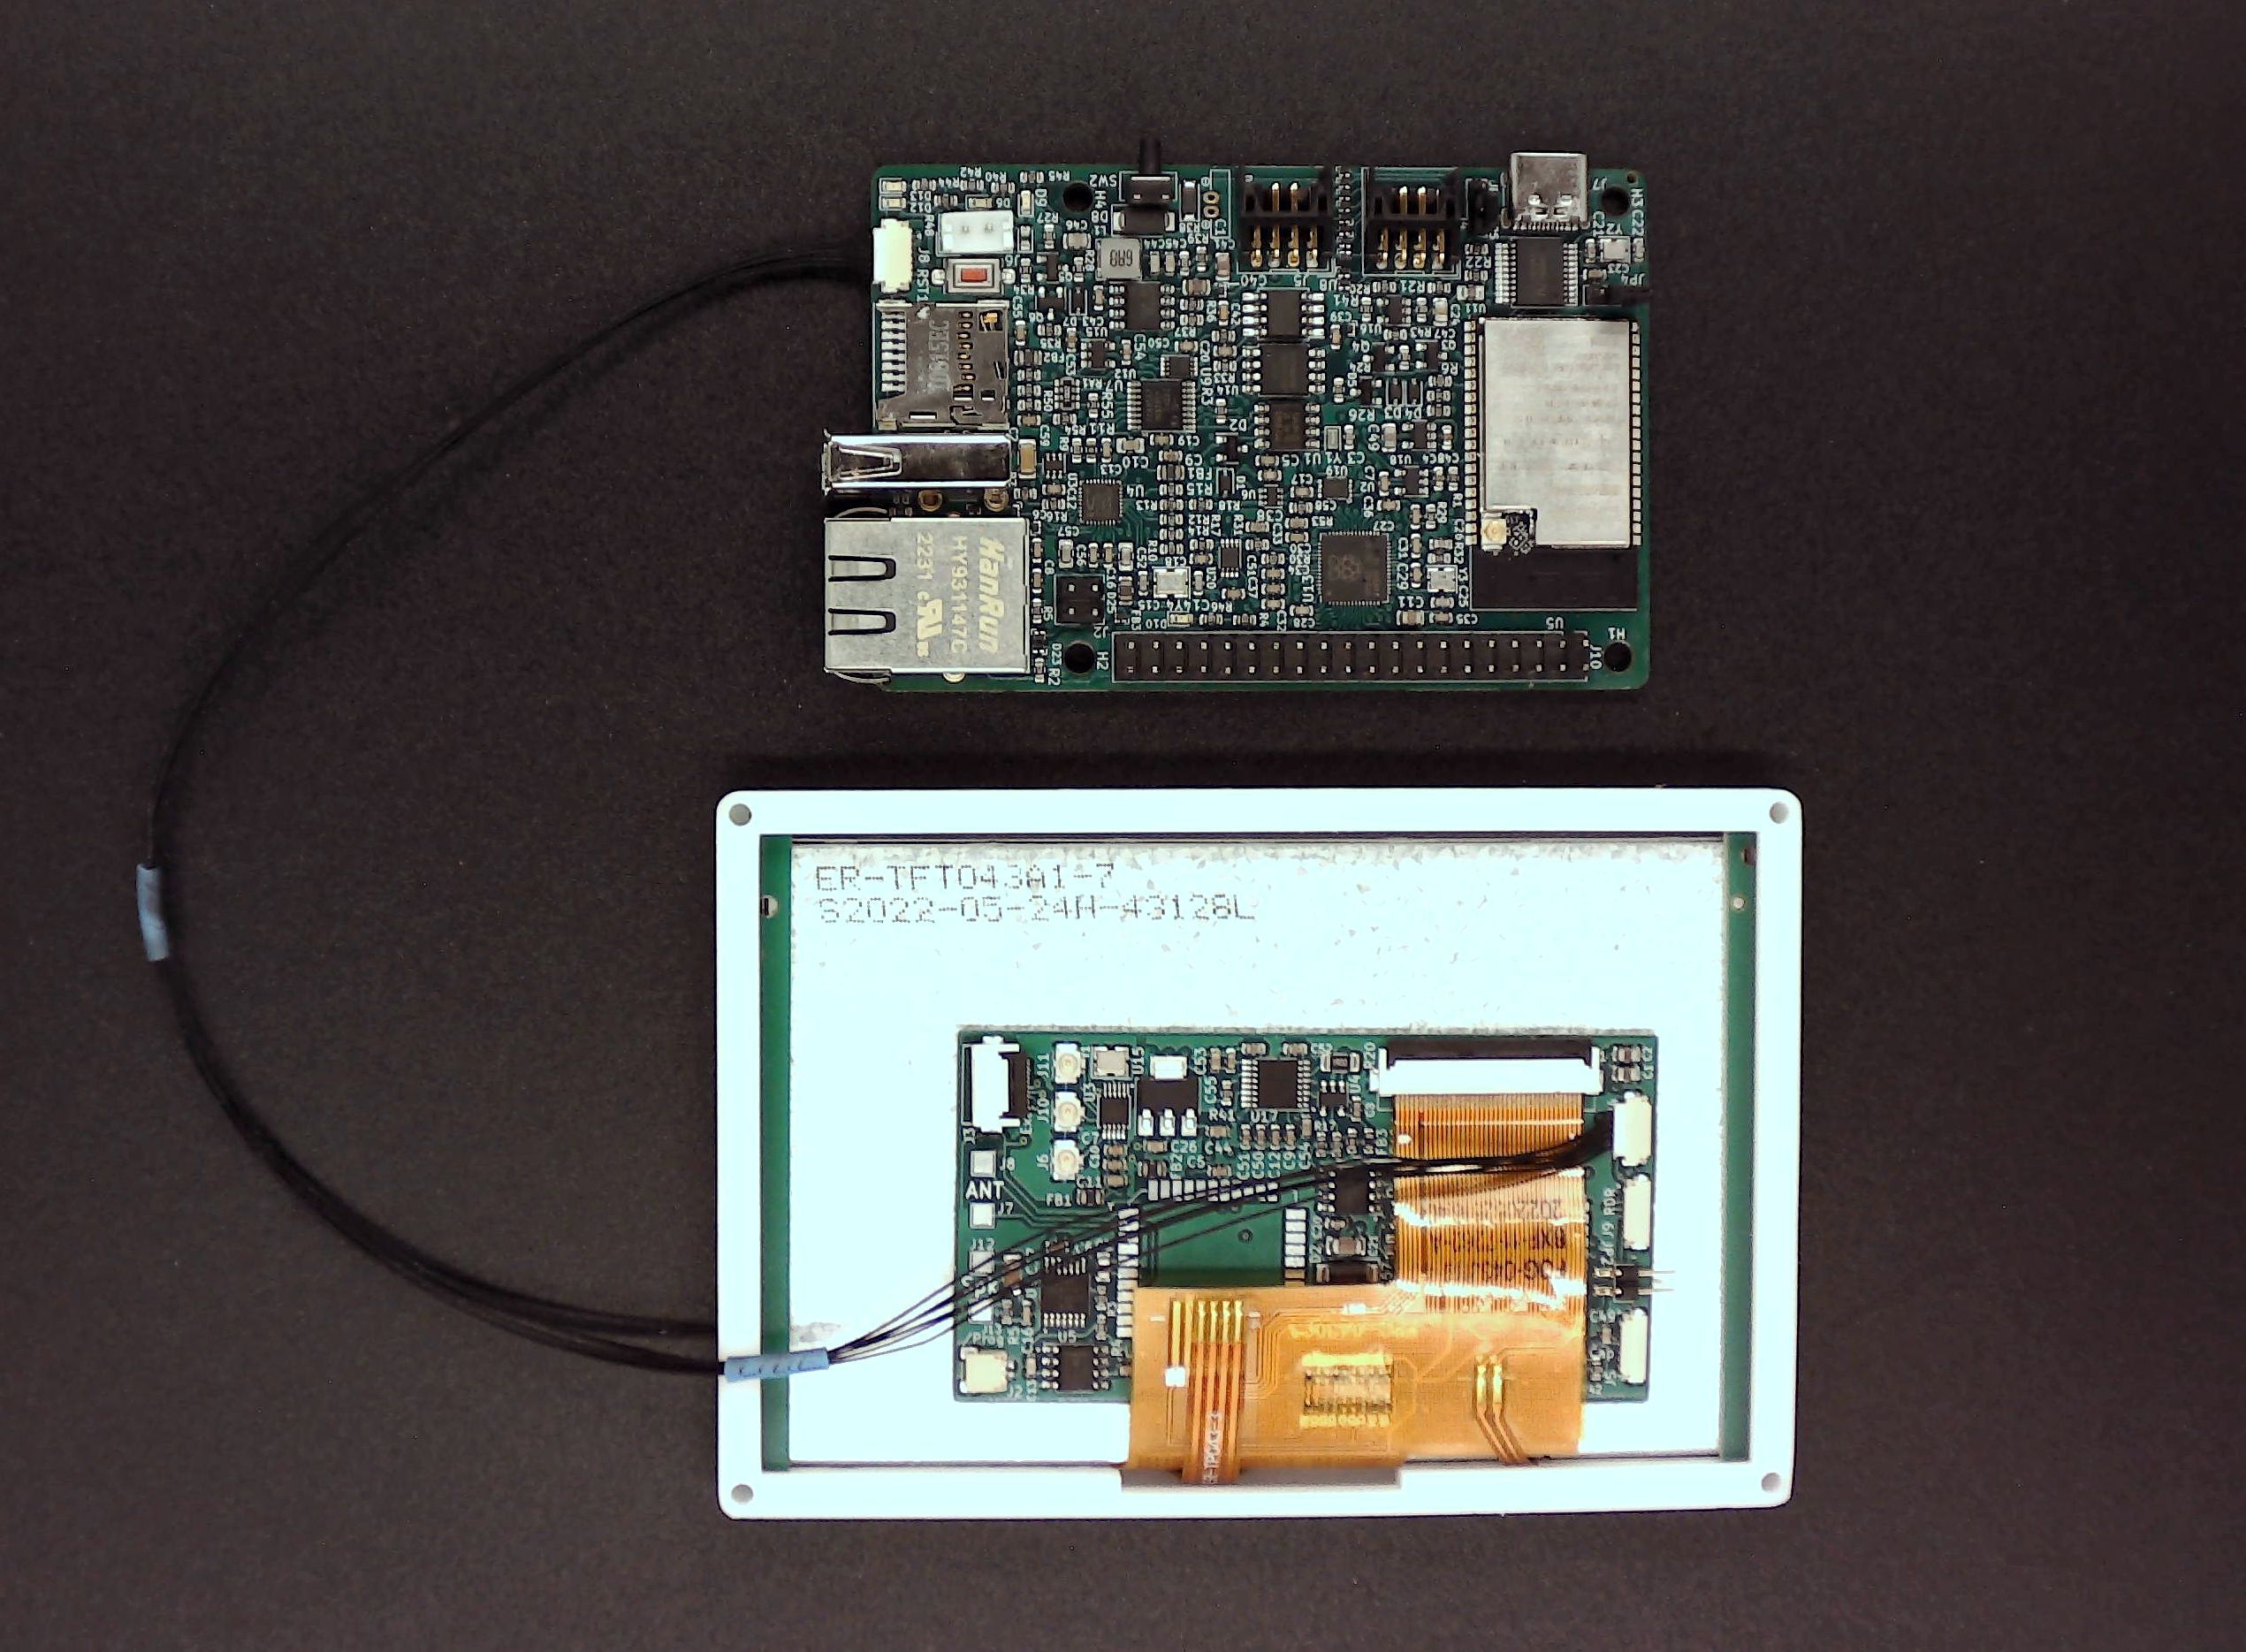
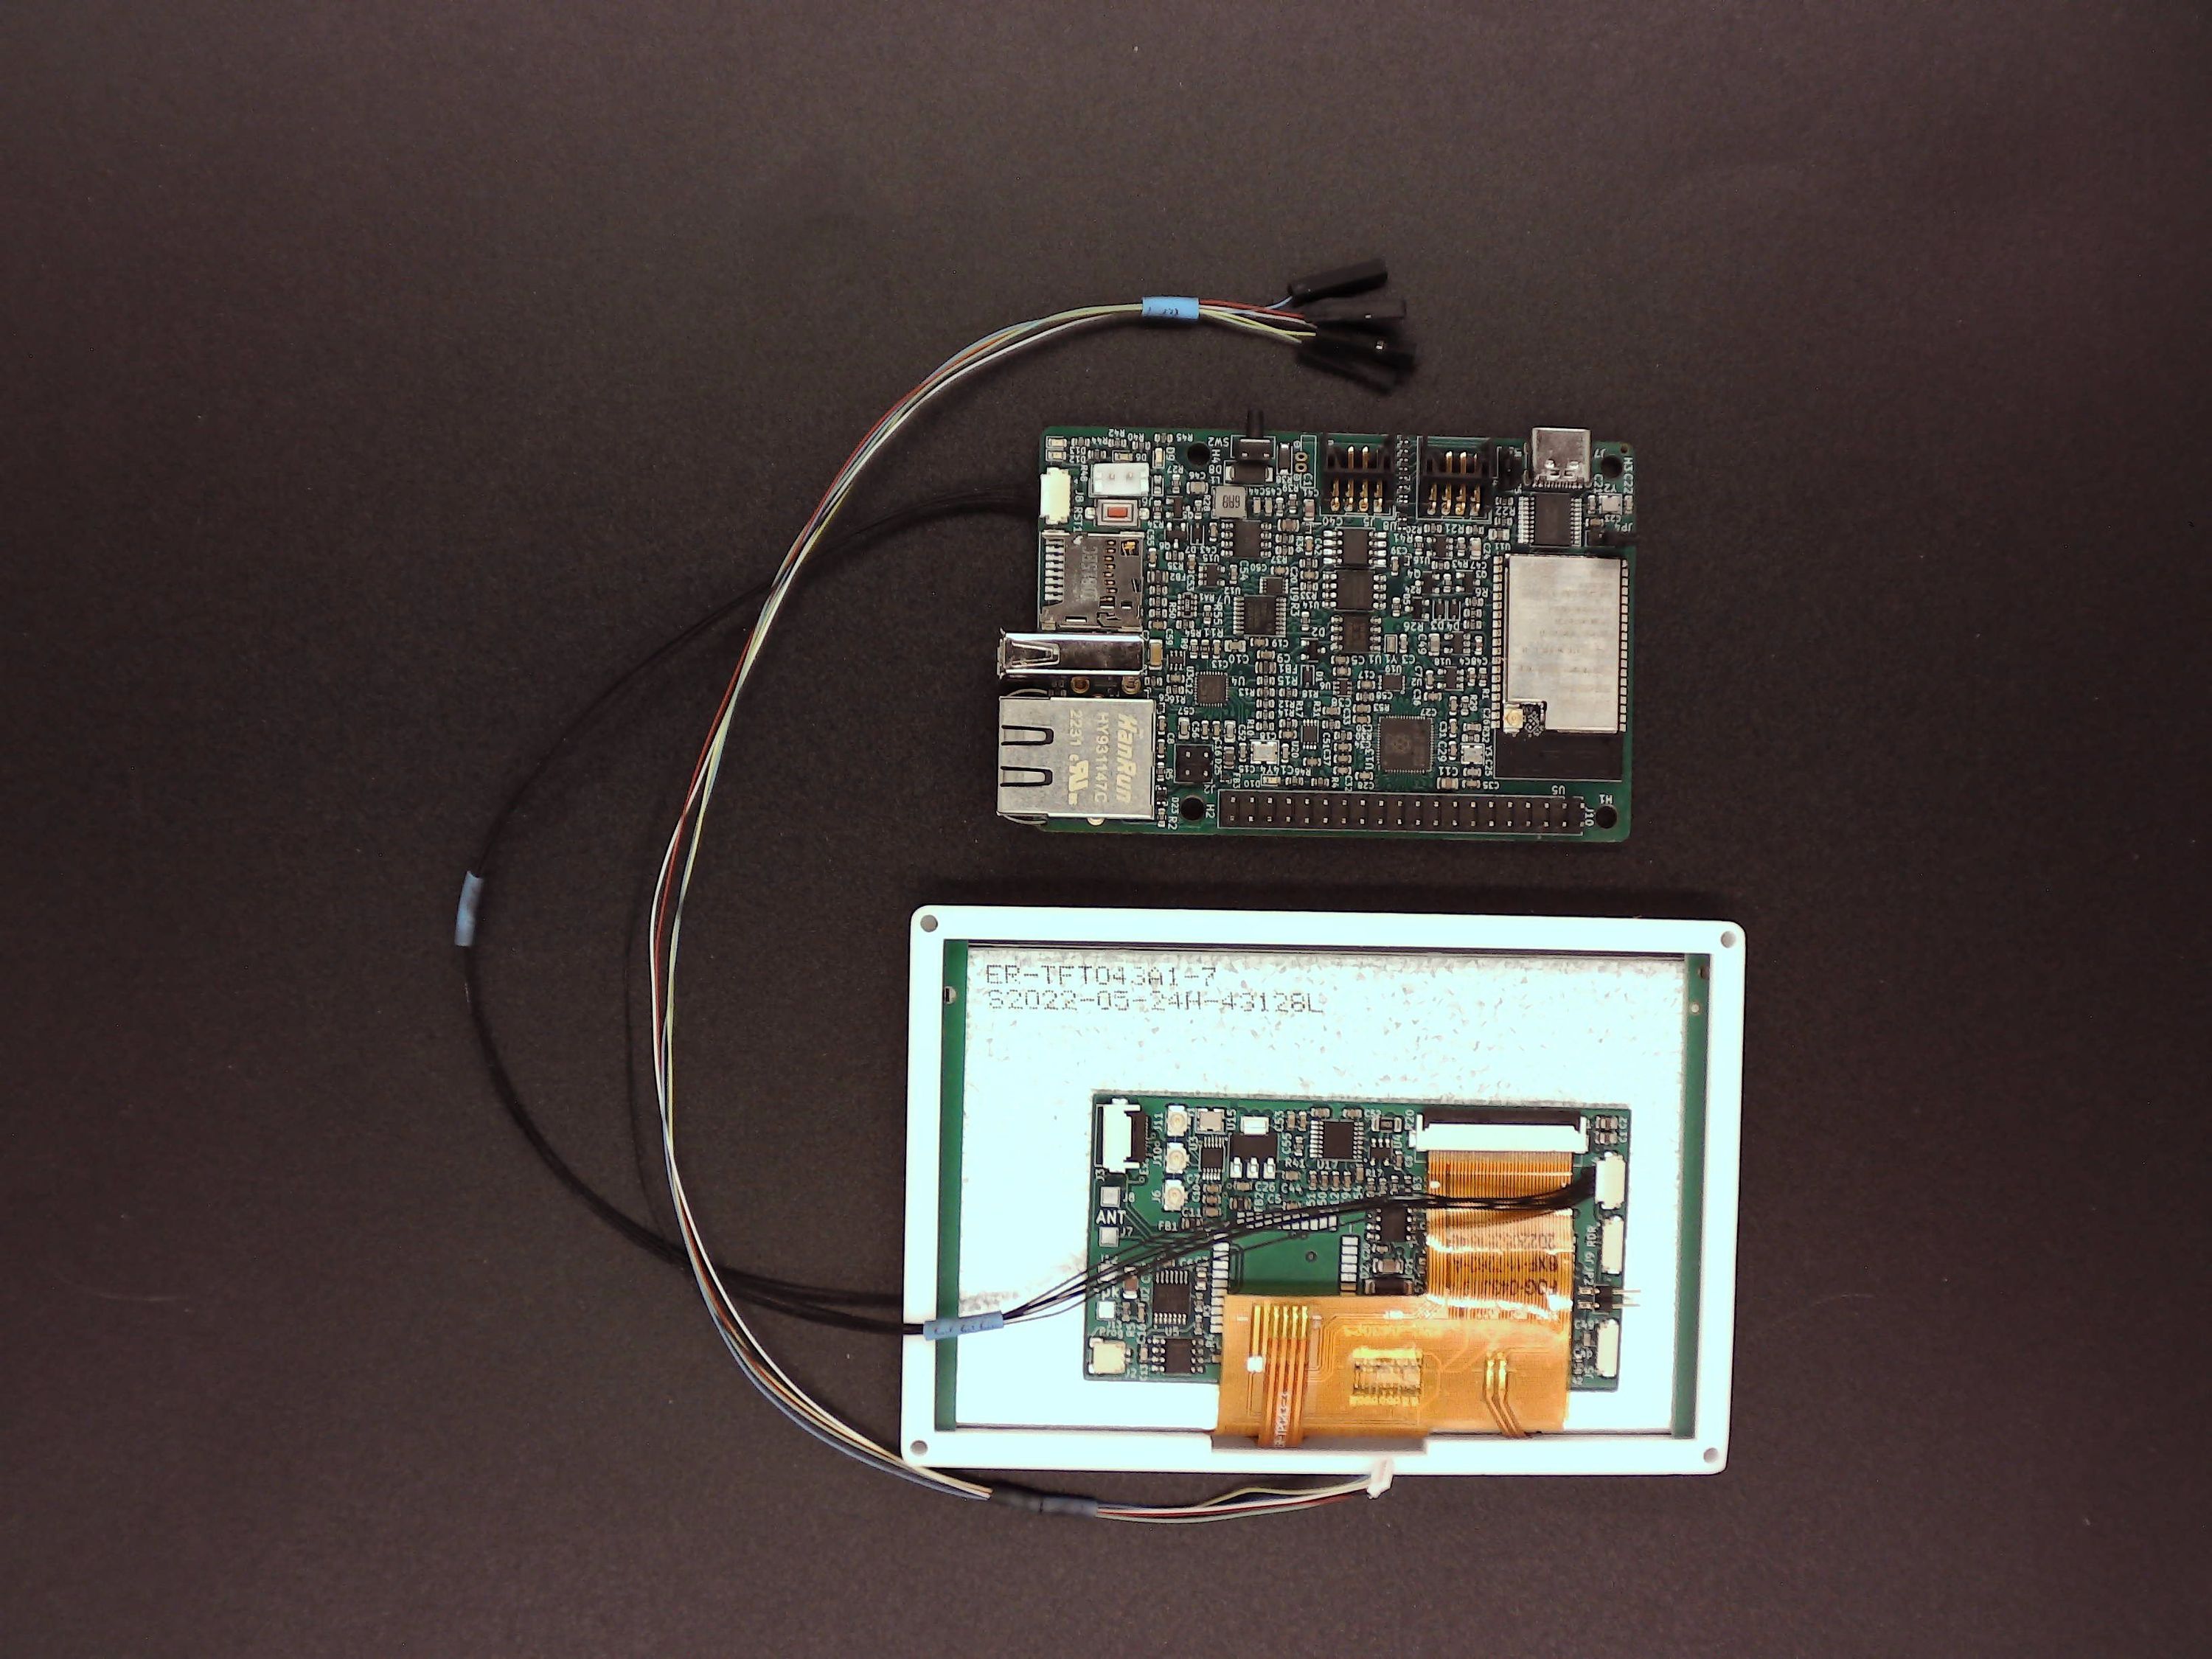
Dreams came true for us with the new "Smart Displays" for the EsPiFF. As you may already know, the EsPiFF has a tiny six-pole connector next to the SD card (shown in the documentation as "HMI connector"). We already had a plan for an easy-to-use display back in the design phase of the EsPiFF and, just days before Christmas, the first prototypes arrived in our office.
Why do we need another "smart display" for the EsPiFF? There are already displays available from Nextion, Newhaven, Riverdi, 4D Systems, to name just a few. The first reason is simple: to mount any of them you’ll need to make a cutout in the case, which means serious metal work. If you are not experienced in this kind of metalwork, and/or you don’t have the required tools at hand, you have a problem. You want a result that looks professional, but if you try it yourself with a jigsaw the result will be ugly! Long story, short: If you don’t have a waterjet or laser cutter for steel, or a CNC machine, mounting the display will be a problem.
That’s why we invented a simple five-hole mounting system for our displays. To mount these Python-programmable displays you only need to drill four small holes, 3.5 or 4 mm diameter, and one 10 mm hole. There’s no need for metalworking with jigsaws, CNC machines, or water jets; just drilling five holes results in a professional-looking display, controllable over UART from an EsPiFF, Arduino, or Raspberry Pi.
The PSD is only 12 mm tall and we offer them in 3.9, 4.3, 5 and 7 inch sizes. EsPiFF users can connect the cable directly to the HMI connector. For Arduino or RasPi users, we’ve added a color coded cable with Dupont connectors, so you can simply connect 5V, GND, RXD, TXD, as you would with a Nextion.
Another reason we developed our own display is the inflexibility of Nextion’s GUI Editor. If you come from desktop GUI programming, you expect components (or widgets) that can be assigned properties and events. You can create instances of these components at runtime and use them as a class instance like any other class instance from C++/Java/Delphi/C#. However, the Nextion GUI Editor is more like a drawing tool: to make an analog meter (a volt meter, for example), you have to draw a volt meter, only the needle is calculated by Nextion. In Nextion, changing the scale on the volt meter requires a new picture! In Delphi (or wxWidgets, or C#, or LVGL), you simply set a property to change the scale and, on the next redraw, the new design will be displayed.
Also, the Nextion GUI Editor is not extendable: In Delphi (or wxWidgets, or C#, or LVGL), you can inherit from a base class (for example, TButton), override the onPaint() method to generated the desired new component. Overriding onPaint() methods is impossible with the Nextion GUI Editor, you have to live with what the current version offers. Other limitations exist as well, for example you can only plot four series in a Nextion chart.
To overcome such limitations, we put an LVGL-uPython port directly onto the display controller. The display controller is the well known, brand new, ESP32-S3, which includes a LCD controller. It can be programmed like any ESP32, but here we focus on uPython-LVGL. The reason is simplicity: From your host (EsPiFF, Arduino, RasPi), you can just send a Python program directly over UART.
Let’s take a simple example, a screen with two buttons:
def event_handler(source,evt):
    if evt == lv.EVENT.CLICKED:
        if source == btn1:
            # treat "clicked" events only for btn1
            print("Clicked")
        elif evt == lv.EVENT.VALUE_CHANGED:
            print("Toggled")


# create a simple button
btn1 = lv.btn(lv.scr_act(),None)
# attach the callback
btn1.set_event_cb(event_handler)
btn1.align(None,lv.ALIGN.CENTER,0,-40)
label=lv.label(btn1,None)
label.set_text("Button")

# create a toggle button
btn2 = lv.btn(lv.scr_act(),None)
# attach the callback
btn2.set_event_cb(event_handler)
btn2.align(None,lv.ALIGN.CENTER,0,40)
btn2.set_checkable(True)
btn2.toggle()
#btn2.set_fit2(lv.FIT.NONE,lv.FIT.TIGHT)
label=lv.label(btn2,None)
label.set_text("Toggled")
Because the Python REPL (Read Evaluate Print Loop) is available on UART, we can also receive events back, allowing you to:
- Modify code and properties at runtime
- Write event handlers in Python and send any data back to the host with the REPL
- Override methods and events to create new components or widgets
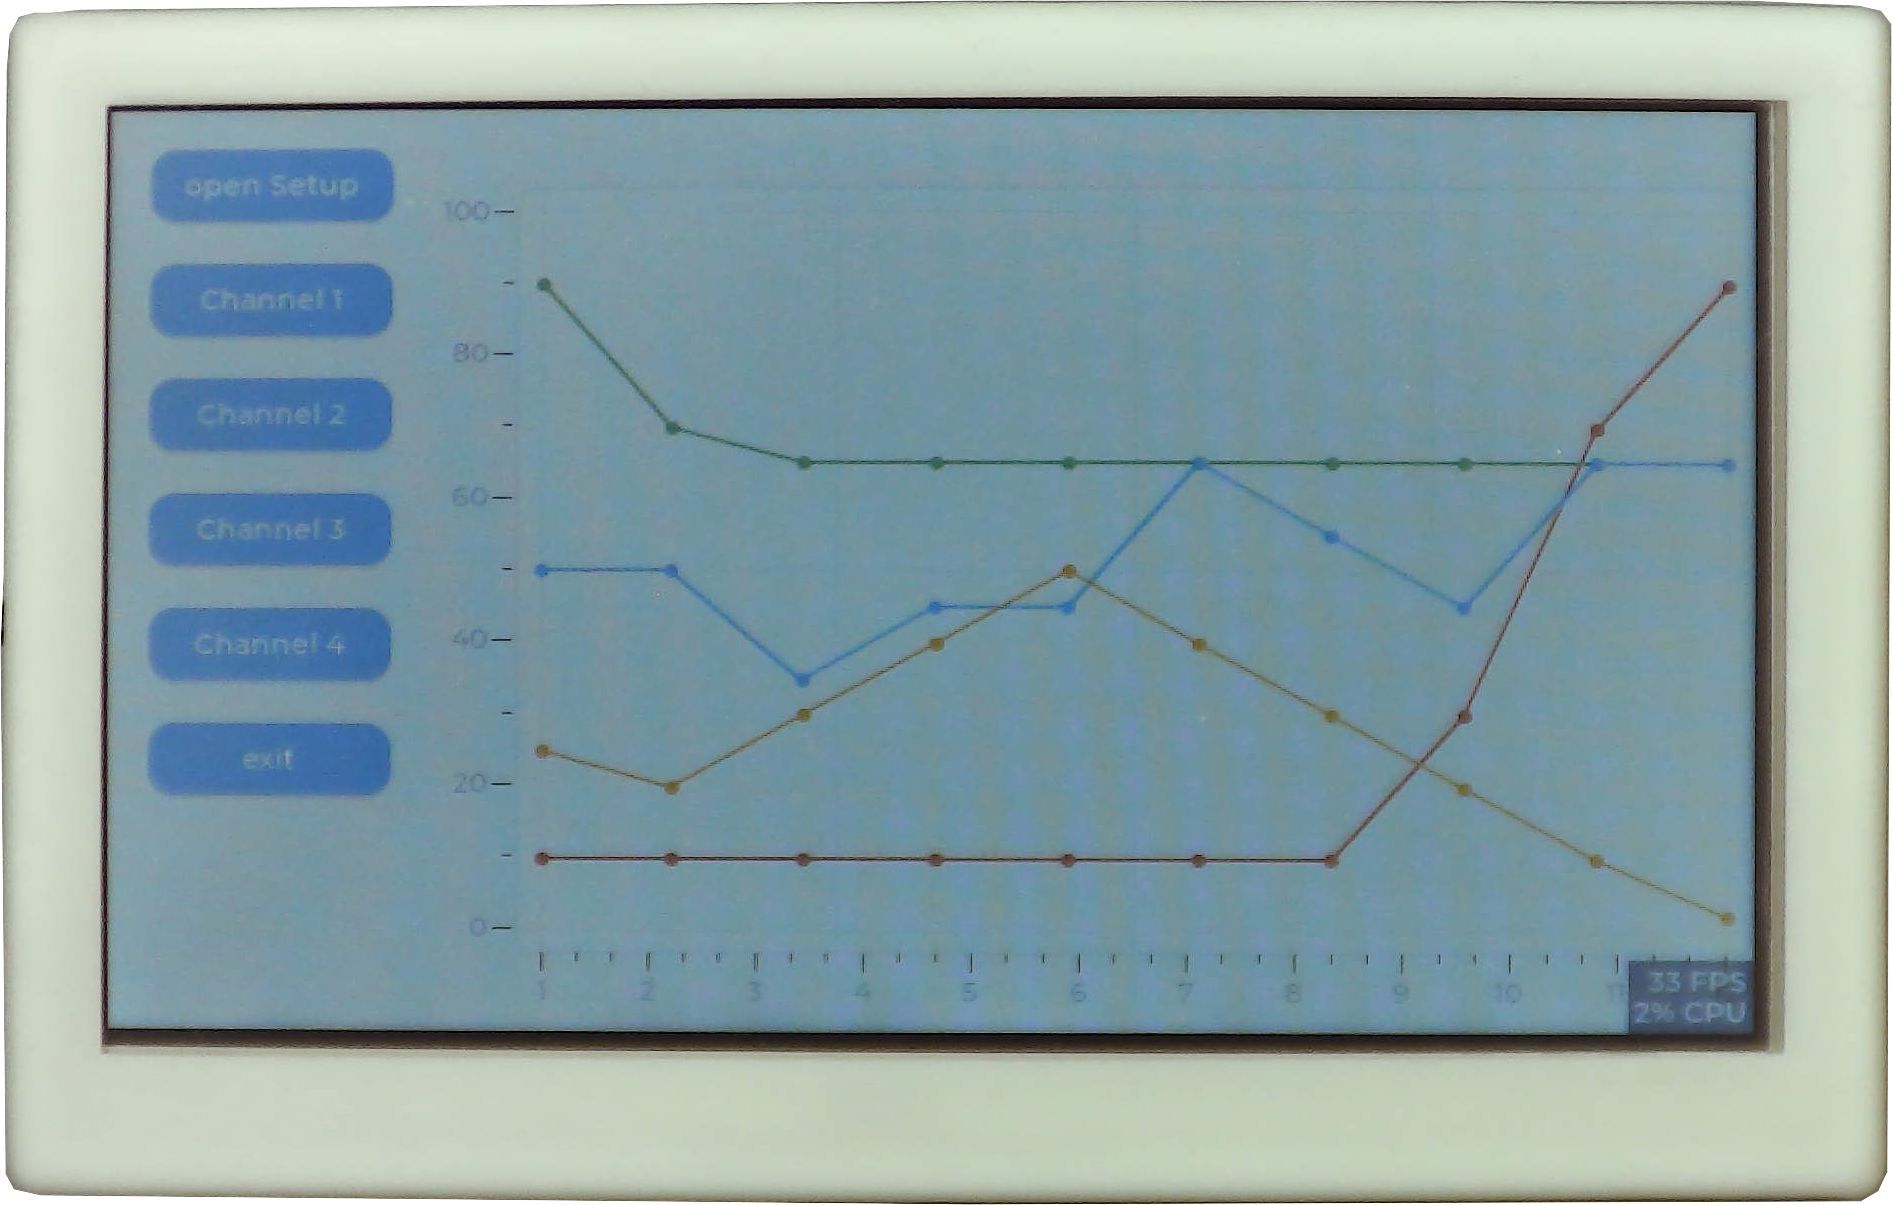
We made this in just a few minutes! LVGL is so great.
(At this point, we’d like to send very big thank to the creators of LVGL, uPython, and Espressif, who ported all to the ESP32-S3!)
While what we have now is already great, we wanted to go one step further and build a visual form designer for the PSD. You’ll find the beginnings of this project in this GitHub directory.
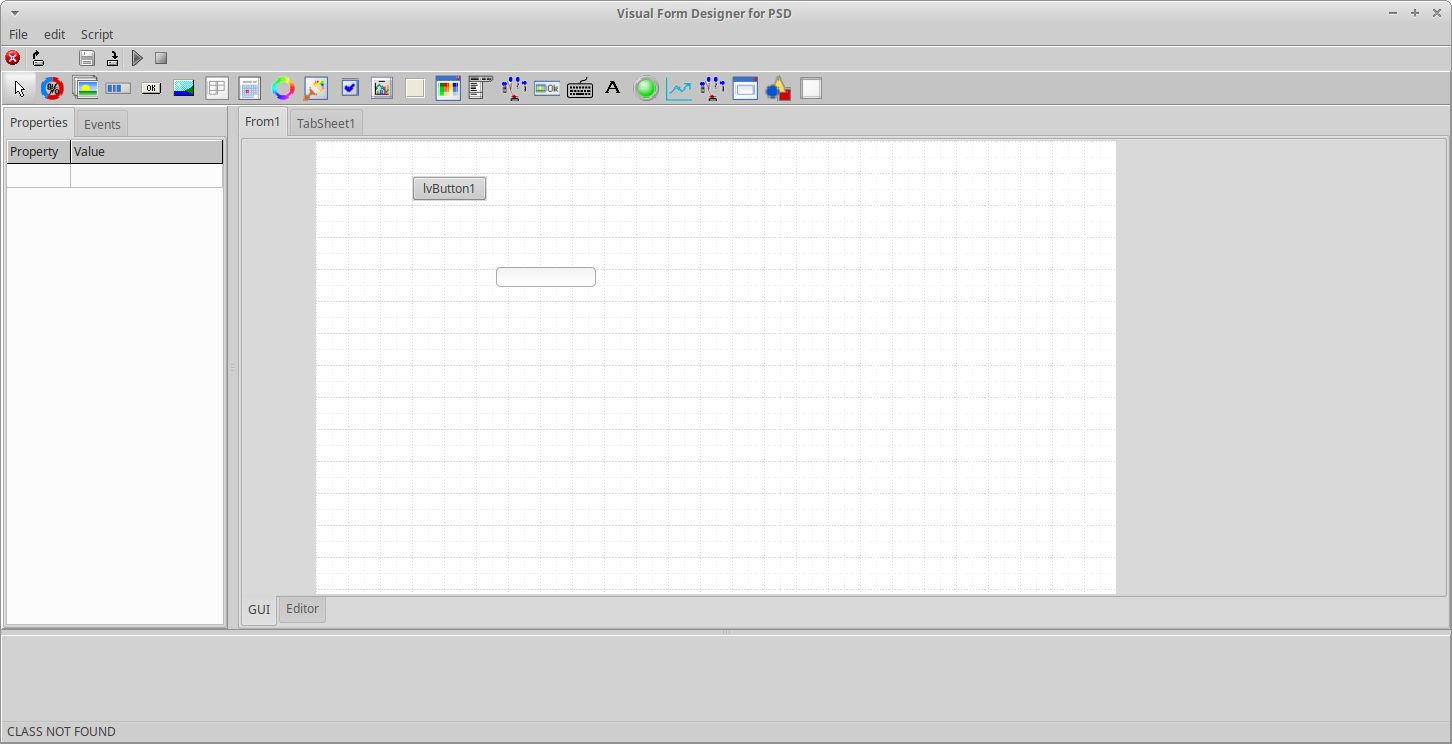
This way, you can design displays as you would in Visual Studio, Delphi, or other desktop visual form designers. We are just getting started, so it will be some time until it’s production ready. But now you can get an impression of the new designer UI. It looks and feels a bit like Delphi, just with Python code instead of Pascal.
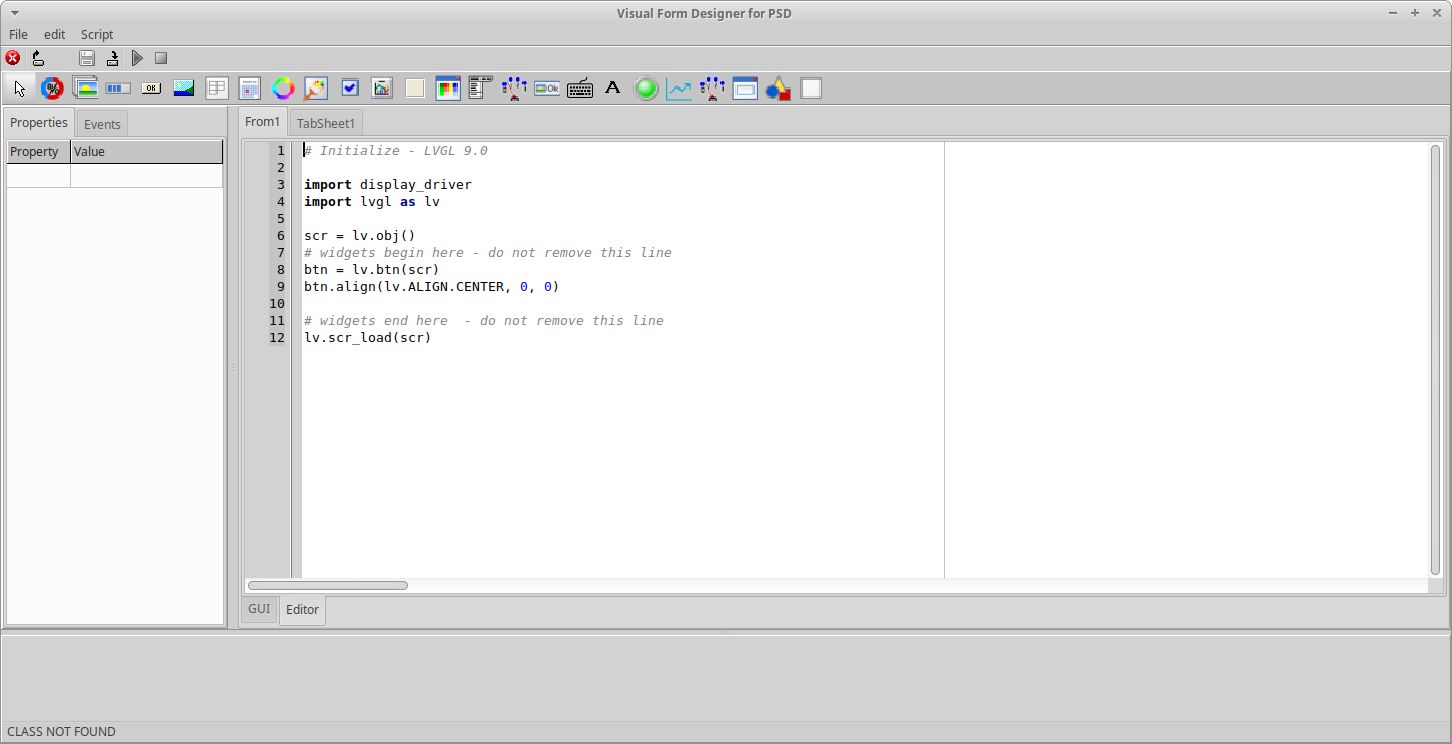
The Visual Form Designer for PSD is written in Object Pascal, using the Code Typhon IDE. For those who are not aware of Delphi’s history: Borland Delphi came on the market in 1995, and quickly became the de facto RAD (Rapid Application Development) tool. It soon had an open source "clone" called Lazarus, based on Free Pascal. Finally, along came Code Typhon, another open source clone of Delphi and, in our view, the best. Lazarus and Code Typhon are very similiar, projects can be converted to and from each other. Both are able to generate native Windows, Linux, and MacOS binaries.
Visual Form Designer for PSD will be released under the GPL v3 license.
We would be happy to have others join our project and help us to build the "RAD for microcontroller". If you are a Delphi or Object Pascal developer who likes displays and MCUs, we would love to welcome you to the community.
We plan to sell the displays in Q1 or Q2 of 2023. Here are the basic specs and anticipated prices:
Available Models & Comparisons
| Resolution | Size | Price | Comparable Nextion | |
|---|---|---|---|---|
| 3.9 inch | 480 x 128 | 50 x 115 mm | $59.90 | none |
| 4.3 inch | 800 x 480 | 77 x 115 mm | $59.90 | NX4827P043-011C-Y ($59.90) |
| 5 inch | 800 x 480 | 87 x 132 mm | $74.90 | NX8048P050-011C-Y ($74.90) |
| 7 inch | 800 x 480 | 110 x 175 mm | $102.40 | NX8048P070-011C-Y ($102.40) |
All models come with a capacitive touch screen, 16 MB Flash, and 8 MB PSRAM.
Wishing you all a happy New Year!
The MDC Team