Project update 2 of 14
Thank you, Video Demo, and Google Coral
by Stefan AHome Assistant Yellow was fully funded in less than five days! Thank you very much for your support!
We are working hard to make Home Assistant Yellow a reality. This week our focus was on sourcing parts (which will be a continuous effort given the electronics market situation) and creating a test setup to make sure every device has been tested to be working properly before making its way to you!
In the meantime, I’d like to show you what Home Assistant Yellow can do for you with a simple example — connecting Zigbee-based motion sensors and lights and creating automation with them.
Sneak Peek of Home Assistant Running on Home Assistant Yellow
When you receive your Home Assistant Yellow, the first thing you’ll need to do is to plug it into power and your existing network via Ethernet. Home Assistant will make sure that you start off with the latest software: at boot, the latest version of Home Assistant will be installed onto the device.
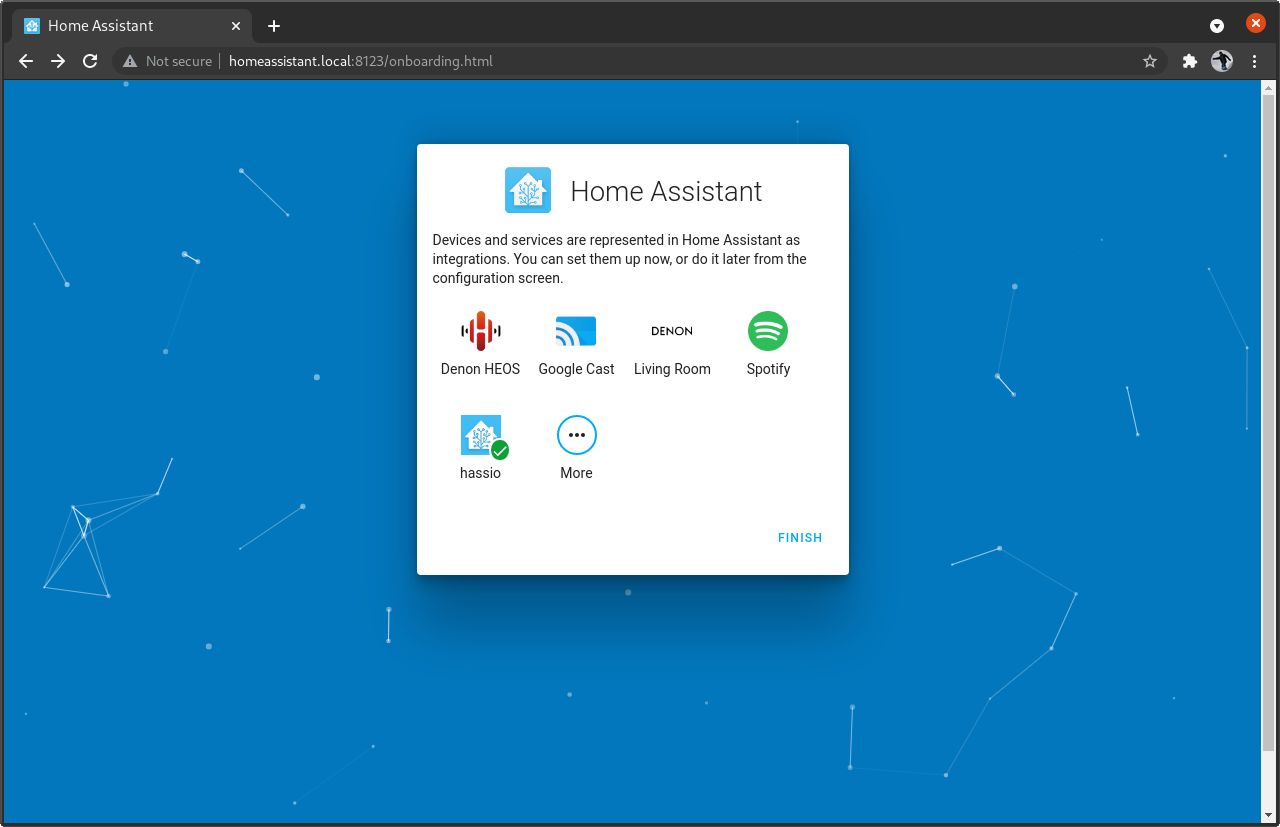
Once Home Assistant is updated and ready, you’ll be able to access it via browser or app at the address https://homeassistant.local:8123. As a first step, you’ll have to create a user.

After that, you’ll have the option to enable integrations for discovered devices. Home Assistant checks your network for devices it can communicate with and gives you the choice to control them through Home Assistant, complete with instructions on how to do this.
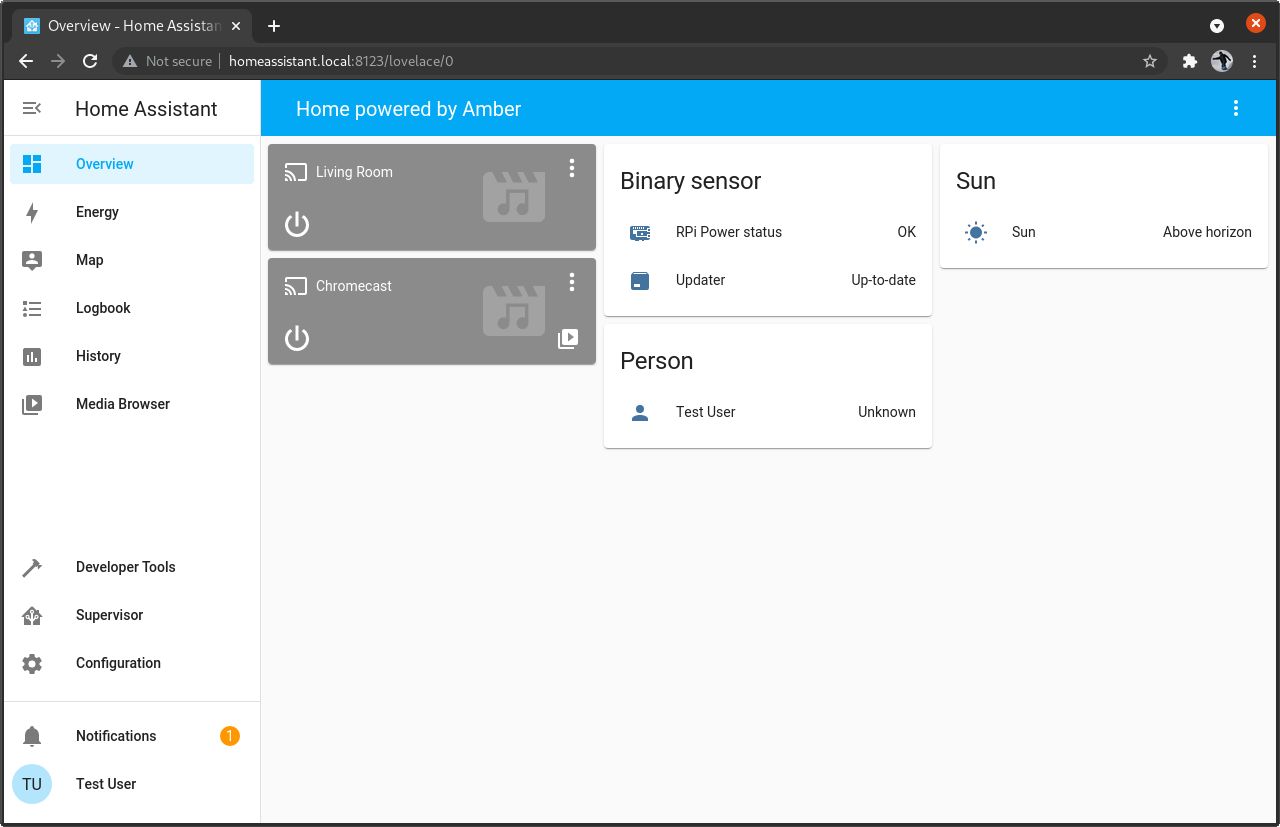
Once Home Assistant is up and running, you will end up on the default "Overview" page, where you’ll already be able to control the detected devices! In my example, I can control my Denon AVR receiver:
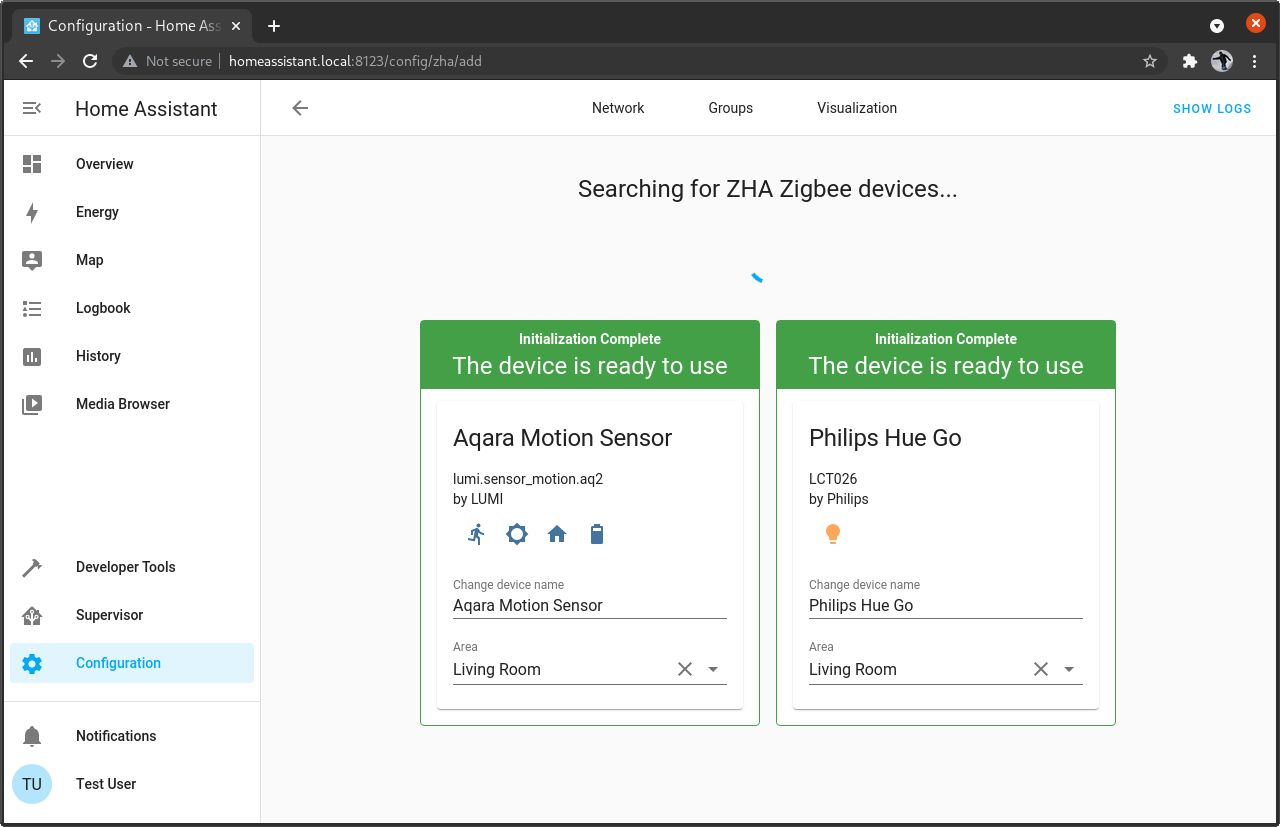
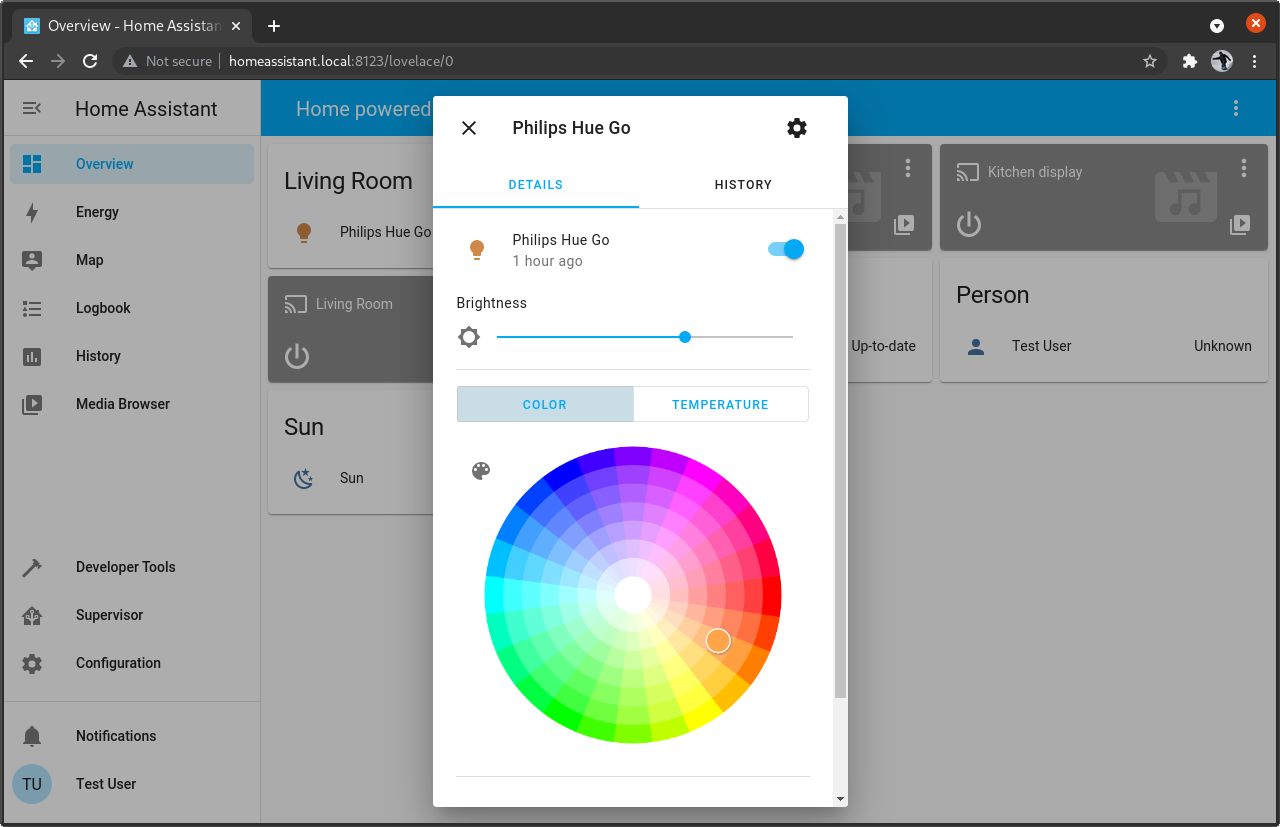
One of the main features of Home Assistant Yellow is its Silicon Labs Zigbee Wireless Radio which allows it to talk to Zigbee devices like IKEA TRADRI or Philips Hue directly. Home Assistant Yellow needs to be brought into pairing mode to on-board new Zigbee devices. This can be done by clicking “Configure”, “Integrations” and selecting “Configure” in the “Zigbee Home Automation” integration card. From there, “Add Device” puts Home Assistant Yellow into pairing mode. Every Device in pairing mode will automatically show up in this Dialog. You can rename and define the room this device is in while still adding additional devices. In my example I paired two devices: Philips Hue Go lamp and an Aqara motion sensor.
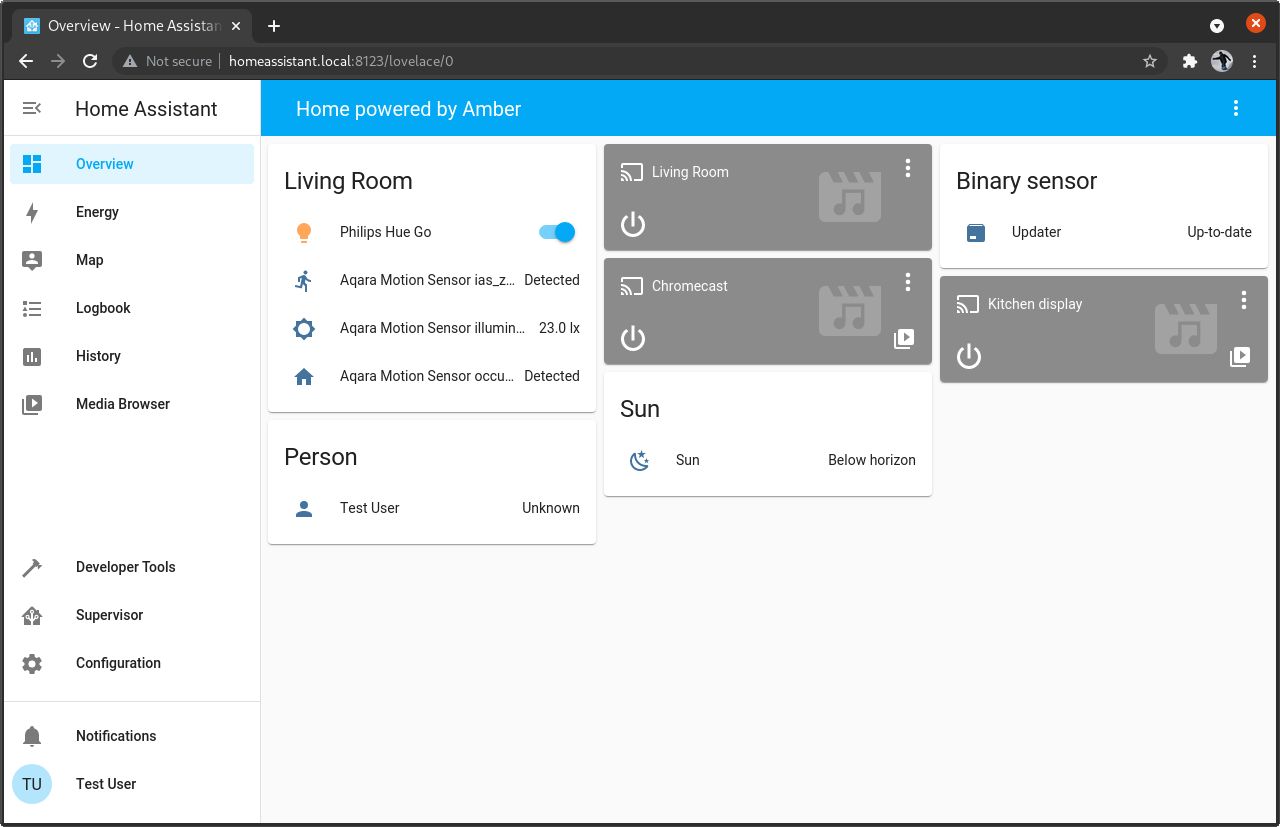
Once the devices have been connected, they will automatically show up in the overview. You can see the status or toggle the light on and off in this dialog.
Clicking on the light bulb will give you additional control over the light. A bit further down, you can see for yourself in a video showing how a motion activated light is controlled and monitored in real time via the Home Assistant Android App.
Finally, let’s create an automation which turns on our Philips Hue Go lamp whenever the Aqara motion sensor detects motion. This can be done in "Configuration" under "Automation." Automations can be created through the UI by manually defining triggers, conditions, and actions. We also have Blueprints for common tasks — in this case we can use the "Motion-activated Light" Blueprint. You can find hundreds of Blueprints in the Blueprints Exchange section of the Home Assistant forums.
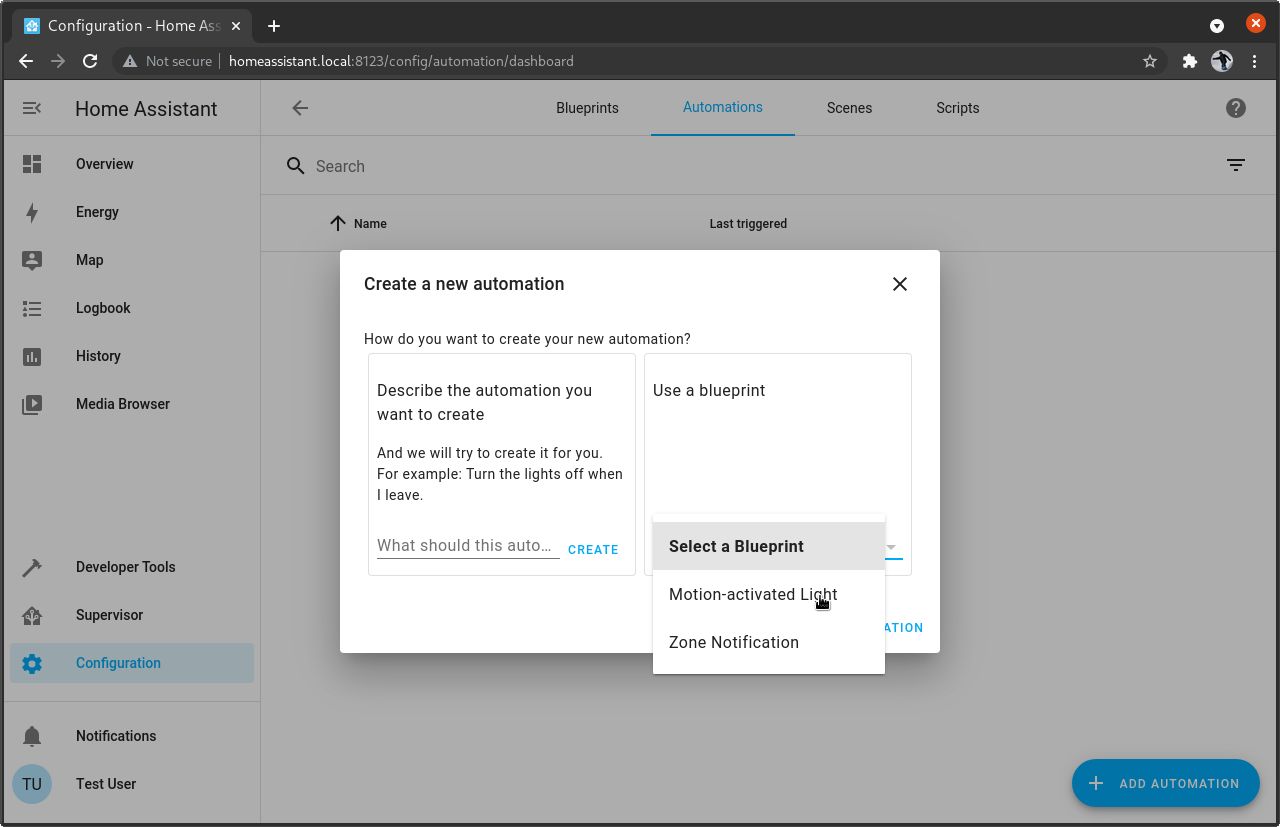
In the next step you will be able to select the Aqara motion sensor as well as the Philips Hue Go lamp.

Once selected and saved, the Automation will be active. With the next motion, Philips Hue Go will trigger the lamp!
This is a rather mundane automation. One of the key strengths of Home Assistant is its vast number of integrations. Besides using the Aqara motion sensor for the lamp, I can also use it to play music on my Denon AVR Receiver. Another example might be to integrate your washing machine: if you have a smart washing machine or a power monitoring device to monitor the power usage of your washing machine, then you can trigger actions when the washing machine finishes its job. For example, let a lamp turn green, or play a microwave style "ding!" on your Google Home speaker. There are endless possibilities!
Update on Google Coral M.2 Compatibility
When we launched, our campaign page mentioned that the Google Coral M.2 AI Accelerator is compatible with the M.2 slot on the Home Assistant Yellow. This turns out to be incorrect and we’ve updated the campaign page accordingly.
We had tested this prior to launch by building Home Assistant OS with the Google Coral drivers. The driver loaded successfully and the Coral M.2 appeared as /dev/apex_0 on the system, so we assumed it was working.
We have now verified that actually using the driver is causing the same issues as noted in this GitHub issue. This is related to a hardware limitation in the PCIe part of the Raspberry Pi Compute Module 4. At this point, it seems unlikely that the limitation can be worked around in software.
However, if you still want to use the Coral accelerator, Home Assistant Yellow is compatible with the Coral USB accelerator stick, which requires a USB-C to USB Type A cable.