Project update 2 of 9
Live Demos Over the Internet
You can now program real Open-V dev boards from anywhere in the world and see the results on a live video feed! Here’s our first demo - blinking the dev board LEDs.
You can see on YouTube a video live stream of our demo board located in Colombia. You can actually program this demo board remotely and then you (along with the rest of the world) will see your program in action on the live video stream by following these steps:
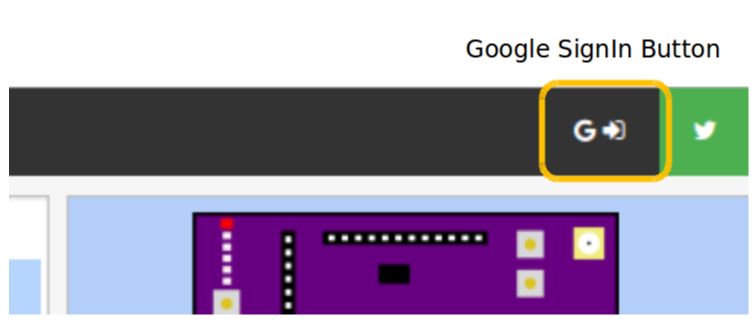
1. Sign In
Go to http://onchip.uis.edu.co and, if you want to remotely program the demo board, sign in using a Google account. You may need to click the sign in button in the upper right of the page. You can also sign in as a guest, but you won’t be able to remotely program the board. Each Google account is given six opportunities (tickets) per day to program the board. If you’re a backer of the campaign and want more tickets, just let us know and we’ll set you up.
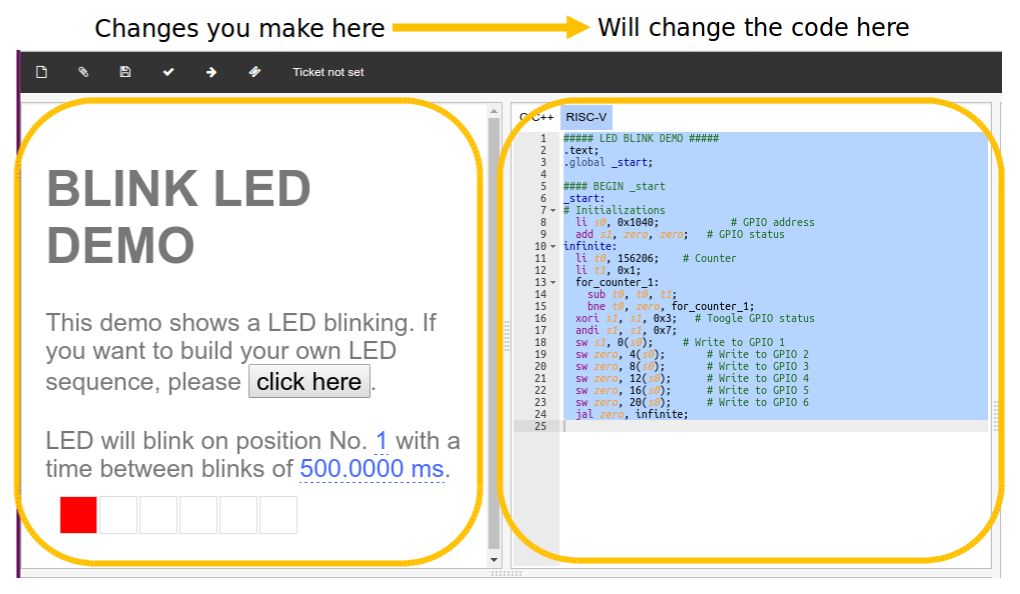
2. Select the First Demo
In the panel on the right of the page, click the top picture of the Open-V testing board to work with the blinking demo.
3. Select the LED to Blink
The testing board has six LEDs in a row. Select which one to blink by clicking the corresponding box. Another demo allows you to control more than one LED at a time - this demo is kept as simple as possible.
4. Set the Interval Between Blinks
Click and drag the blue time value to change the time interval between blinks.
5. Modify Code!
You might have notice that modifying the LEDs to blink and time interval also changes the code listing in the middle panel of the page. In fact, you can write whatever code you want in that panel and that’s exactly what will be compiled and downloaded to a real testing board. You can choose between C and assembly by selecting the appropriate tab at the top of the middle panel. Of course, directly modifying code is optional and you can proceed without doing so.
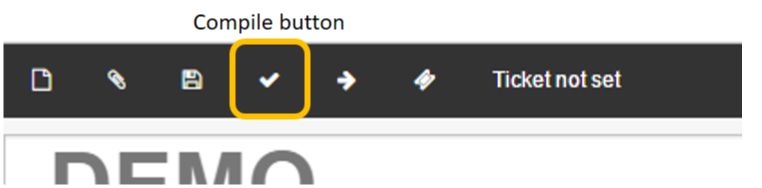
6. Compile
When your parameters are set, you’ll be able to compile & send the program to the open-v microcontroller in the dev. board. For compiling you need to click the “check” button.
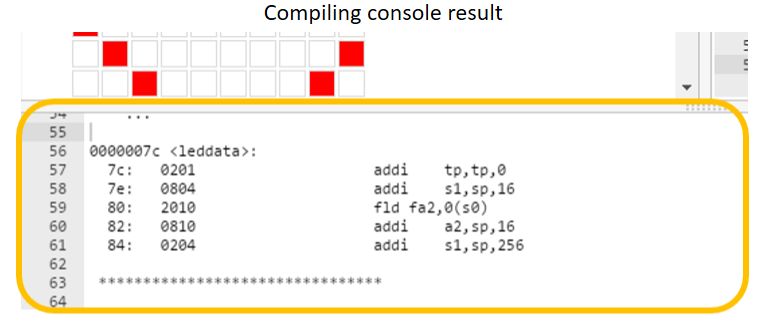
You can follow the compilation results on the console at the bottom of the page.
7. Request a Programming Slot
To send your program to the dev board, you need to request a ticket by clicking the “ticket” button.
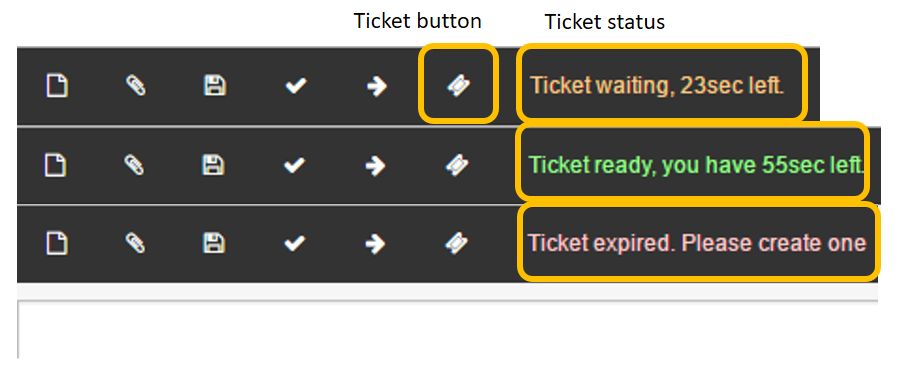
If your browser’s time is net synced, you’ll see a seconds counter to the right of the ticket button indicating how much time is left to program. If there are other pending tickets you need to wait.
The text will be colored Orange indicating how much time you need
to wait to program.The text will be colored Green indicating you can program the
board and how much time you have for this action.The text will be colored Red indicating you need to request
another ticket in order to program the demo board.
If something goes wrong, you can see what happened in the console.
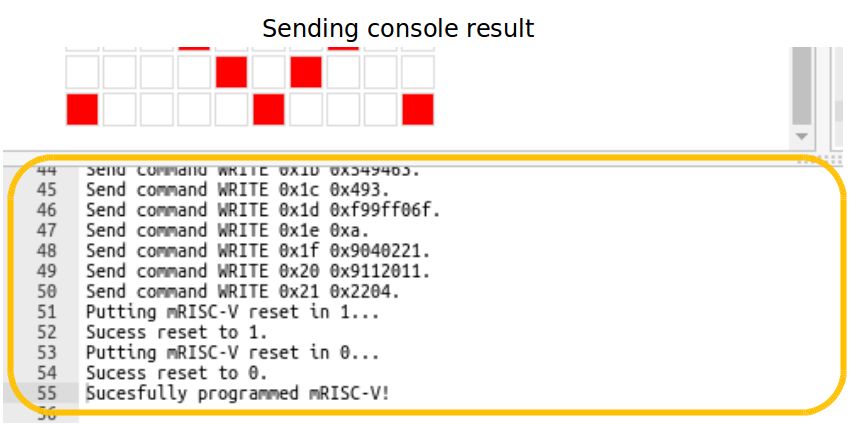
8. Load Your Program
When you have permission to program using the ticket, click the “right arrow” button.

This process will take several seconds considering that the program is being sent through a slow USB-to-SPI interface. When finished you will see the result in the console prompt and also on the board in the live video.
9. See the Results
Watch your program in action on our live video stream!
10. Tell the World!
Share the video link and impress all your friends and family by being among the first people to program a real RISC-V microcontroller! Now that you’ve mastered the blinking LED demo, go ahead and explore the other demos - they work in a similar way. Enjoy, and thanks for all your support!