Project update 10 of 21
The Mould is in Production
Hiya Everyone!
This week we have a brand new kind of update that we’ve never had during this campaign. Thanks to the fact that the μArt got funded early, we know that it will go into production, thus why wait until the campaign ends? If we can start preparations earlier, it should minimize the chance for some delays, right? And so that’s exactly what I did. Dear backers, I’m giving you the first production update.
Injection moulding
I hereby humbly and ceremoniously announce that the mould’s design is finished (barring some corrections that may be needed after the first few cases come out of it) and is ordered!
As you know, the μArt will come with its own plastic enclosure, and it is going to be injection moulded. If you don’t know what this means, injection moulding is basically die-casting, but for plastics. Basically, you take a big metal form (this is the mould) containing your product in negative, and you inject molten hot plastic into it under high pressure. This brings a great number of technical advantages for the end product, like better sturdiness, a nicer look, close to perfect reproducability, and so on. Why don’t many other projects do this too? Well, I’m not blaming them, the reason is simple: this is a very expensive technology for small quantities. And to be honest, despite the success of the campaign, the μArt is far from a high-production volume in the industrial sense. Normally, you’d need multiple thousand pieces of produced units to even just start considering injection moulding, because the one-time costs are so high. The mould with the cavity that is used to form the molten plastic is a much more complicated part than some people believe. It is largely solid metal (the mould needs to endure extreme heat and pressure), and even the smaller and lighter ones weigh about 150-180 kg. As such, these moulds are moved around using car(t)s, machines, and even cranes. Also, the moulds are not just solid metal. Inside they have fine movable mechanics for various purposes, ranging from those ejecting your finished product, to a multitude of levers to be able to produce complex (both concave and convex) forms in one process. Add to this a whole city of bolts, screws and springs, tunnels for coolant, and many-many hours of manual labor needed to form, grind and polish it to the desired specifications within 50-100 μm accuracy. And that’s just the production, without taking into account the time needed to design such a beast that is largely client-specific! All I wanted to say is, that these things are expensive, and this is why you don’t usually see injection moulded parts for hacker projects on the internet.
Making it possible
As you see, normally it would have been impossible for me to turn to injection moulding. Thankfully I’ve found tec4data, and they designed the μArt’s case and oversee its production now.
If you design a 3D part based completely on just the "looks and optics", you will probably get something nice, maybe even practical, but all chances are that it would be very expensive to produce. Injection moulding has its limitations, and unless you know what you are doing you will quickly design a form that can only be moulded using a lot of moving machine parts, a complex mould, or even needs multiple moulds. To my luck, tec4data knew how to optimize the case for easy batch manufacturing. They do contract mechanical and electronic engineering as their daily business so they know a lot about these stuff. For me, this translated directly into a less complex mould for the same function, and coupled with using some used parts from other projects, this made injection moulding realistic for the μArt. I still needed to order a lot more cases than I was planning for the electronics (1000 case parts each), and in the beginning this seemed a lot, given I defined campaign success with less than 250 sold μArts. But I decided to take the risk, and seeing the current success and considering possible future sales, I’m glad I did.
The mould
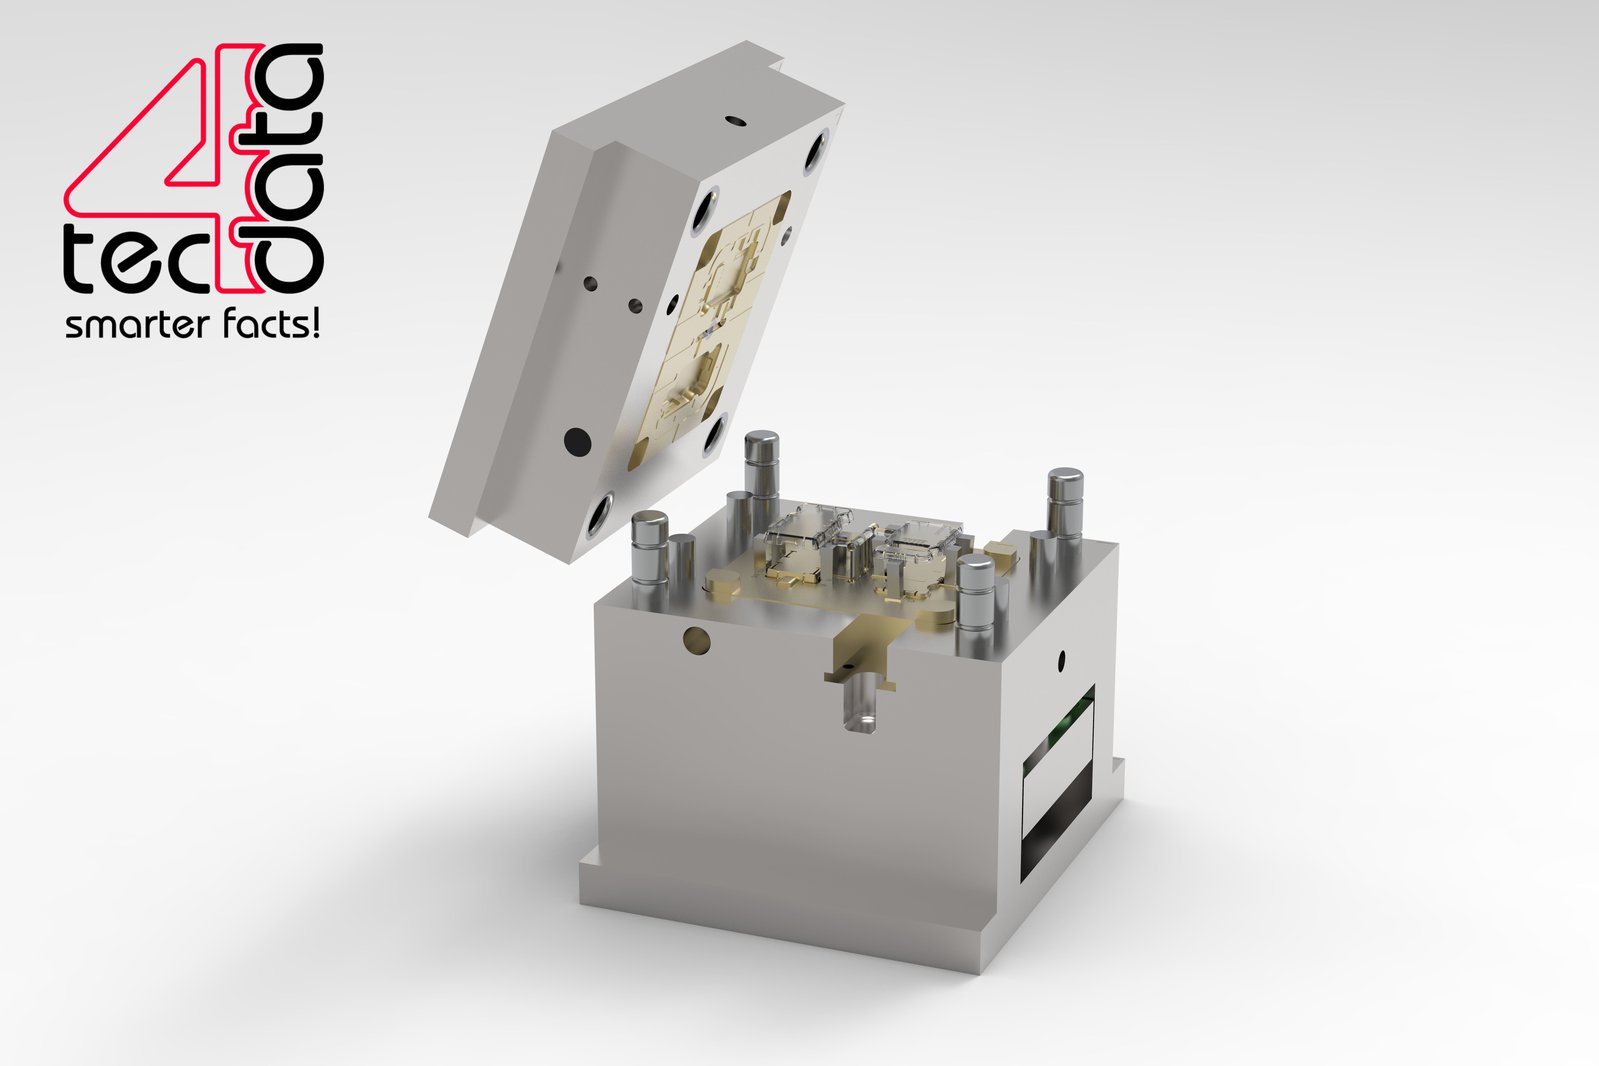
Okay, but do I have something to show? You bet I do. The mould for the μArt was ordered almost two weeks ago, and since yesterday, we have a detailed 3D model for the mould. This signifies that its design phase has ended and it is now being manufactured, which will last about 2-3 weeks. Once that is done the mould is ready to be used for producing μArt cases, but the first few that come out of it (appropriately called the "first-out-of-tool") might reveal some necessary corrections to the mould. Those corrections have a lot faster turnover however, a few days each at most instead of weeks. So, what does the mould look like? I received a high-resolution render from tec4data of a semi-exploded view.
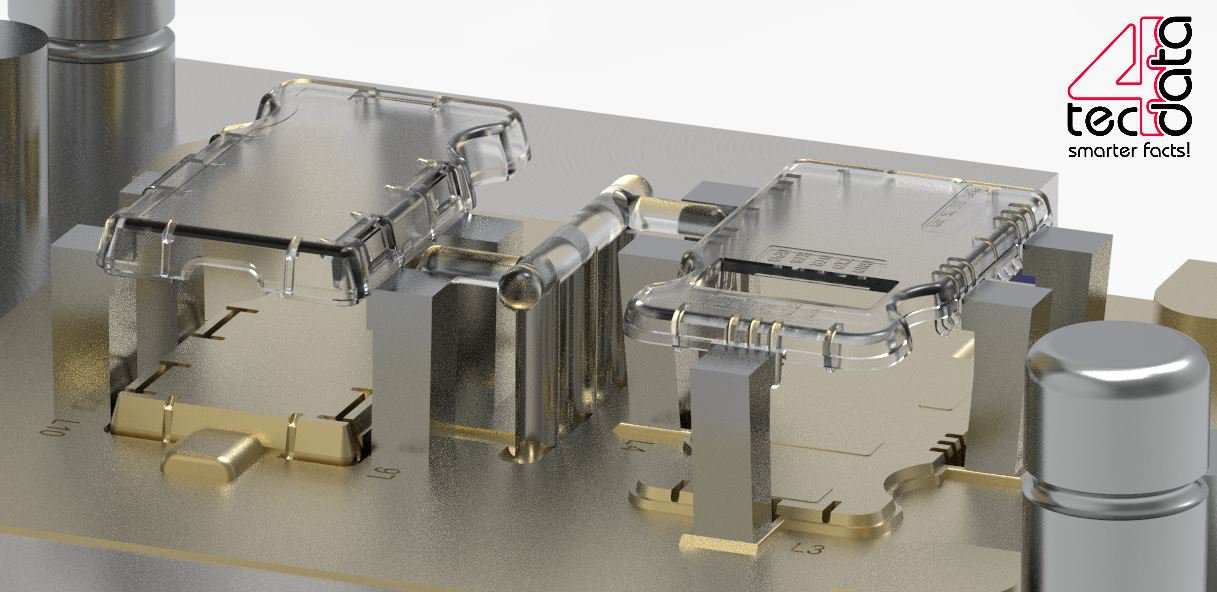
You can clearly see the two mould parts that are separated. In the top of the mould you have the negative of the "top" side of both the case’s top and bottom parts, while the bottom mould has the negative of the other halves. When put together, two tightly sealed cavities are formed with the exact shape of the μArt’s plastic parts, and they are then filled with molten transparent plastic over the central injection canal.
This canal is what results in the leftover cylinder-shaped plastic in between the case’s top and bottom in the rendering. The smaller metal columns around the case parts that look like as if they were holding the plastics are actually movable levers that allow the case snap-in fingers to be manufactured without becoming latched into the mould itself and making them unable to eject. I think these are also used as the ejecting mechanism too in this particular case, though I’m not 100% sure.
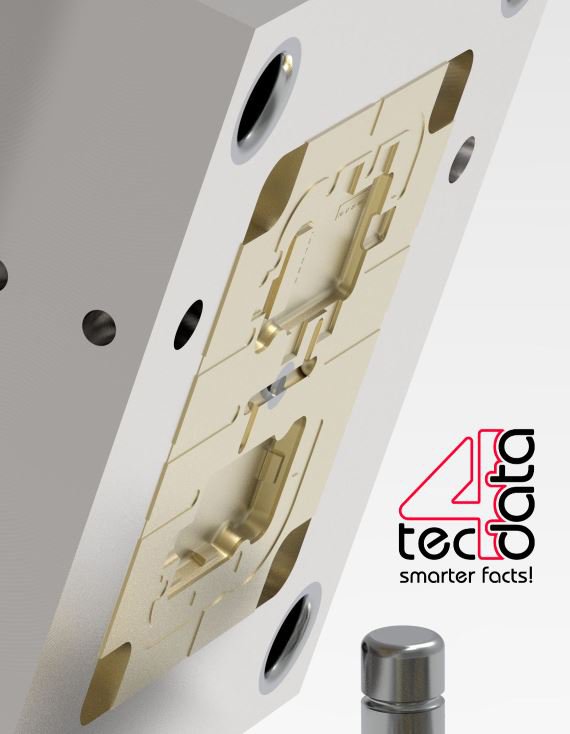
The top part of the mould is also interesting.
Besides containing the other halves of the enclosure’s top and bottom (well, the negatives of them), you can see a small hole in the middle, which is also marked with grey disc around it if you look carefully. This is the so called sprue, the opening where plastic is injected.
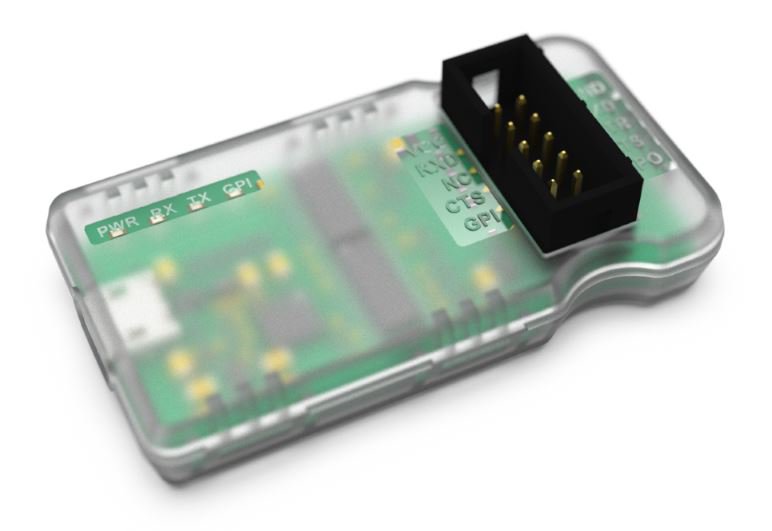
The rendering of the case parts - the transparent plastics in the images above - is actually not that exact. Here they seem as if they were wholly transparent, but this is not the case (no pun… a little pun intended). The case is actually mostly translucent, except for the embossed areas around the labels, which are clear transparent. The clear areas also include most of the bottom of the case so that you can read the information I’ve printed on the back of the electronics board :). All in all, the most accurate picture of the final enclosure is still the rendering you already know from the campaign, even if it is not so photorealistic.
Closing
I have never seen such detailed pictures of a mould for injection moulding before, so I am still amazed at these images. Have you seen anything like them? I think these are totally awesome. Thank you tec4data once more for these cool renderings and for supporting the μArt. As for me, and as always, I’ll keep you updated with more stuff.


