Project update 6 of 19
Project History
On the campaign page I mention the previous iterations of this project, the LiFePO4wered/Pi and LiFePO4wered/Pi3. Since many backers may not be familiar with how the current LiFePO4wered/Pi+ came to be, I thought it might be interesting to recap a little history of how this project has grown over time to where it is now.
My first introduction to LiFePO4 batteries happened at Walmart of all places. They were selling four-packs of Westinghouse AA size LiFePO4 replacement cells for solar lights. I bought a pack and decided it was just amazing to have an AA size cell with twice the normal voltage, so you could simply power electronics from a single cell! Better yet: the 2 V to 3.6 V voltage range perfectly matched the voltage range of many 3.3 V chips, and the cell’s low internal resistance meant you didn’t need any voltage regulator at all! Plus I found out about the amazing cycle life of over 2000 cycles. The potential for use of these batteries in electronic projects seemed tremendous, and it made me wonder why they weren’t more widely known and used in the Maker community.
Seeing this situation as an opportunity instead of a problem, I decided to do something about it, and the first LiFePO4wered branded product was born: the LiFePO4wered/USB. It was conceived as a minimal "battery holder with built-in USB charger" module that could be dropped onto perf board prototypes to instantly solve power for 3.3V battery powered projects. It was late 2014 when I first released it.
To do some marketing, I decided to have a booth at the Boulder Mini Maker Faire early 2015. I needed to come up with demo applications showing what you could power with this thing. On a whim, I decided to try if you could power a Raspberry Pi with it. And surprisingly, it worked! It was surprising because I was powering the Pi straight from the 3.2 V battery while the Pi is supposed to be powered with 5 V. At the fair, I had Big Buck Bunny running in a loop playing from a Pi powered with this demo contraption. You can see this very first LiFePO4wered/Pi prototype on the left in the picture below:
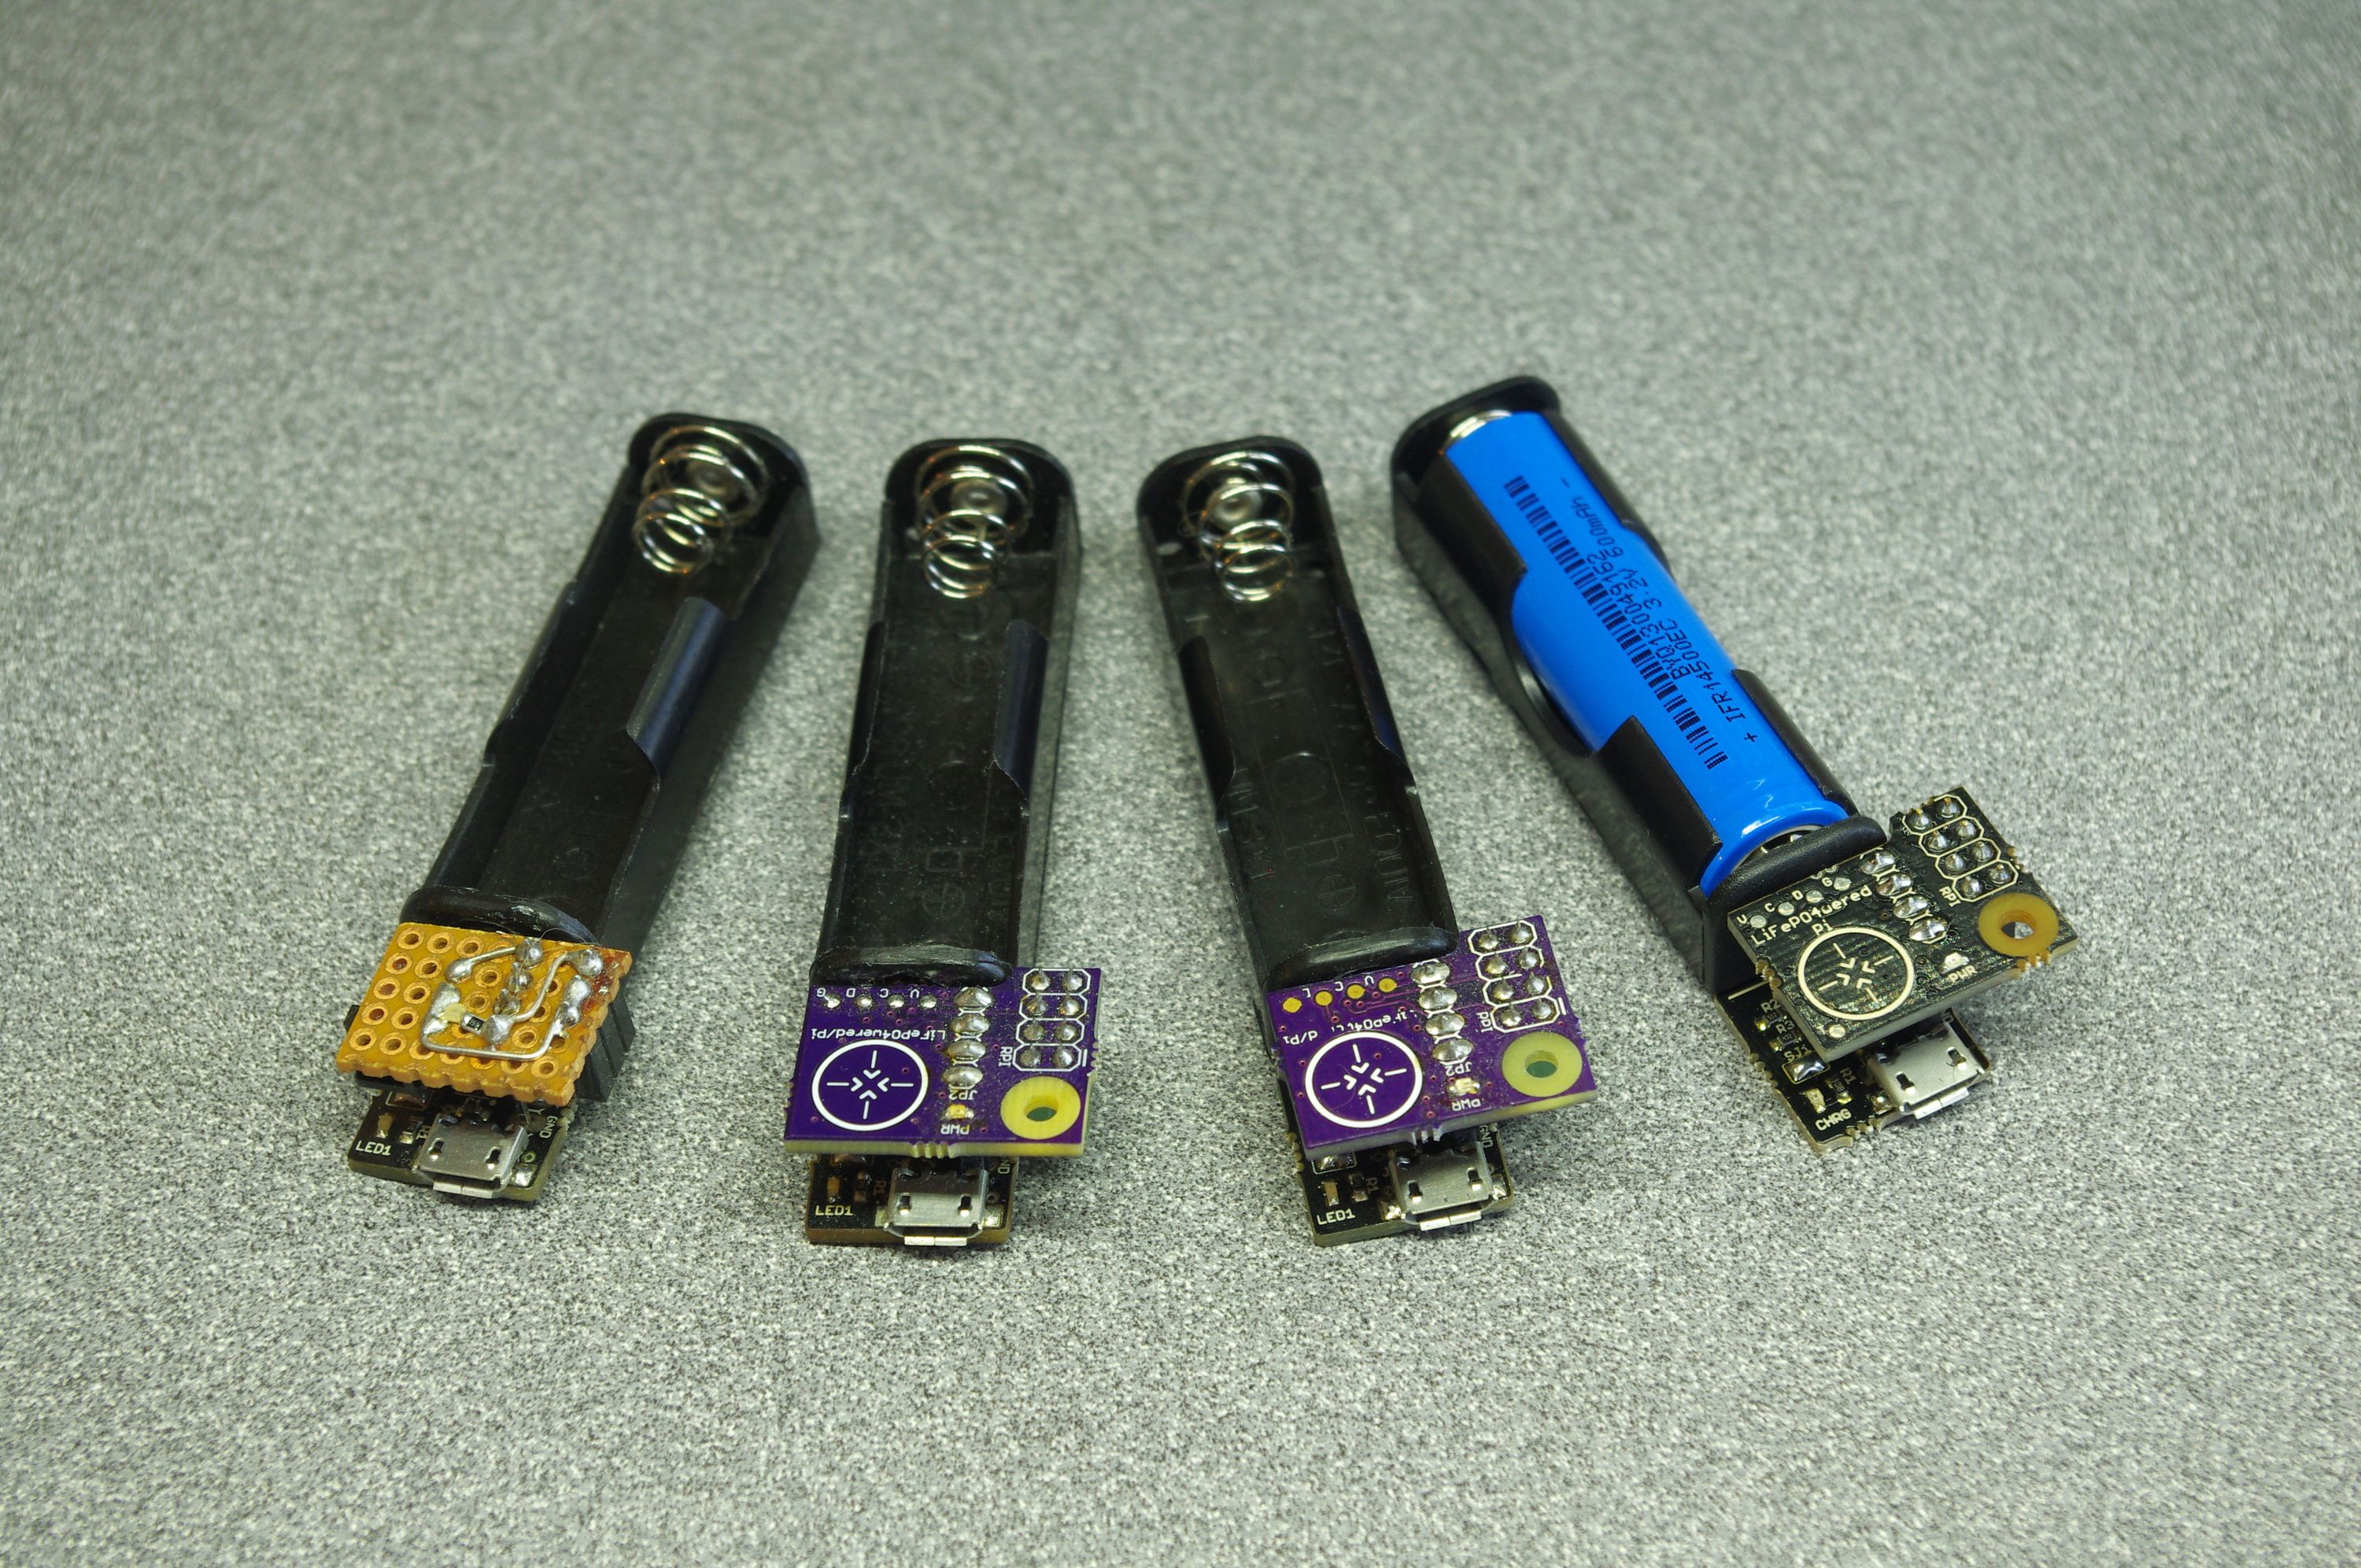
This thing just had a slide switch to turn power to the Pi on and off. I started to think how nice it would be if I could make the Pi do a clean shutdown instead. Seeing how popular the Raspberry Pi had become, I decided that there might be a viable market if I turned this into a product. My first prototypes (2nd from the left) were still feeding the battery voltage directly to the Pi through a load switch. But, I was worried that people would complain about powering their Pi with an out-of-spec voltage if I started to sell it commercially. So I created a version with boost converter (3rd from the left) and eventually decided to go with that option for the commercial release (rightmost in the picture).
The LiFePO4wered/Pi immediately became a better seller on Tindie than the LiFePO4wered/USB ever had been. I was somewhat taken aback by this, but of course it makes sense: the market for "plug modules together" Makers is significantly larger than for "build something on a perf board" Makers.
The release of the higher power Raspberry Pi 2 and Pi 3 posed a challenge for the LiFePO4wered/Pi, since it had been designed for lower power Pi’s. While the boost converter was capable enough to produce the instantaneous power demanded by these boards, the LiFePO4wered/USB charger used a linear charging chip and was not capable to keep up with the power demand. This lead to the bad situation that the battery would eventually run out when powering these boards, and the Pi would shut down, even if the system was plugged in! An unacceptable thing to do for a UPS of course.
So, the need for a more powerful charger became obvious. Eventually I found the awesome CN3801 chip, which became the basis for the LiFePO4wered/18650 which, combined with the same power manager I already had on top, created the LiFePO4wered/Pi3. The first prototype for this is on the left in the picture below:
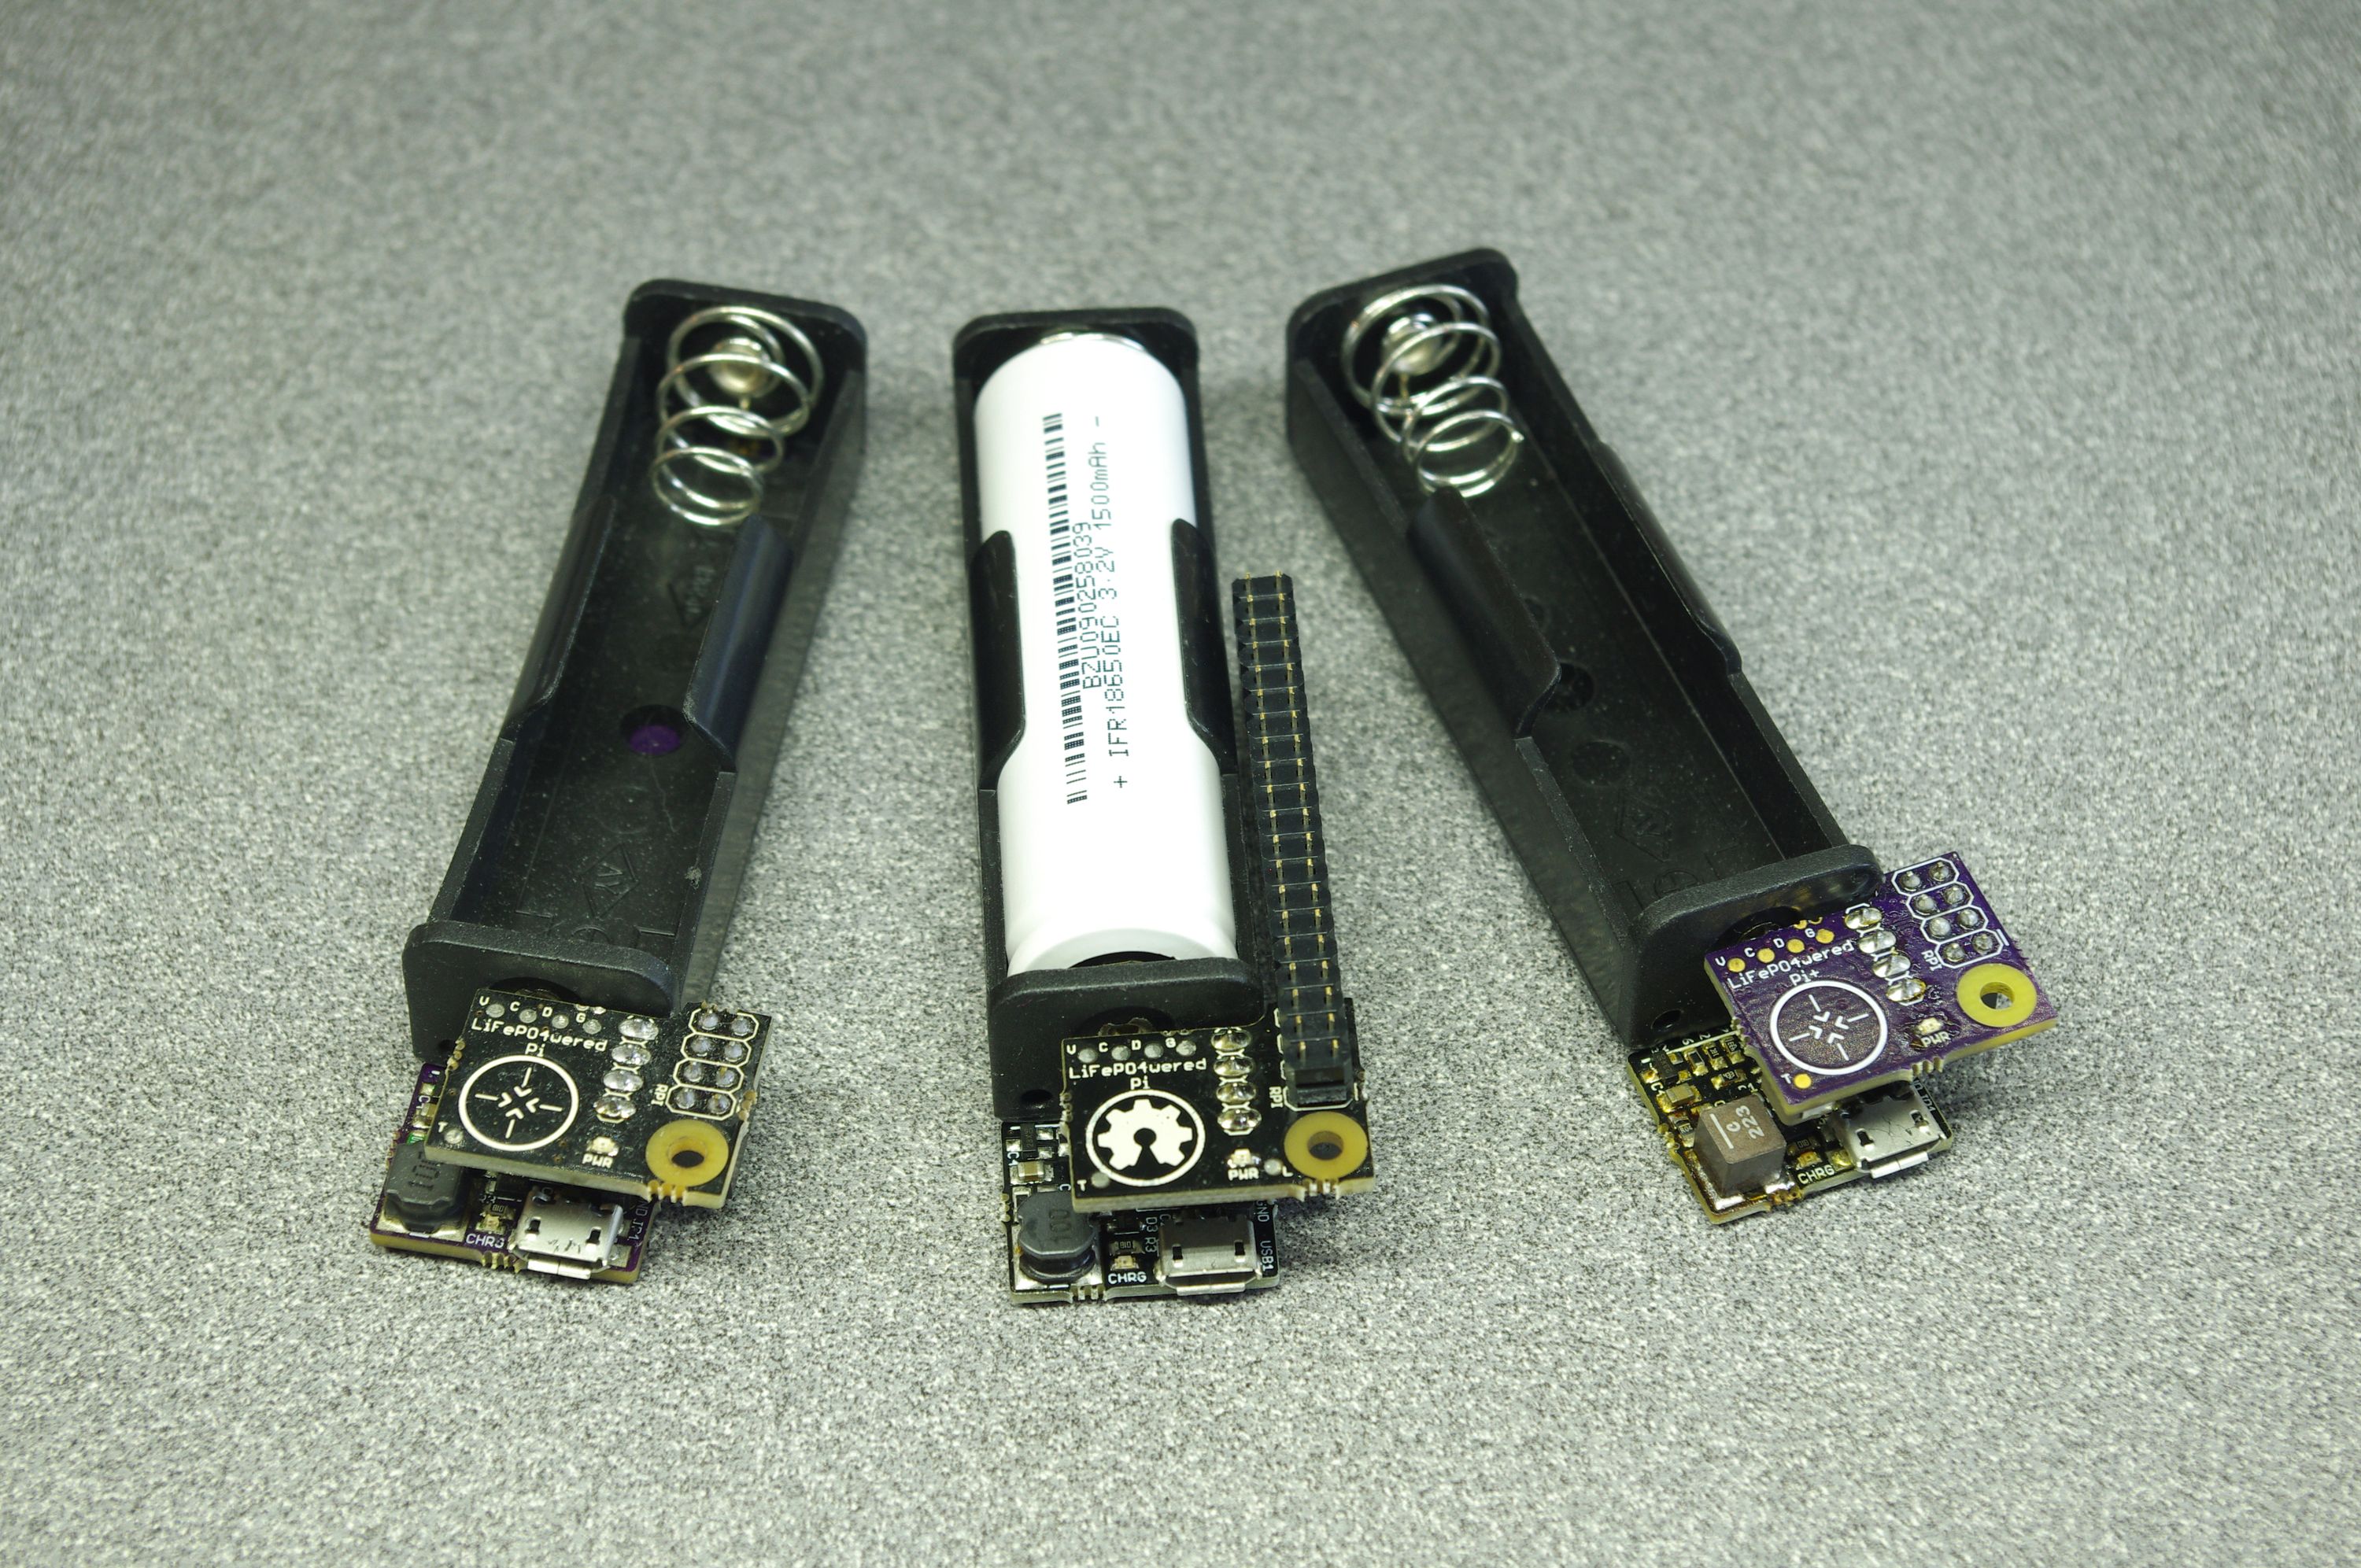
The production version can be seen in the middle. This iteration became even more popular on Tindie, regularly making it to the top row of best sellers. One important feature the LiFePO4wered/Pi3 added as well was monitoring of the input power, which was a much requested feature for the LiFePO4wered/Pi.
Of course, it is human nature to always want more. Now I had a UPS that worked with the Raspberry Pi 2 and Pi 3, customers wanted it to work with power hungry peripherals such as USB hard drives and LCD screens. This time the top power manager board was turning out to be the limiting factor. I did some experiments with higher rated components (rightmost prototype in the picture above), but it became clear the current form factor was reaching its limits in how much power output could be expected from it.
So I decided to restart with a new form factor from scratch and fix everything that that still needed improvement to create the LiFePO4wered/Pi+. The picture below shows the iterations this design went through:
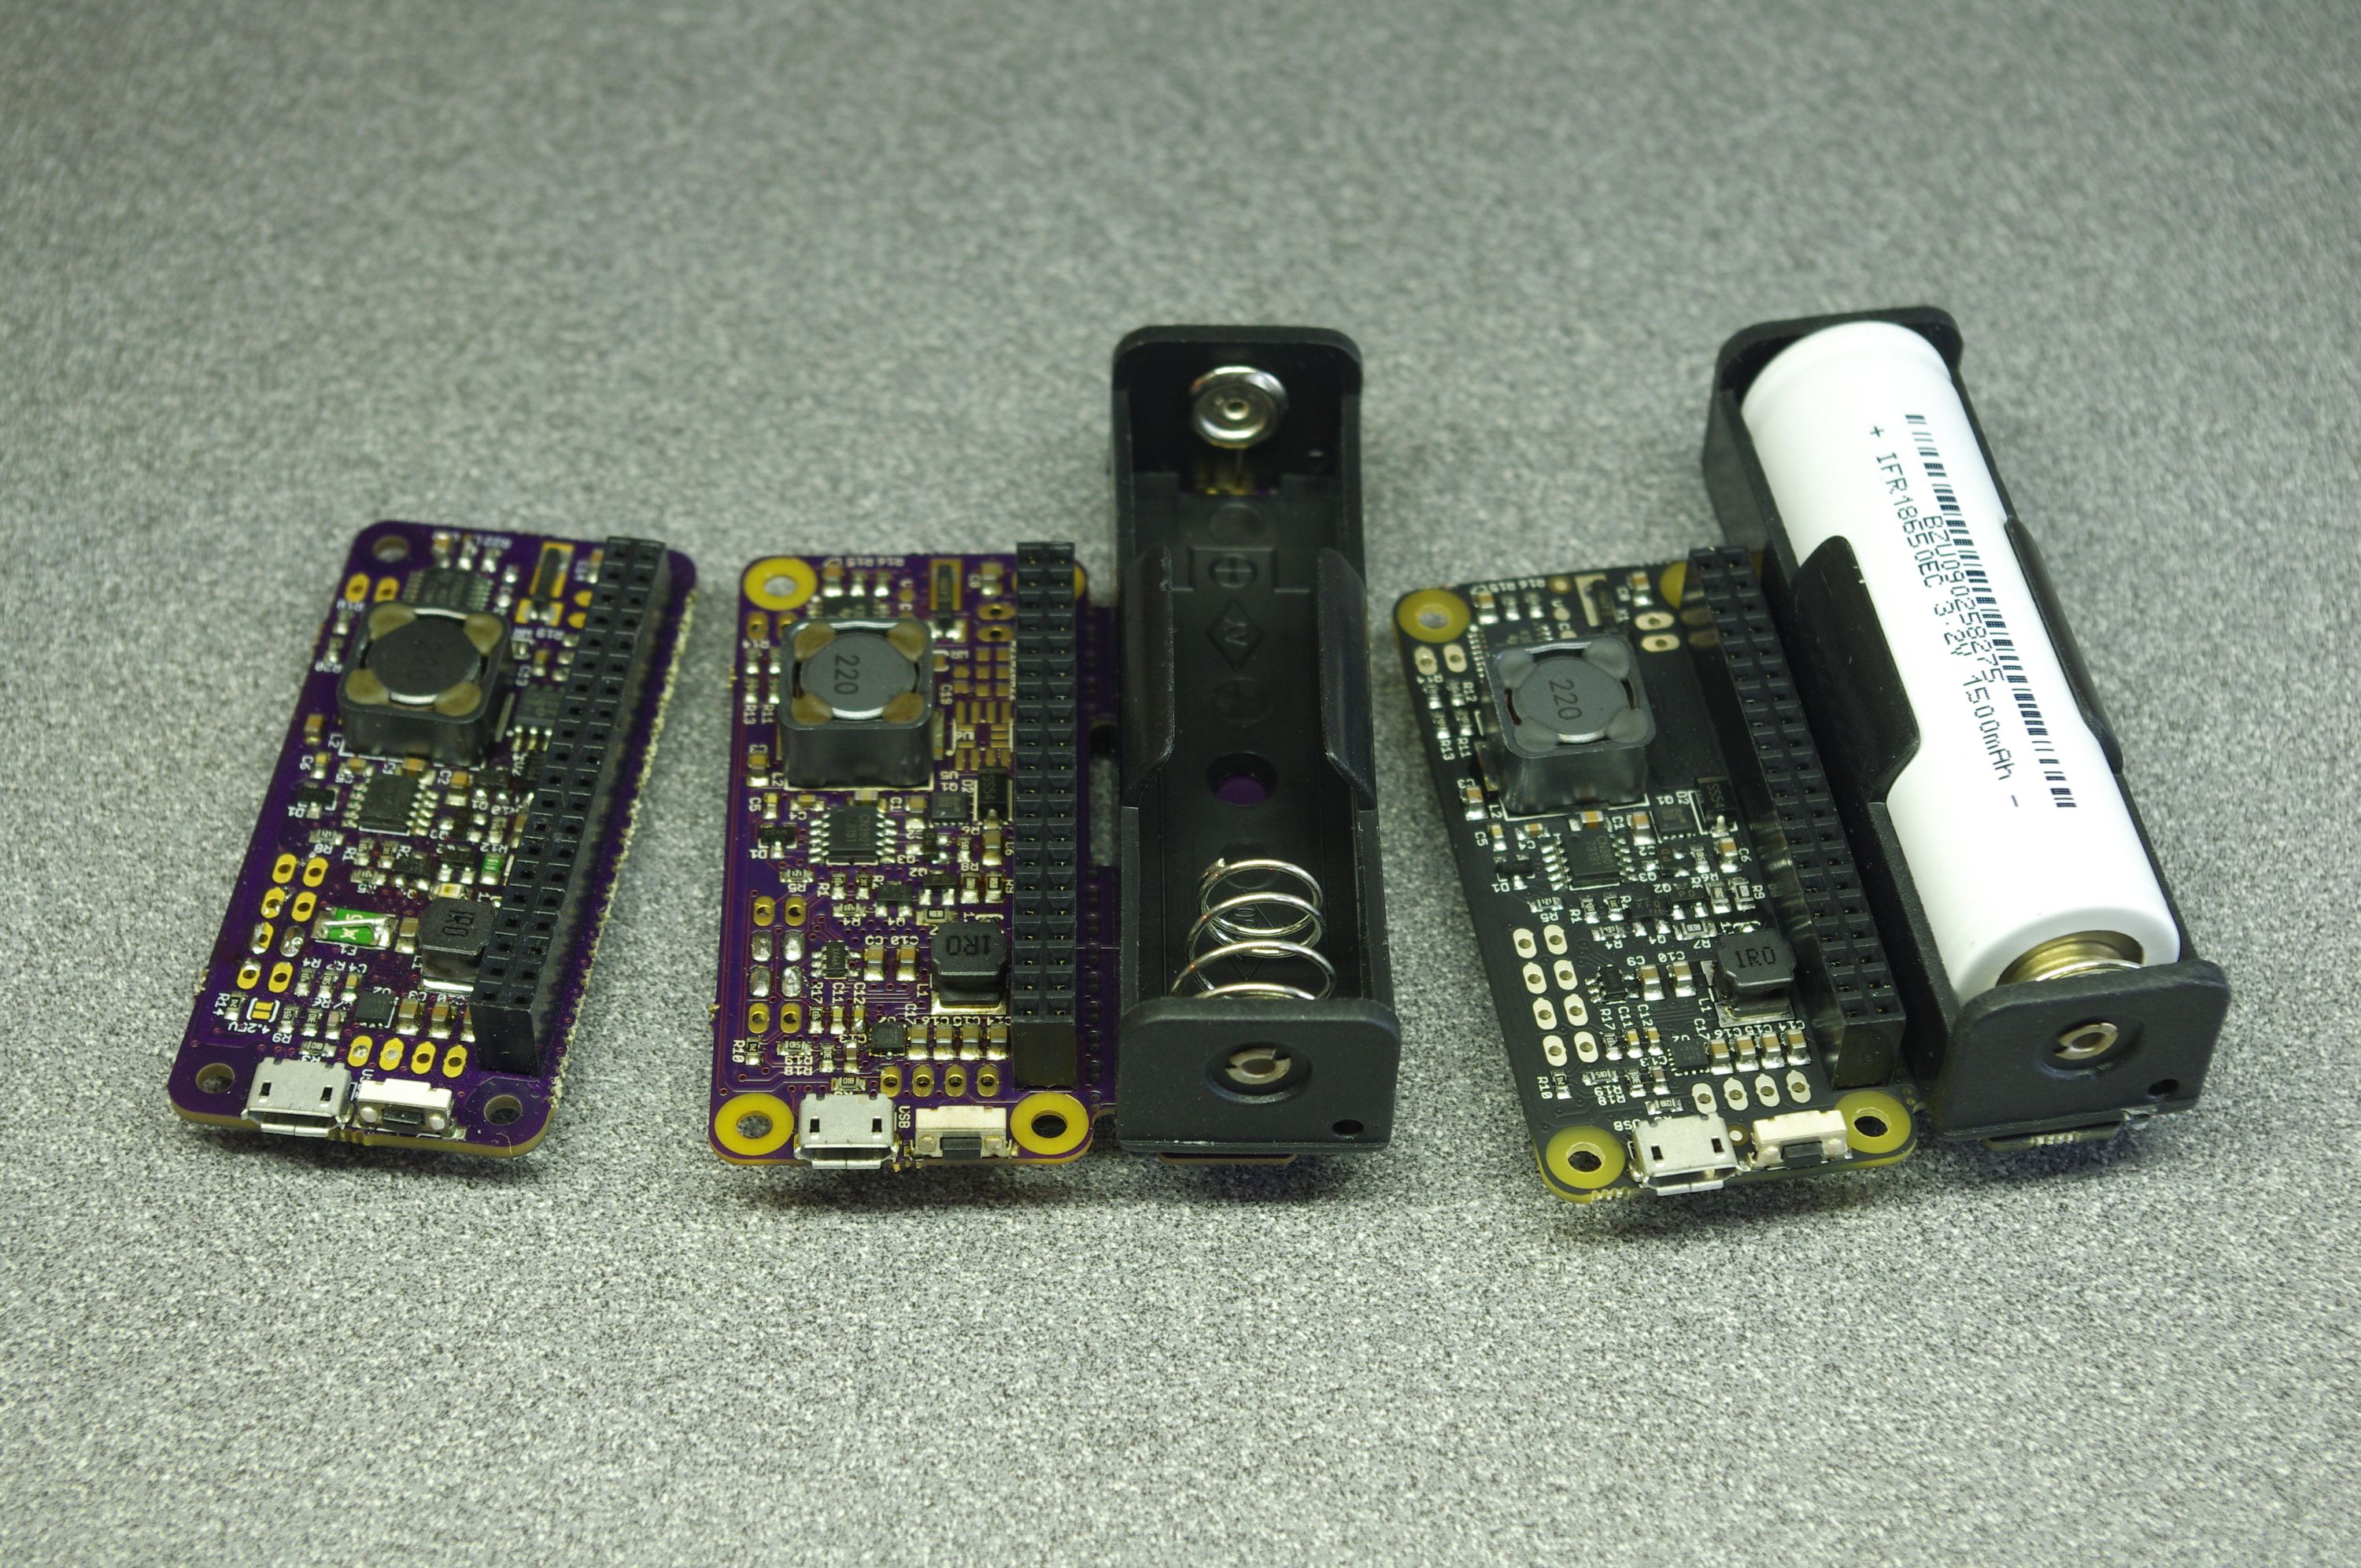
The larger board with 2 oz copper made 2 A continuous current possible so you can not only power a Raspberry Pi 3 Model B+, but also power hungry external peripherals. The first prototype on the right had a smaller power power transistor which was later replaced by a much beefier model, an option for 4.75 V output which seemed superfluous and was removed, a thermal fuse for the auxiliary battery output which was replaced by a protected load switch, and a HAT EEPROM which, due to the dumb way the HAT standard is created to allow only one EEPROM, seemed more harmful than beneficial for those who want to use the LiFePO4wered/Pi+ with other HATs and was removed. Another good improvement is that the battery contacts now face up instead of down, hopefully reducing the number of people creating burn marks on metallic surfaces they apparently like to set things on (still not a good idea!).
As you can see, it’s been a long road and about four years to get here, but through all the experience gained and feedback received from early customers (thanks!), I think the LiFePO4wered/Pi+ has now reached the point where it makes an excellent power manager for Raspberry Pi projects. Thank you to all you backers for the confidence and support to make this release a success, I really appreciate it!