Project update 10 of 22
Testers
Building testers
Last week it dawned on me that time keeps passing and I hadn’t given much thought yet to how I was going to test the wESP32 and wESP32-Prog boards before we ship them! A very important issue to start cranking on, especially with holidays and vacation eating up a good amount of time.
wESP32-Prog tester
The wESP32-Prog board is quite simple and because of this, the tester can be simple as well. Building the tester only took half a day and this is what I ended up with:
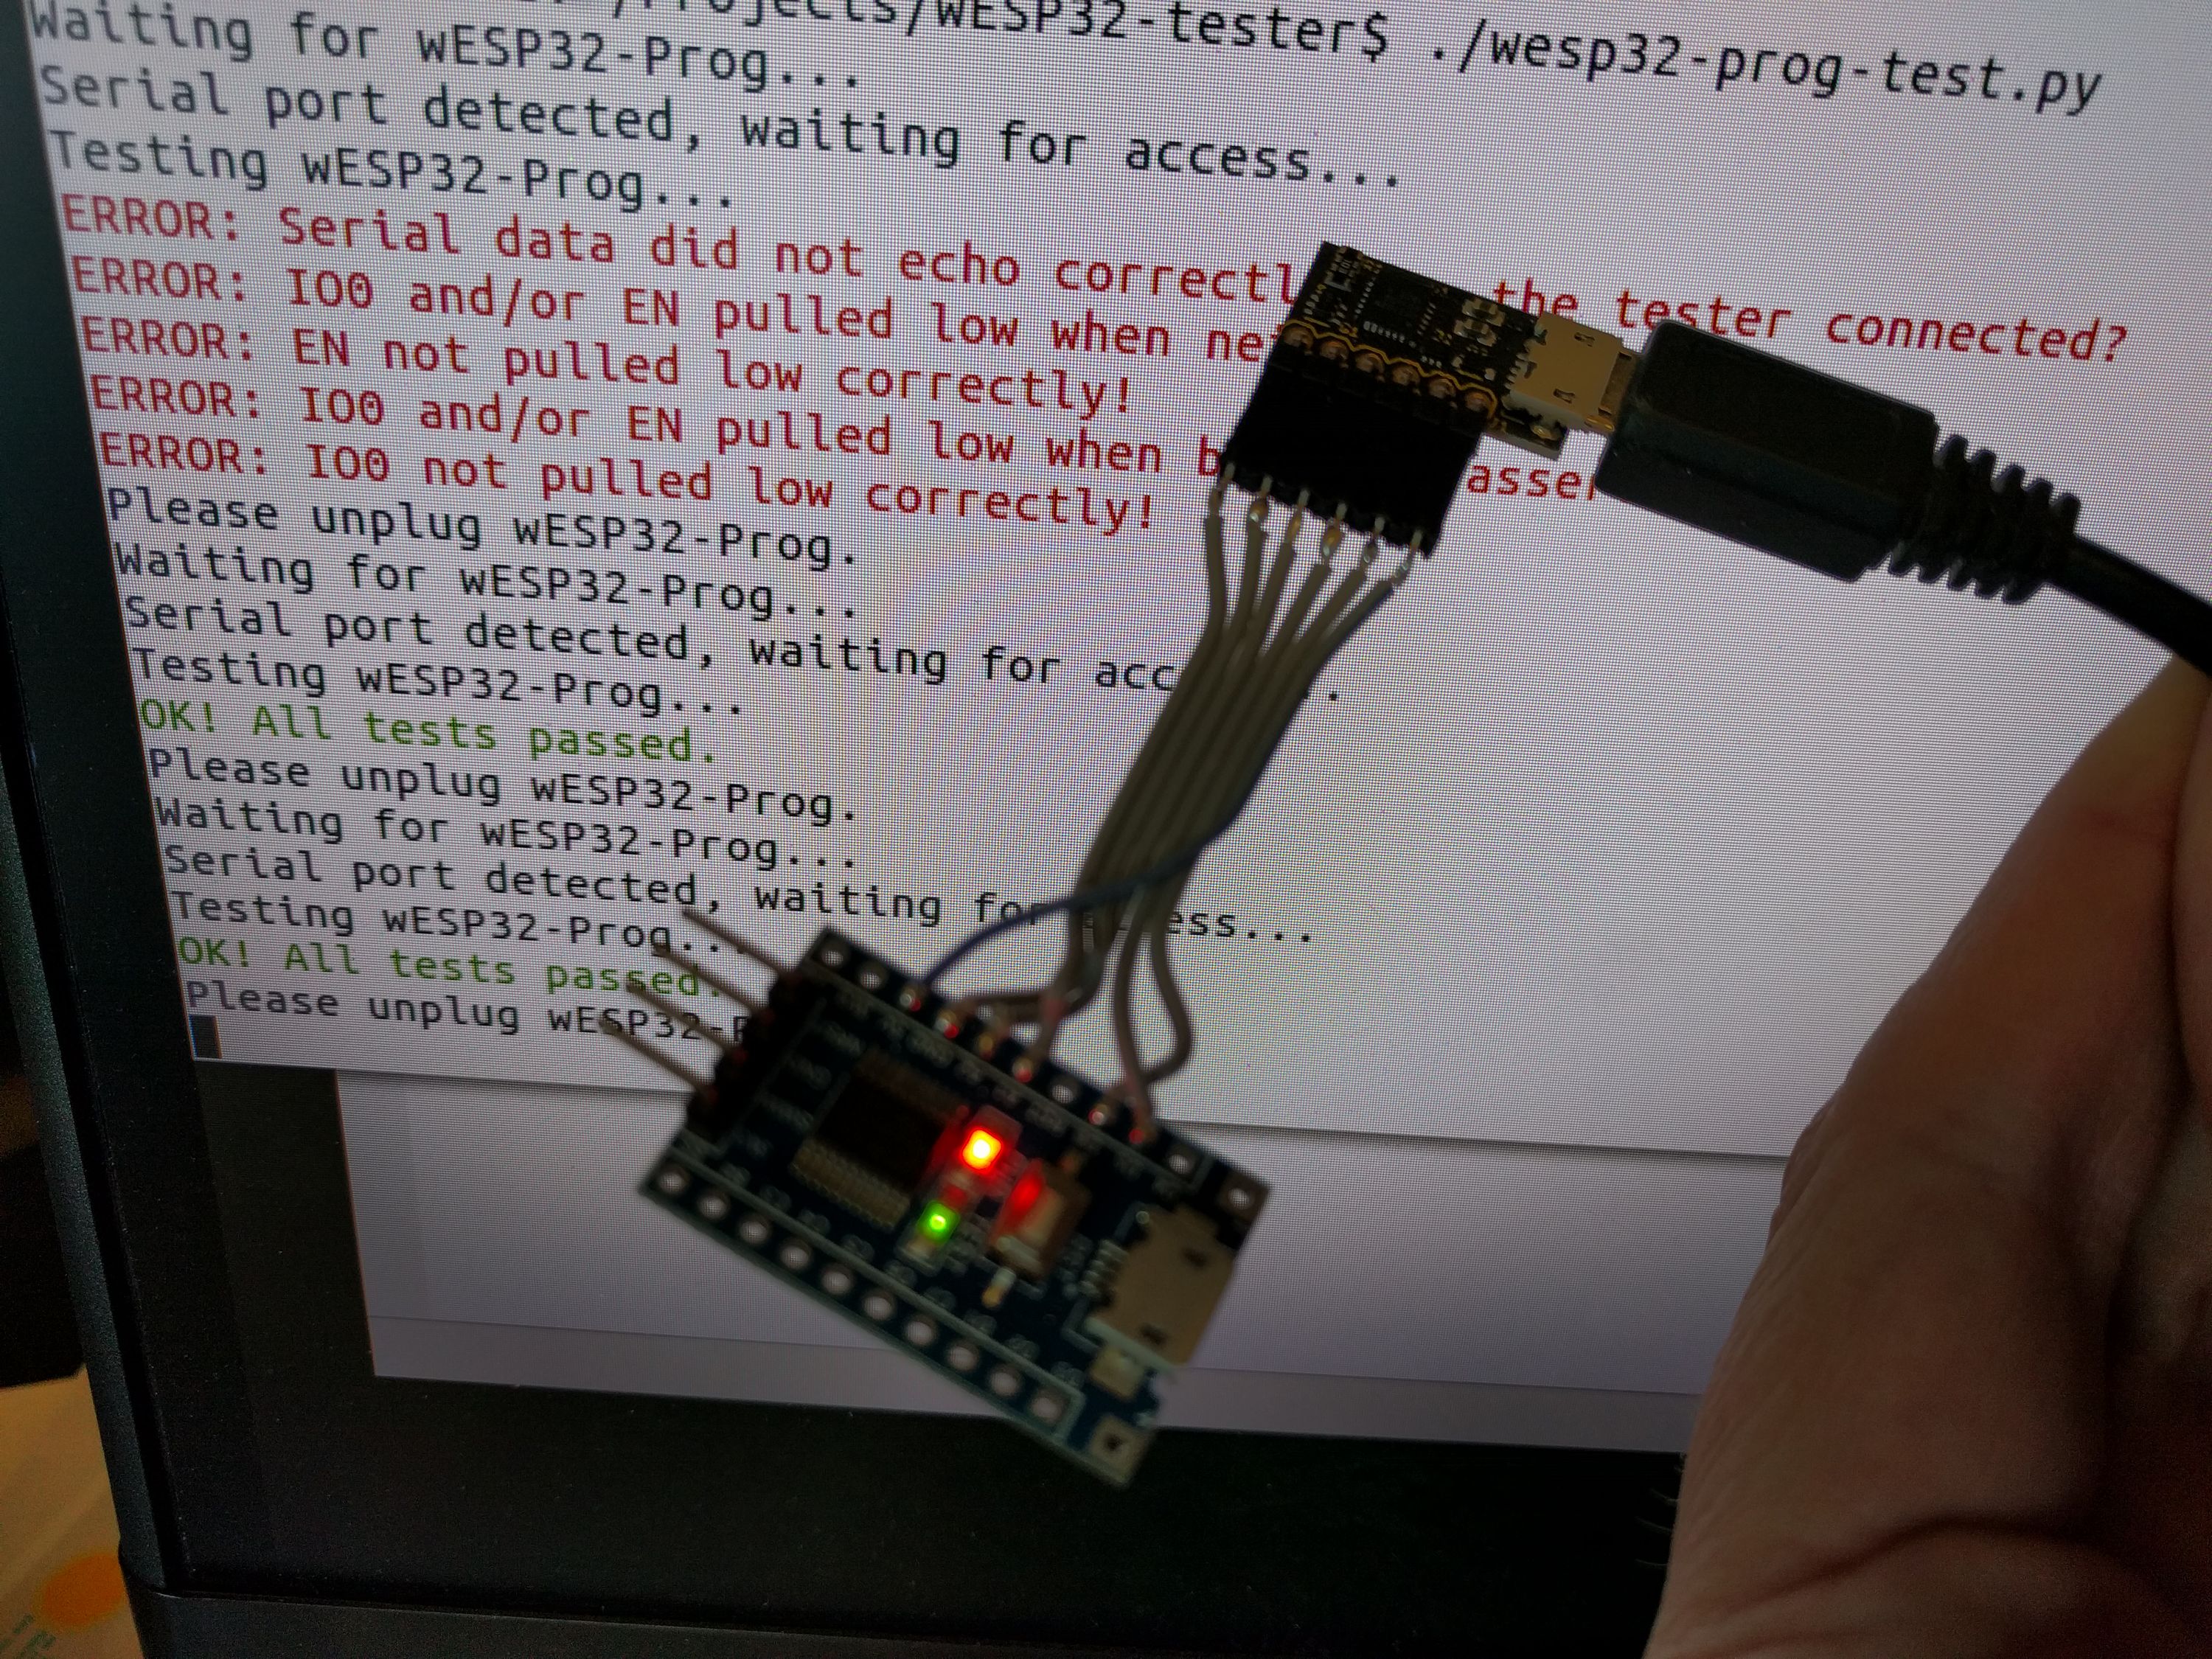
The hardware consists of a little STM8S103F3 board that can be had for less than a dollar on AliExpress. I had it laying around and all I needed for this was a simple UART capable chip, so this was perfect. I used the Sduino project project to speed up firmware development. It looks slightly different from normal Arduino code because the SDCC compiler doesn’t support C++, only C. It was simple enough to get it to work though, and the code can be found in the wESP32-tester repo on Github.
All the code does is when a byte comes in, it echoes it back with the bottom two bits replaced by the current state of the IO0 and EN signals. The second to highest bit also sets the tester board’s on-board LED state.
This firmware works in conjunction with a little Python script that’s also in the repo. It waits for the wESP32-Prog board to be plugged in, which will create a /dev/ttyUSB0 device. For some reason, trying to immediately open the serial device after this threw an access error, so we wait until it becomes accessible and then open it.
Testing ensures that when we send a byte, the STM8 micro echoes a (modified) byte back to us. We do this with various states of the RTS and DTR signals which control EN and IO0 respectively through the auto programming circuit. If everything comes back as expected, we print a success message, turn on the green LED on the STM8 board and wait for the board to be unplugged.
wESP32 tester
The wESP32 is more complex, so the tester has to be as well. We have a bed of nails that connects to the GPIO header and the programming port. The fixture has a wESP32-Prog module on board that connects to the wESP32 for programming and to run the testing sequence over the serial connection.
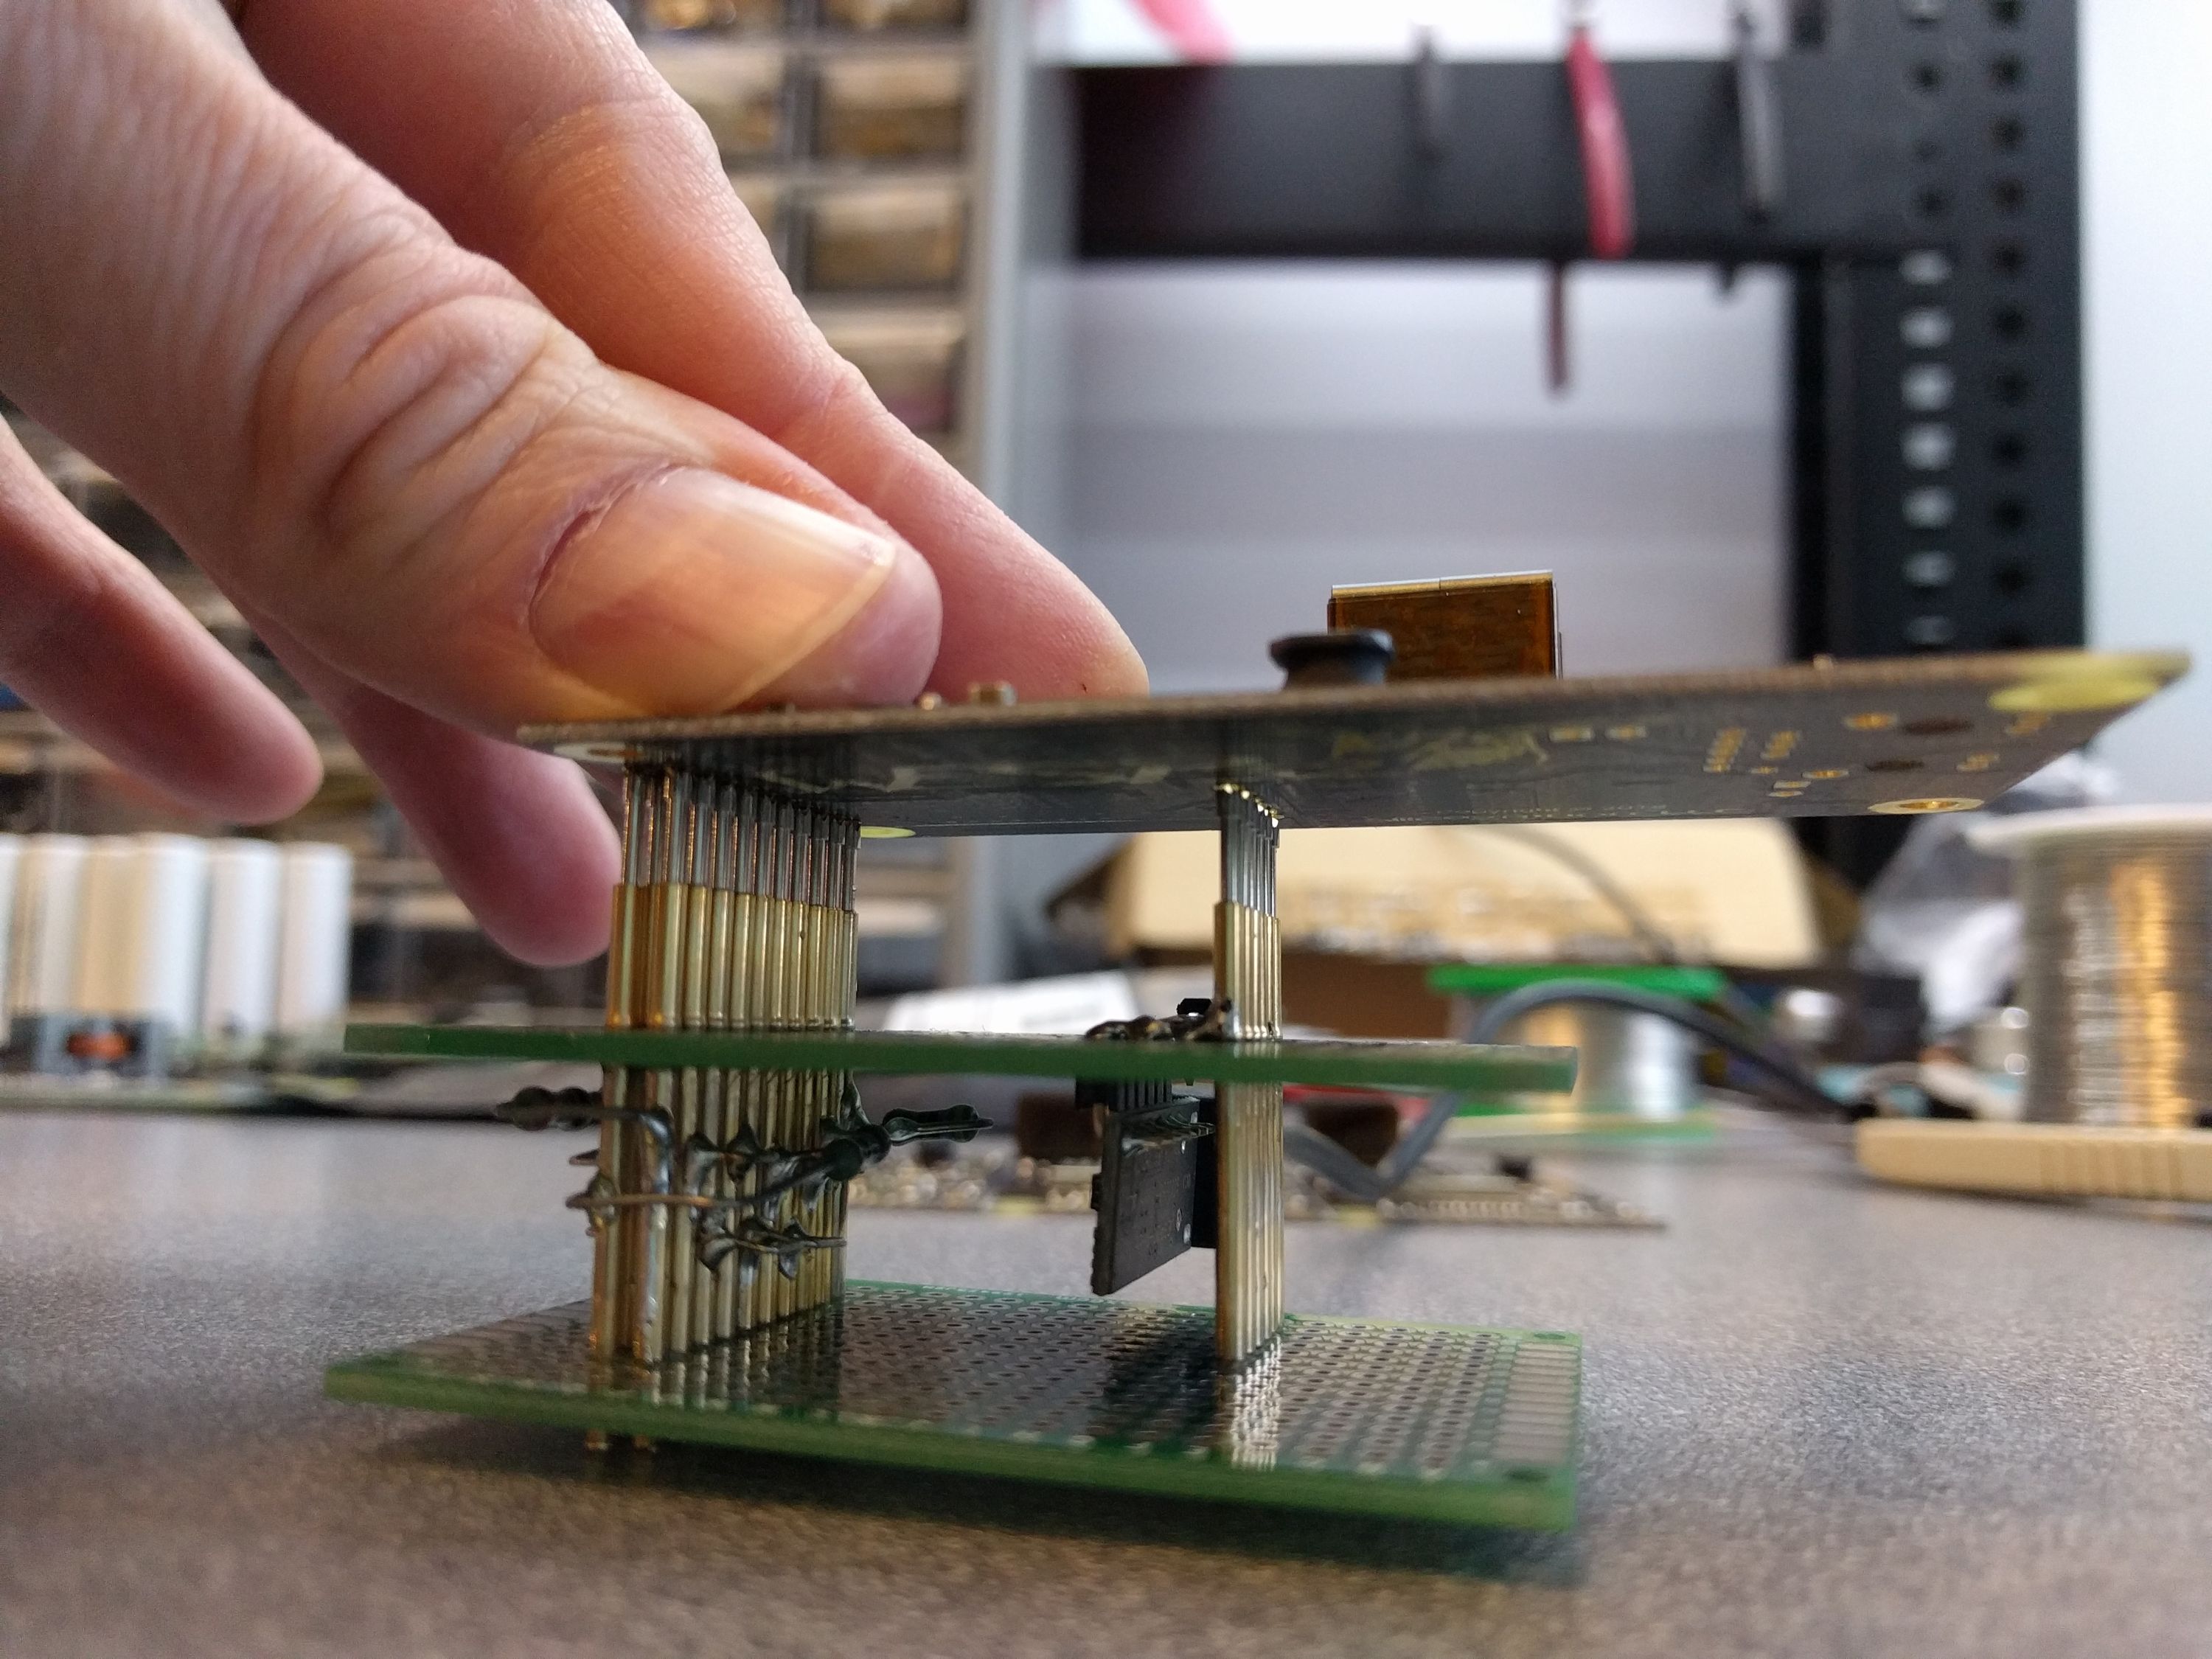
Software still needs to be written, but here’s the gist. The test starts by plugging a PoE powered Ethernet cable in to the RJ45 and pushing the wESP32 onto the pogo pins. First a MicroPython image will be flashed to the ESP32 and a factory boot.py and test script will be loaded. The boot.py enables and configures the Ethernet port correctly for the wESP32 to establish a network connection. This script will remain on the units when they are shipped, so you will have a MicroPython install with working network connection straight out of the box! The test script will exercise the GPIO pins and measure the V+ voltage while a load of about 12 W is applied. Most of the GPIO pins will be connected together in physically spread out pairs of which one pin will be an output and the other an input. These will be driven alternately high and low to ensure connectivity from the module pads to the header footprint with no shorts.
When all these tests running on the ESP32 turn out successful, the test script will notify the PC over the serial port that the unit is OK, after which the test script will be erased and the unit is ready to go.
Production progress
We received wESP32-Prog production units from both Colorado Tech Shop and Boktech! I am pleased with how fast Boktech turned around this order. What I am not pleased with is the way the product looks:
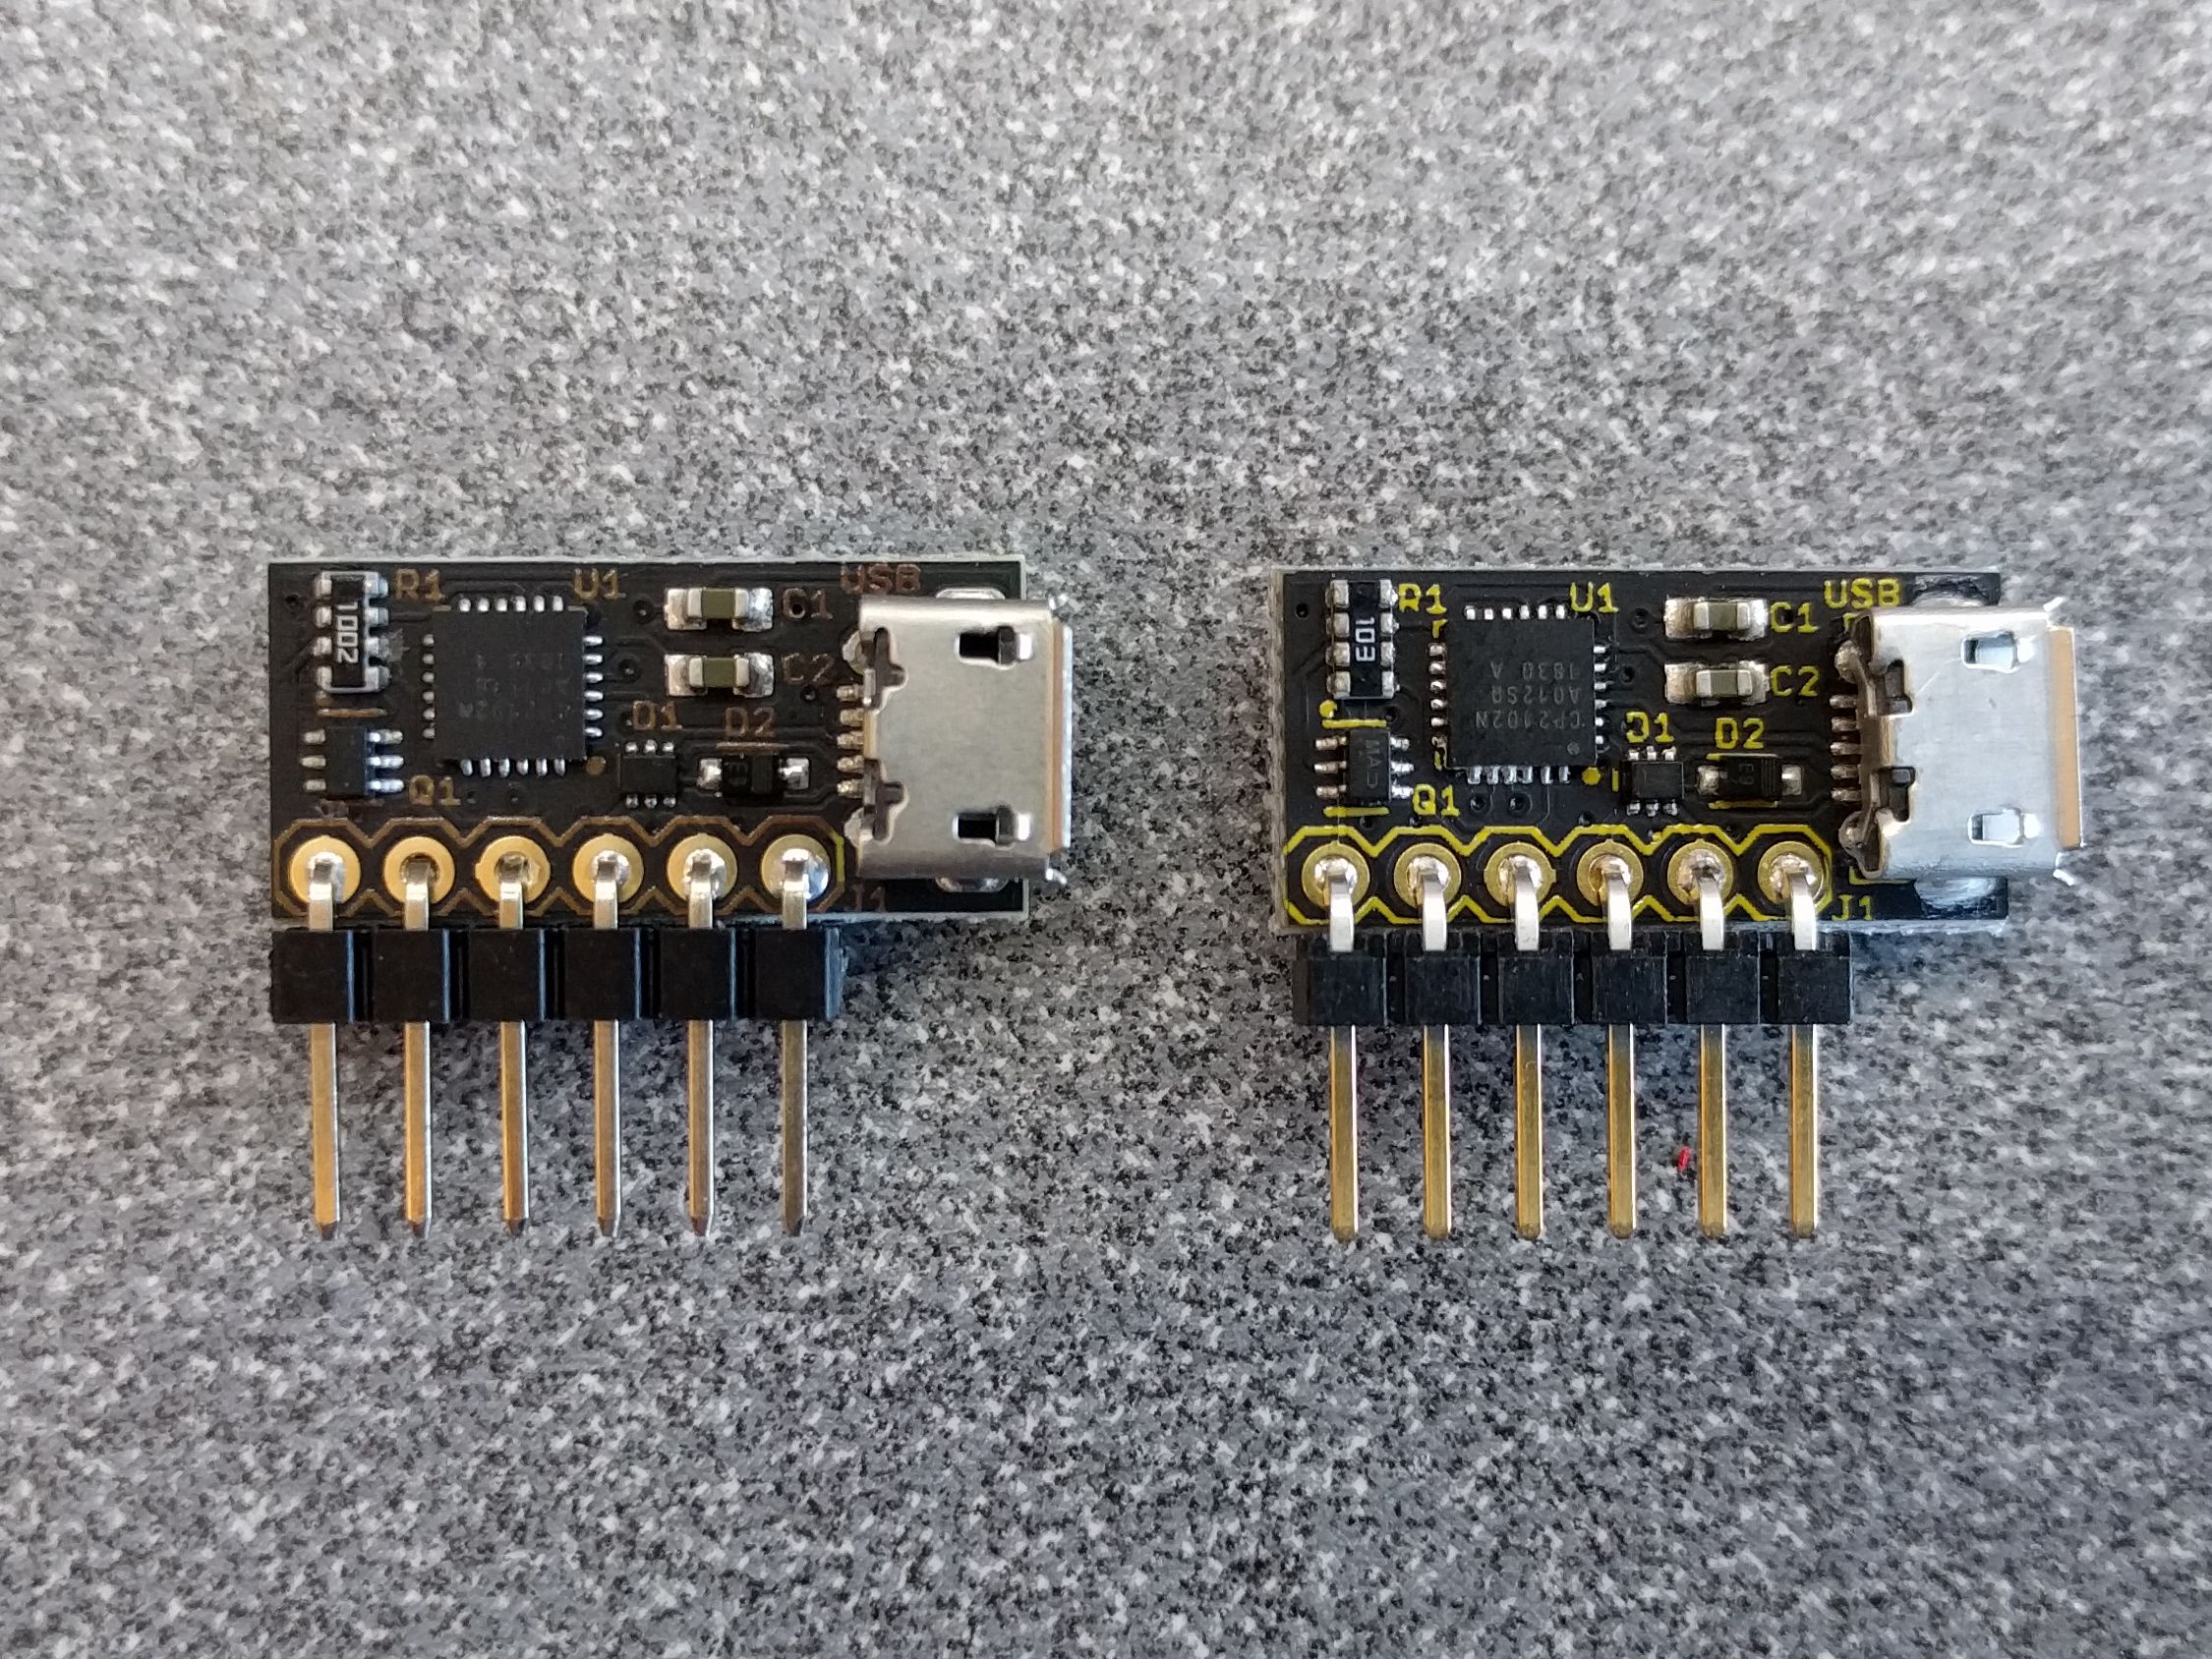
The unit on the left is one produced by Boktech. The one on the right is a production unit from Colorado Tech Shop. The Colorado Tech Shop unit looks beautiful, the unit from Boktech not so much. All units from Boktech have ugly brown silk screen like that, while it should be yellow. Before they started production, they sent me a picture of a unit for first article inspection, and that unit looked very good with nice yellow silk screen, so I approved it. Unfortunately, production didn’t turn out the same. When I asked about it, they said the first article unit was handmade, not done in the normal production process! I think they are kind of missing the point of what a first article inspection is for… :-/ Unfortunately, in my discussion with them it has become clear they don’t think anything is wrong with either the color change or producing an invalid first article, so I think I’ll be looking to try a different Chinese CM.
We also receive a first article wESP32 from Colorado Tech Shop:
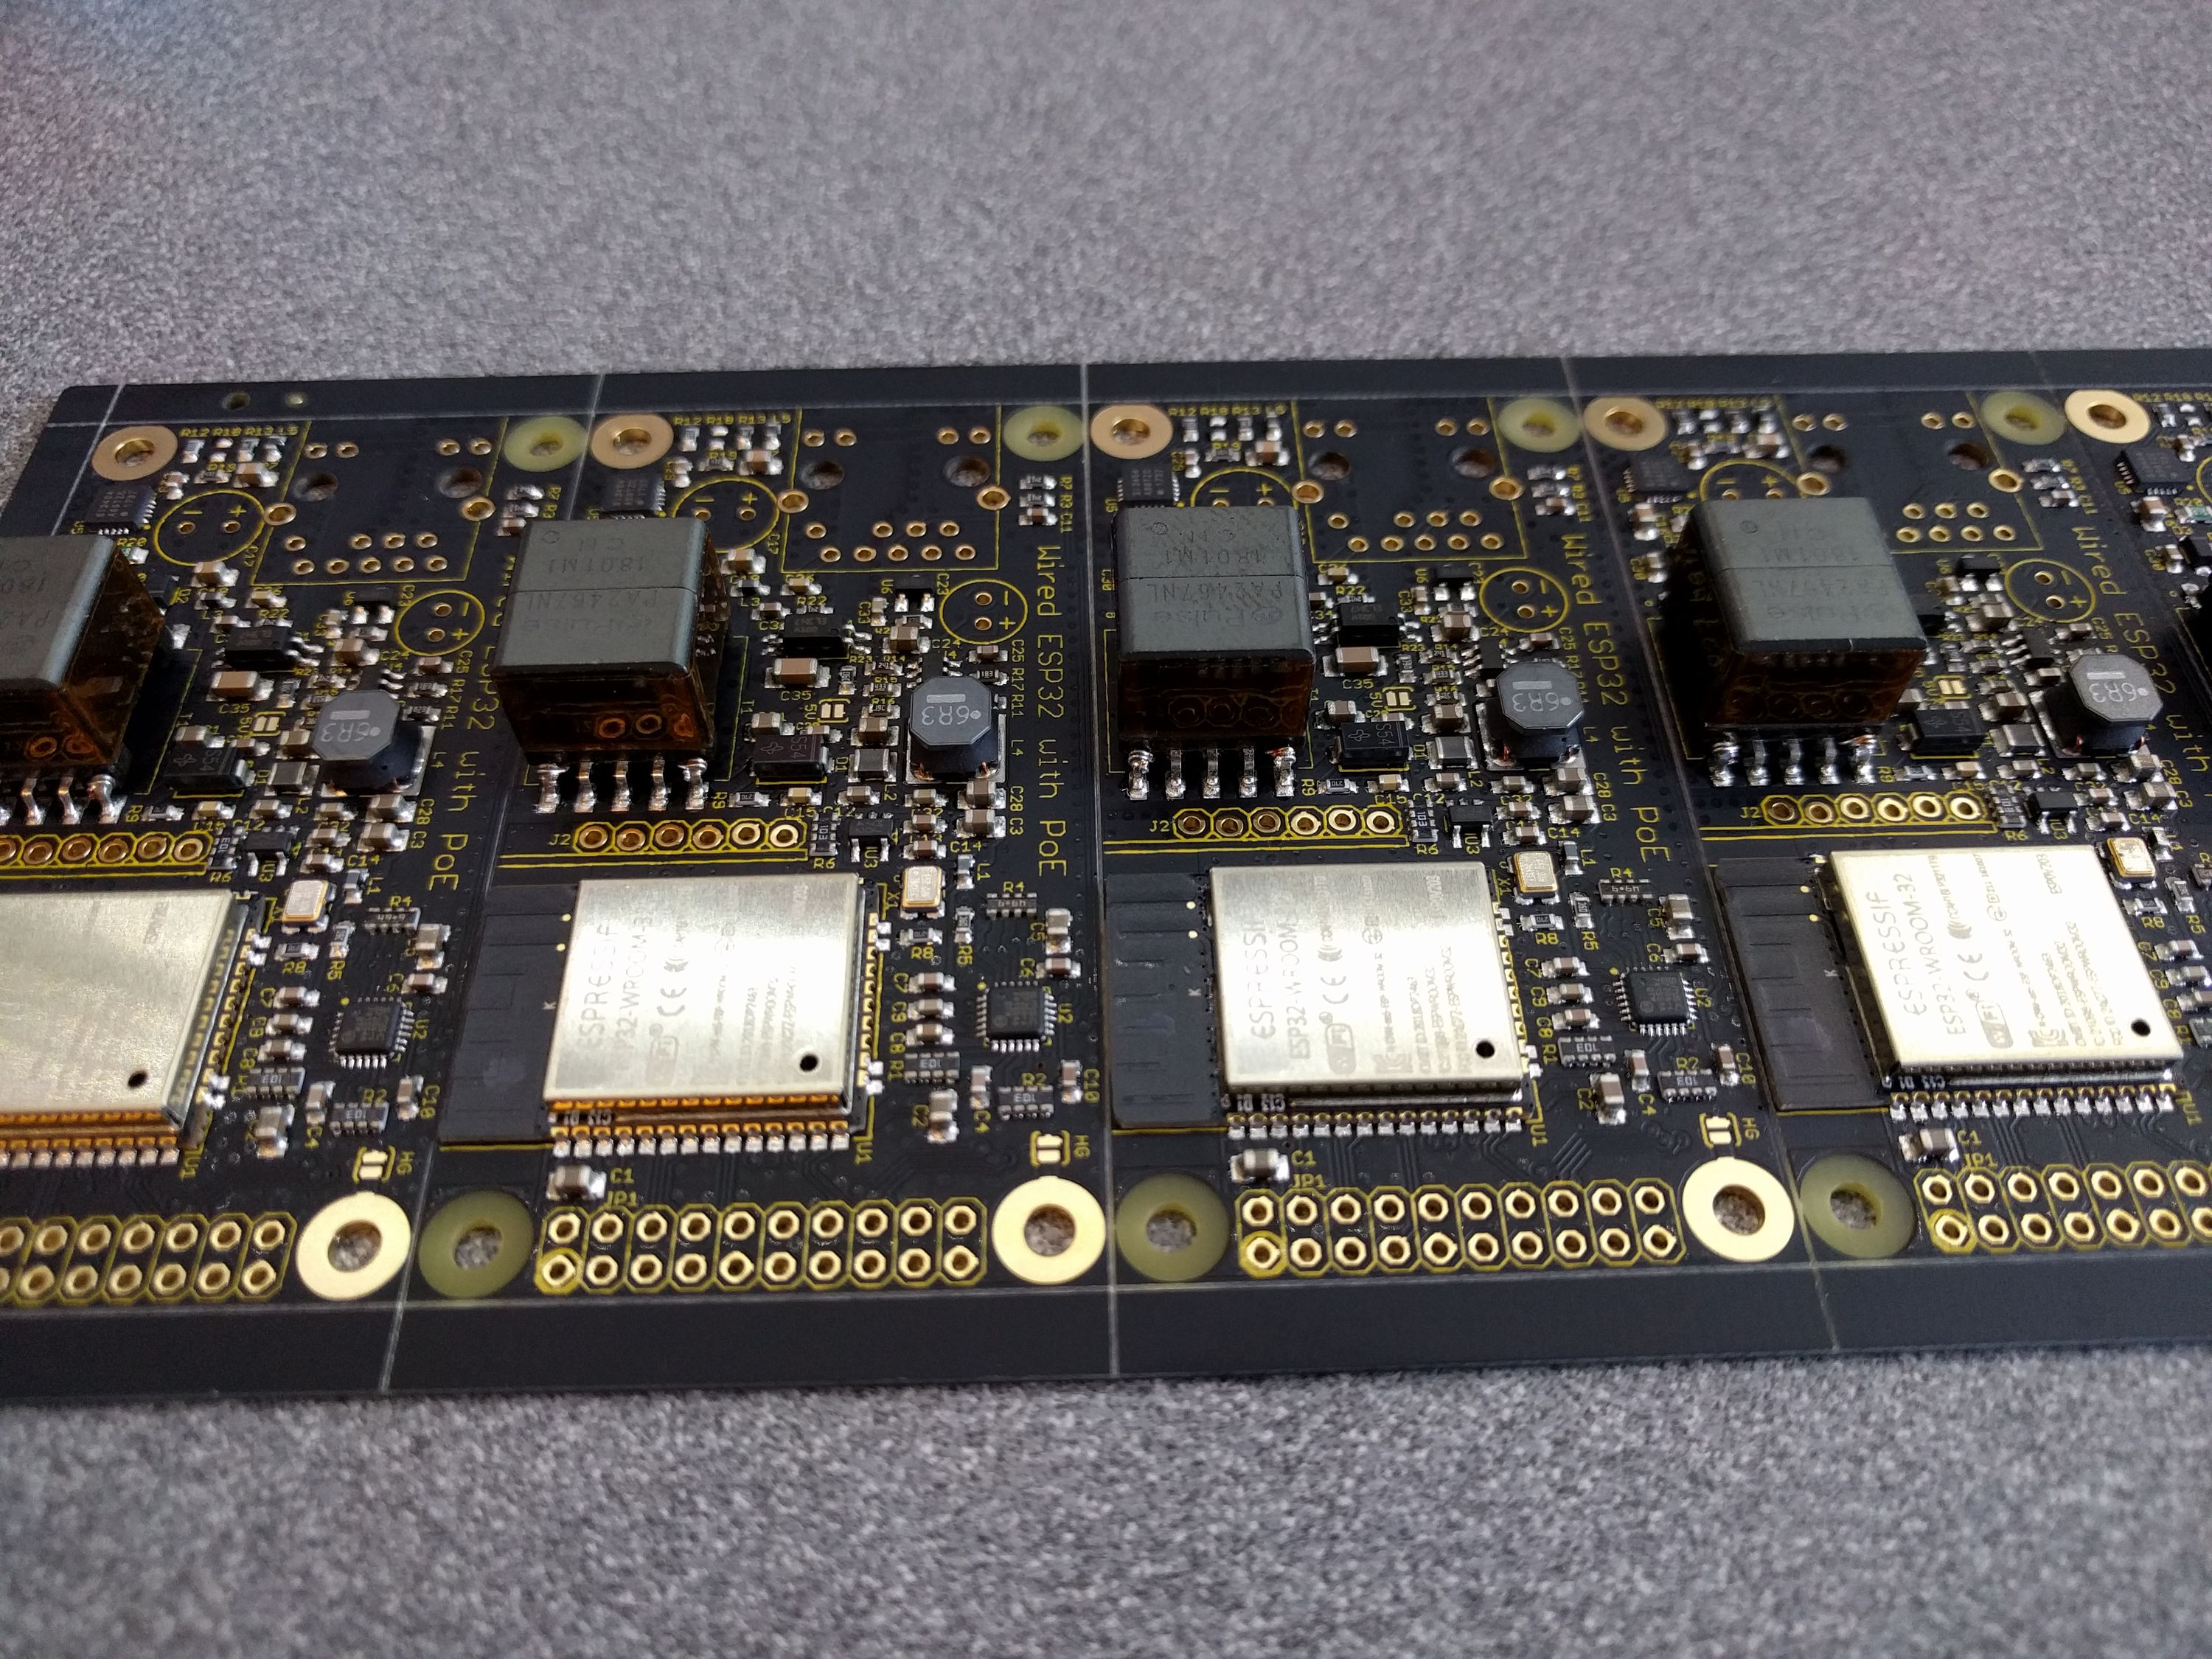
They turned out looking really good! I inspected the boards and quickly added the remaining components to one of the units for testing:
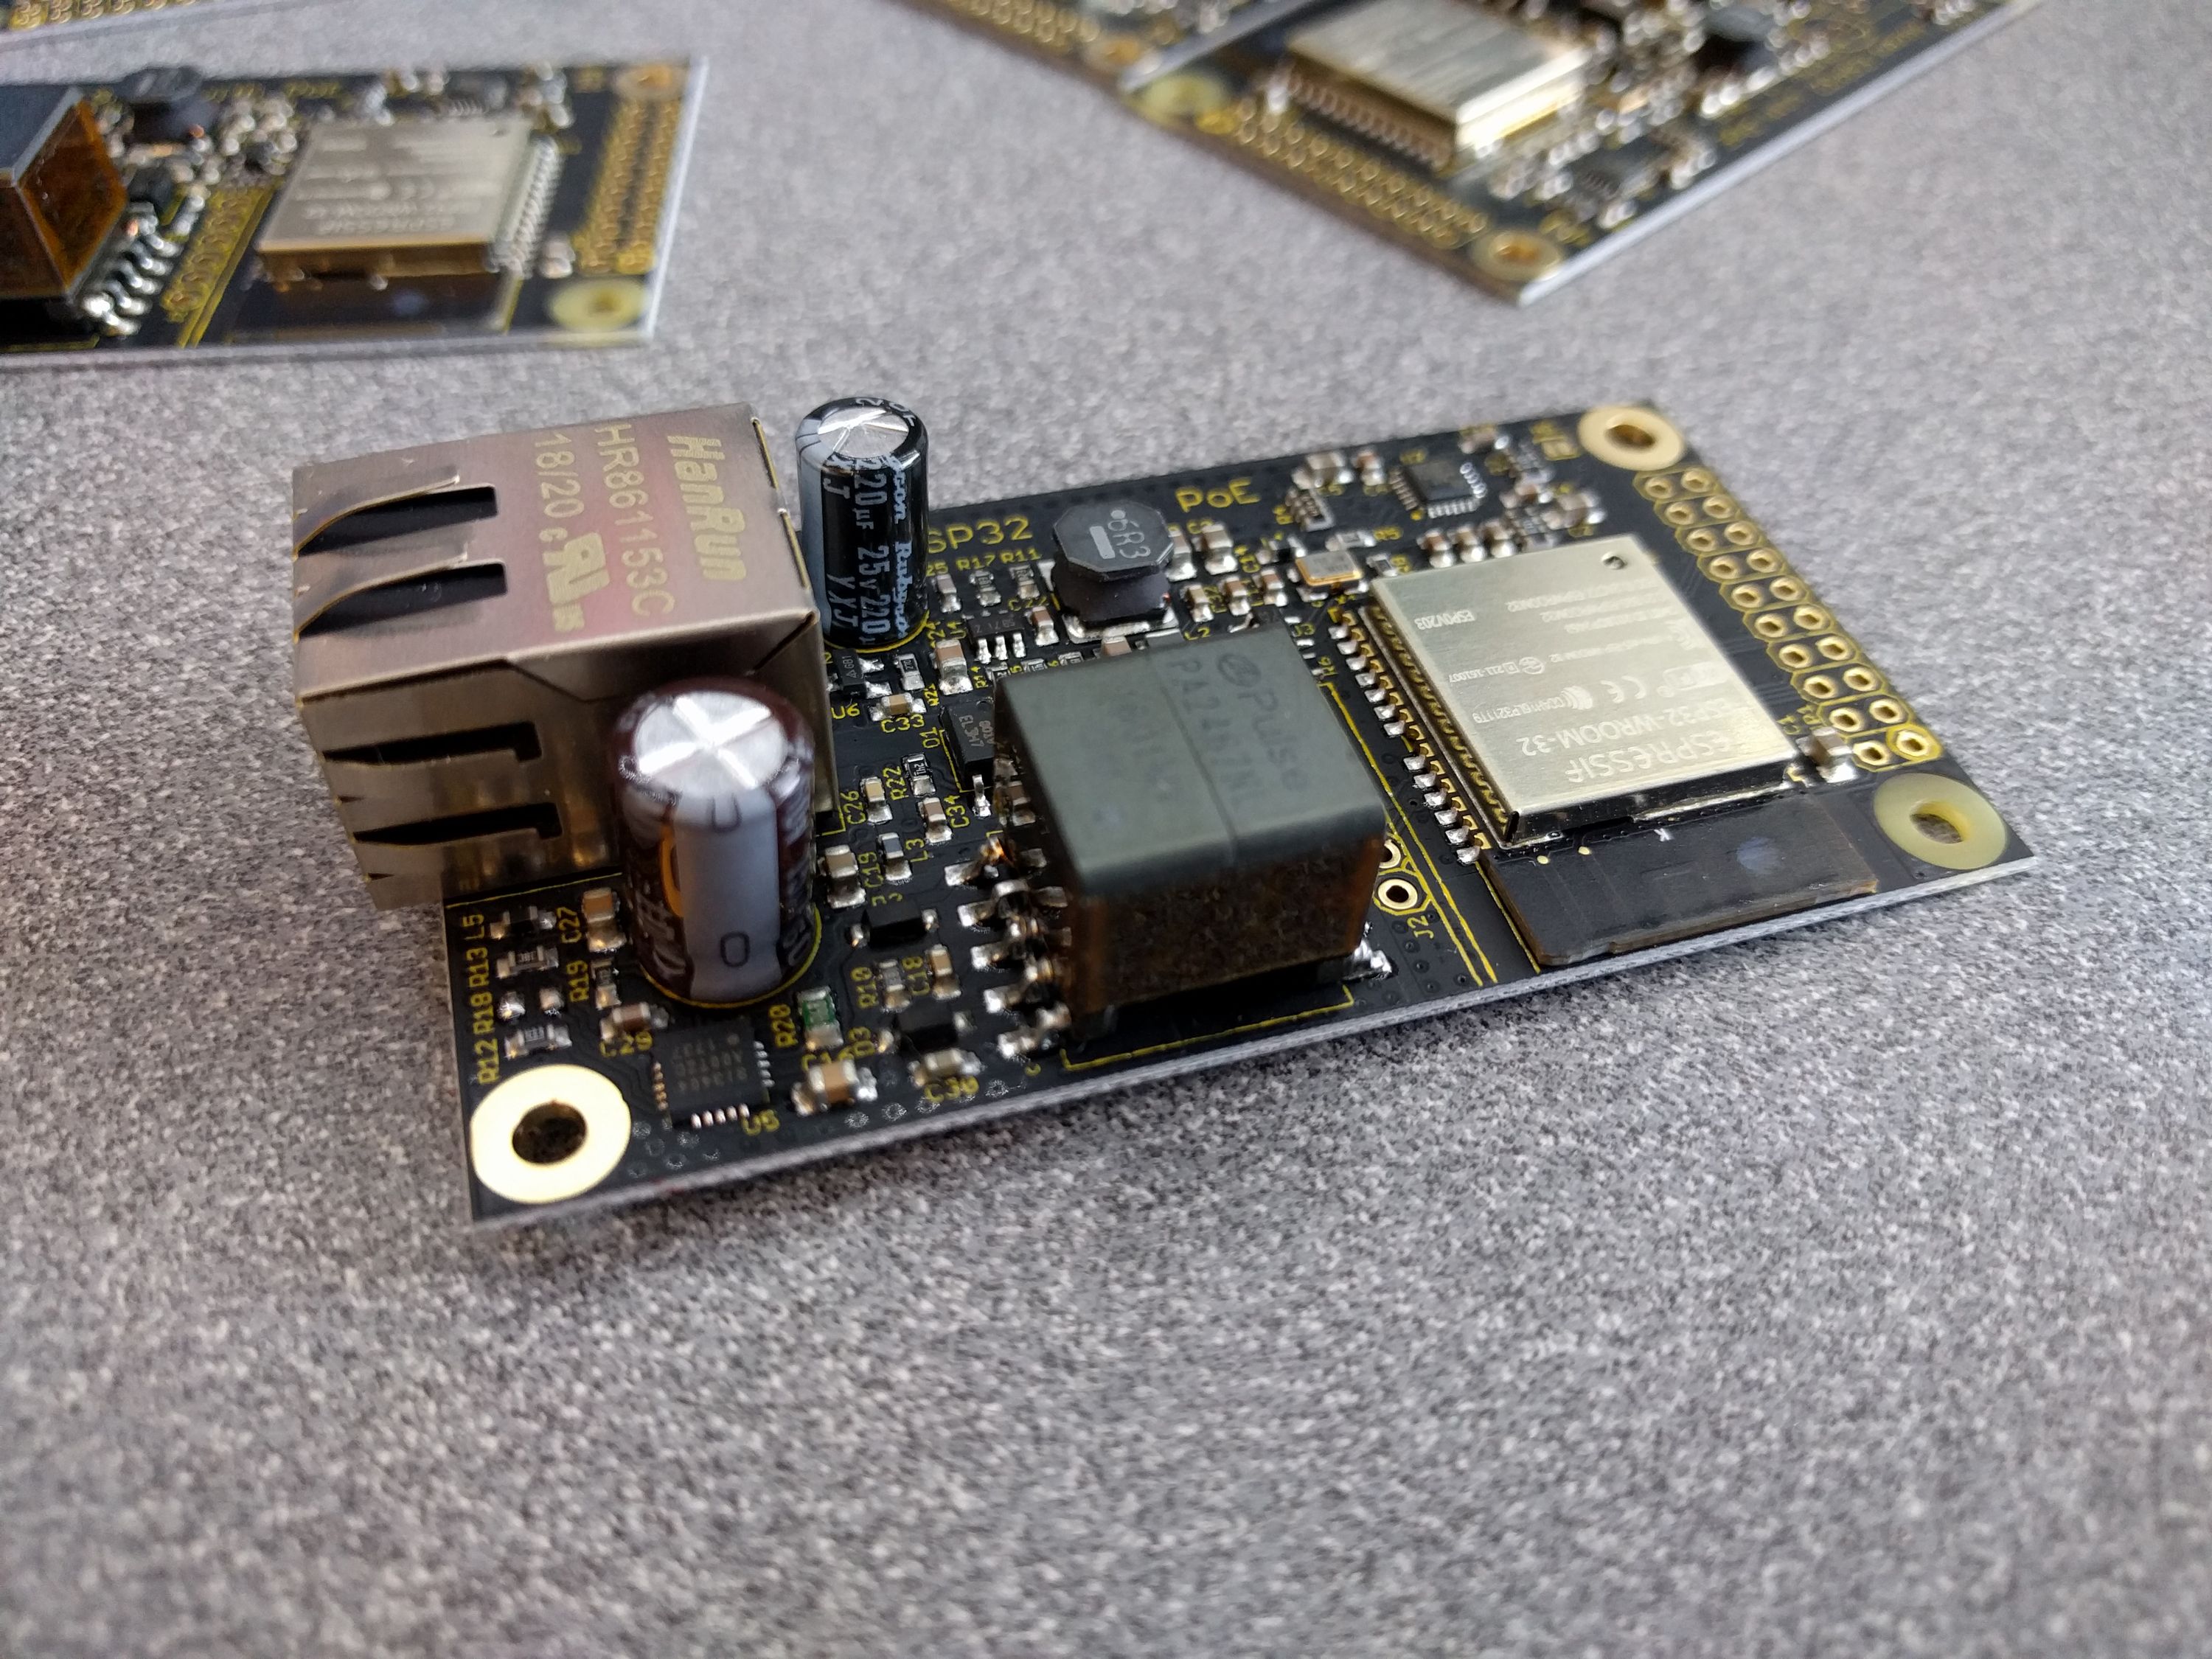
Initial tests are all positive: I can program the ESP32, the 12 V, 5 V and 3.3 V outputs are accurate, and after programming, the ESP32 connects to the network over Ethernet. I am now running a long term test of the unit under high load (13 W), which has been going for about 5 hours now. Performance of the production units seems to be equal to the prototypes.