Project update 2 of 10
The Three-Year Journey from Frustration to Innovation
by Magne LMost consumer products hide their messy origins behind polished marketing. You see the sleek final result, but never the countless prototypes, failed experiments, or never-ending debugging sessions that made it possible.
I believe that story matters. Especially when it’s a story of solving a real problem faced by millions of STEM students and professionals every day, but that no major company has ever thought to address.
Today, I want to pull back the curtain and show you exactly how, over the course of three years, Mathpad evolved from my own frustration into the specialized device you see today.
(You can find the complete development logs on Hackaday if you’re curious about every detail.)
Where It All Started: The Ugly First Prototype
Three years ago, I was tired of hunting for mathematical symbols every time I needed to type an equation outside of LaTeX. So I bought a $20 macropad kit and started experimenting.
The Sweet 16 from 1UP became my weapon of choice. I grabbed various colored keycaps, drew symbols on them with a marker, and cobbled together my first working prototype.
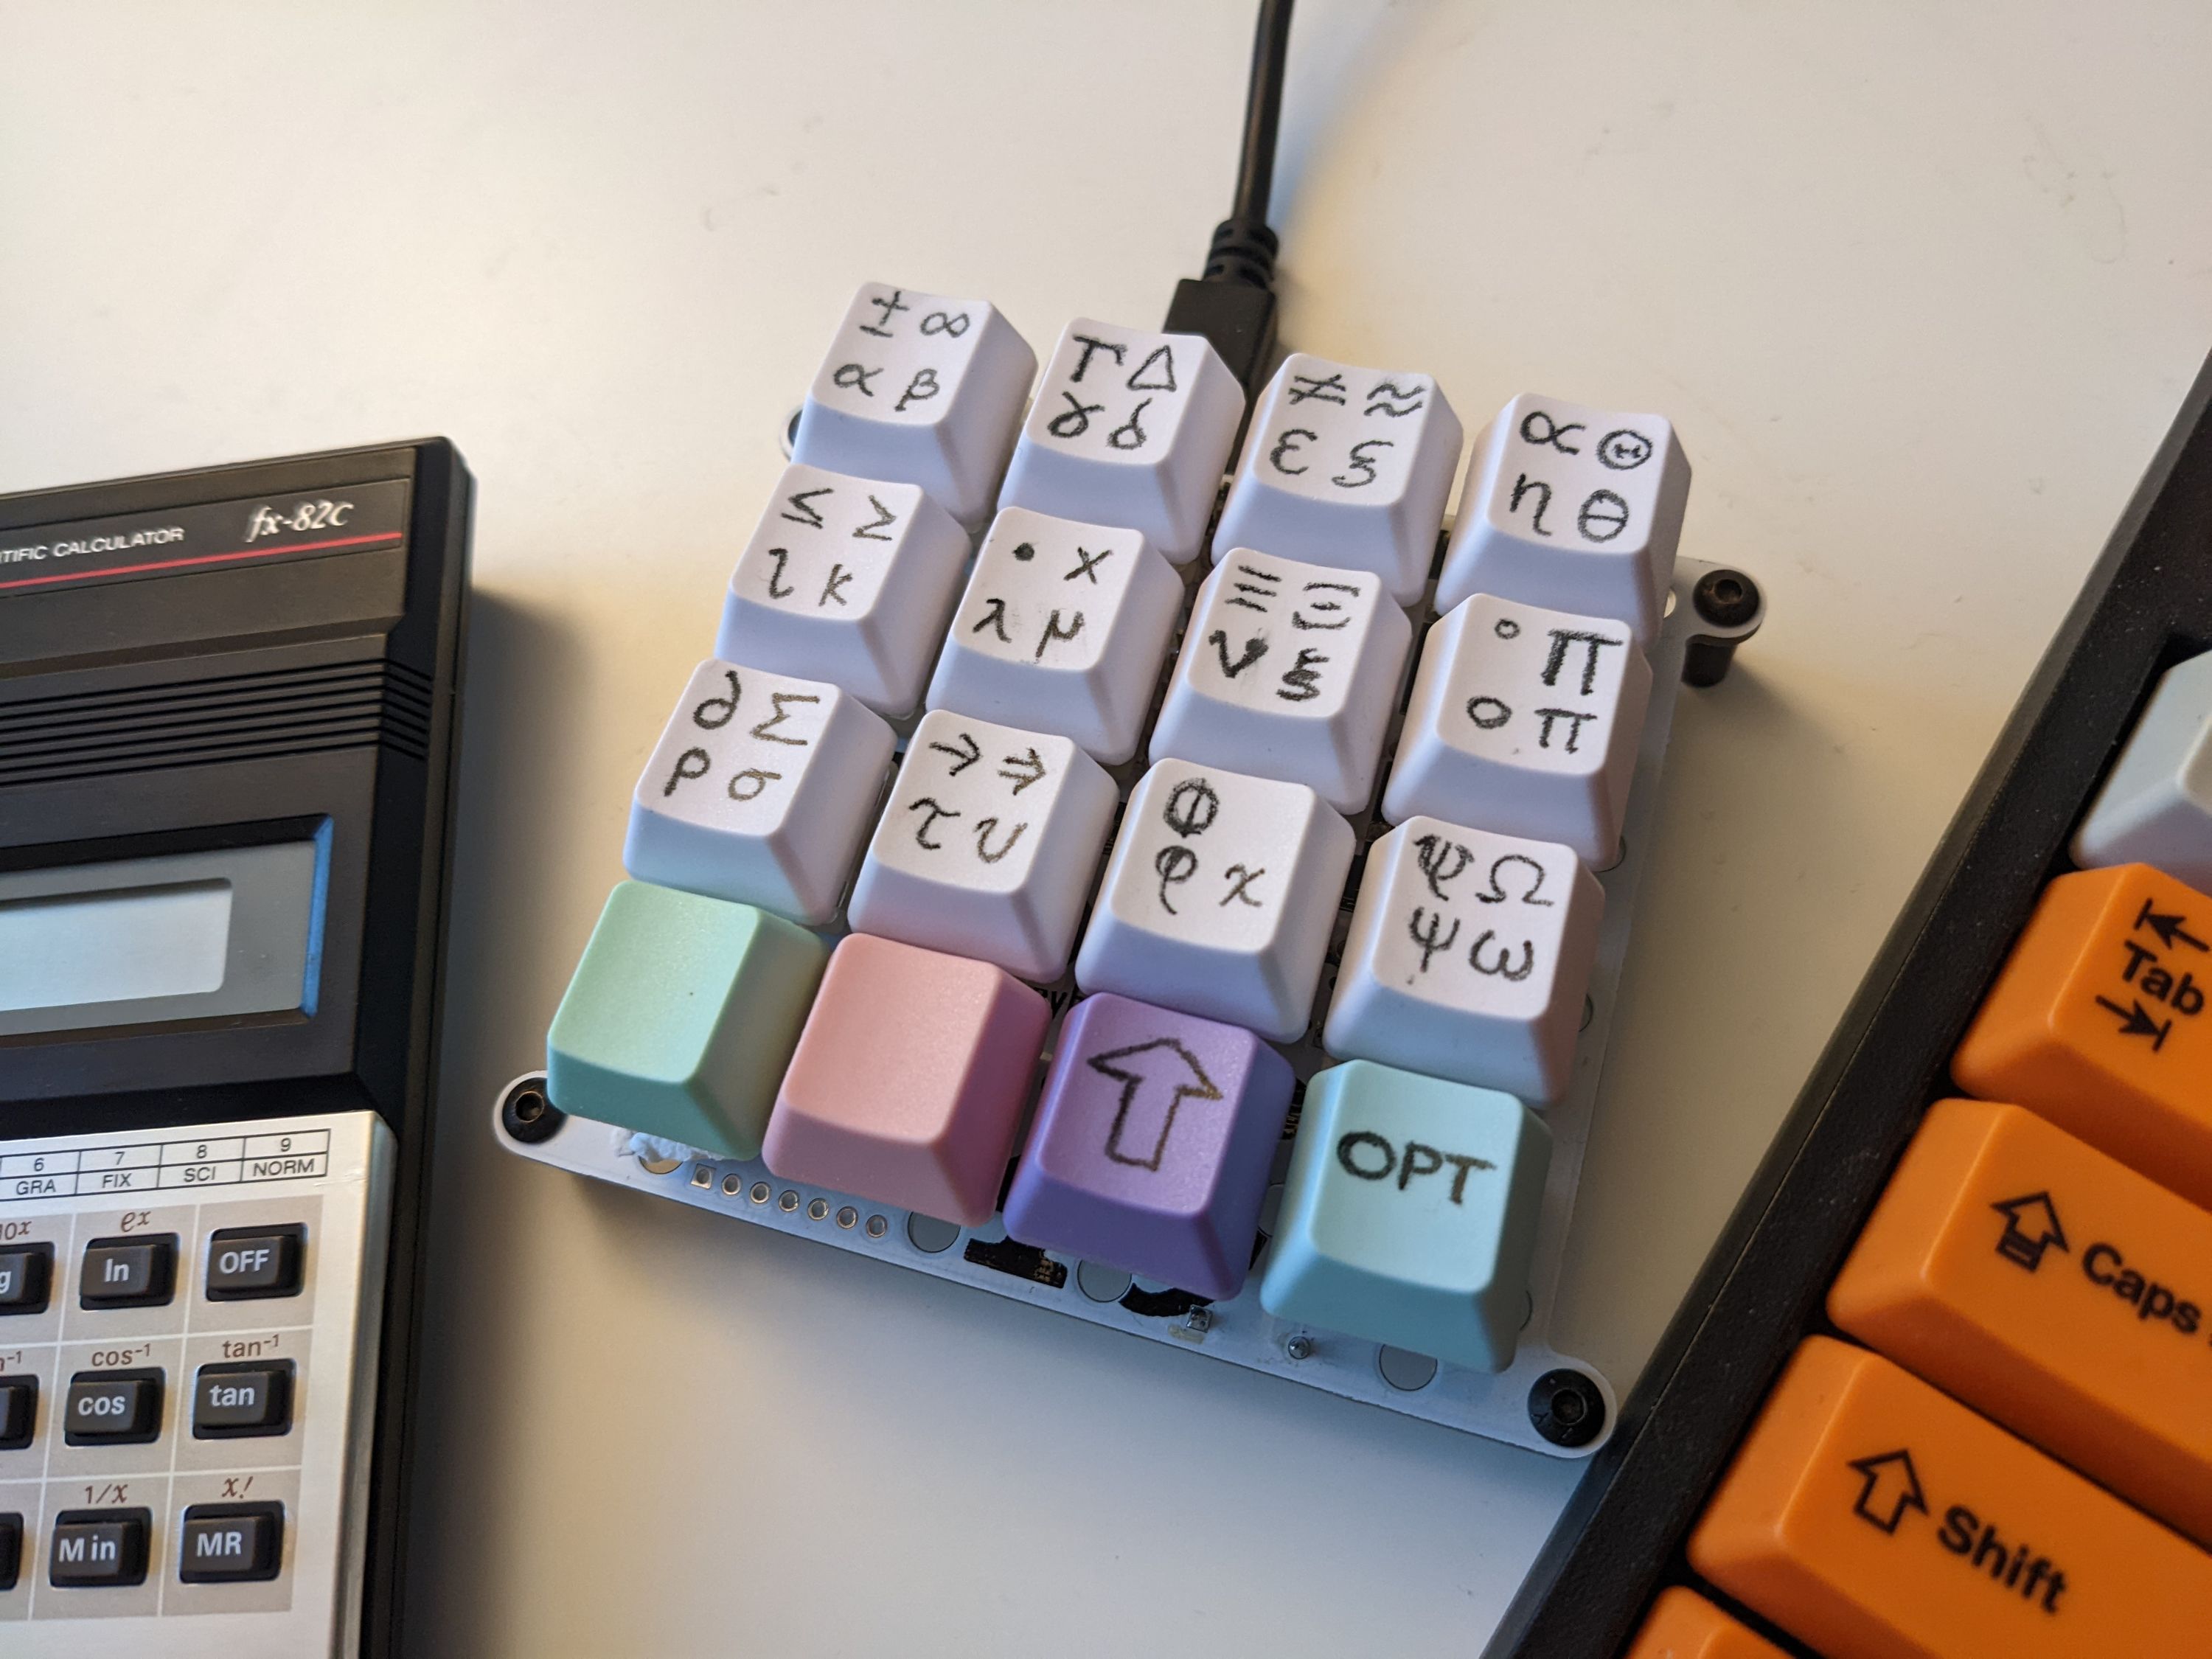
It was not going to win any beauty contents. But it worked, and that let me focus on the real challenge: Writing the firmware that would prove the concept of universally compatible math typing wasn’t just a dream. At this stage, I genuinely didn’t know if what I wanted to achieve was even technically possible.
I spent a several months learning how to write and compile keyboard firmware with QMK, and finally the breakthrough came: I was able to map four symbols onto each key, and have those symbols be sent and interpreted as Unicode by the computer. This was the proof of concept I had hoped for, and it filled me with hope that this project could become something more than just the world’s ugliest 4x4 macropad.
The UV Printing Breakthrough
Fast forward to a maker faire in France, 2022. I happened to meet someone who owned a UV printer, a specialized machine that can print directly onto almost any surface with UV-curable ink.
This chance meeting changed everything. Suddenly, I had a path to professional-quality keycaps without the astronomical quotes I’d been getting from keycap manufacturers (when they bothered to respond at all).
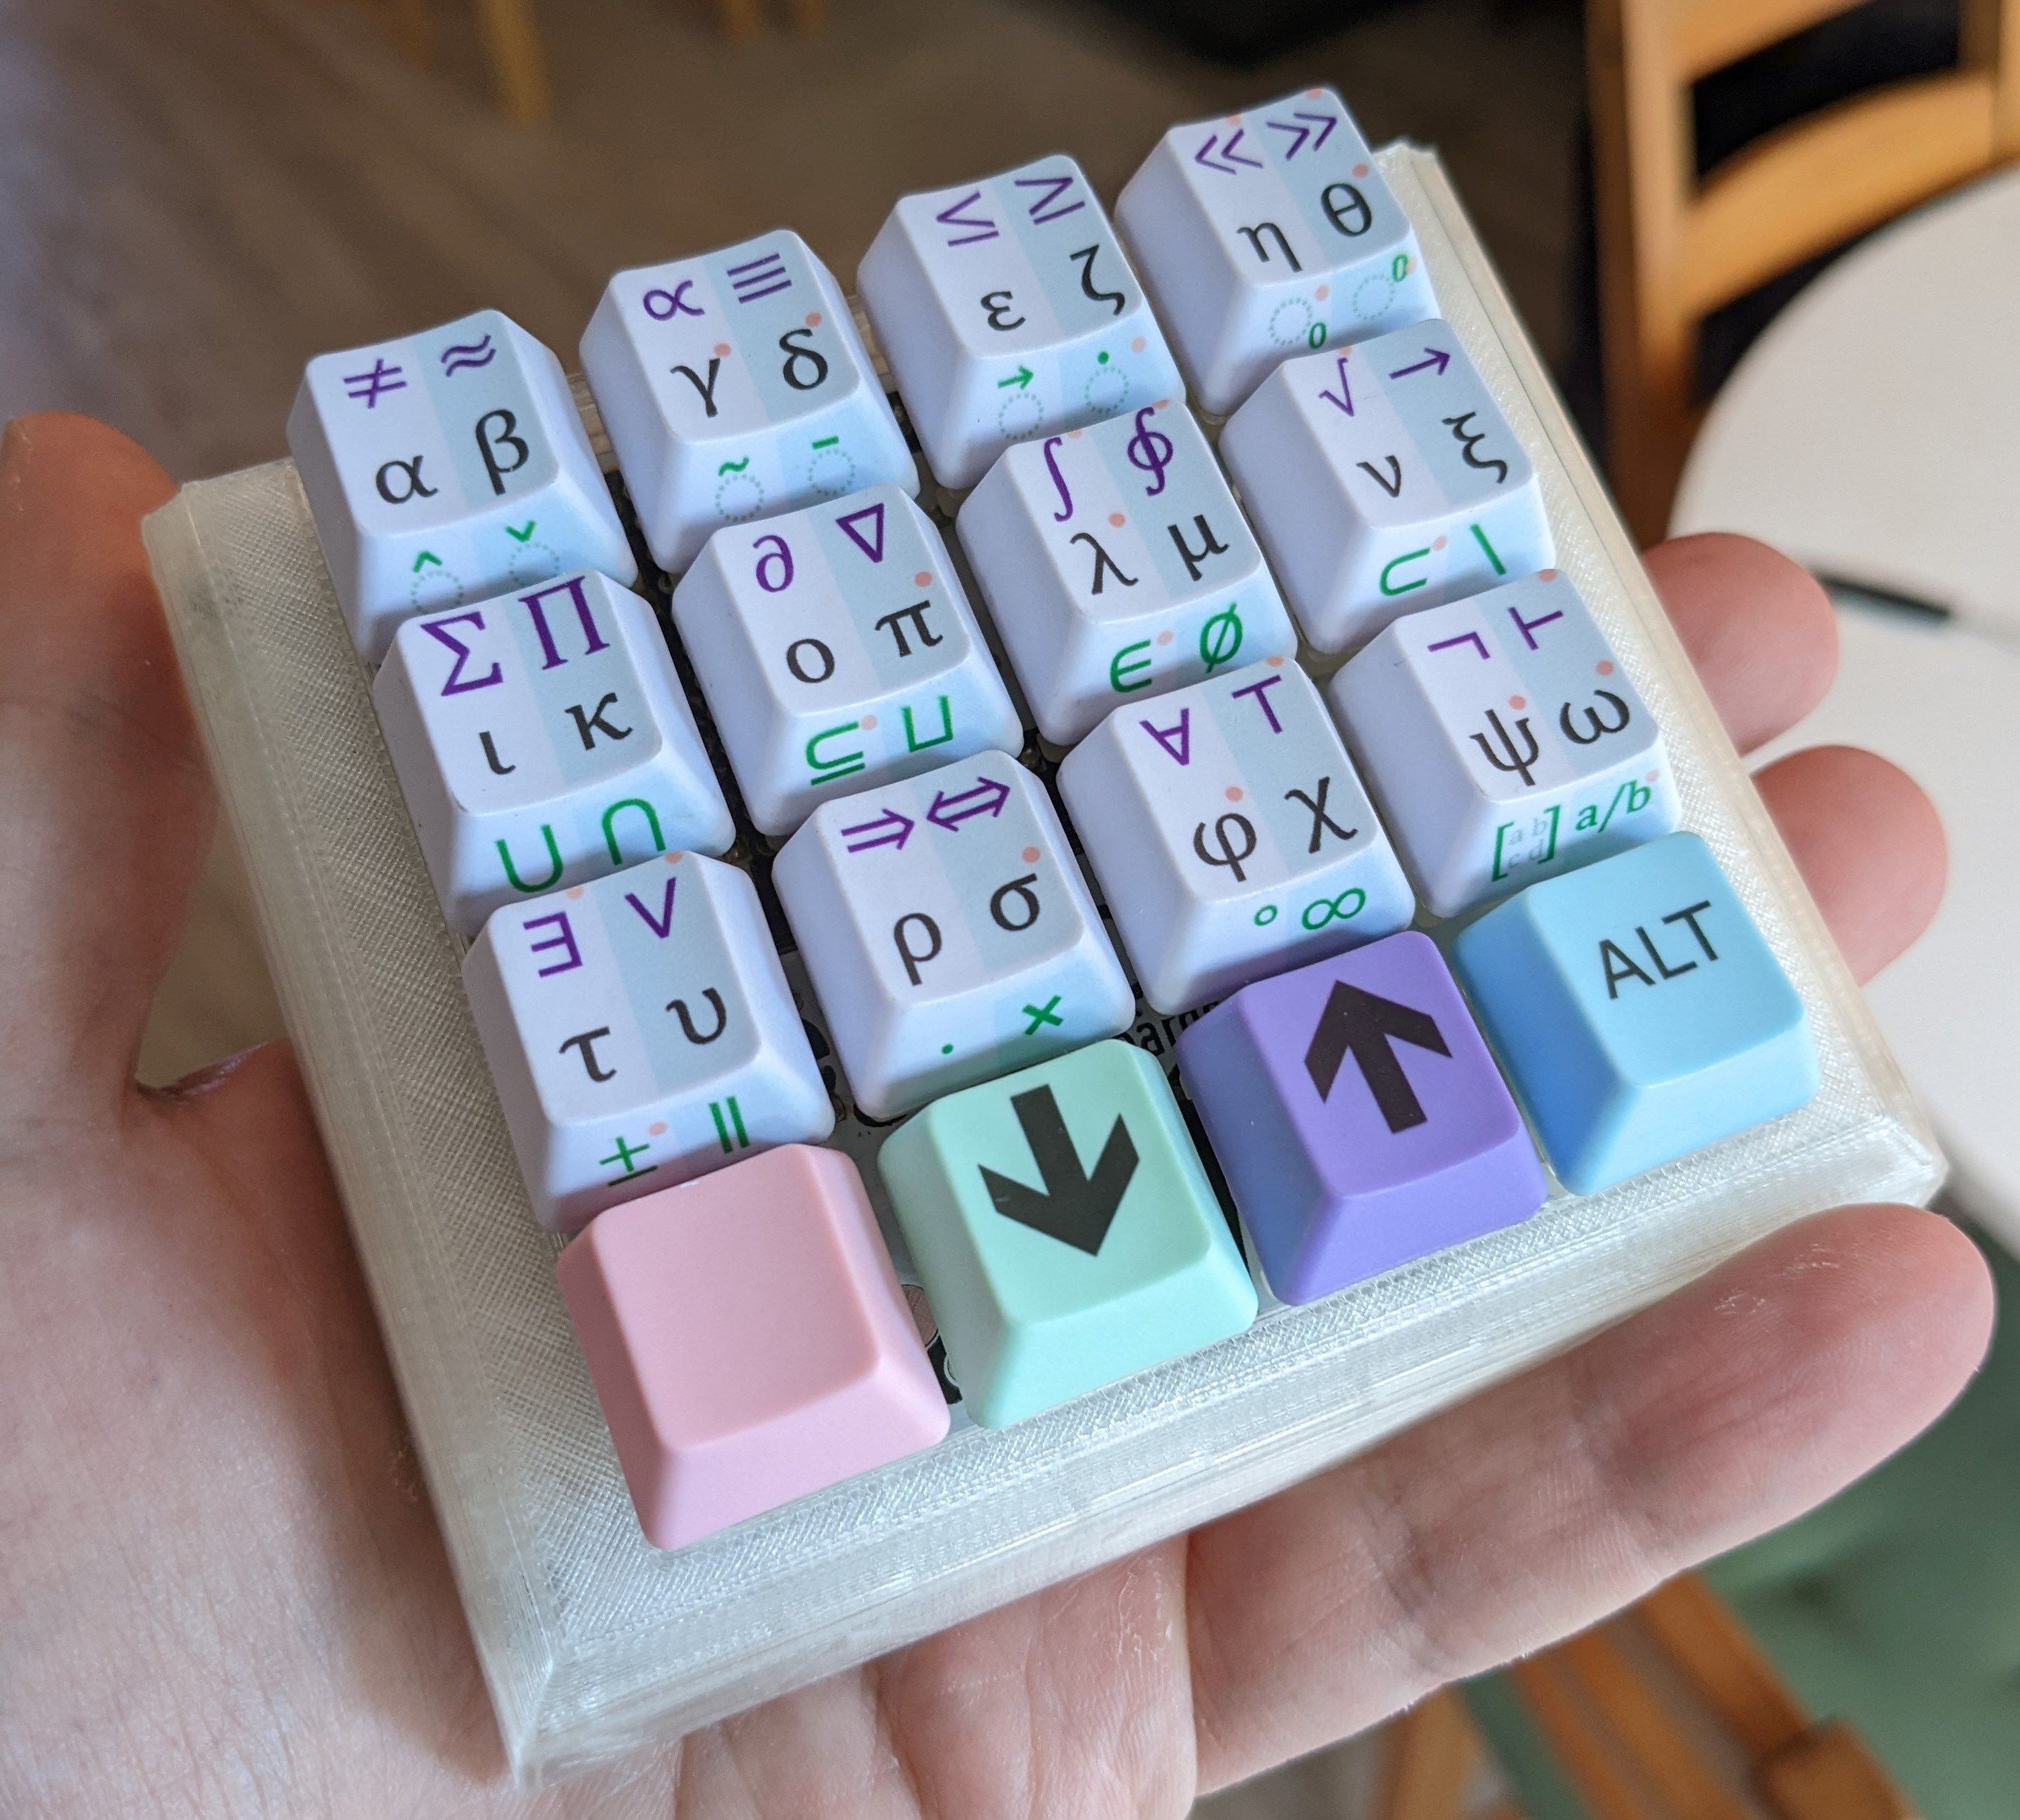
With proper keycaps, the project suddenly transformed from an interesting experiment to something that could feasible become a real and useful product for the STEM community.
Going Custom: Iterations Two and Three
Armed with renewed confidence and three critical pieces:
- Proven firmware that actually worked across platforms
- A keycap solution that looked professional
- Validation that the core concept was solid
I spent the next year building custom versions of the PCB and case in KiCAD and Autodesk Fusion. I really enjoyed this process, and it was my first introduction to CAD. Nothing teaches you new skills quicker than working on a project you love!
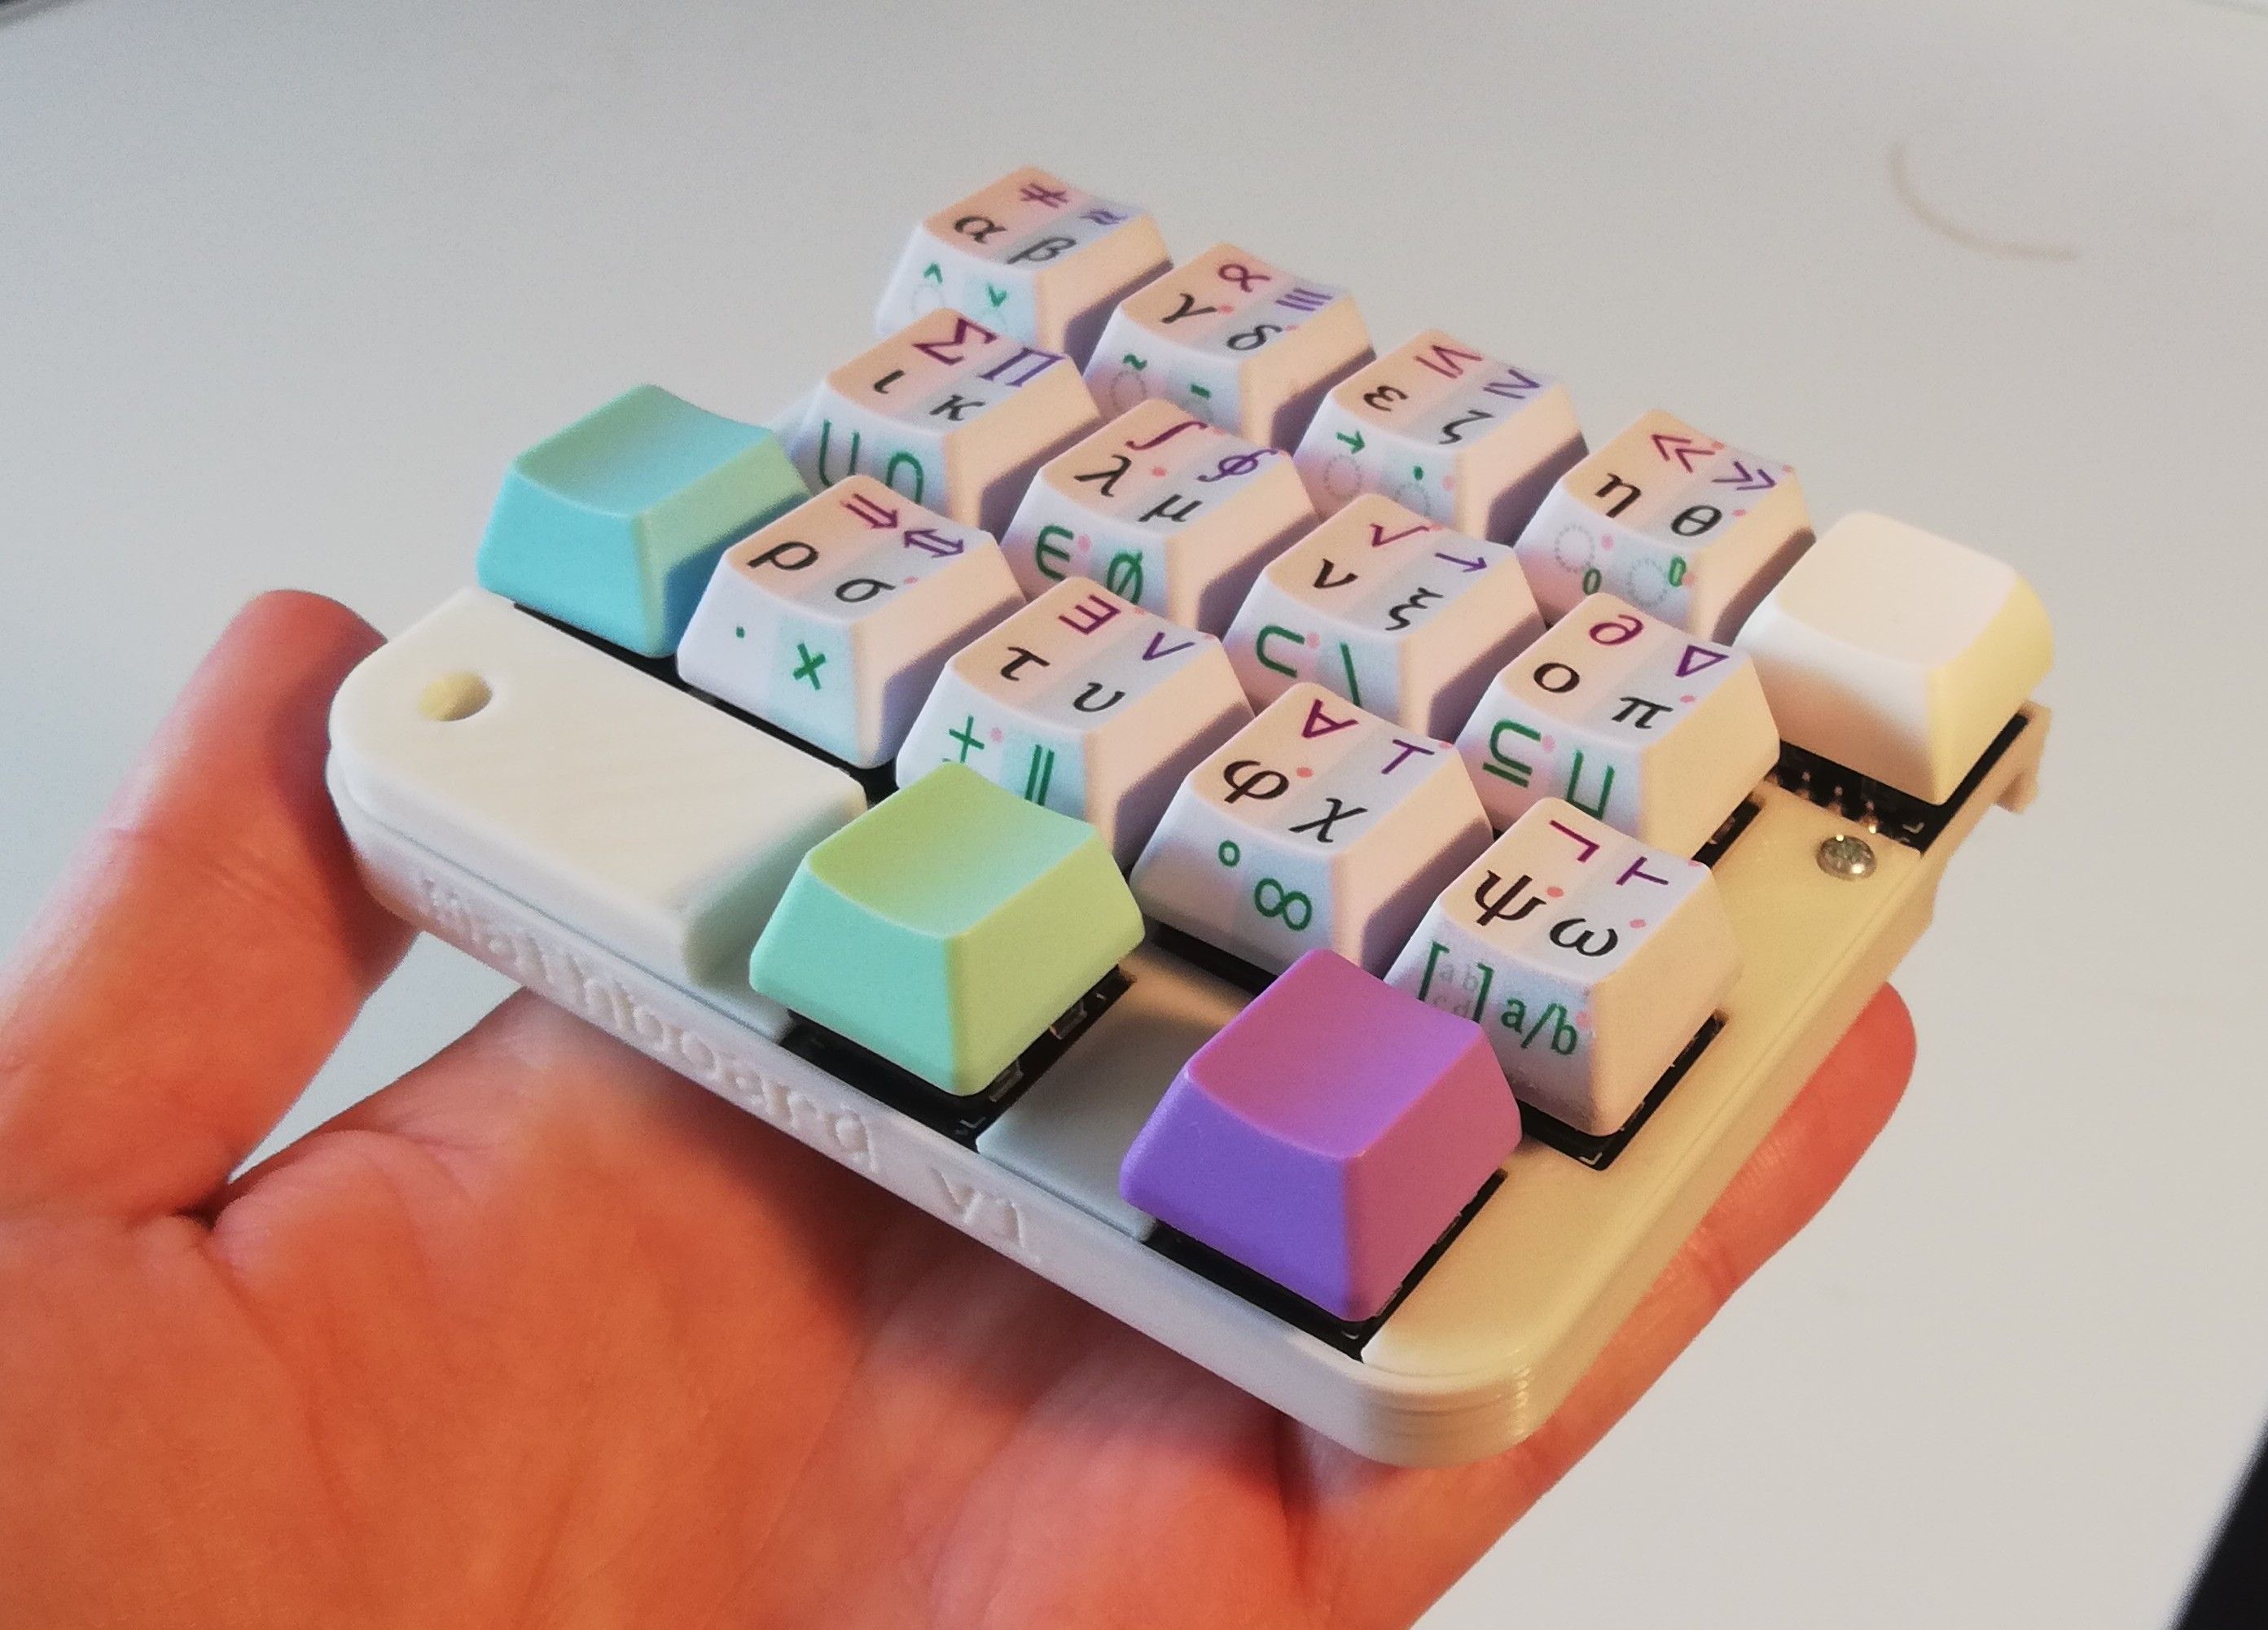
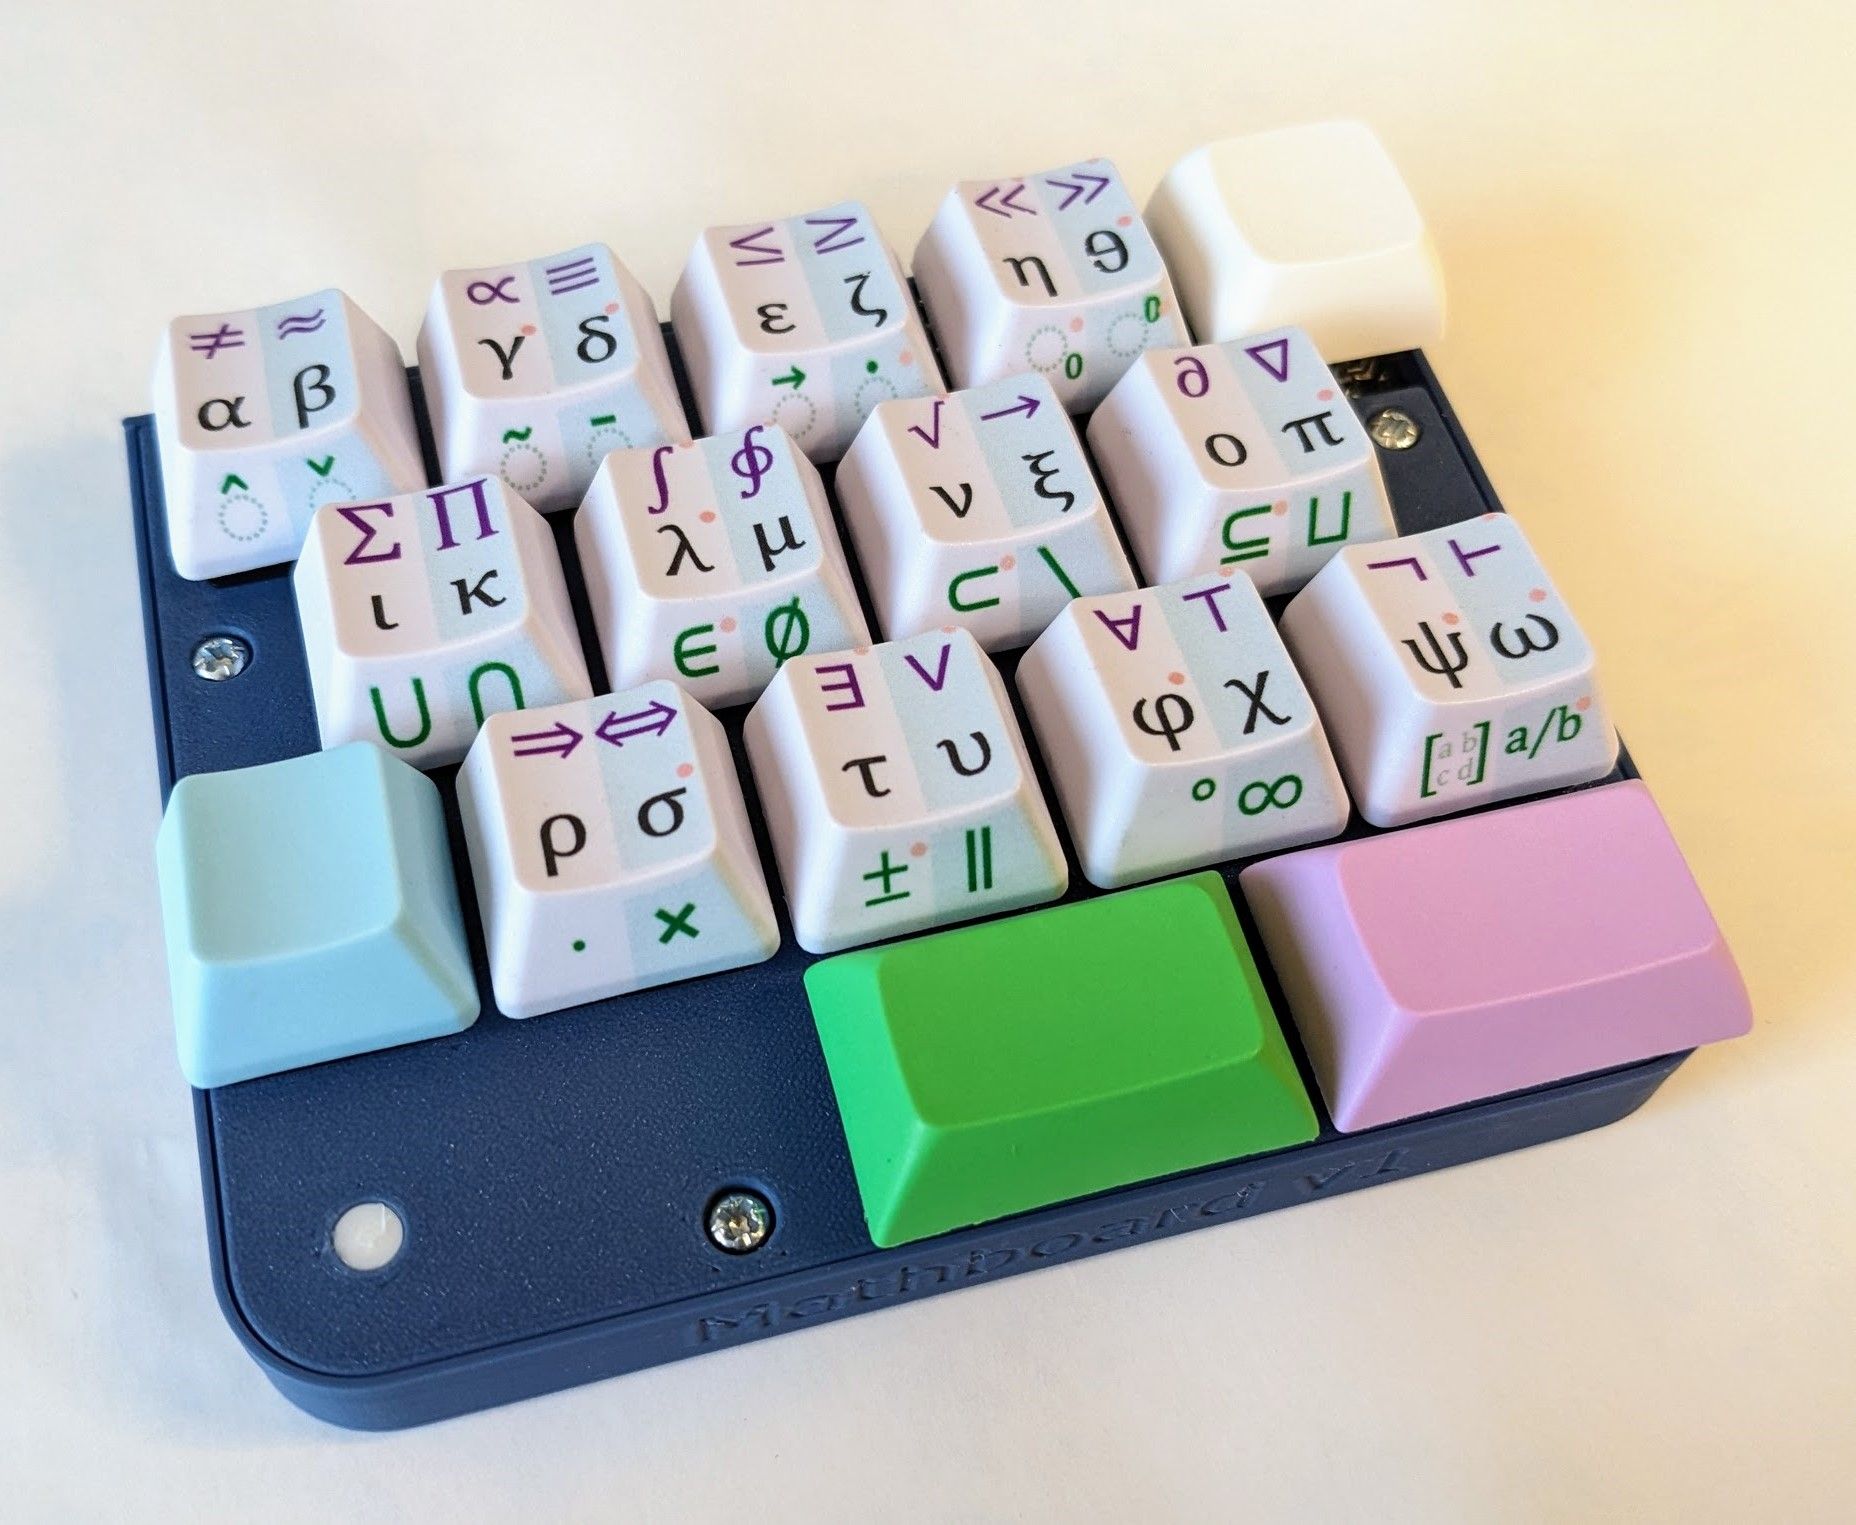
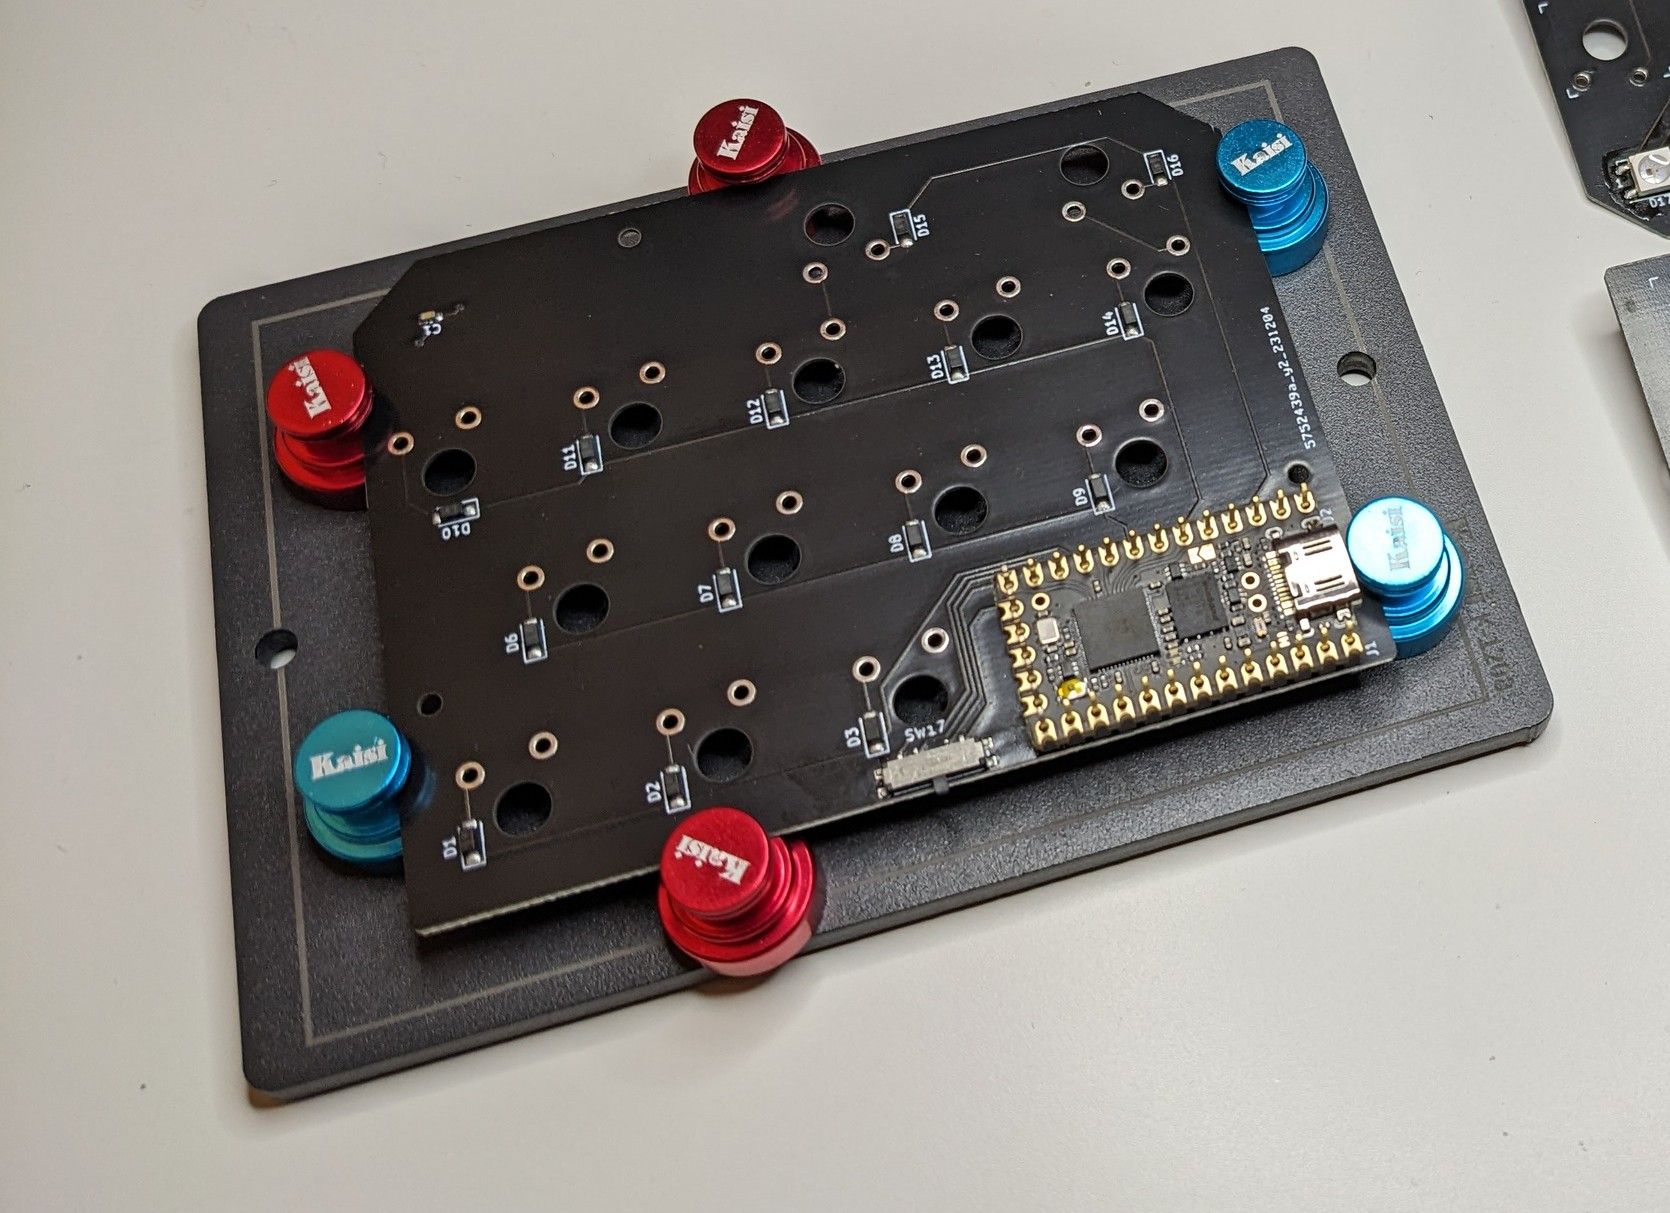
These 3D-printed prototypes worked beautifully. But feedback from testers was unanimous: "It feels too lightweight, it needs more substance."
I took this to heart and got working on the next iteration. I knew I wanted it to be slimmer, sleeker, more solid, and feel like a robust tool that you could depend on.
But first, a few words about the keycaps.
The Keycap Odyssey
Around this time, I was lucky enough to get in touch with Loic from 3dkeycap.com — the person who made Mathpad’s final keycaps possible. What followed was over a year of transatlantic collaboration, with keycaps, UV print tests, and prototypes constantly shipping back and forth as we perfected every detail. Colour schemes, keycap profiles, mode switch designs and more was iterated upon until we felt satisfied.
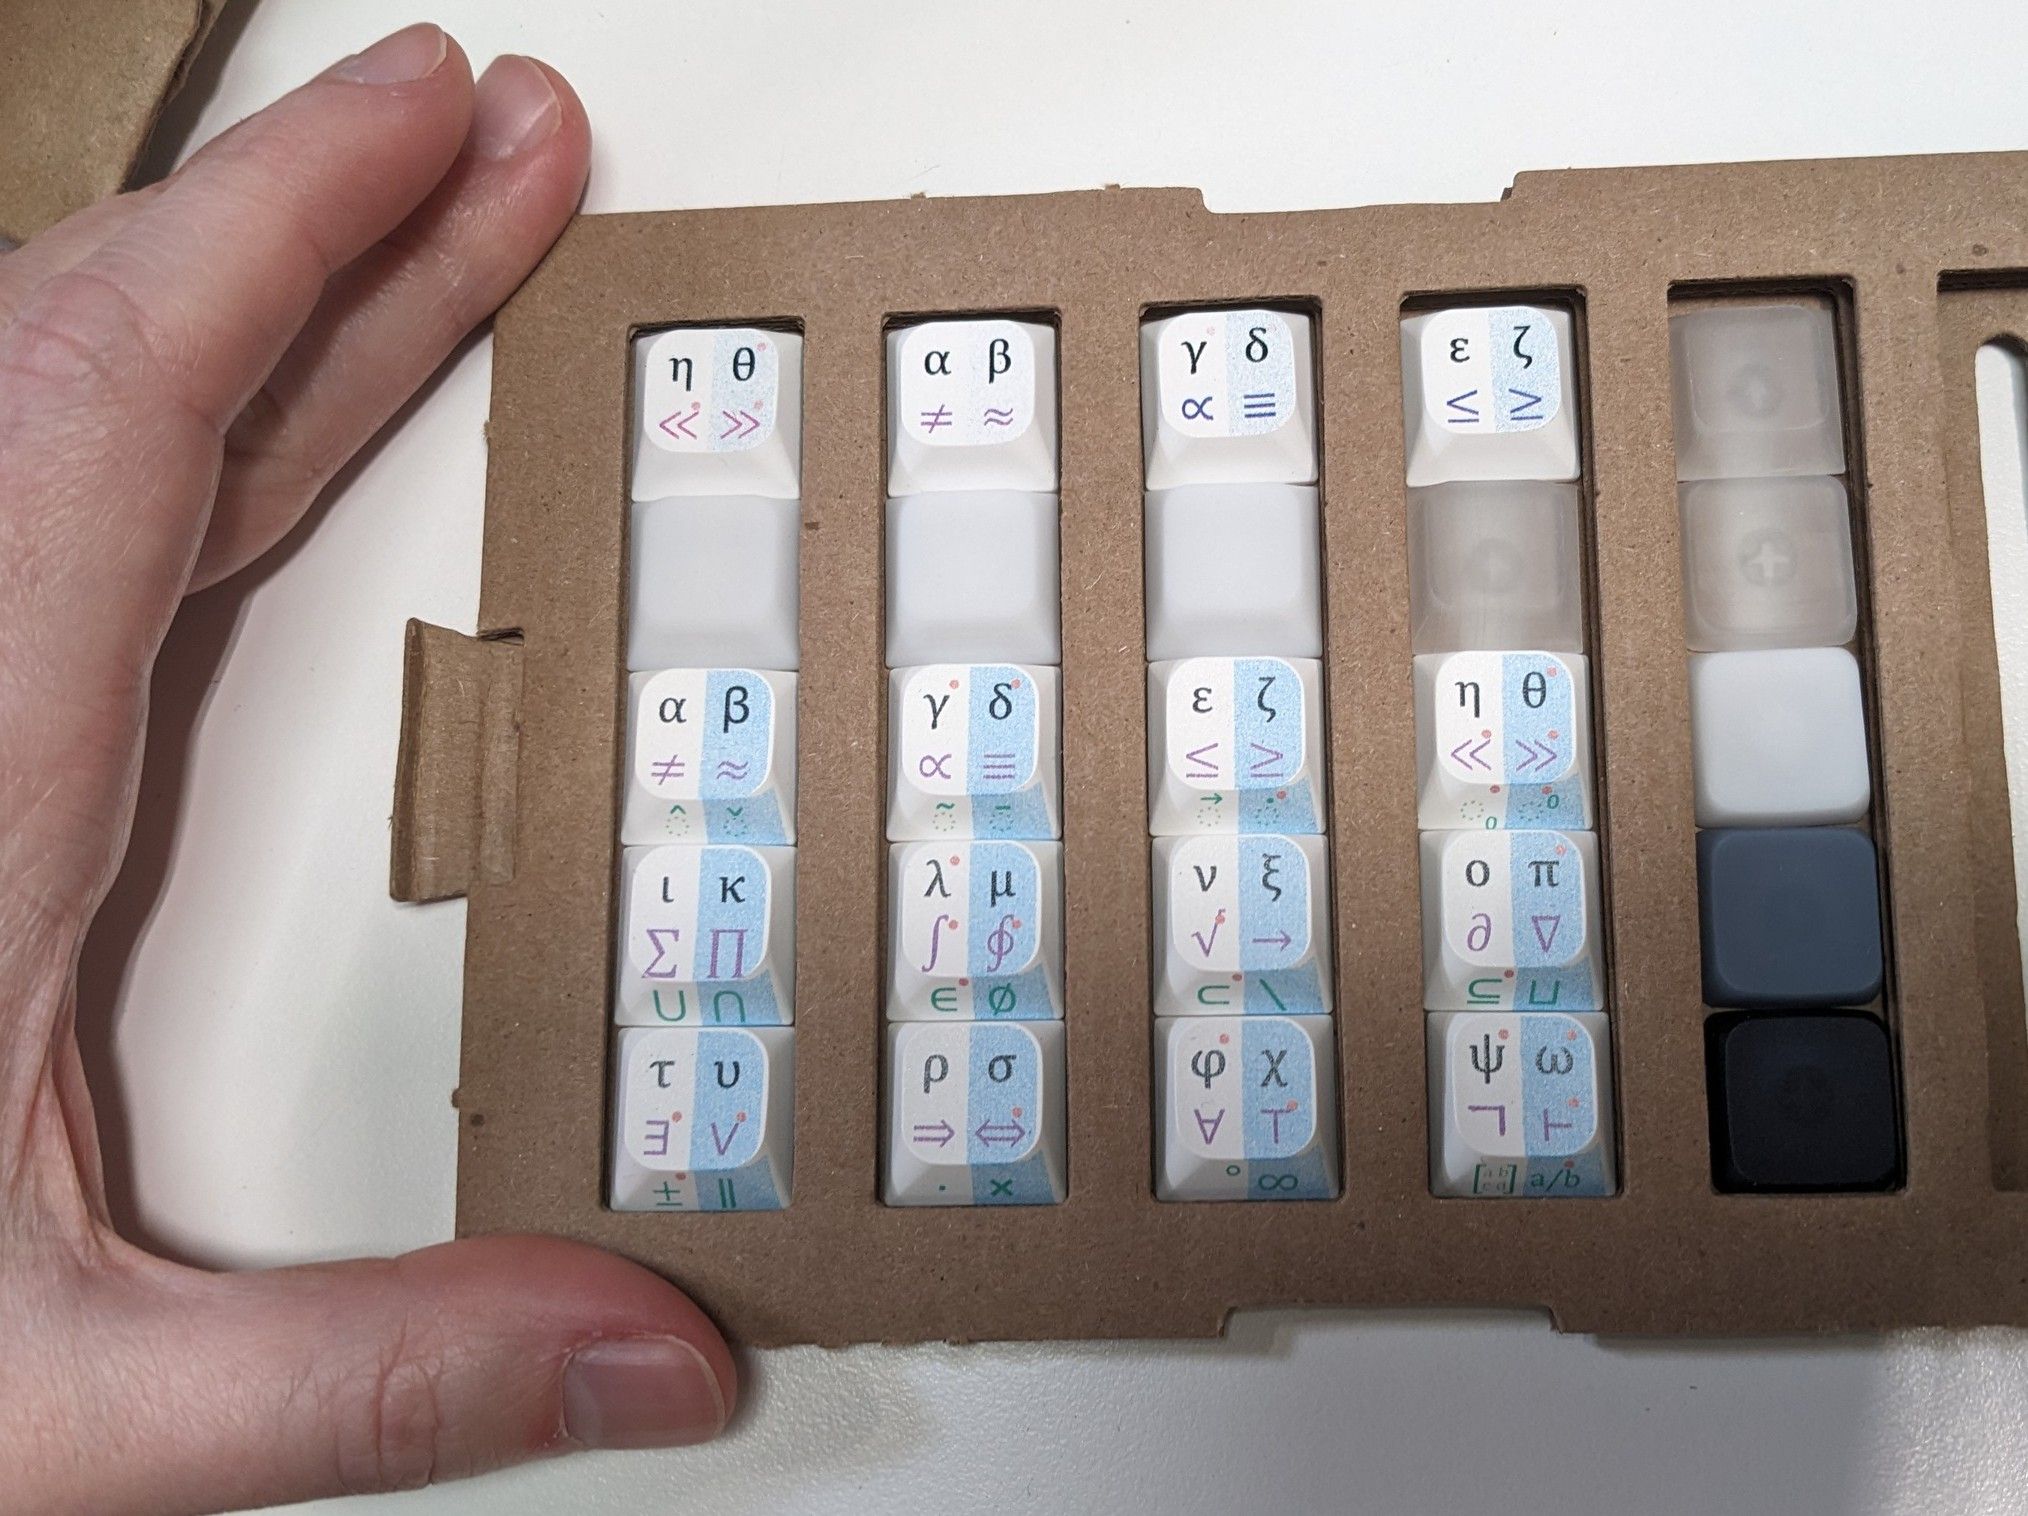
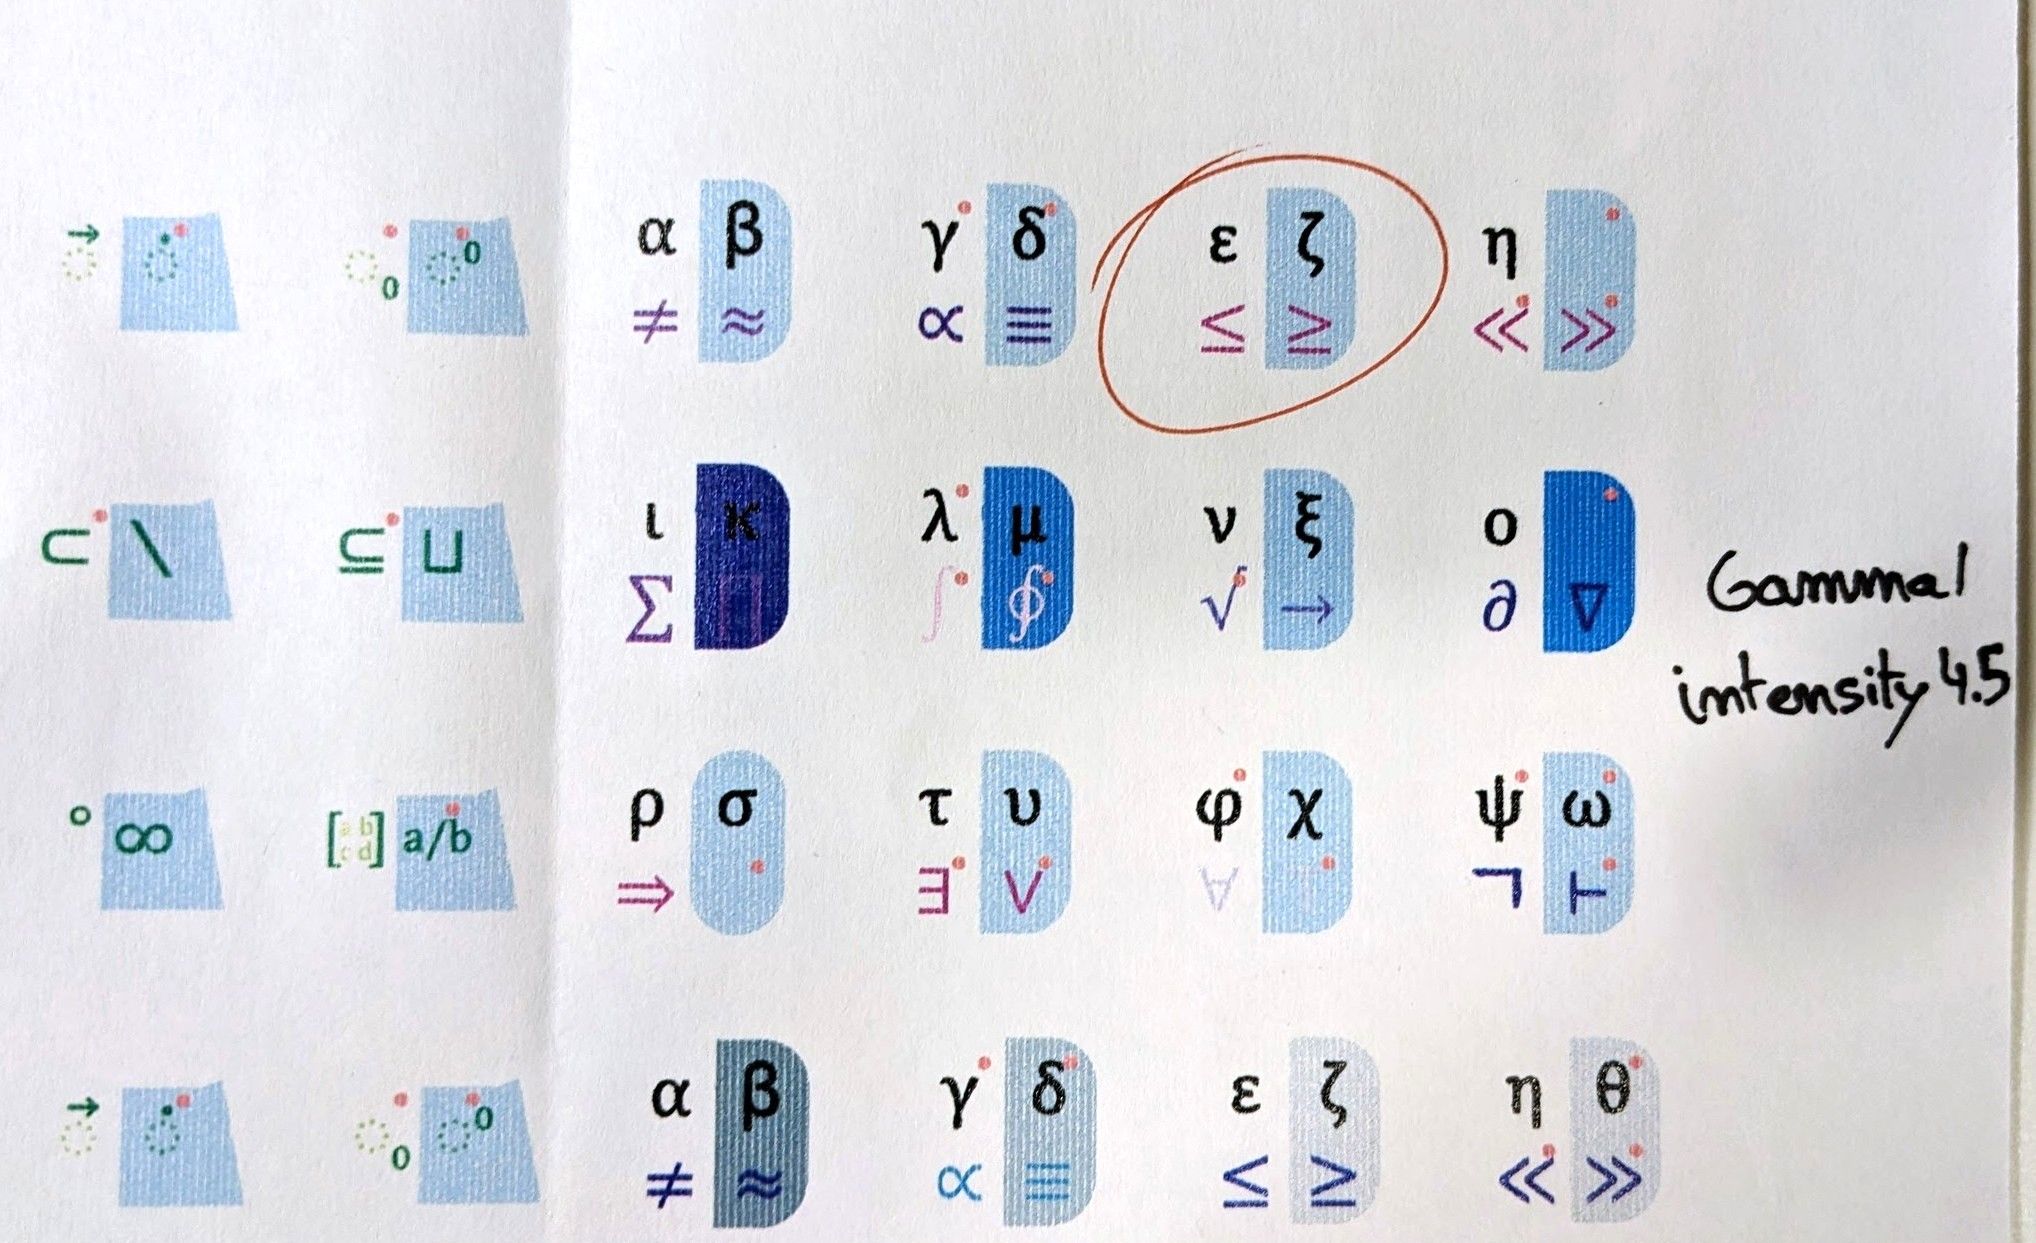
Loic didn’t just manufacture keycaps, but actually became a true partner in solving the challenge of printing symbols on both sides of each keycap that were visually clear at small sizes. Without him, Mathpad simply wouldn’t exist in its current state.
The Metal Revolution: Iteration Four
After extensive redesign work, iteration four finally delivered the substance that testers had been asking for. Out went the 3D-printed plastic; in came machined and anodized solid aluminum.
The PCB evolved too, moving from a separate microcontroller module to a fully integrated design that was both more reliable and, most importantly, slimmer. Integrating the microcontroller directly into the PCB instead of relying on a soldered-on off-the-shelf unit took the PCB thickness from 10mm to 2mm, getting me closer to the low-profile look I was after.
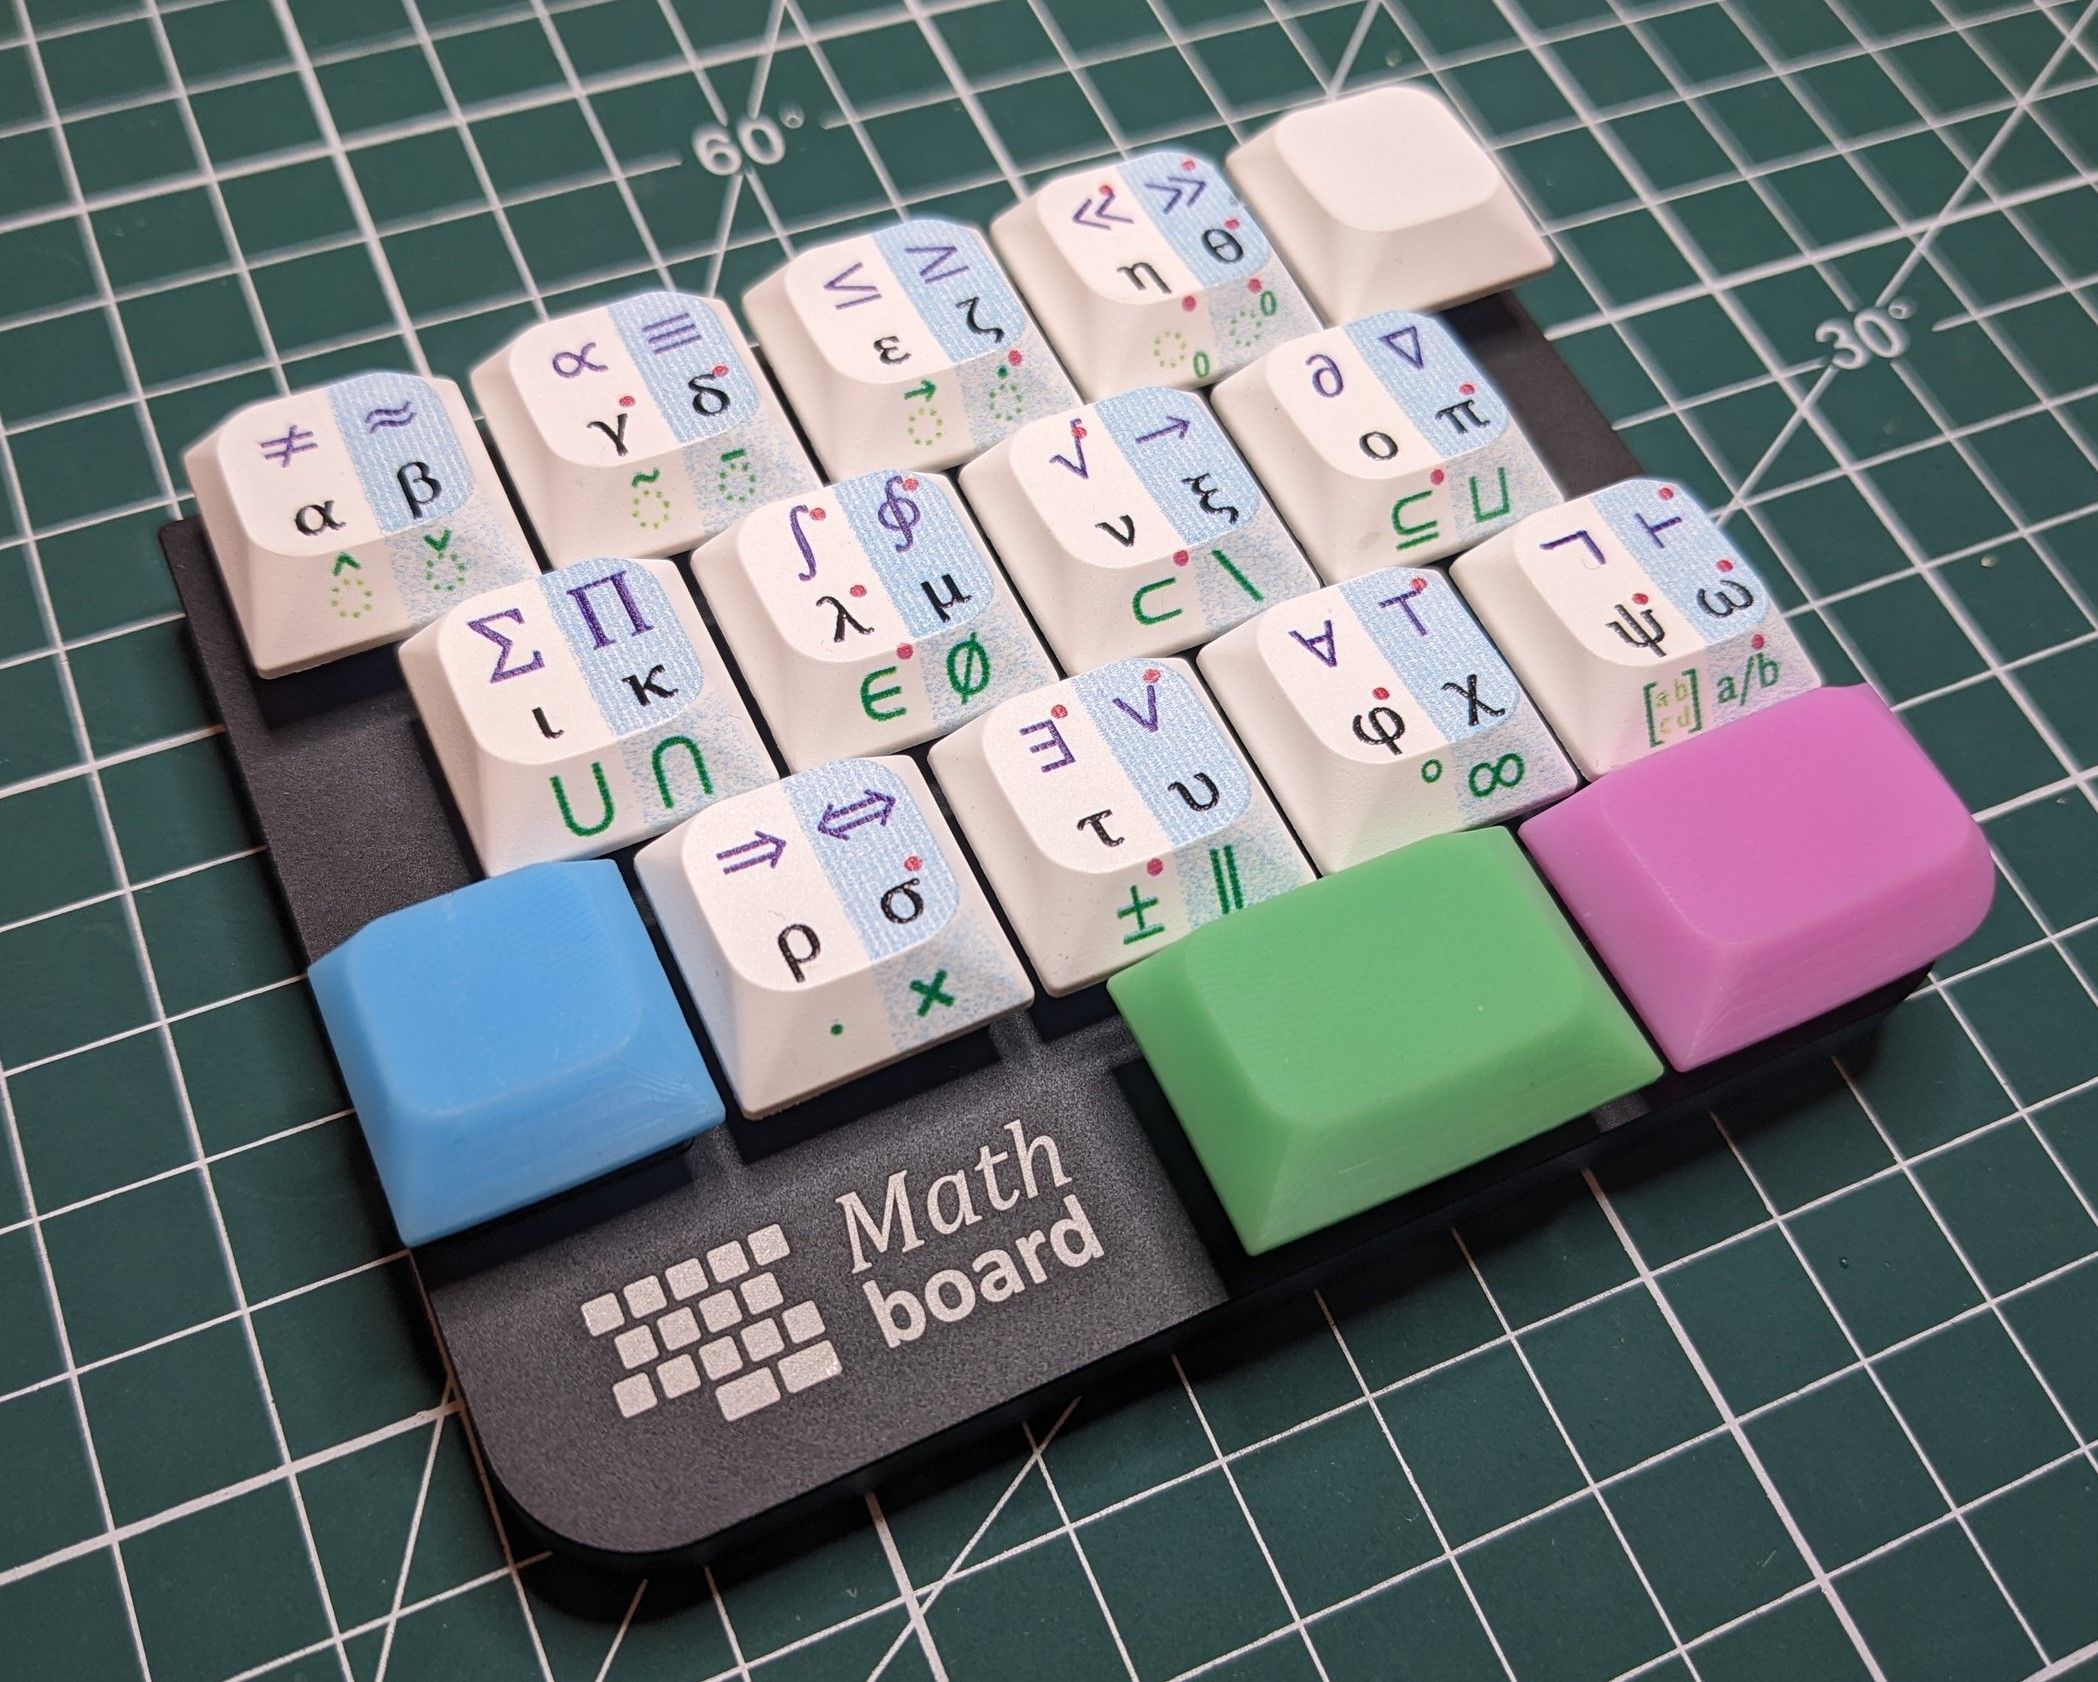
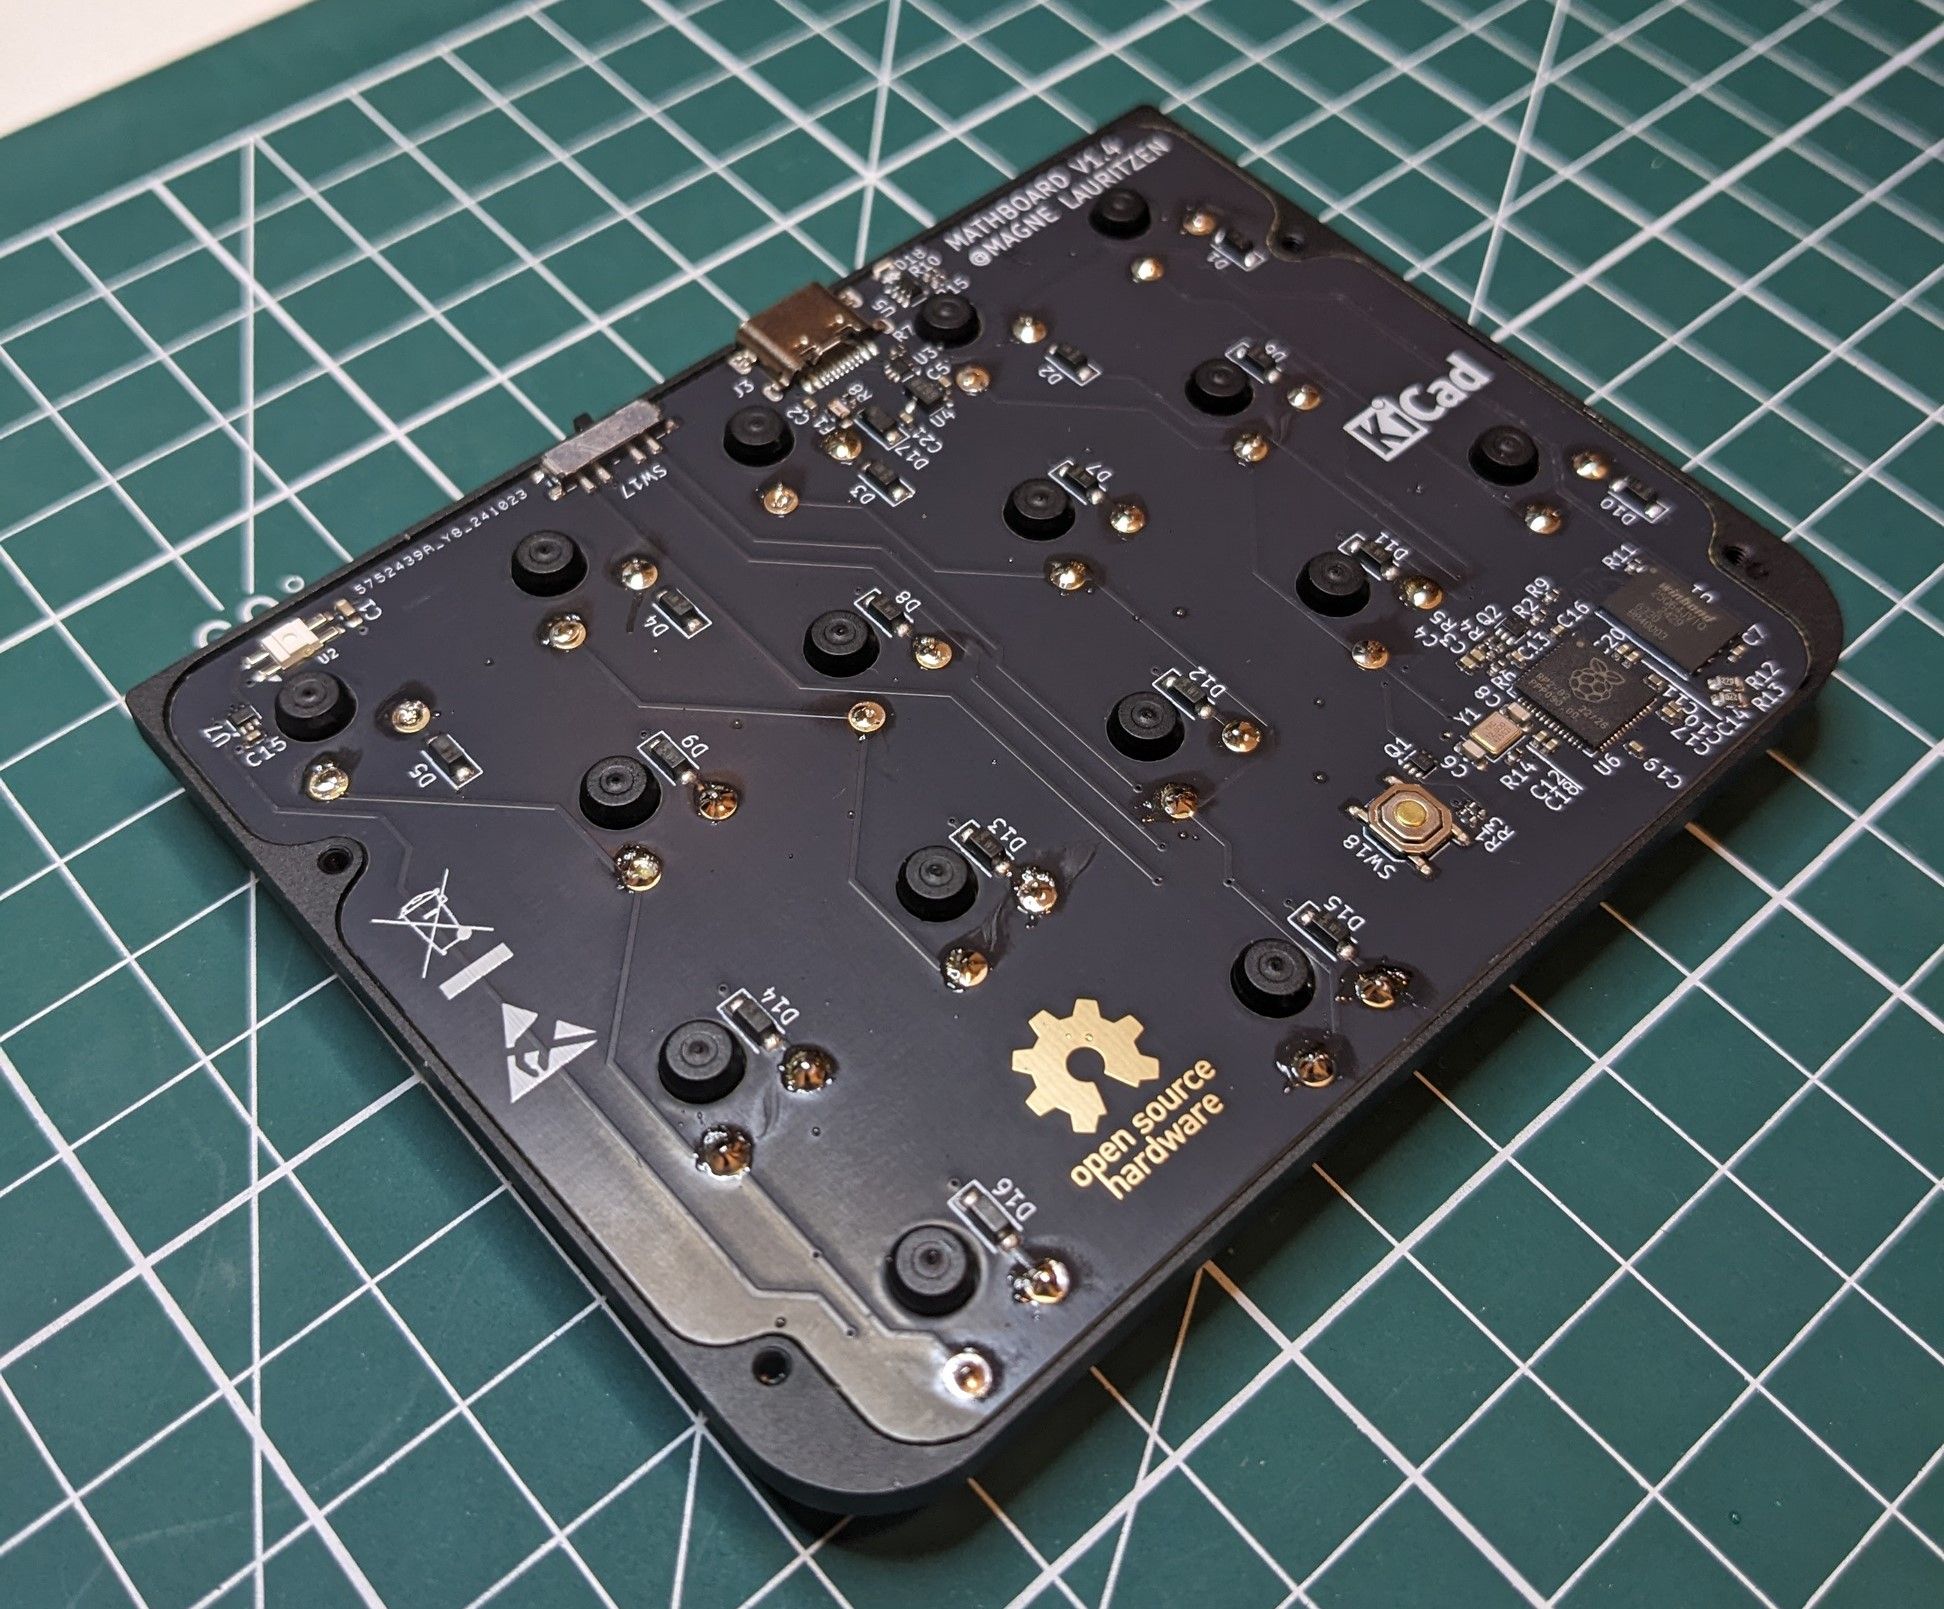
This version was close, very close, to what you’ll receive as a backer.
The Final Product: Obsessive Attention to Detail
The Mathpad now available on Crowd Supply represents countless refinements over the course of years. This isn’t a product that was rushed to market, but instead carefully crafted to solve a specific problem: A problem faced by millions of people every day, but that no-one had thought to solve before.
Why does this matter to you? Because when you back Mathpad, you’re not just getting another gadget. You’re getting a tool that represents thousands of hours of problem-solving, prototyping, and refinement; all focused on eliminating a specific friction point that makes mathematical typing unnecessarily painful.
Every symbol placement, every firmware decision, every hardware choice has been made with one goal: to make typing mathematics as natural as typing regular text, whereever you can type regular text.
Coming next week: A demonstration video showing just how effortless Mathpad makes mathematical typing. You’ll see how your workflow changes when you can type ∫, ∇, and α as easily as a, b, and c.
Haven’t backed yet? Join the campaign and experience math typing the way it should always have been.