Project update 3 of 11
Electromyography (EMG) Walkthrough
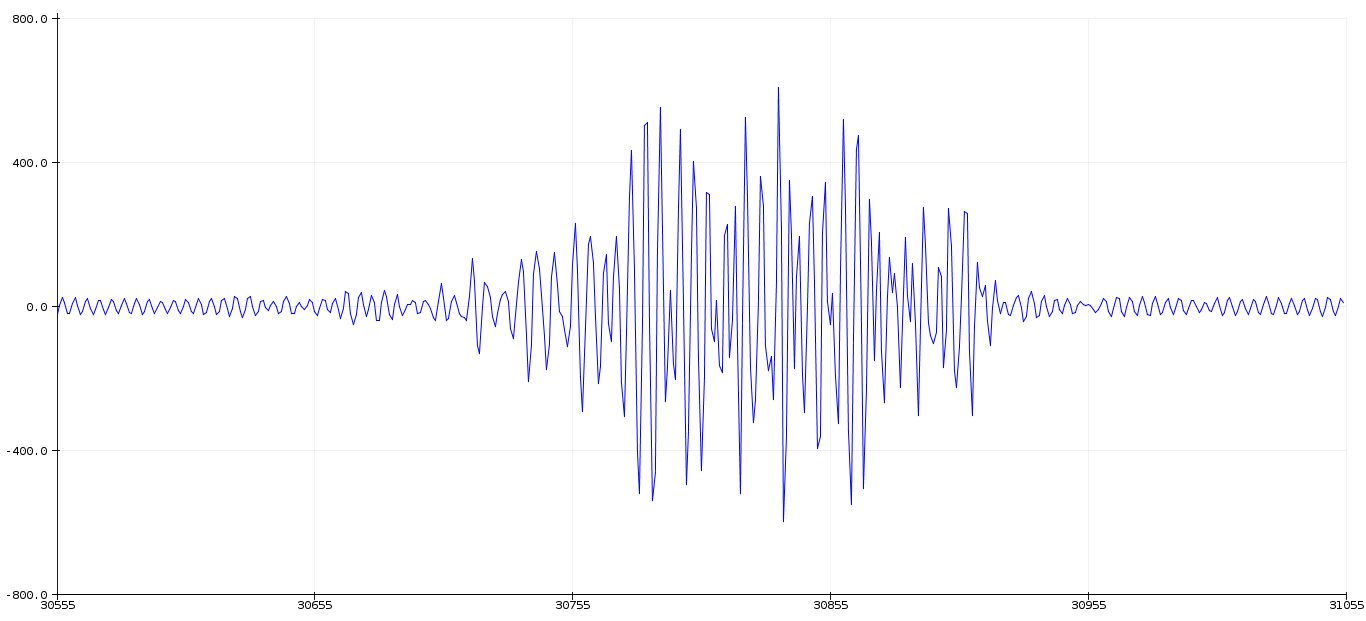
by Deepak KhatriElectromyography (EMG) is a technique for evaluating and recording the electrical activity produced by skeletal muscles. EMG is also used as a diagnostic procedure to assess the health of muscles and the nerve cells that control them (motor neurons). EMG results can reveal nerve dysfunction, muscle dysfunction, or problems with nerve-to-muscle signal transmission. The image below shows an EMG wave recorded with BioAmp EXG Pill.
How to Create an Electromyograph with BioAmp EXG Pill?
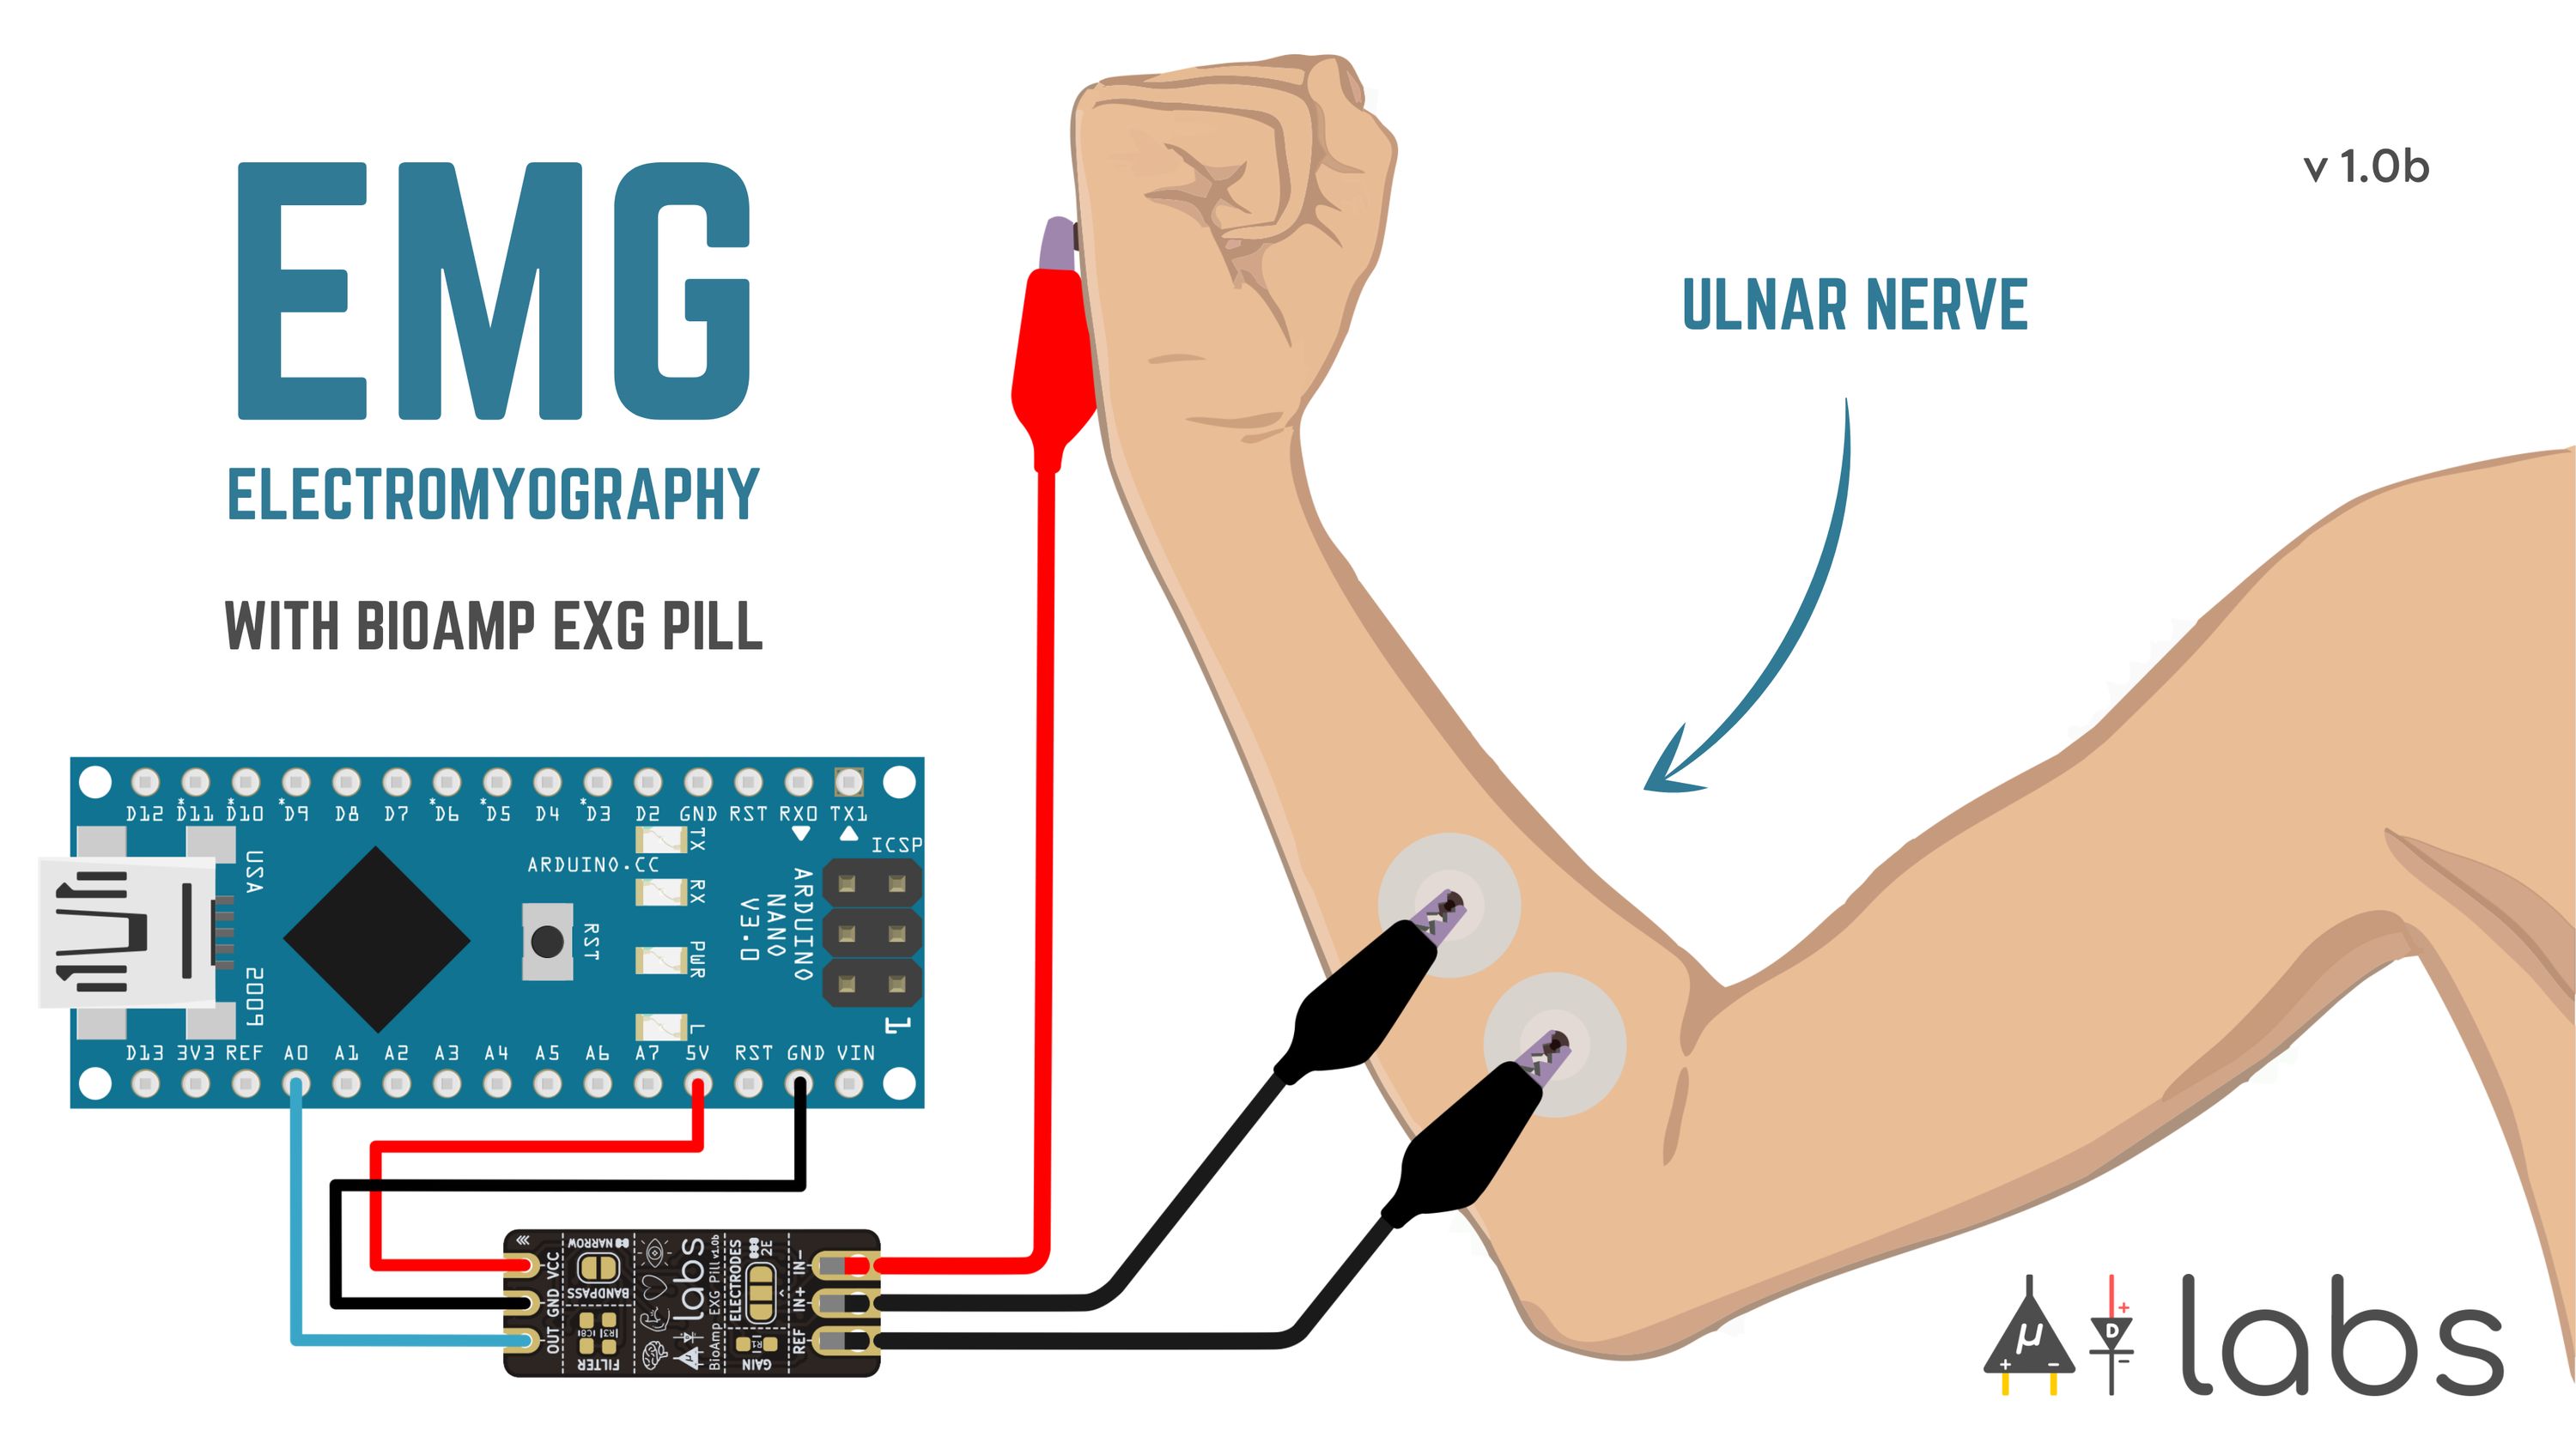
EMG is performed using an instrument called an electromyograph to produce a record called an electromyogram. Common electrode placement for recording good EMG signal for hand movement is near the ulnar nerve, as shown in the diagram below.
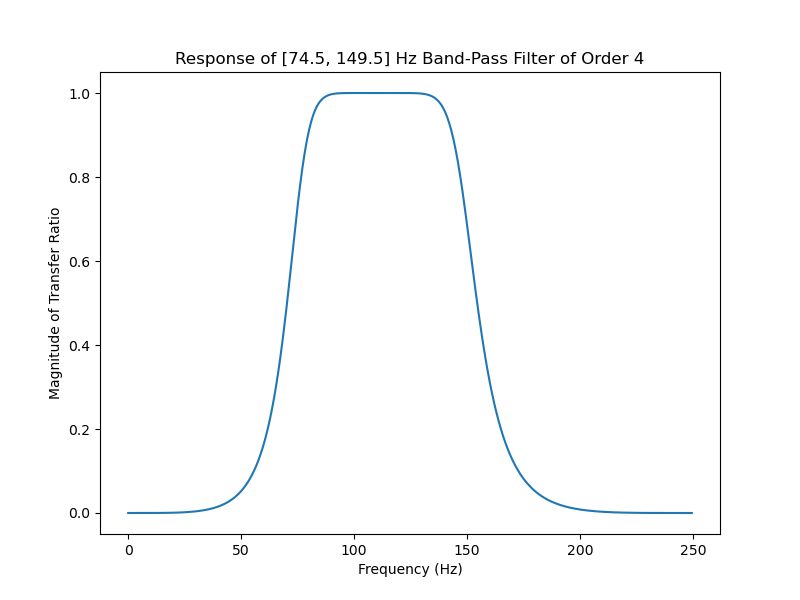
To record nice clean EMG signals with BioAmp EXG Pill, all you need is the Analog Serial Out Arduino sketch. If you want more control we also have a Fixed Sampling Arduino sketch that allows you to record EMG and other Biopotential signals at a specific sampling rate. You can also use the EMG Filter Arduino sketch for recording EMG at a 500 Hz sampling rate and a 74.5 - 149.5 Hz frequency. The image below shows the 4th order bandpass Butterworth IIR digital filter used in the EMG Filter sample sketch:
For practical use cases, we need a smooth signal, but the raw EMG signal does not come out as a smooth curve, which is why we offer the envelope-detection Arduino sketch for BioAmp EXG Pill. The video below shows envelope detection at work:
Example EMG Projects with BioAmp EXG Pill
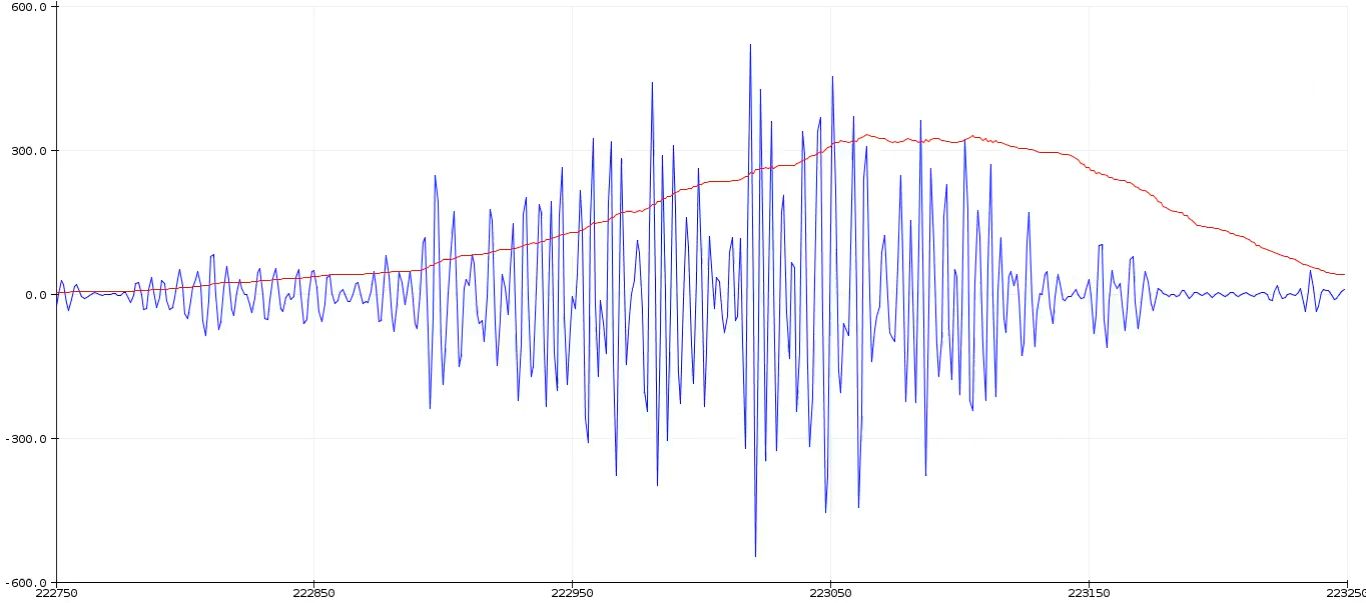
BioAmp EXG Pill allows you to do a lot with muscle power. We show two examples below: a servo controller and an LED bar graph. Both demonstrations use code that is derived from the envelope-detection Arduino sketch. The image below shows how envelope detection works on the Raw EMG signal.
Servo Controller
Controlling a servo motor with BioAmp EXG Pill is pretty easy, as shown in the video below. To create the same project, all you have to do is load the servo-control Arduino sketch onto your Arduino-compatible board, and you’re good to go.
LED Bar Graph
The same envelope-detection concept is used for the LED bar graph project. You can use as many LEDs you want with this project. To make a cool LED bar graph like the one shown in the video below, just edit the LED bar graph Arduino sketch, upload it to the Arduino board, then connect the LEDs according to the specified pin numbers.
Things People Have Made with BioAmp EXG Pill?
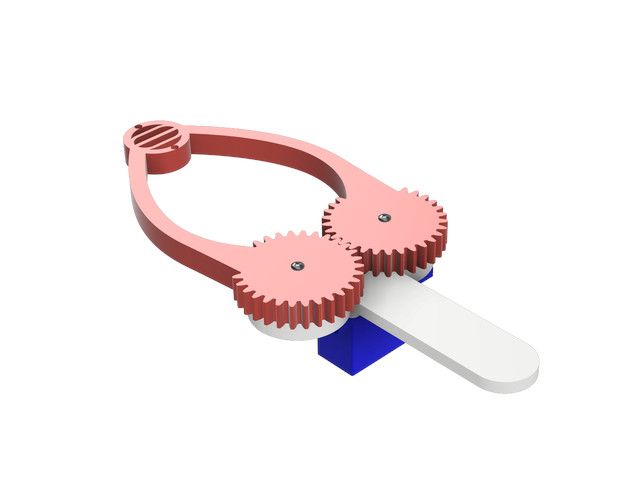
PR ROBOTICS created an EMG-controlled 3D claw project with BioAmp EXG Pill. For more detailed information on how it works and how to make one for yourself, you can check out their detailed Instructables article on the Claw Controller Using BIOAMP EXG PILL project.
New BioAmp EXG Pill v1.0b PCBs Coming Soon!
The v1.0b revision of the BioAmp EXG Pill design is complete, and we have ordered prototype boards from PCBWay. They are black and matte-black PCBs with an ENIG finish. We look forward to sharing more information in upcoming project updates!
References
- Mayo Clinic article on EMG
- Wikipedia Electromyography page
- PR ROBOTICS Instructables article on Claw Controller Using BioAmp EXG PILL
- Upside Down Labs - BioAmp EXG Pill GitHub repository