As a development board ANAVI Light Controller gives numerous opportunities. The default open source firmware is fully compatible with Home Assistant and even supports automatic discovery over MQTT. In the past there was a showcase with ESPEasy and Domoticz. Alternatively, you can also flash EPSHome to ANAVI Light Controller.
ESPHome is an open source firmware for your ESP8266 or ESP32 devices with simple and yet powerful configuration files that allows you to control them remotely through the open source IoT platform Home Assistant and/or other home automation systems.
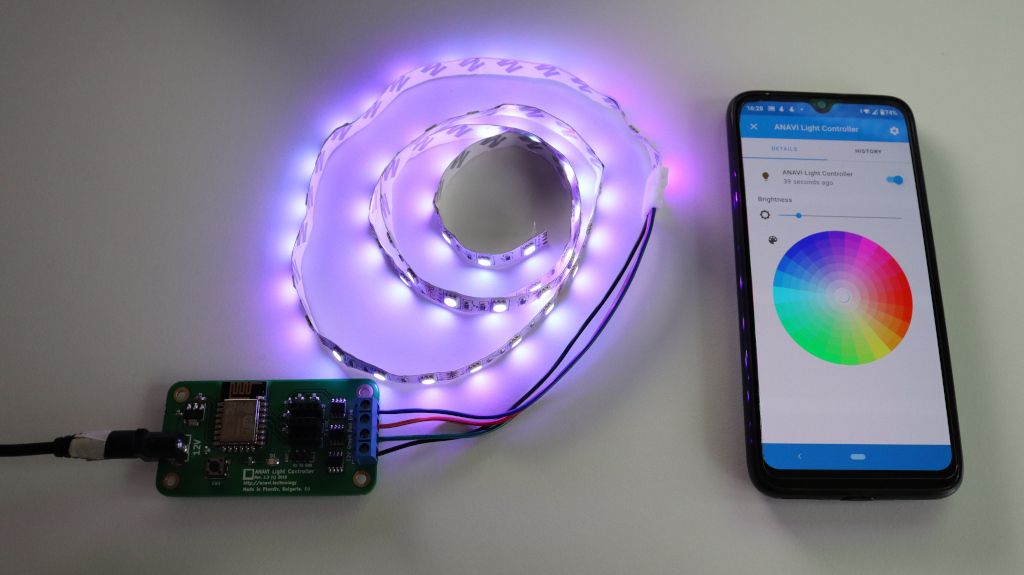
This article provides a video as well as the steps how to add a ANAVI Light Controller with ESPHome in Home Assistant.
Upload ESPHome
You can either do this through the command line or alternatively, you can do it through Home Assistant ESPHome add-on. USB-to-serial debug cable is required.
Depending on the device you may need to edit an existing ESPHome configuration file or to create new from scratch. An example for ANAVI Light Controller is available at GitHub. Remember to set your WiFi credentials and device password in it as well as to enable the API. After flashing ESPHome to the device it is important to write down the address and the port. Both are printed in the serial output after booting the device.
After flashing ESPHome to the device it is important to write down the address and the port. Both are printed in the serial output after booting the device.
Home Assistant Integration
Open the web interface of Home Assistant. From the left side menu select Configuration and after that click Integrations. Click the button in the right lower corner with label Add Integration. From the menu select ESPHome. Enter connection settings for your ESPHome device. Set the address for host and port both of which were obtained on the first step. Click SUBMIT. Enter the password from the ESPHome configuration file. Click FINISH to complete adding the device.
After successfully adding the ESPHome device to Home Assistant it will appear in the overview section. For more information and exact steps, please have a look at the video.
Conclusions
Although, we ship ANAVI Light Controller with our default open source firmware which is compatible with Home Assistant over MQTT, ESPHome is an interesting alternative for advanced users with more specific use cases. For example, with ESPHome you can easily add I2C peripherals which are not supported by the default open source firmware.
We are planning to extend the ESPHome support for all of our compatible product. We have already published in GitHub example ESPHome configuration for some of them. Have a look at ANAVI Miracle Controller, ANAVI Thermometer, ANAVI Gas Detector and ANAVI Fume Extractor.
Thanks,
Leon