Project update 2 of 3
Making a Clock with I²C Mini
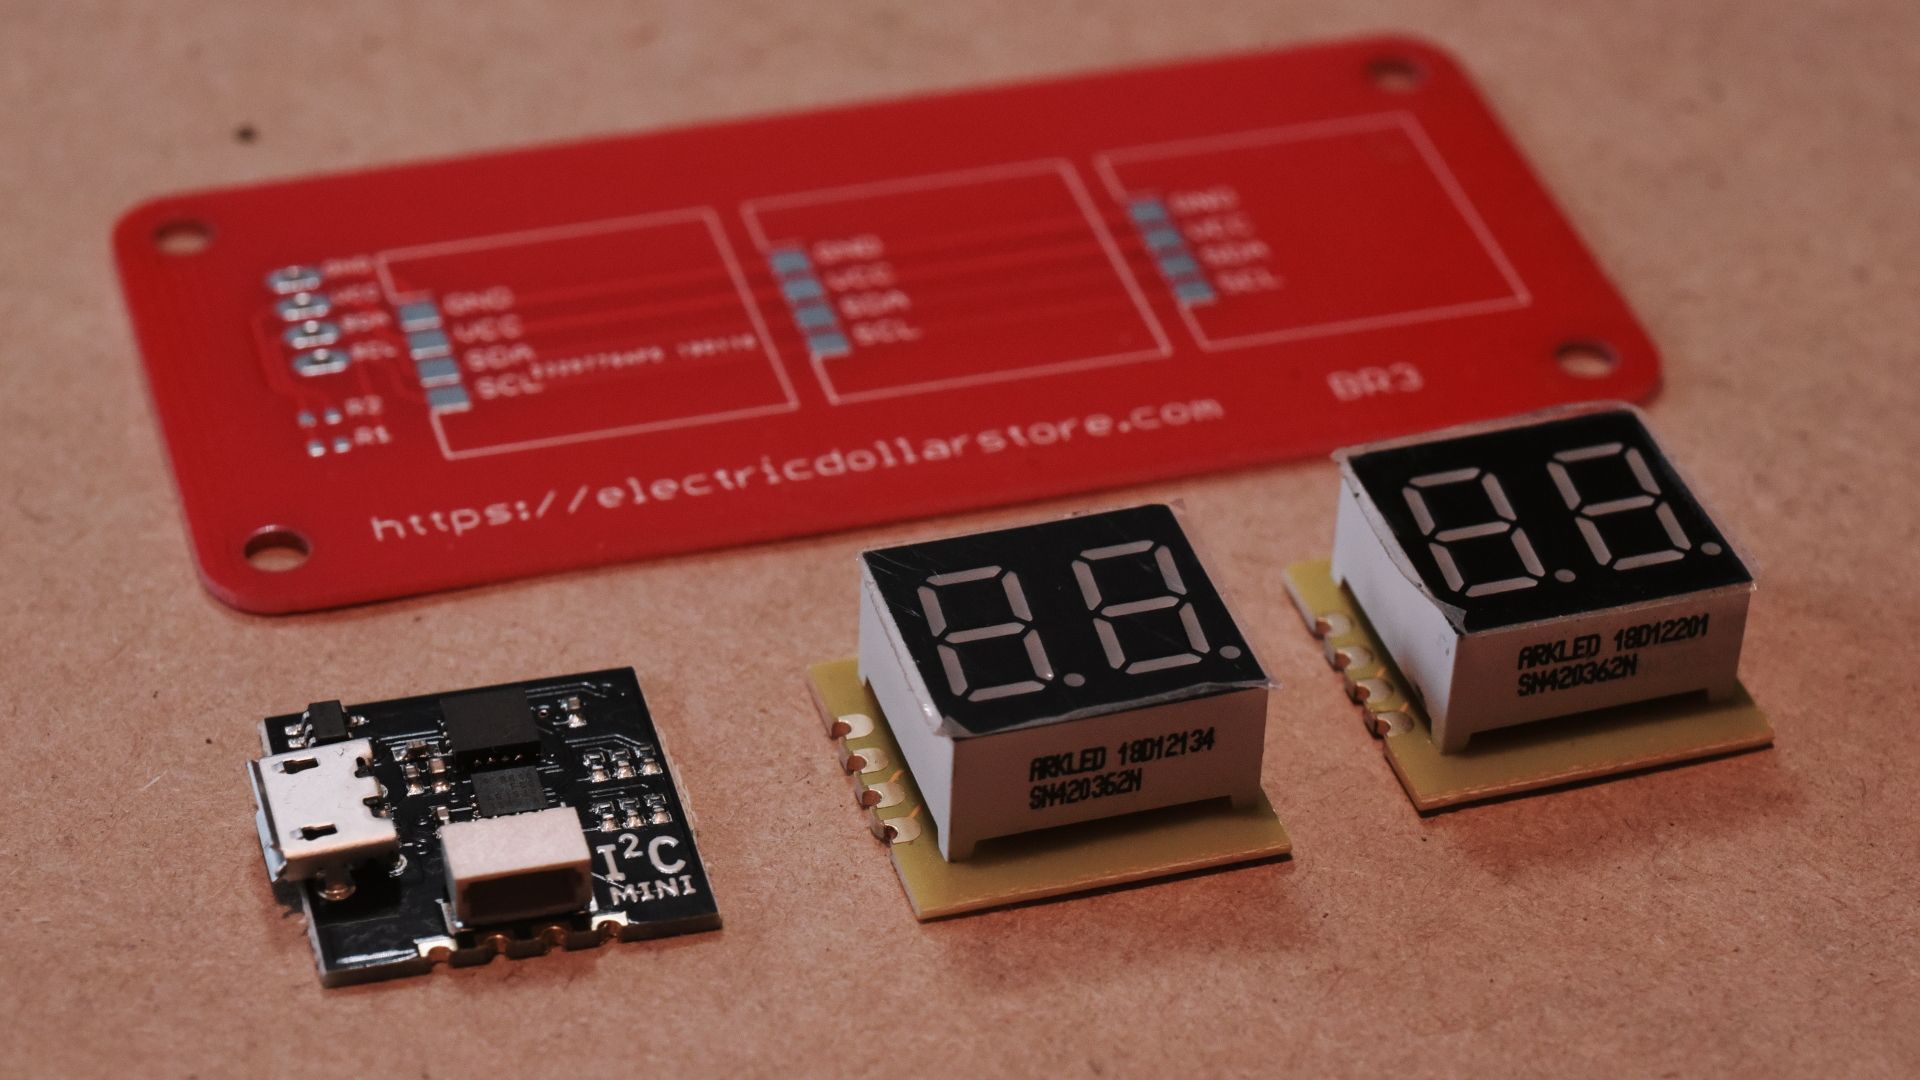
I²CMini is a tiny interface between USB and an I²C circuit. Here is an I²CMini, two I²C 7-segment LED modules, and a carrier board. It’s all you need to make a USB-connected bright red 4-digit display.
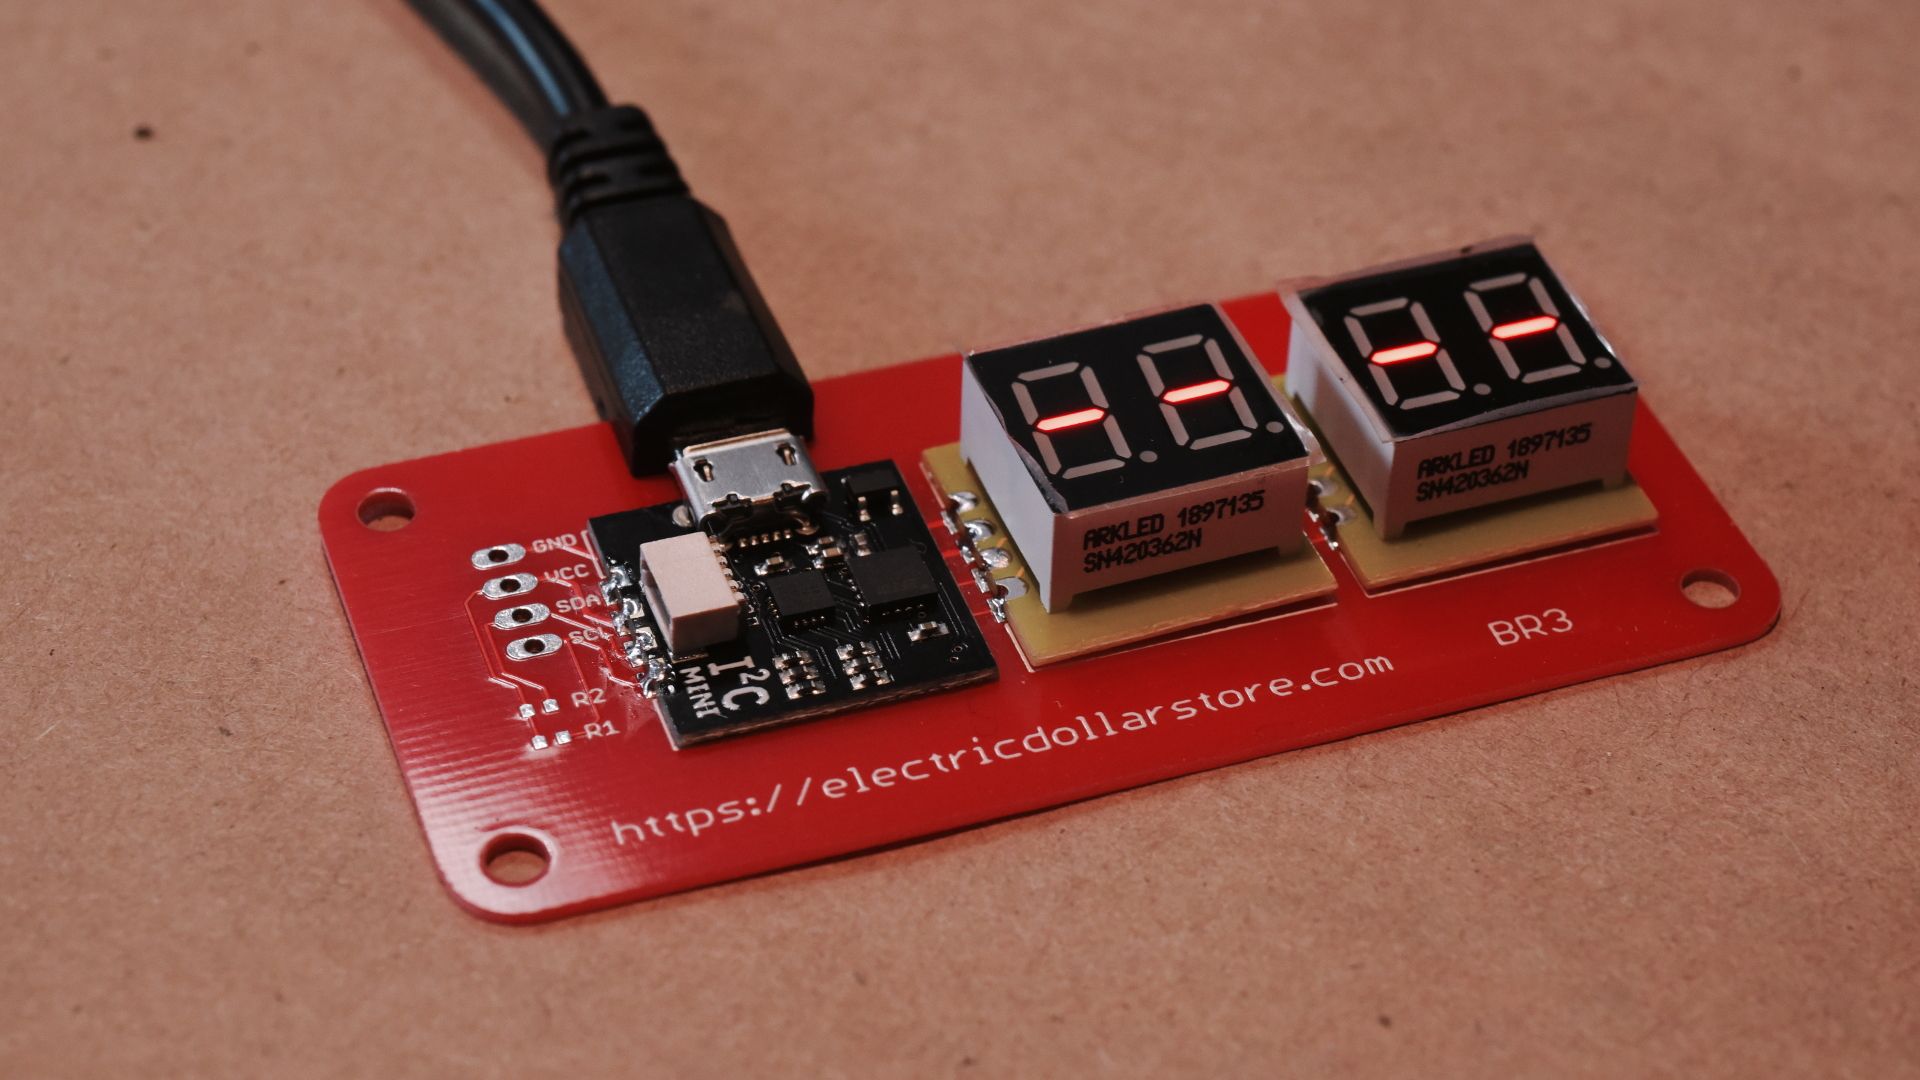
First solder the parts to the board, and plug in. The two LEDs should show horizontal bars, showing that they are powered up and waiting for an I²C command.
From here on everything is software. You can use the I²CDriver GUI, Python, the command-line or C++ to drive the DIG2 modules. I’m demonstrate in Python.
To start with, import the i2cdriver module and connect to the I²CMini:
>>> from i2cdriver import I2CDriver, EDS
>>> i2 = I2CDriver()
The ask it to do a bus scan. The two LEDs appear at address 14 and 15 respectively
>>> i2.scan()
-- -- -- -- -- -- -- --
-- -- -- -- 14 15 -- --
-- -- -- -- -- -- -- --
-- -- -- -- -- -- -- --
-- -- -- -- -- -- -- --
-- -- -- -- -- -- -- --
-- -- -- -- -- -- -- --
-- -- -- -- -- -- -- --
-- -- -- -- -- -- -- --
-- -- -- -- -- -- -- --
-- -- -- -- -- -- -- --
-- -- -- -- -- -- -- --
-- -- -- -- -- -- -- --
-- -- -- -- -- -- -- --
Next create two devices to drive the DIG2s like this
>>> d0 = EDS.Dig2(i2, 0x14)
>>> d1 = EDS.Dig2(i2, 0x15)
You can put decimal numbers on the displays with
>>> d0.dec(12)
>>> d1.dec(34)
And a clock is almost as easy:
>>> from datetime import datetime
>>> t = datetime.now()
>>> d0.dec(t.minute)
>>> d1.dec(t.hour)
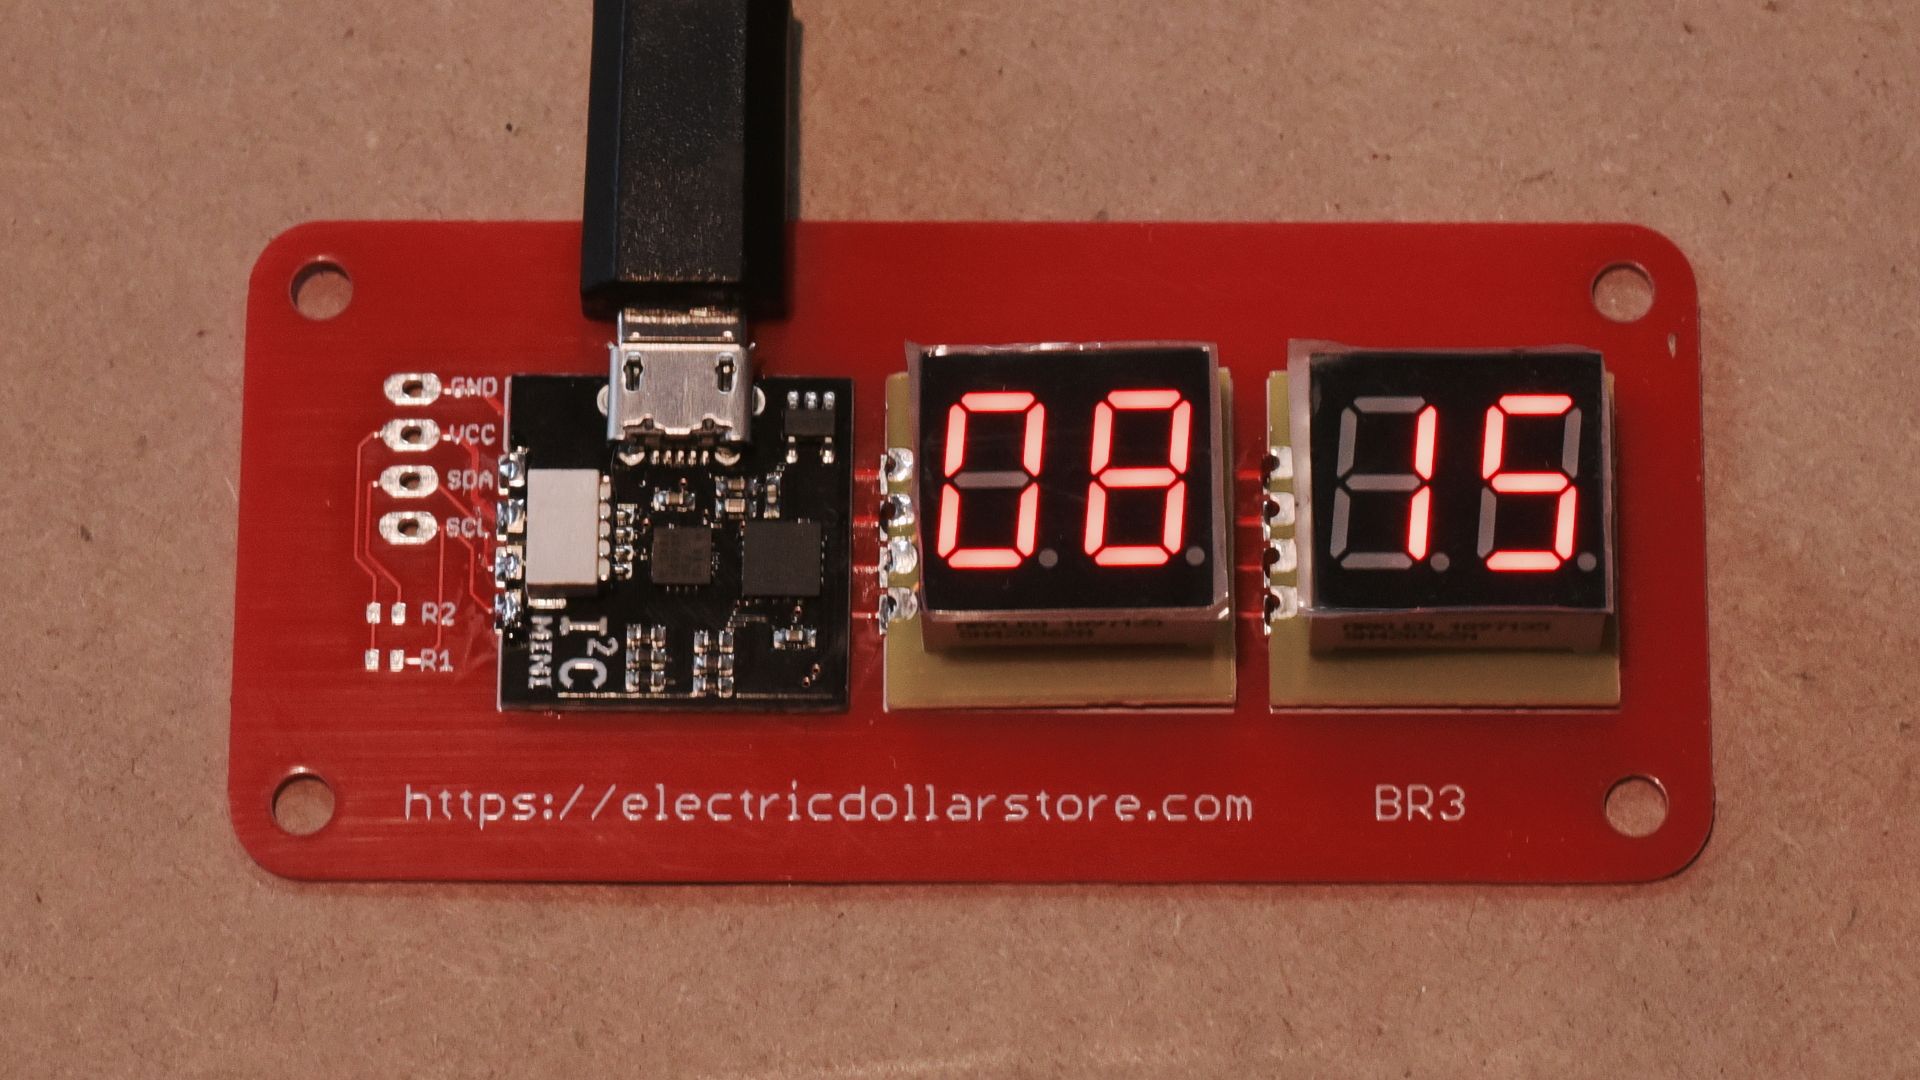
And to run it constantly as a desktop clock, you can do
>>> while True:
… t = datetime.now()
… d[0].dec(t.minute)
… d[1].dec(t.hour)
…
Voila - instant timepiece! These parts are included in the premium packages in the I²CMini campaign.