Project update 4 of 8
Analog & Digital Signal Capture With BlueIO832Mini & the BlueIOSigCap Mobile App
by HoanBlueIO832 Mini is a powerful device that allows you to do a lot without needing to write a single line of code. Today, we will show you how to capture data from its three analog and six digital pins using the BlueIOSigCap mobile app. This data will be sent to the app in real time for visualization and storage.
Follow the instructions below and have fun with your device!
I. Feed Analog & Digital Signals to BlueIO832Mini
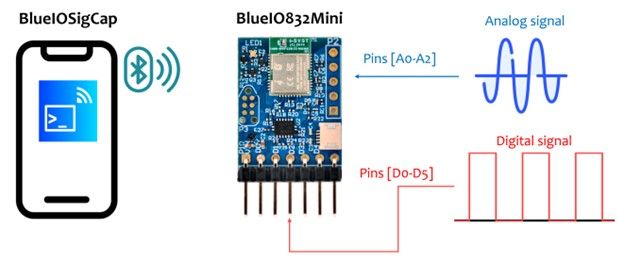
You will need to send analog and digital signals to BlueIO832Mini, as shown in Fig. 1 below.
II. Download & Install the BlueIOSigCap App on Your Mobile Phone
You can scan the following QR codes to download BlueIOSigCap from the Apple App Store and install it on your iPhone.

Note: The Android version of BlueIOSigCap will be available soon!
III. Use BlueIOSigCap with BlueIO832 Mini to Capture Signals
Step 1: Turn on the Bluetooth feature in the user’s mobile device.
Step 2: Open BlueIOSigCap on the user’s smartphone. The main user interface is shown in Fig. 2.
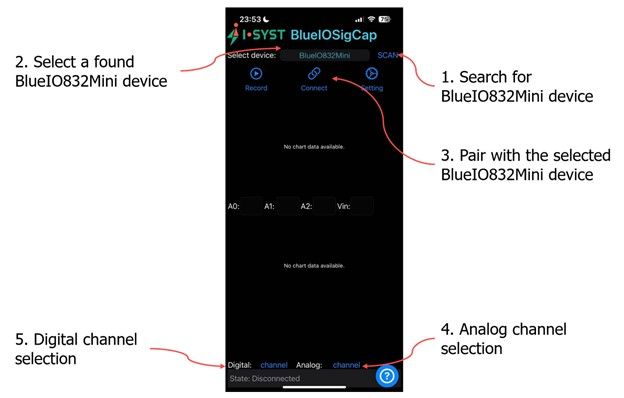
You will use this interface to pair the app with your BlueIO832 Mini by following three steps:
- Tap "SCAN" to search for BlueIO832 Mini.
- If there exists multiple BlueIO832 Mini(s), you can tap "Select device" and scroll through a list to choose your preferred device.
- Tap "Connect” for pairing the app with the selected BlueIO832Mini.
Step 3: After the app is paired with your BlueIO832Mini, just tap one of the drop-down menus ("Digital" or "Analog") and select channels as shown in Fig. 3 below.

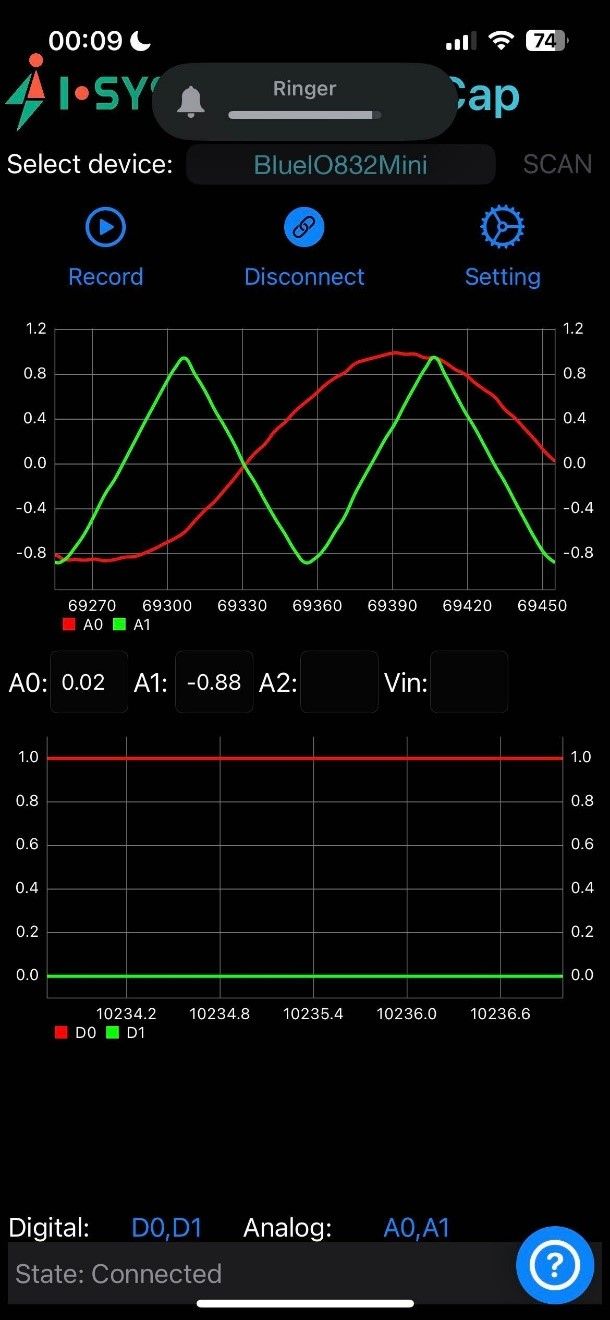
Step 4: Once your captured data has been displayed, as shown in Fig. 4 below, you will have the option to save it on your phone by tapping "Record" so you can share it with others via email, messenger, etc.
Step 5: To stop capturing data, simply un-check all of the selected channels in the "Digital" and "Analog" drop-down menus.
Step 6: To unpair the app from your BlueIO832 Mini, you can tap "Disconnect." (Note that you must un-check all selected analog and digital channels before doing so.)
IV. Configure BlueIOSigCap Settings
To specify your sample rate and configure analog capture, tap "Setting" as shown in Fig. 5 below.
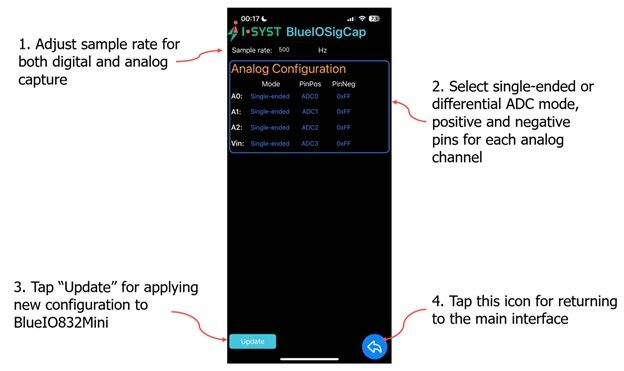
- The "Sample rate" input field allows you to adjust the sample rate for both analog and digital sources.
- Analog capture mode (single-ended/differential), positive pins, and negative pins are configurable in the app.
- Tap "Update" to apply the new configuration to your BlueIO832 Mini.
- Tap the left arrow icon in the lower, right-hand corner to return to the main app interface.