Project update 6 of 17
Integrating ESP-based relays to HestiaPi
So you’ve heard us brag about being open and all that, but how does this really help you? In this update you will see how easy it is to add a wireless relay without being tied to a specific vendor.

So the idea is to add a wireless relay contact anywhere in your house that will be fully integrated with your HestiaPi installation, and will accept commands from your phone or follow automated rules from HestiaPi itself. The relay contact can control almost any electrical device like lights, air conditioning units, pet feeders, or garden sprinklers. For this example we will use the cheap Sonoff socket, but any ESP-based module like NodeMCU or ESP8266/ESP32 will work exactly the same.
Programming Tasmota
First and most important, you will need to load your ESP with Tasmota. Tasmota unlocks a great range of functionality including MQTT support. All info and instructions are in the above link, including some of the important steps copied below.
Configure Wi-Fi
Tasmota provides a wireless access point for easy Wi-Fi configuration.
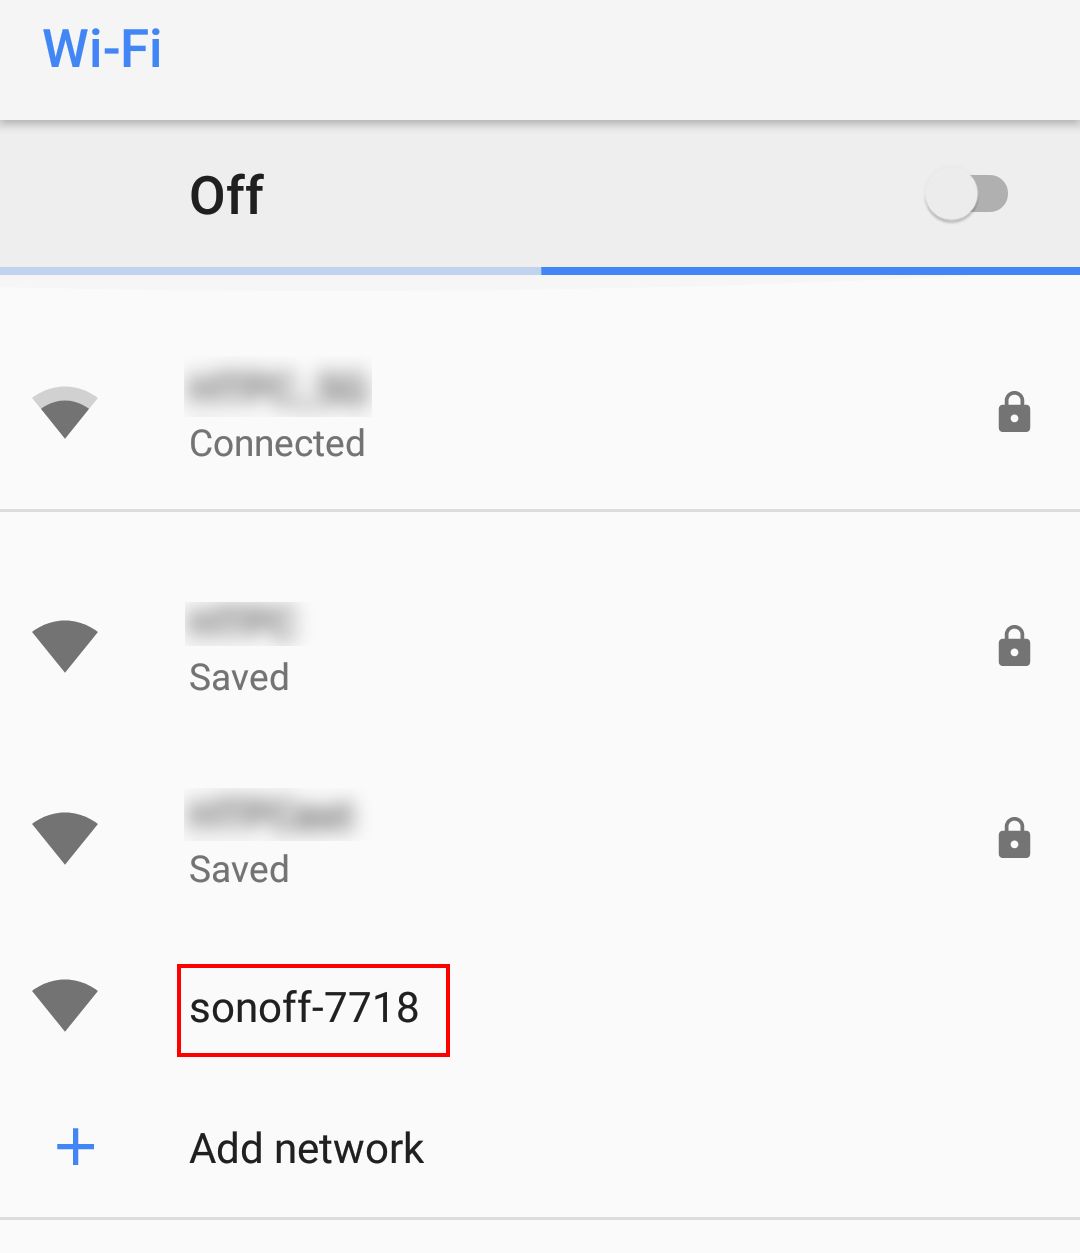
Connect your device to a power source and grab your smartphone (or tablet or laptop or any other web and Wi-Fi capable device). Search for a Wi-Fi AP named sonoff-xxxx (where x is a number) and connect to it. In this example the Wi-Fi AP is named sonoff-7718.
Wi-Fi manager server is active for only 3 minutes. If you miss the window you might have to disconnect your device from power and reconnect.

After you have connected to the Tasmota Wi-Fi AP open http://192.168.4.1 in a web browser. Most devices will prompt you to sign in to Wi-Fi network which should also open the above address.
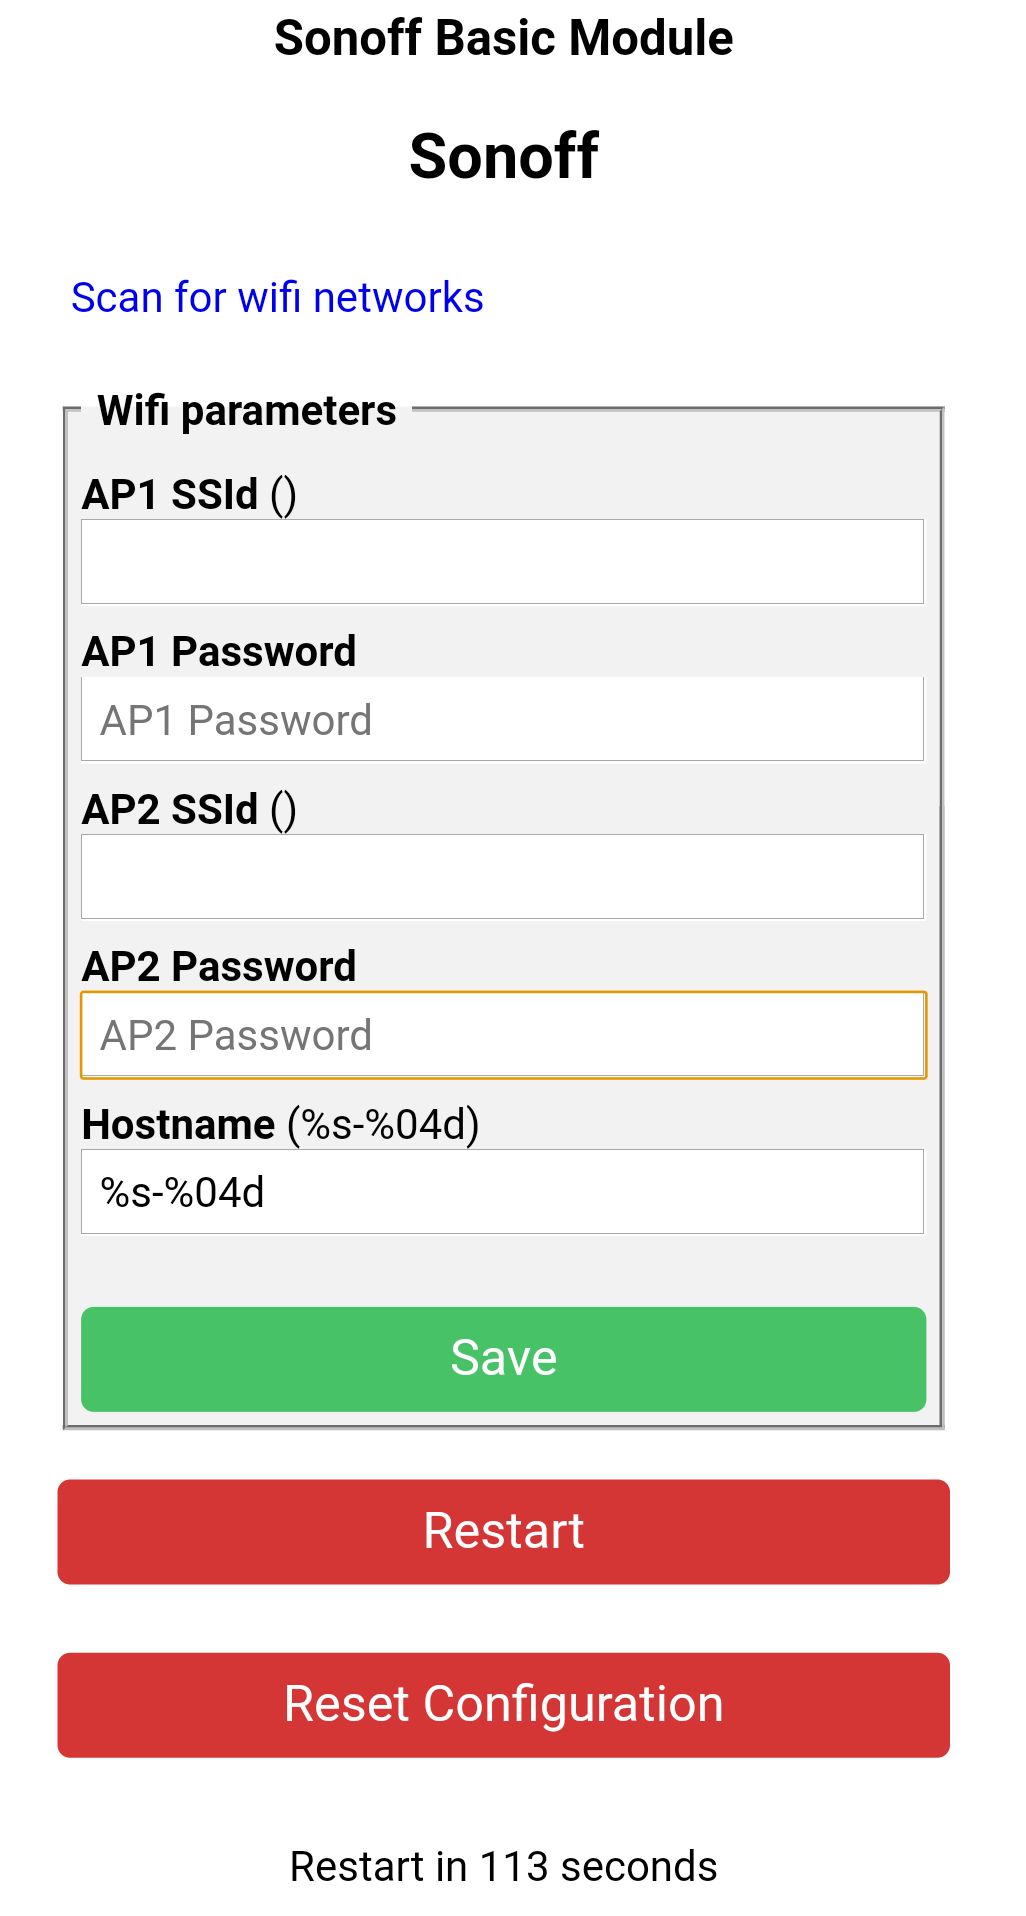
At this page enter the following:
AP1 SSid - your Wi-Fi network name
SSID’s are case sensitive
AP1 Password - password for your Wi-Fi AP
Wi-Fi password has to be under 32 characters and without special characters (e.g. asterisks) or white spaces
Recommended:
AP2 SSid - alternative Wi-Fi network SSID
AP2 Password - password for your alternative Wi-Fi AP
If you’re not using a second Wi-Fi network you can enter an SSID without a password you can connect to as a backup in case something went wrong with your Wi-Fi credentials.
Double Triple check the Wi-Fi credentials and click on Save to apply the settings. Device will restart and connect to your home network.
MQTT
Look in your router for a newly connected device with the same name as the Wi-Fi access point. (In this example sonoff-7718.)
If you don’t have access to your router you can find your newly flashed device with an IP scanner:
- Fing - for Android or iOS
- Angry IP Scanner - open source for Linux, Windows and Mac. Requires Java.
- Super Scan - Windows only free tool
Open the IP address with your web browser and you have full access to Tasmota.
Now is the time to set up MQTT, the last remaining, but equally important step.
Configure MQTT using WebUI
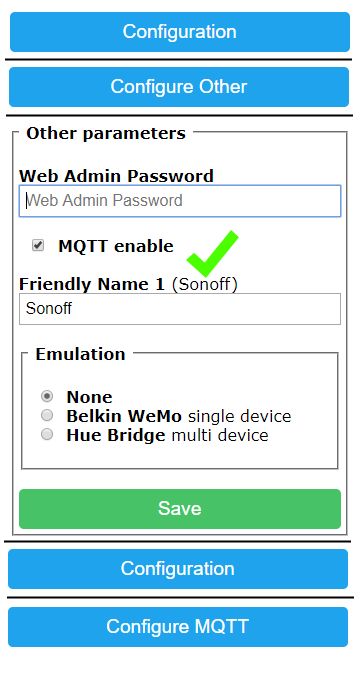
Go to Configuration -> Configure Other and make sure "MQTT Enable" box is checked.
Once MQTT is enabled you need to set it up using Configuration -> Configure MQTT.
While here, you might as well change the Friendly Name into something more descriptive than generic "Sonoff".
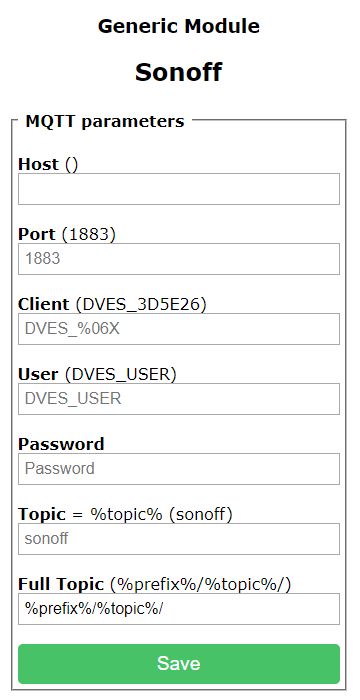
For a basic setup you only need to set Host and Port, but it is recommended to change Topic to avoid issues. Each device should have a unique Topic.
- Host = your HestiaPi address or IP
- Port = set it to 1883
- Client = device's unique identifier, do not change if not sure what it is for
- User = username for authentication - you can leave blank
- Password = password for authentication - you can leave blank too
- Topic = unique identifying topic for your device (e.g.
hallswitch,kitchen-light).%topic%in wiki references to this. In our example here we will use 'fan' - FullTopic = full topic definition, do not change if not sure what it is for
Hit Save. Sonoff will reboot in seconds and will connect to the Host.
openHAB
Now let’s move to openHAB and add the relay we have just configured. There are 3 text files that need to be changed. Later version will allow this to be done from a graphical interface even easier.
Edit the items file:
sudo nano /etc/openhab2/items/default.items
and add this line at the end:
Switch Fan "Fan" {channel="mqtt:topic:Fan:switch"}
Edit the things file:
sudo nano /etc/openhab2/things/default.things
and add these below the heating things (not inside it):
Thing mqtt:topic:Fan "Fan" {
  Channels:
    Type switch : switch "Fan Switch" [
      commandTopic="state/fan",
        on="1",
        off="0"
      ]
}
Lastly place the button on your UI by adding it to the sitemap file:
sudo nano /etc/openhab2/sitemaps/default.sitemap
and add these below the heating frame (not inside it):
Frame label="Fan" {
  Switch item=Fan
}
If you wait for a few minutes for the changes to take effect, you would then see a new button on your phone that you can switch on and off!
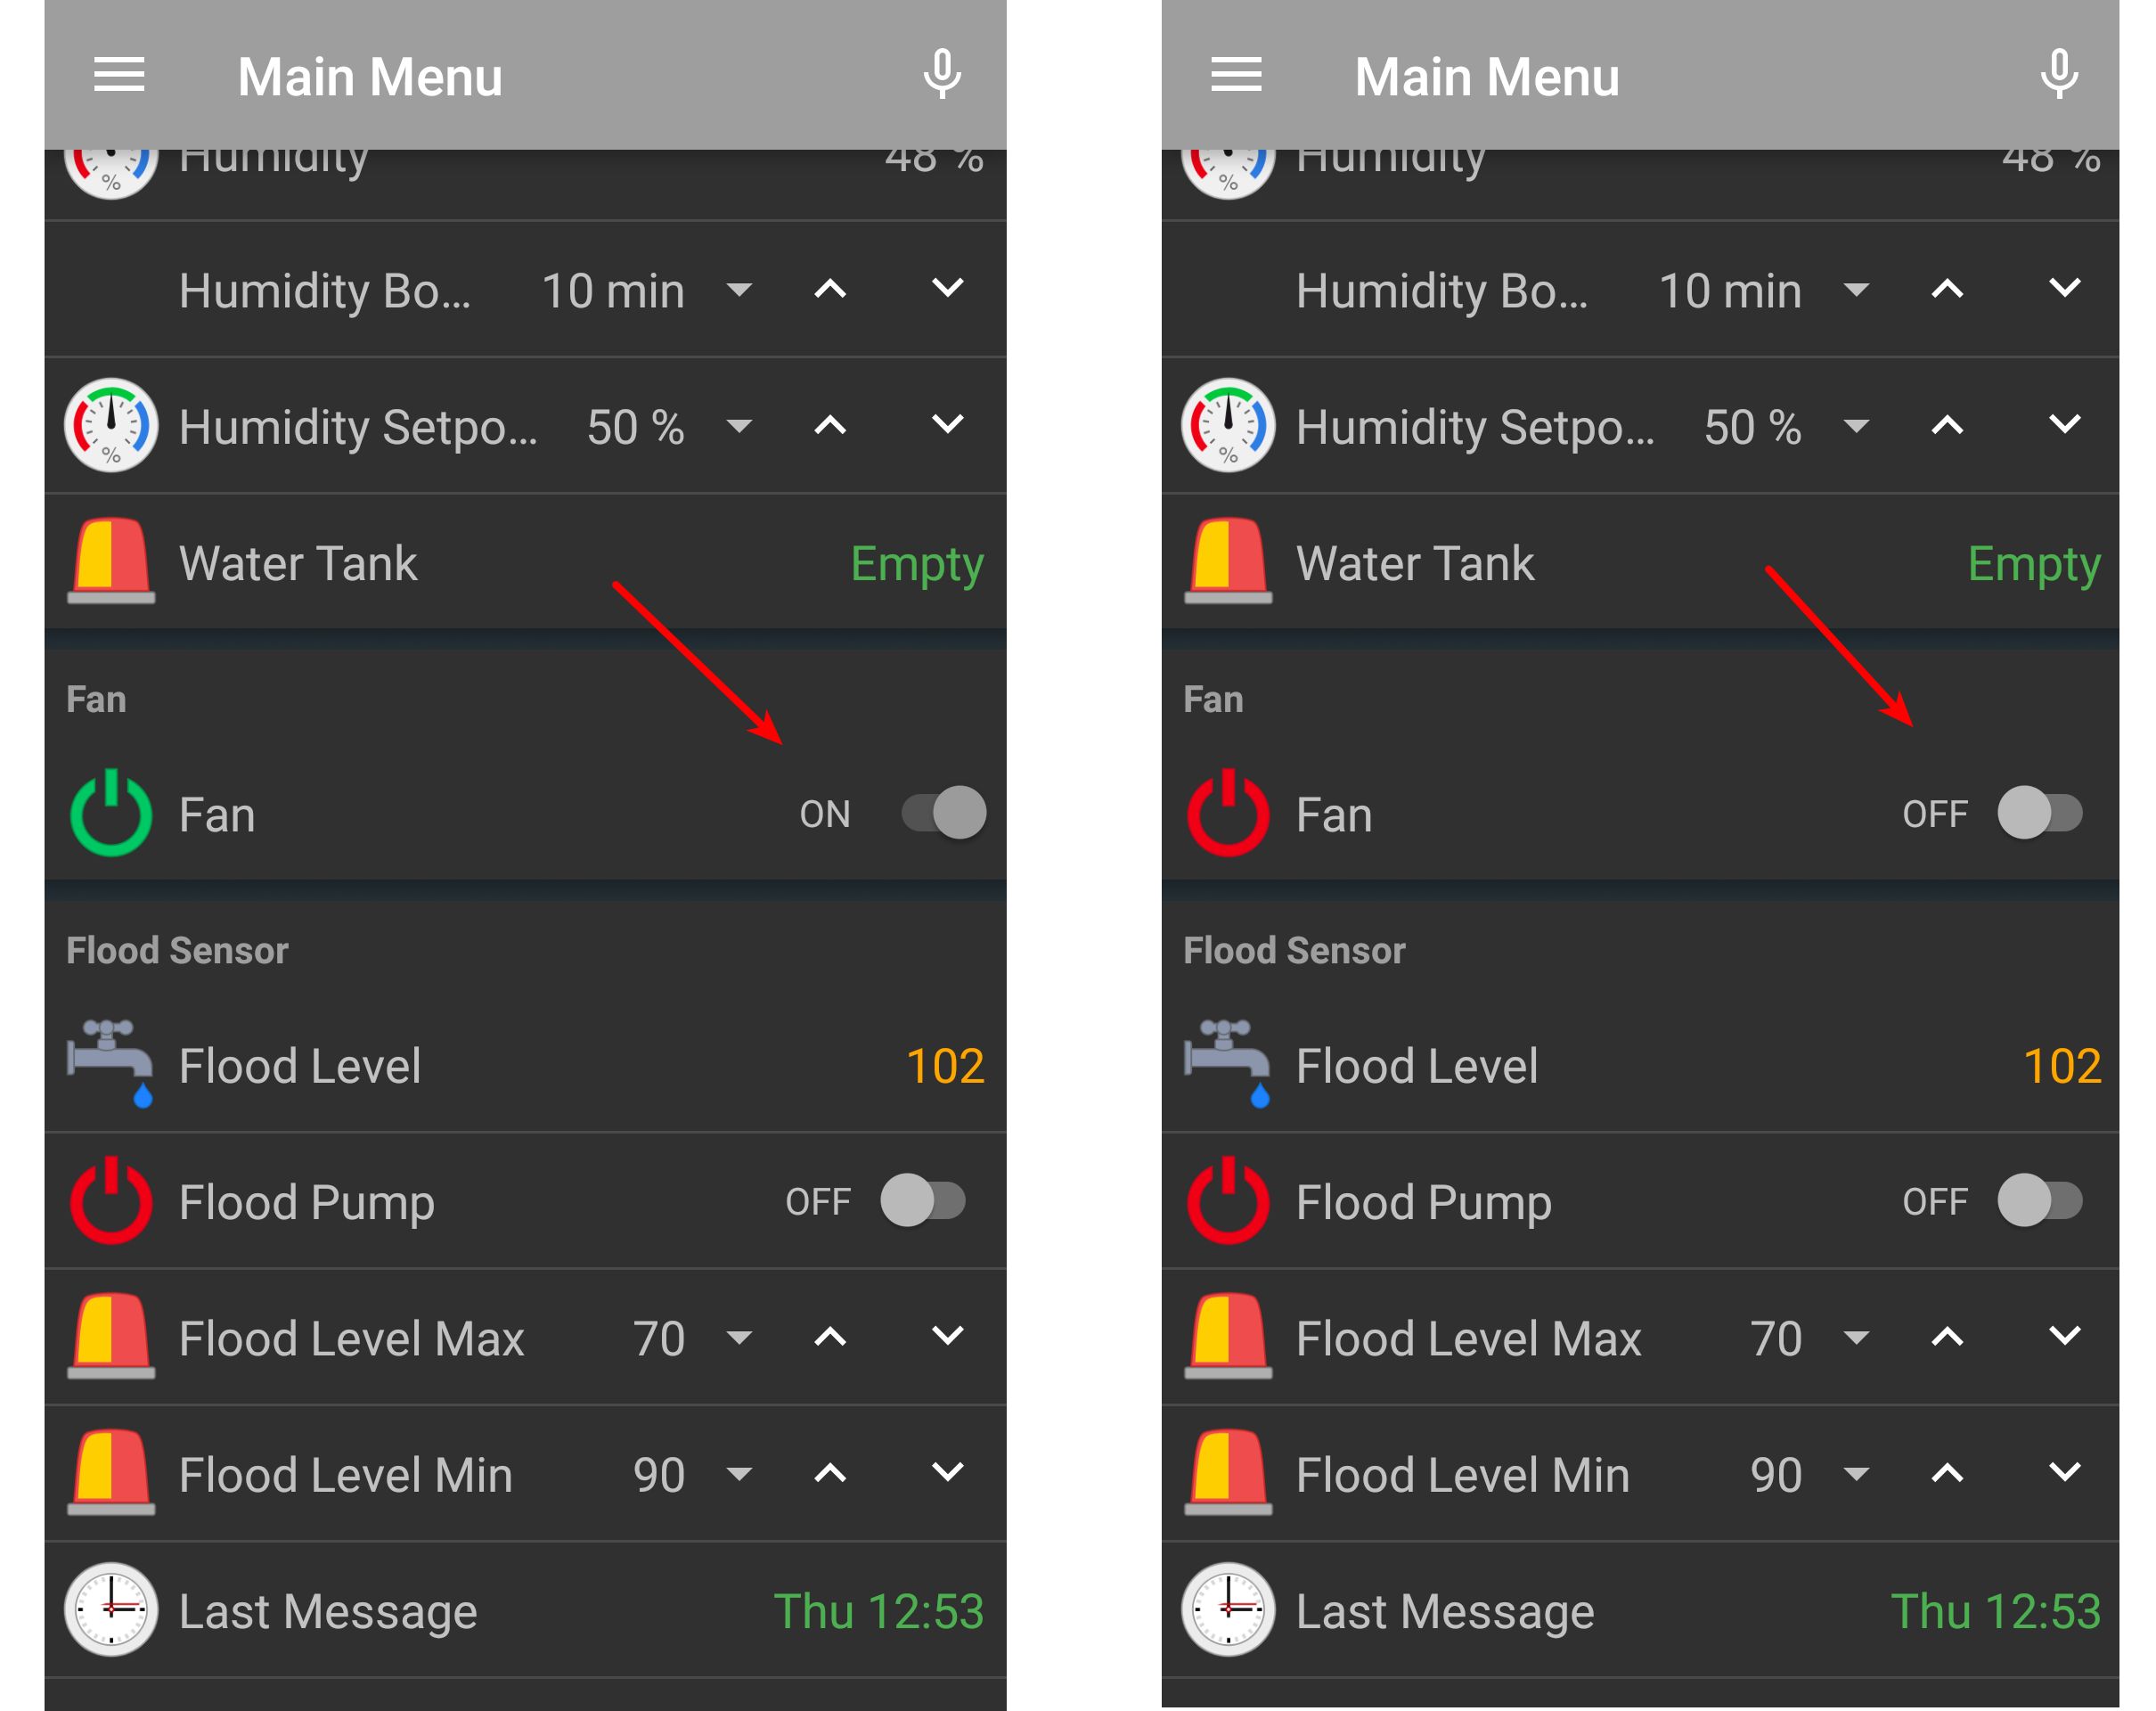
And that’s it! If you want to take it further you can add rules that control the Fan item depending on room temperature, your presence, or even add an additional setpoint for the fan alone. Your imagination is the limit!
What will you think of?