One of the main improvements that a modern emulation handheld such as Game Bub brings is a significantly better screen than those used in the original systems.
The original Game Boy was monochrome green, while the Game Boy Color and the original Game Boy Advance had unlit, desaturated TFT LCDs. It wasn’t until the Game Boy Advance SP that the screens became frontlit (and then backlit with the AGS-101), but even then, the displays (from the early 2000s) are completely inferior to the modern IPS LCDs we’ve grown used to.
Modern screens are brighter, higher resolution, more evenly lit, and can display a much wider range of colors than those of the late 90s and early 2000s. This poses a new problem, however, because the original game designers specifically made games to look good on these original displays. If you play a game meant for an older handheld on a modern screen, it’ll look significantly different from what the creators intended.
Below is a rough comparison between games on a Game Boy Color and a Game Boy Advance SP (AGS-001) and how they would look on a modern sRGB display:
Aside from the difference in brightness, and the visible scanlines, the colors on the left are duller and less saturated.
We can address this difference with color correction: applying a filter to the video output so the colors look similar to how they would have looked on the original screens. Let’s take a look at how color correction works.
A Bit of Digital Color Theory
Color theory and color reproduction comprise an entire field of research that blends physics and human perception. We’ll go over some basics here, but for a more in-depth look, consider reading the article "What Is a Color Space?" by Dan Hollick.
A color is how our eyes and brain perceive a specific distribution of electromagnetic energy (light) across wavelengths. Multiple different spectra can appear identical to us, due to the specifics of how our eyes sense color.
Every display has a specific color gamut: this is the full range of colors that can be reproduced by the display. These colors are generally created by mixing three different color primaries (red, green, and blue), which is a very useful simplification that relies on the fact that we have three kinds of color-sensing cells in our eyes.
Additionally, our eyes do not perceive color linearly: a light with twice the energy is not perceived as twice as bright by our eyes. Instead, our eyes are more sensitive to brightness differences the darker the color is. In digital color reproduction, we correct for this effect with a gamma curve, which maps between perceived brightness and light energy.
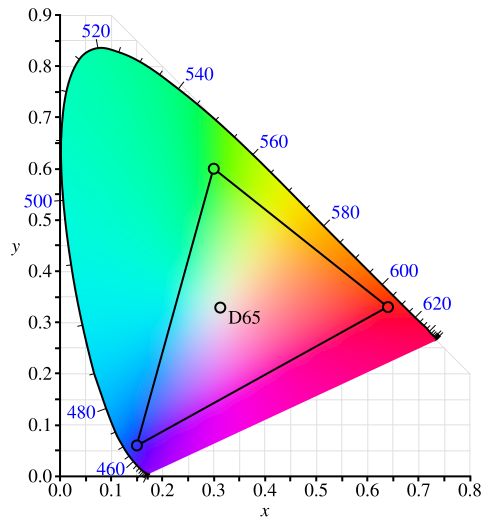
This diagram is a CIE 1931 chromaticity diagram of the common sRGB color space. It is a visual representation of the color gamut (the area of the triangle) and its primaries (the corners of the triangle). (source)
Mapping Colors Between Different Displays
Different displays produce color differently: they have different color primaries, different built-in gamma curves, and the overall color gamut may be different. The same RGB value displayed on both screens may appear wildly different.
"Mapping a color" from display A to display B involves displaying a specific RGB color value on display A, and then finding an RGB color value for display B that produces a color that is perceived identically. This is generally done with the help of a spectrophotometer (or a simpler colorimeter), which can measure light and calculate a standardized color.
This mapping may not be possible in all cases: if display A has a wider gamut than display B, there will be some colors that display A can show that display B cannot. Fortunately for us, modern LCD screens tend to have a wider gamut than the older screens we’re trying to emulate, so there generally aren’t colors that are unmappable.
The output of this mapping is a complete table mapping each color to an output color, sometimes referred to as a LUT (lookup table). In practice, we can often approximate this by simplifying to a color correction profile made up of three parts: input gamma, a 3x3 correction matrix, and output gamma. In matrix notation:
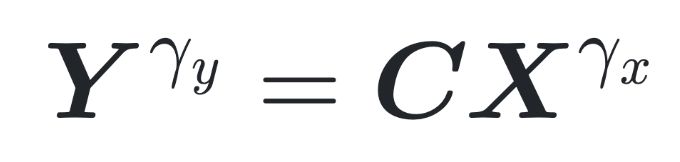
*X* is the input color (a column vector, where each element represents red, green, or blue, from 0.0 to 1.0). *Y* is the output color, *C* is the correction matrix, and the two γ are the input gamma (x) and output gamma (y).
Simplifying the color correction to this formula makes it easier to store, use, and transform the color corrections.
Fortunately for us, a person going by "Pokefan531" has done most of the hard work of measuring the original displays and generating color correction profiles for each! These profiles are widely used in software emulators.
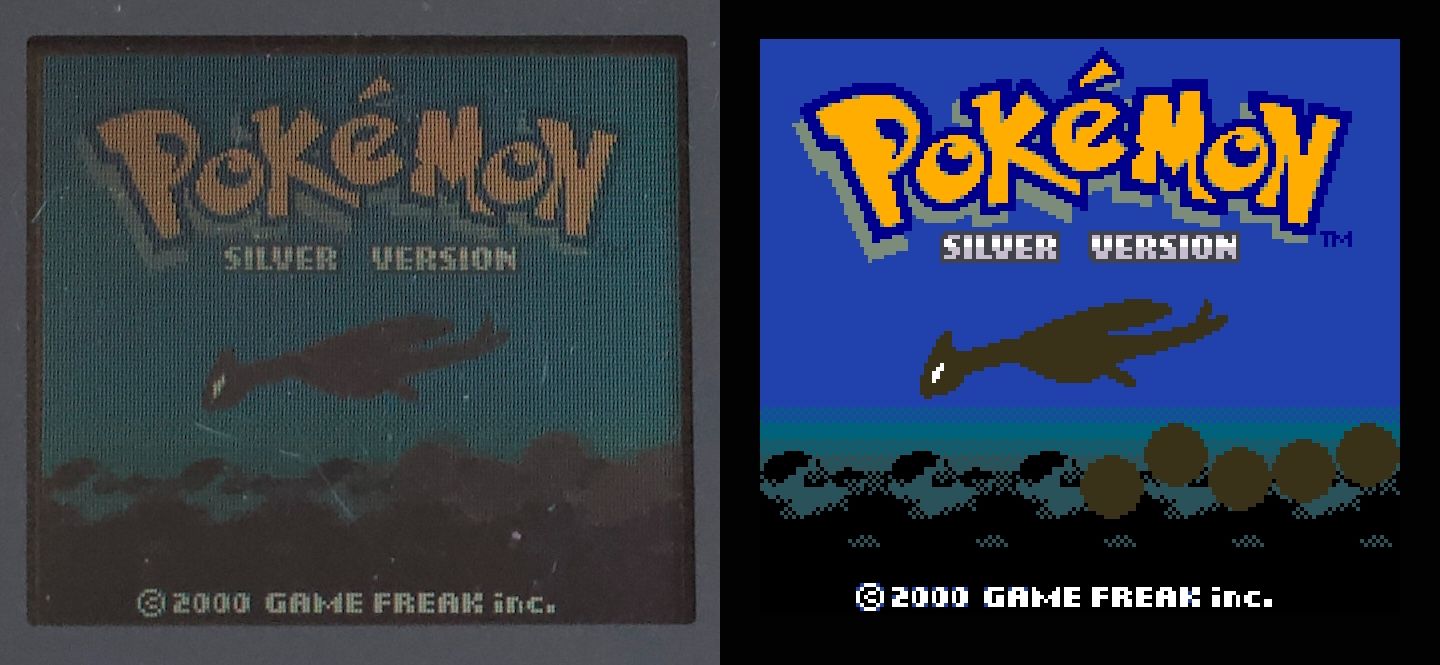
First, here’s the standard Game Boy Color correction. Uncorrected is on the left and corrected (sRGB) is on the right:
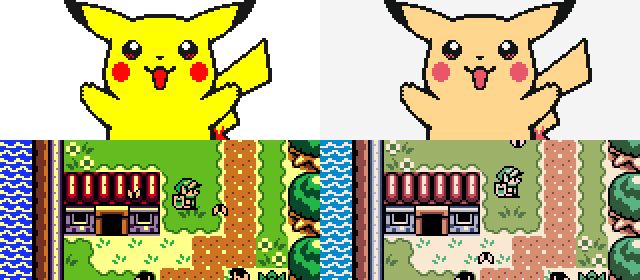
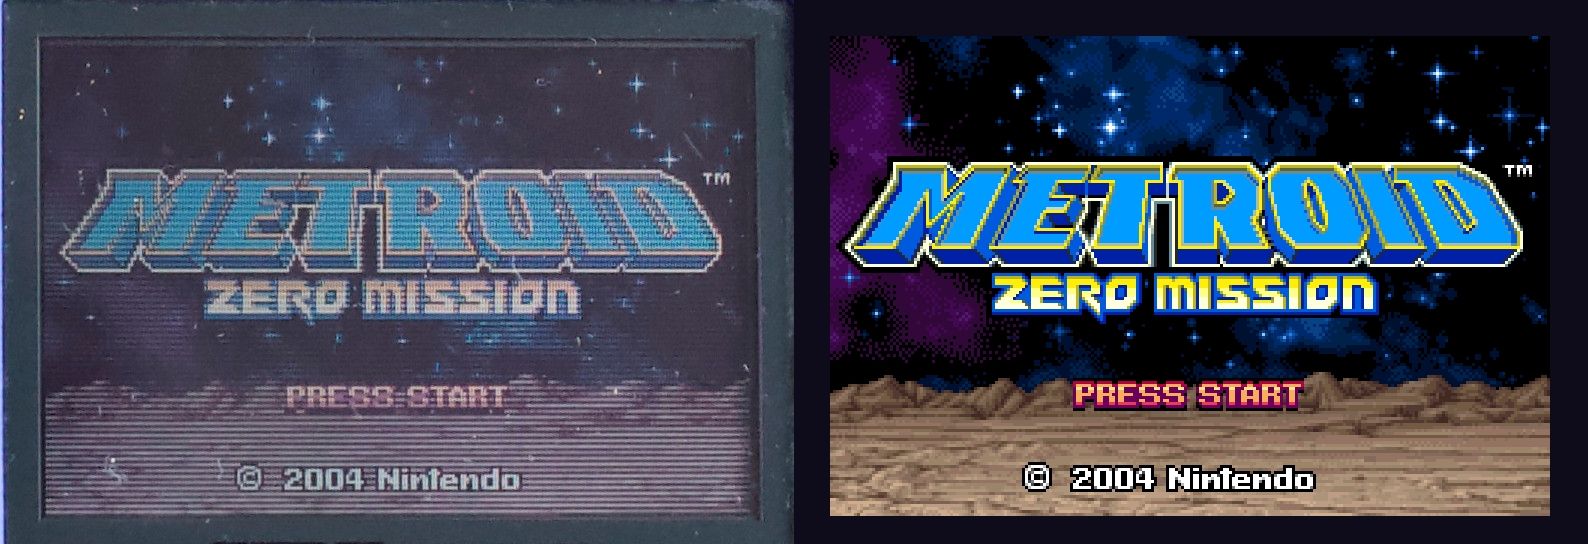
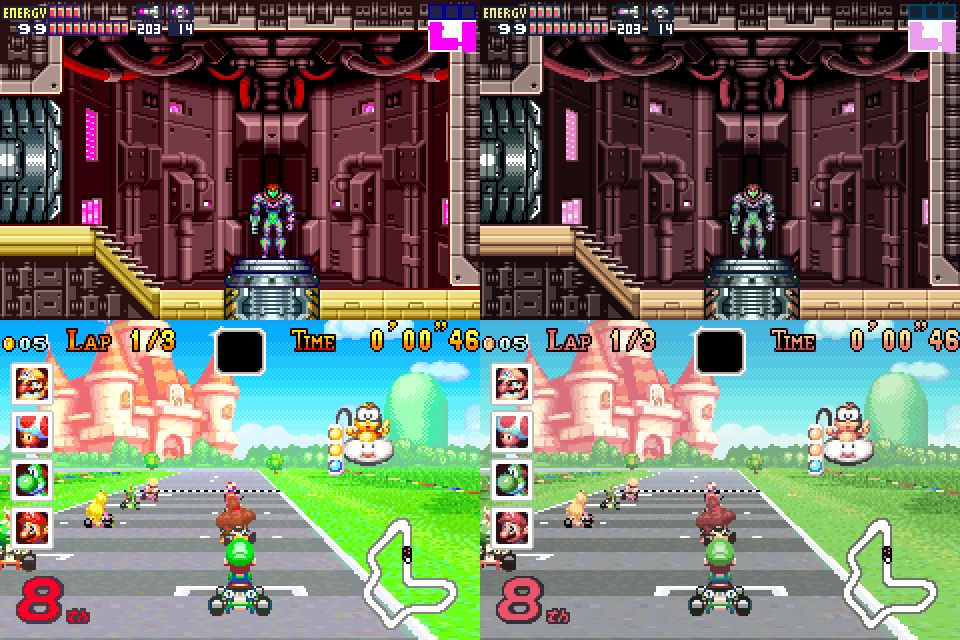
Next, here’s the Game Boy Advance (original) correction. Again, uncorrected is on the left and the corrected one is on the right:
Choosing a Color Correction Profile in Game Bub
Game Bub includes different color correction profiles for each system (e.g., Game Boy Color, Game Boy Advance, Game Boy Advance SP AGS-001, and the AGS-101) and you can easily switch between them in the Settings menu.
If you’re used to the saturated, correction-less look, you may want to play without applying any corrections. Otherwise, you can pick the one that corresponds to the system you think looks the best. Further, some games may look better with specific profiles: for example, a GBA game made late in the handheld’s life may have been made with the backlit AGS-101 in mind.
Perhaps you want a different profile? Fortunately, Game Bub is open source, so you can modify the firmware to support different profiles. We also hope to make this easier in the future by allowing you to put custom profiles on a microSD card for use with Game Bub.