Project update 4 of 7
Touchscreen Sound Board Video Demo
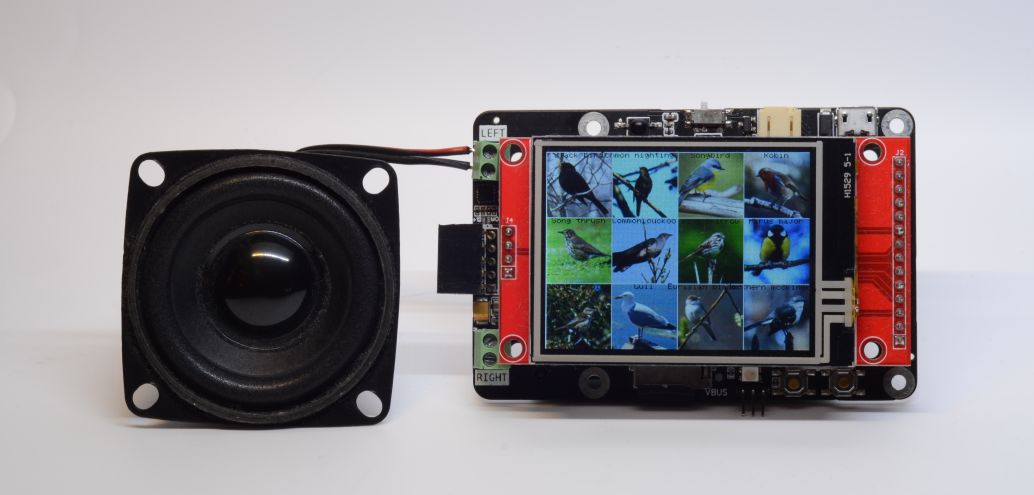
by AndriyFor this update, I want to show how to use the touch screen together with the audio output of Loud-ESP. The most obvious combination of the two is a sound board. Due to internal memory capacity limits, it makes sense to use the SD card to store audio files and images.
First Steps
While developing the Loud-ESP hardware, I spent some time creating firmware examples utilizing each of the peripherals in isolation as well as in combination. This help me make sure that each board revision not only fixes issues but also doesn’t introduce any new problems.
For this specific project, I will combine the esp32-esp8266-audio-test-sdcard-random example (SD card player implementation) and the esp32-test-touch-screen example that implements screen render and touch events. Alternatively, you could use the esp32-test-lvgl example, but for this simple project it would be overkill.
SD Card Preparation
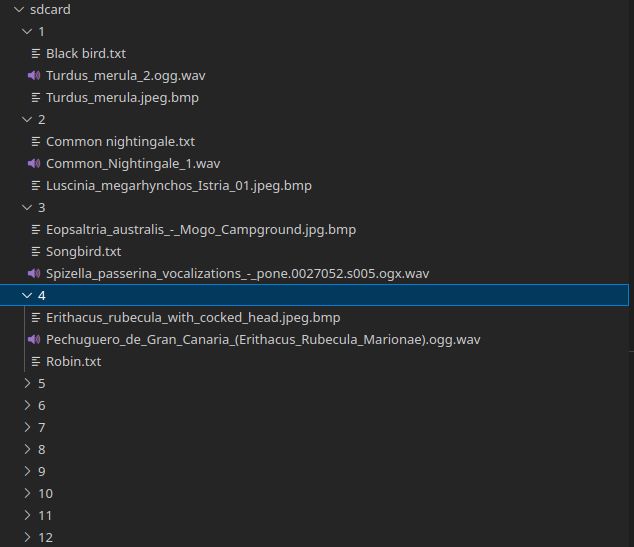
Since my screen has a 4:3 aspect ratio, it makes sense to split it into 12 equal parts. I will prepare 12 folders on the SD card accordingly, each with one file for audio, one for an 80x80 pixel image, and a text file for a caption. Since we have plenty of space on the card, I converted images into bmp files and audio into wav files. These are not file-size friendly, but implement no compression whatsoever, making the ESP32’s job easier. Running ffmpeg will make it easy for you.
find ./ -name "*.og?" -exec ffmpeg -acodec libvorbis -i "{}" -acodec pcm_s16le {}.wav \;
find ./ -name "*.jpg" -exec ffmpeg -i {} -q 0 -vf scale="'if(gt(iw,ih),-1,80):if(gt(iw,ih),80,-1)', crop=80:80:exact=1" {}.bmp \;
What to Play?
I ended up using bird songs but it’s obviously your personal choice, since you just need to replace the content on the SD card. You could use car engines, ambient sounds, animal cries, or whatever else springs into your mind.
Firmware
Once this is done, running it is straightforward using the ESP-32 soundboard. We read files from the SD card and render images on the screen. Whenever the screen is touched we either play or pause the corresponding track, feeding it into a 12-channel mixer (using the ESP8266Audio library).
It did take me a few hours to fix all the small issues that arose here and there. But starting from sample firmware saved me half of the effort for sure, saving the time needed to at least jump start all of the peripherals.