Project update 3 of 11
New features and accessories for TinyNES
by Daniel GThanks so much to everyone who has already backed this project! It means a lot to me and the team and we’re all super grateful for your enthusiasm and support. Don’t hesitate to keep asking questions!
Some Technical Background
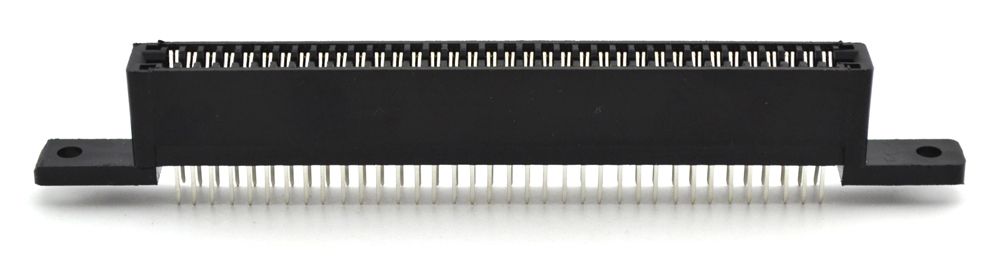
NES cartridges (as well as Famicom variants) use an industry-standard method of interfacing called card-edge connectors. These are popular because they only require one component: a socket. The other side of the connection is fabricated from the printed circuit board (PCB) substrate itself, a feature sometimes called gold fingers. Many technology standards have used card-edge connectors over the years, including PCI, the vast majority of RAM, and many video game systems. The Famicom used a 60 pin (2 x 30) connection with a very standard 2.54 mm (0.1") pitch, while the NES used a 72 pin (2 x 36) connection with an infuriatingly non-standard 2.50 mm pitch (yes, that 0.04 mm difference matters, but that’s another story). The TinyNES uses a socket that looks like this:
And here’s the mating card-edge on a game PCB that goes into it:

Card-edge connectors, while being ubiquitous, inexpensive and convenient, have one particular weakness: movement. Once inserted into a socket, any movement (angling) of the board can result in pins momentarily losing continuity with their respective contacts, which is not a good thing. On game consoles, this will often result in the system crashing. Also, 30-40 years of aging doesn’t improve this situation. Once mated, the inserted board should ideally move (wobble, rotate, or shift) as little as possible!
Nintendo released three primary NES systems (of course there are numerous other official and unofficial systems, e.g., the Famicom Titler, the Sharp Nintendo Television, and so on) These three systems use two different methods of interfacing physically with the cartridges. The original Famicom is a top-loader. This means carts are inserted down into the system, perpendicular to the main board, into a standard socket like the one above. The later NES model (known as the NES-101) also used this method, which trades height for stability. By securing the cartridge at a point higher up on its shell, its range of motion is limited.
The other method used was front-loading, for the original NES console, in which the cartridge was inserted fully inside the system, secured with a spring clamp, and even hidden behind a little swinging door! It’s very complicated, takes up a lot of space, and even then it was quite unreliable, (although this was due to deforming low-friction contacts, not movement, which is also another story).
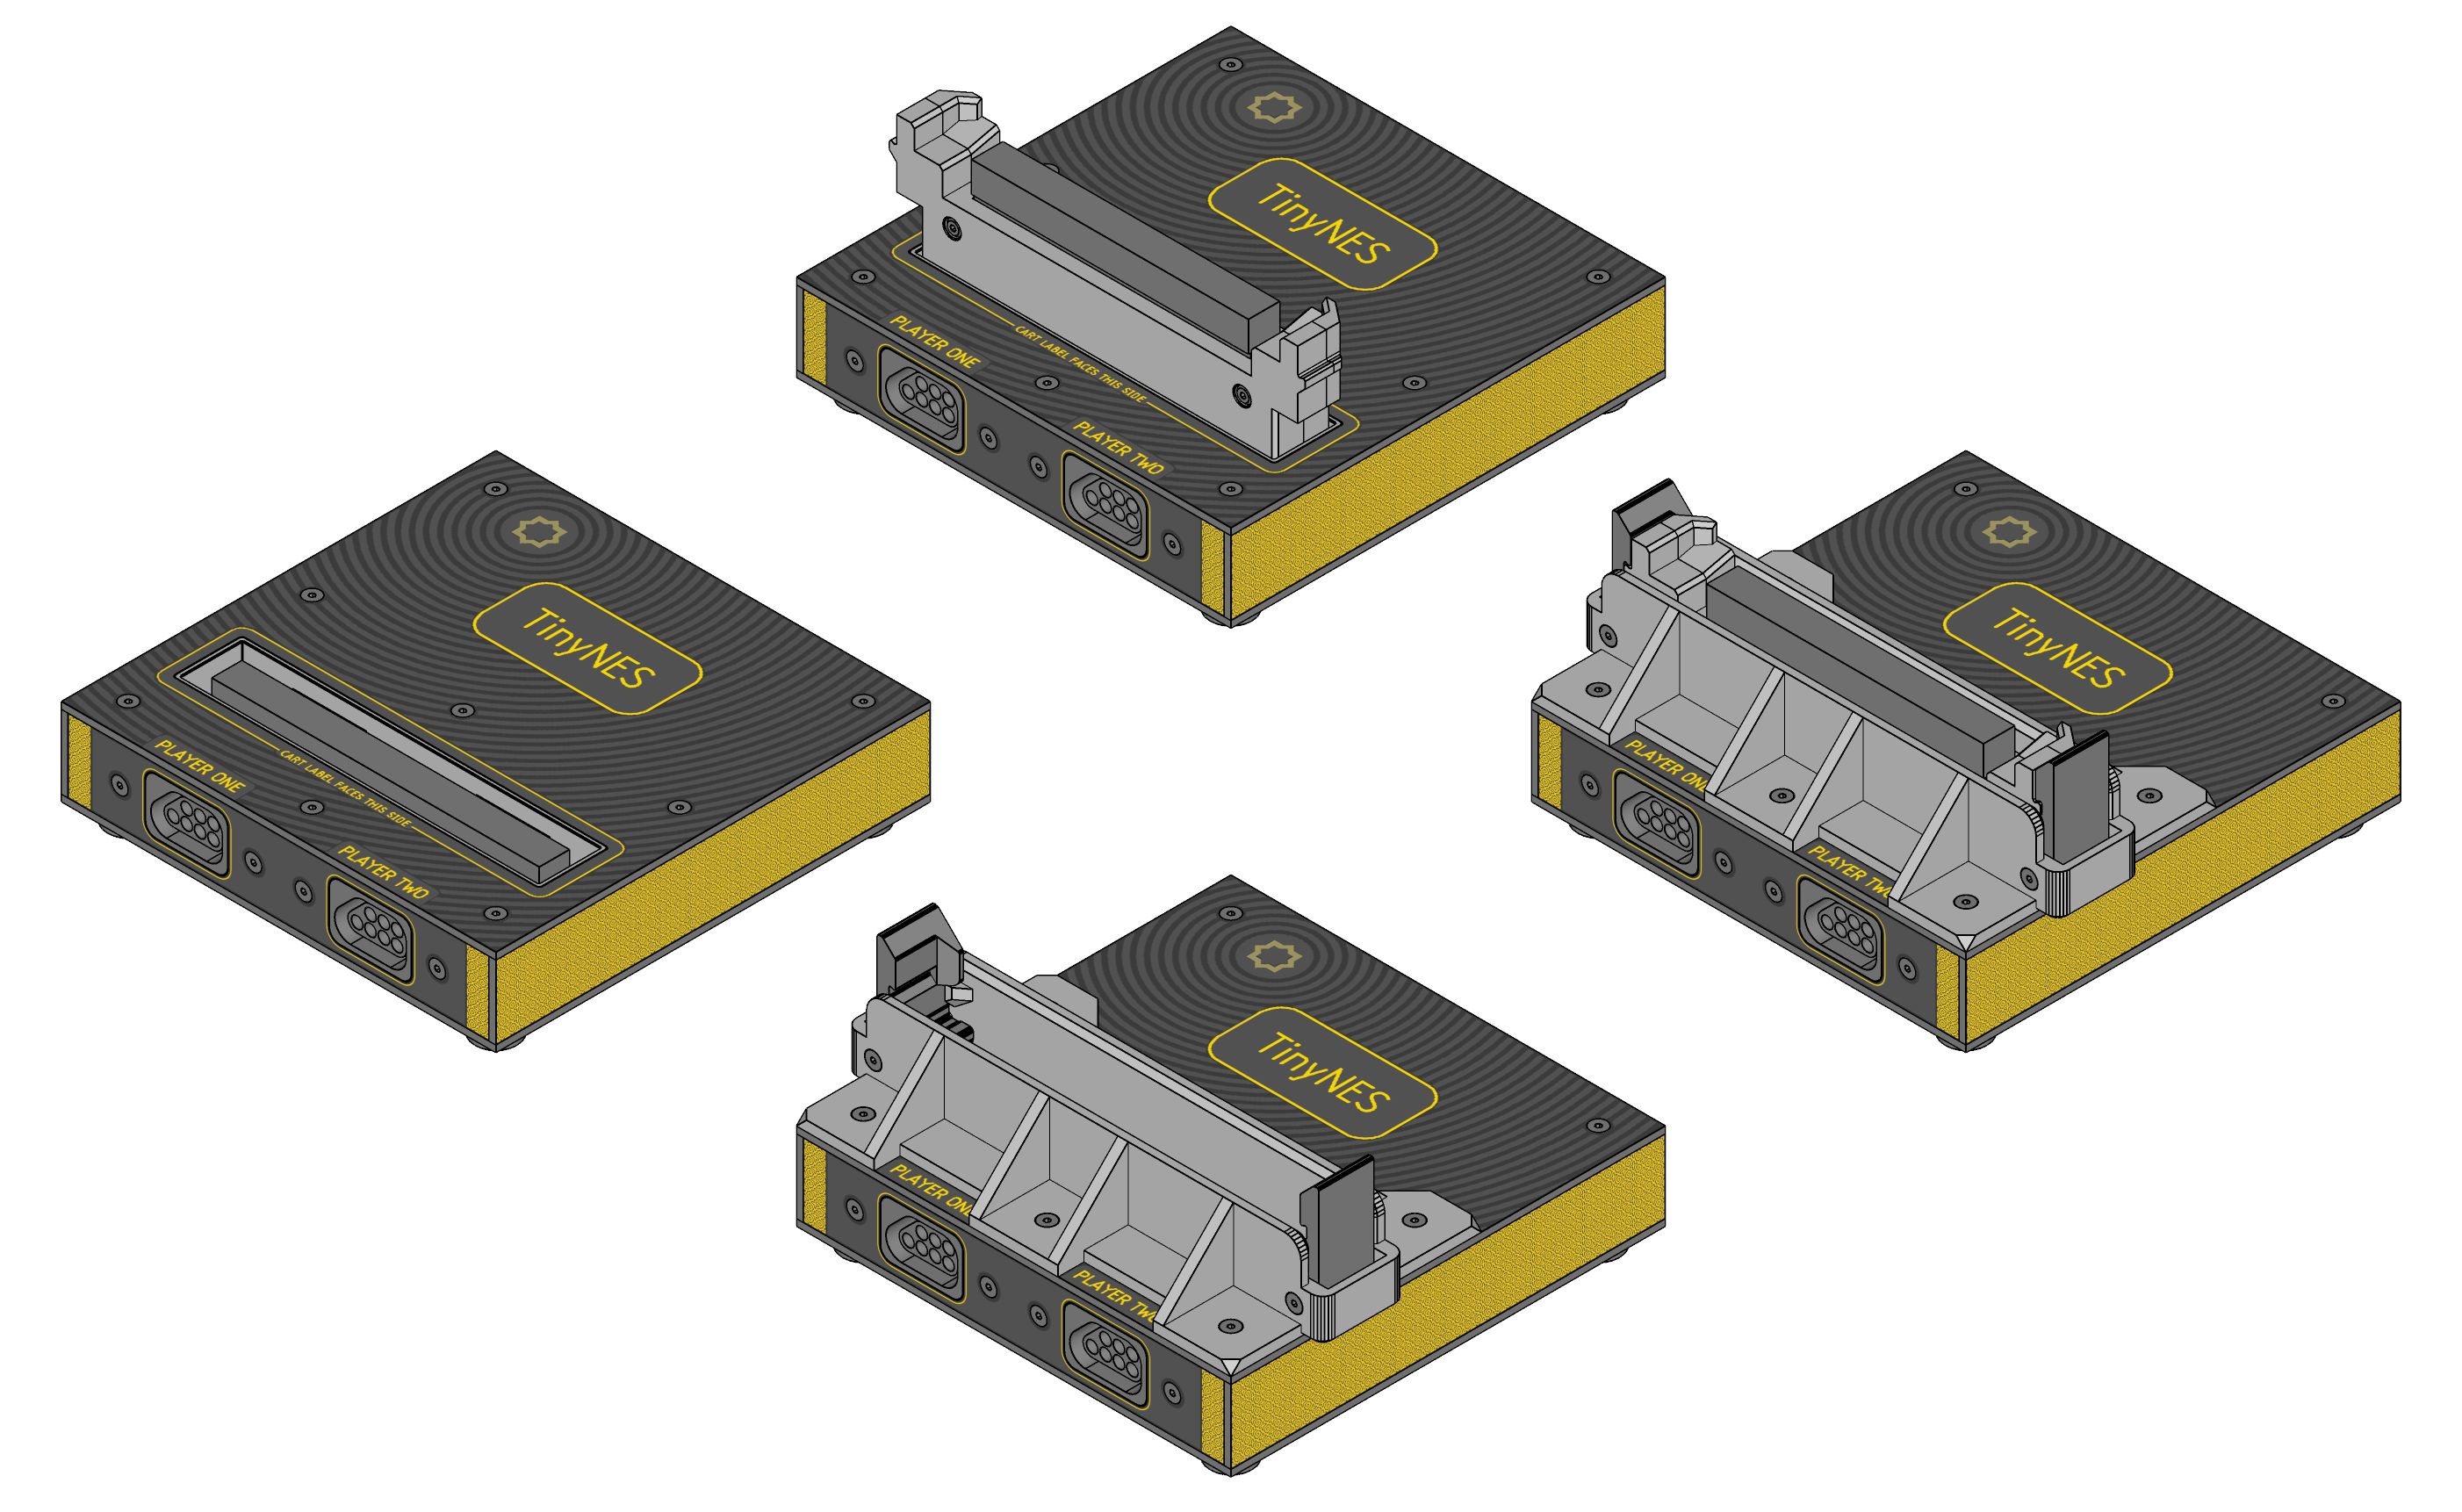
The TinyNES is supposed to be, well, tiny, so we use the former method of top-loading, with its (reasonably) standard edge-connector, and we trade small size for slightly less physical stability. However, we’ve attempted to compensate for this with the custom insert that surrounds the socket. This is a plastic part that guides the cart and holds it in place as securely as possible. Here’s how it looks now, in its current form:
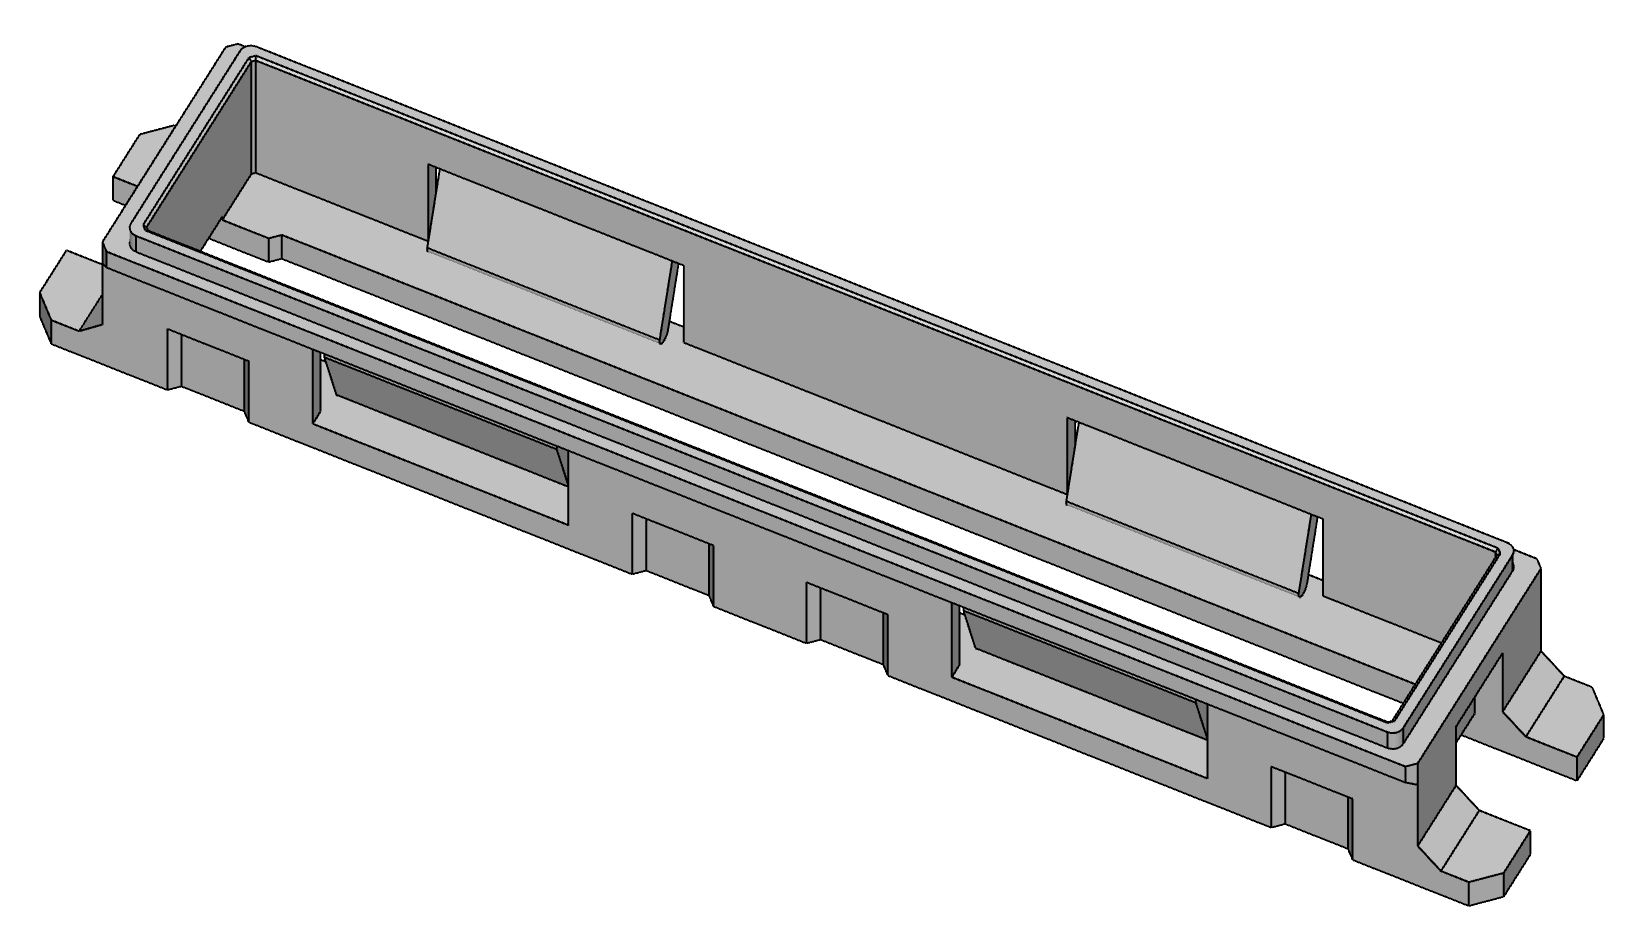
We’ve made a huge number of revisions to this part! Certainly more than any other custom component. Many, many, many revisions. Why so many? Well, for one, NES carts aren’t all the same size (this is pretty annoying). The vast majority of carts are just about 17.0 mm thick. However, some of the early ones (of the five screw variety), as well as some of the aftermarket plastic shells, are slightly thicker, measuring at around 17.4 mm. Gold carts can vary too! The amount isn’t much, but it’s enough of a difference that at one size, the smaller carts will fit nicely, but the larger ones won’t fit at all. Or, if you make the larger ones fit nicely, then the smaller ones will wobble back and forth (remember, movement = bad).
Our insert uses angled flaps and the spring-like properties of plastic to grip the cart just enough to keep it reasonably stable, no matter whether it’s on the thinner or thicker end of the range.
Cart Latch
This will be good enough for most people, but what if you want the ultimate in security? What if you like over-engineering as much as I do? What if you’re performing live using your TinyNES? What if you’re in an earthquake-prone area of the world? What if you have clumsy housemates? Well, that brings us to freebie number one…
This is an accessory that attaches to the TinyNES system itself, which provides a heavy-duty (industrial strength) means of supporting the currently inserted game cartridge, as well as a very easy way of ejecting it!
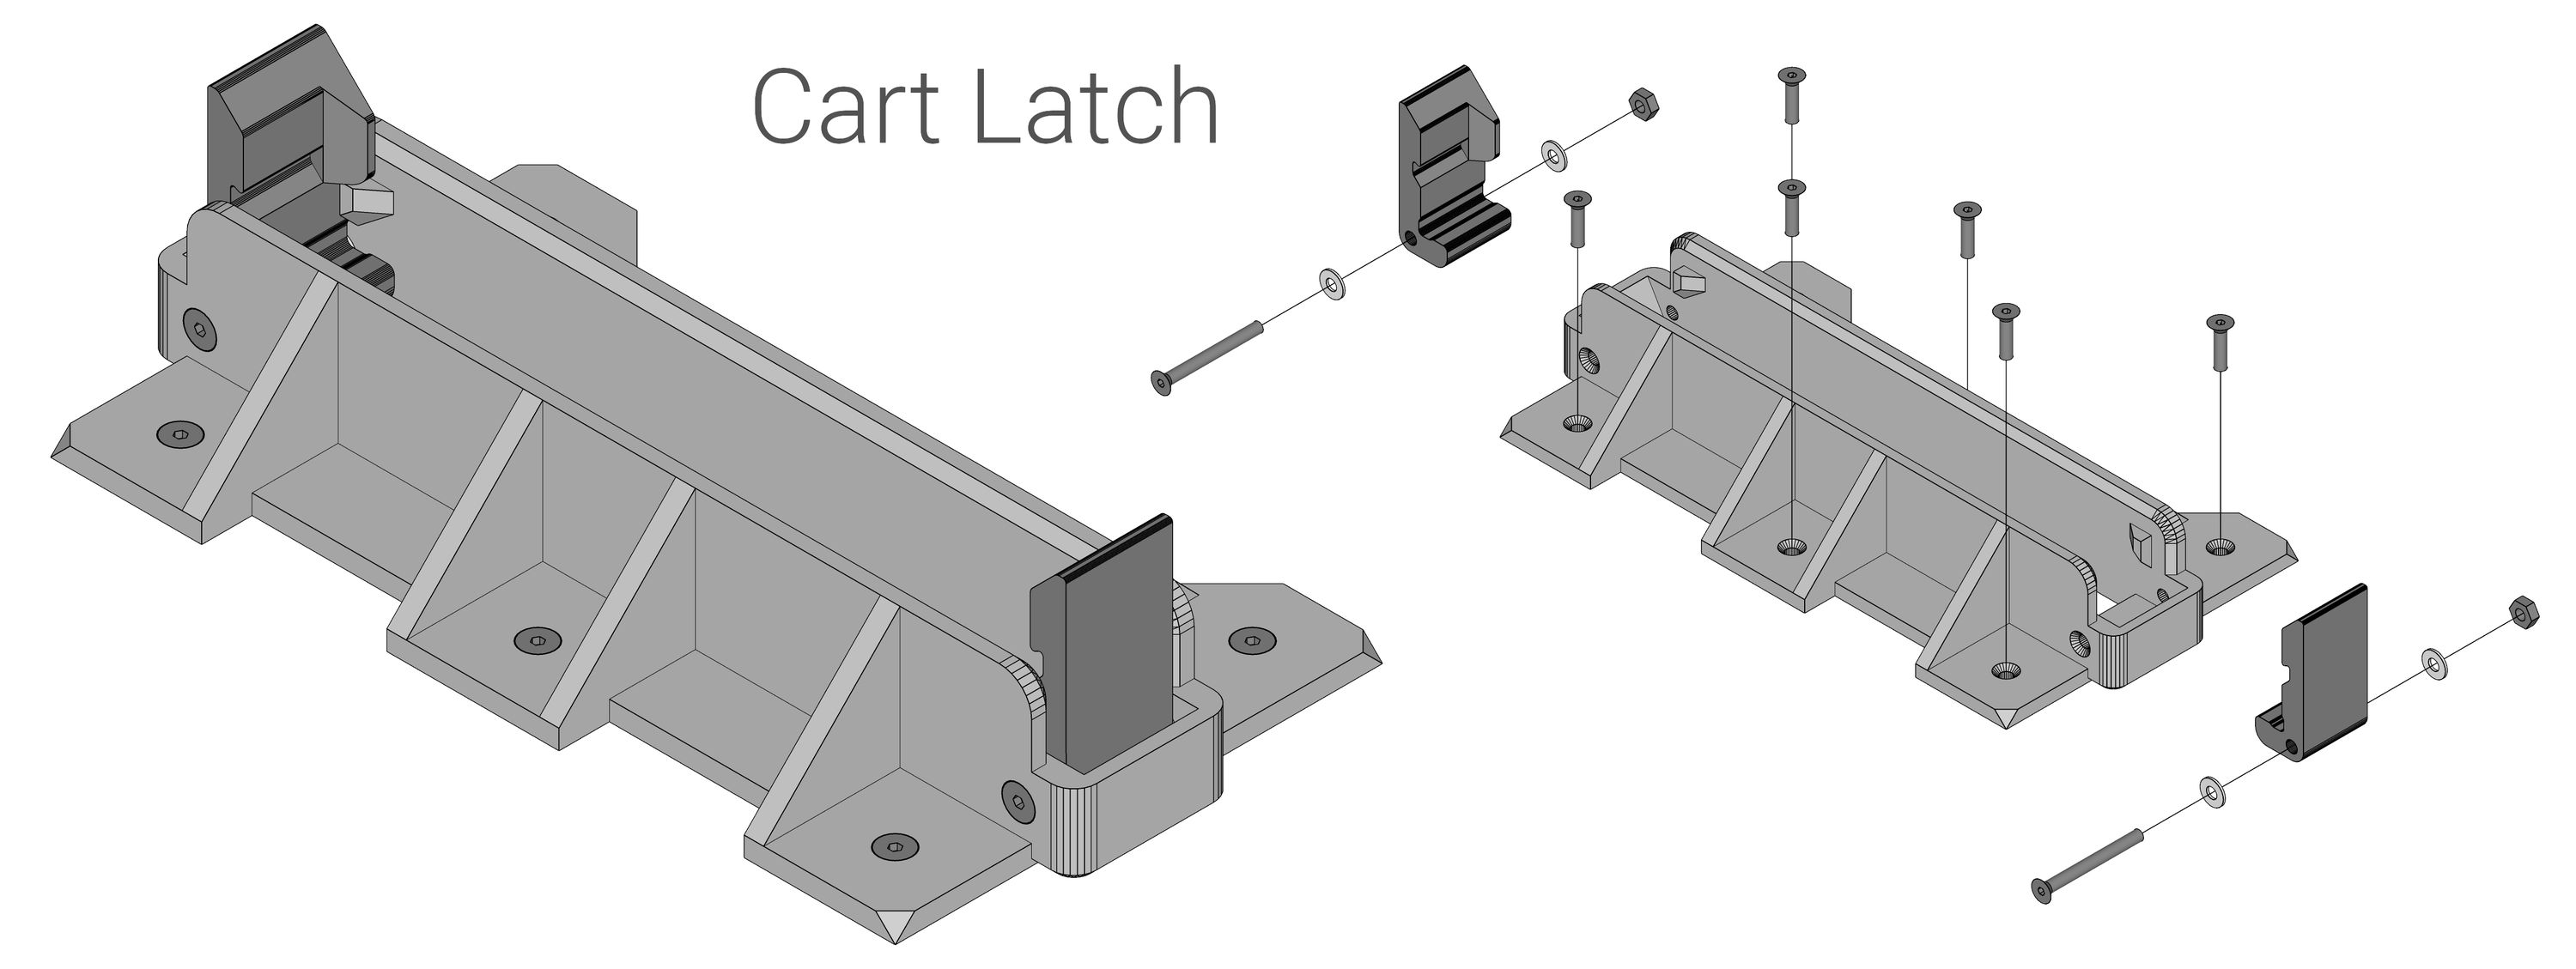
Here, we’re trading back some height in exchange for more stability. We’re also employing a novel approach (for NES consoles) of using small levers on either side of the cart. These levers are tilted up when a game is inserted, further holding it in place. Then, to eject the cart, the levers can be pushed down, pushing the cart up and out, releasing it from the formerly secure connection. We’ve been iterating this design for a while and it’s finally in a really good place where it’s working well with all the plastic cartridge shells we’ve thrown at it. It’s also keyed to enforce game polarity, so you can’t accidentally insert a cart the wrong way.
With this accessory, you can grab the cart and shake it while the system is on, and it still won’t crash (of course, we don’t recommend doing this). But, you know, just in case…
The best part is that it feels really nice, and really solid. This will be sold as a not-terribly-expensive add-on after the campaign ends, but all backers will receive one for free with their order. We think you’ll probably love it.
Famicom Adapter
A lot of people have written asking about Famicom support. Somehow the TinyNES just feels sort of incomplete without it, but adding a dedicated Famicom socket would increase the size and complexity of the system to a point that just doesn’t feel right (though there are old designs that did include both).
I think we’ve come up with an excellent solution for this:
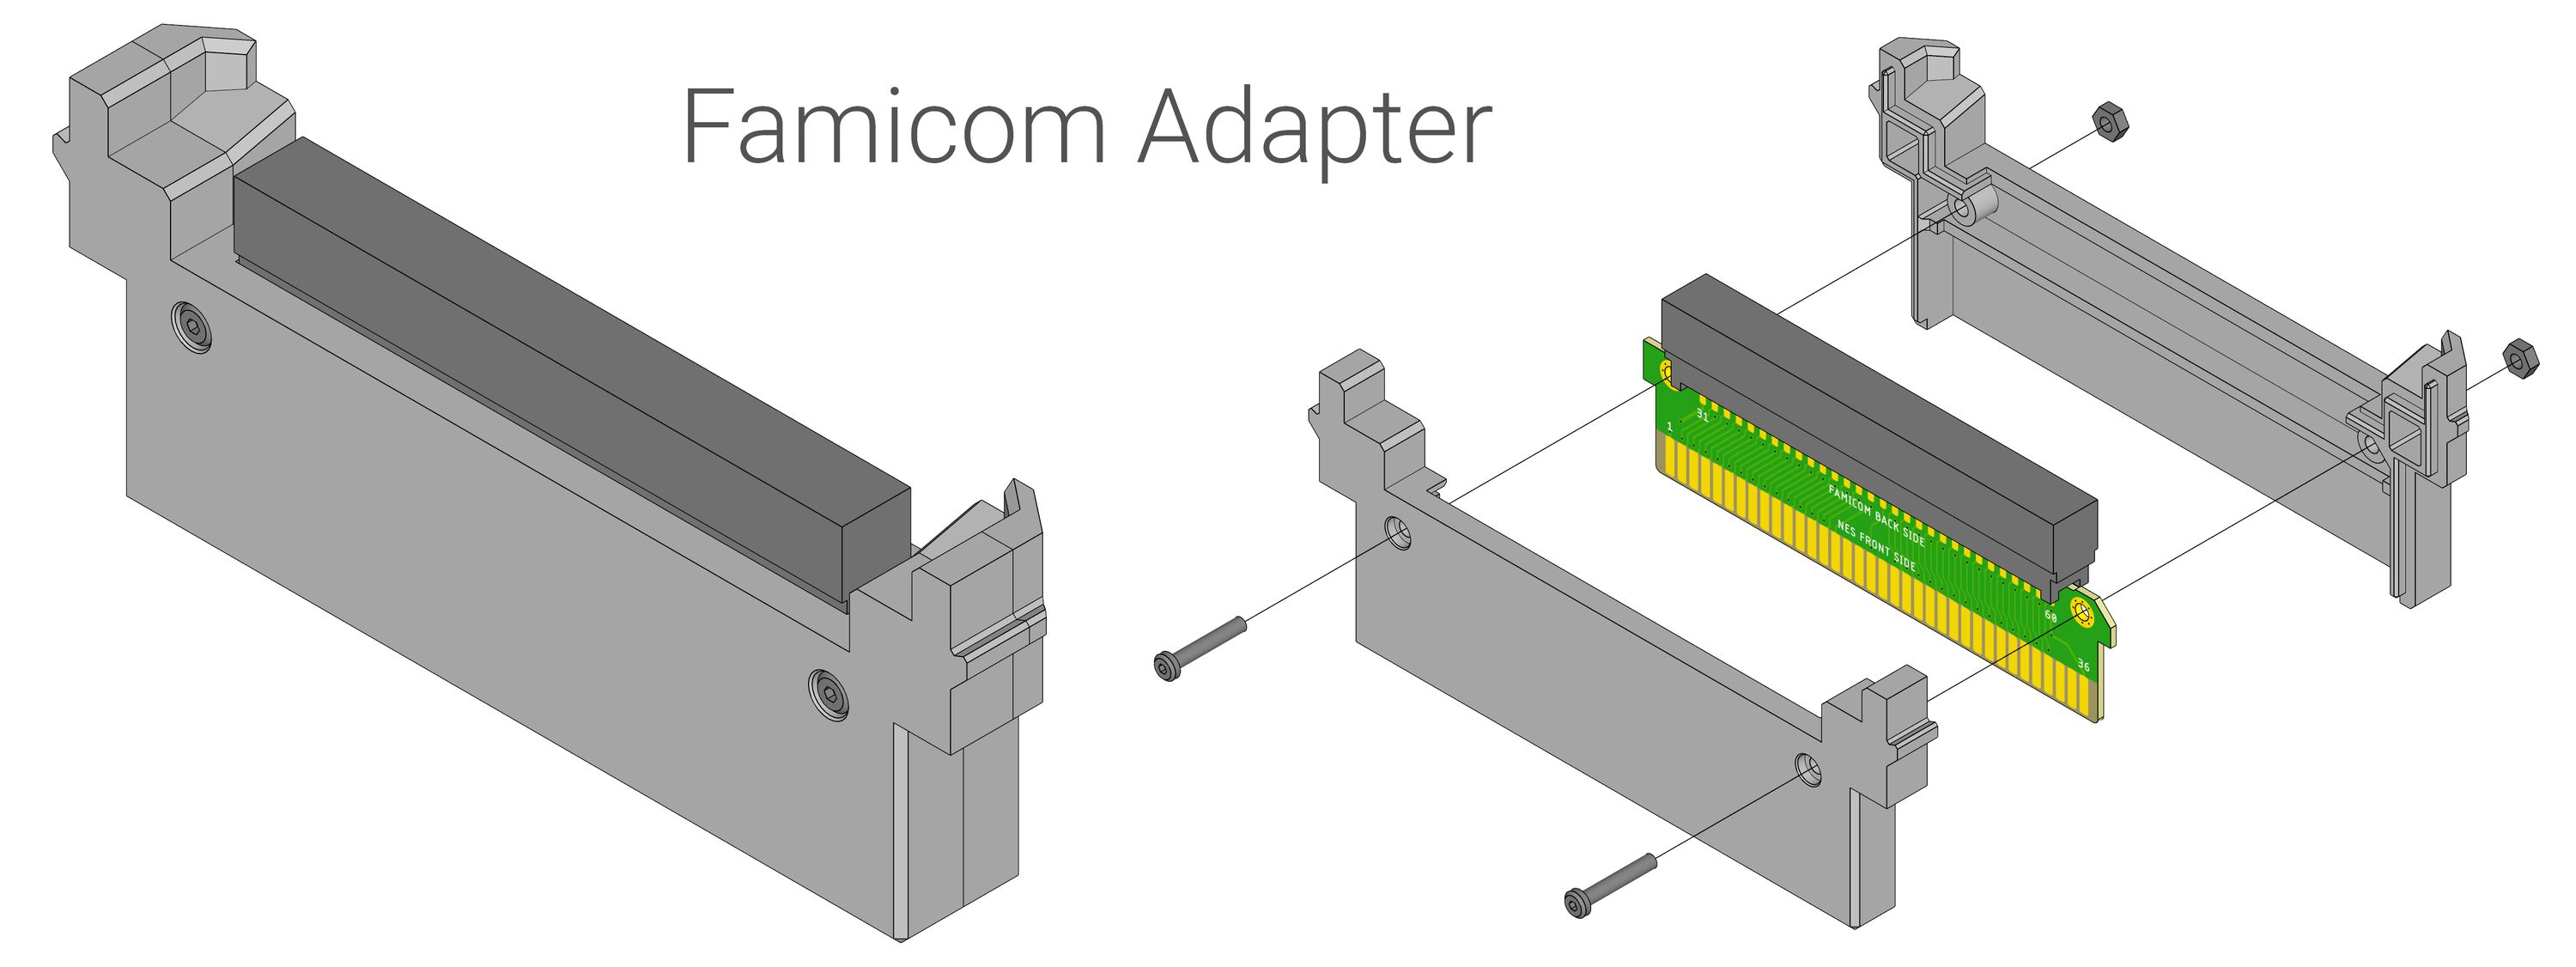
This is a custom-made Famicom-to-NES adapter for the TinyNES. In particular, the adapter works beautifully with the Cart Latch which can be used to securely hold it in place! This accessory will allow you to play Famicom games on your TinyNES.
Some details:
- Can be used with or without the Cart Latch, but if combined, they can be locked securely together.
- Famicom games face backwards, toward the rear of the system. This is a feature, not a bug, because it allows the adapter to be much smaller than it would be otherwise.
- Supports Famicom expansion audio! Specifically, cart audio output (FC pin 46) is routed to EXP6 (NES pin 54).
- Does not contain a CIC chip, which is unnecessary for use with the TinyNES.
- Still being prototyped, so some small details may change a bit.
Like the Cart Latch, this will be sold separately after the campaign, but backers will get one for free!
Both of these new accessories can be used on their own or together at the same time:
Audio Update
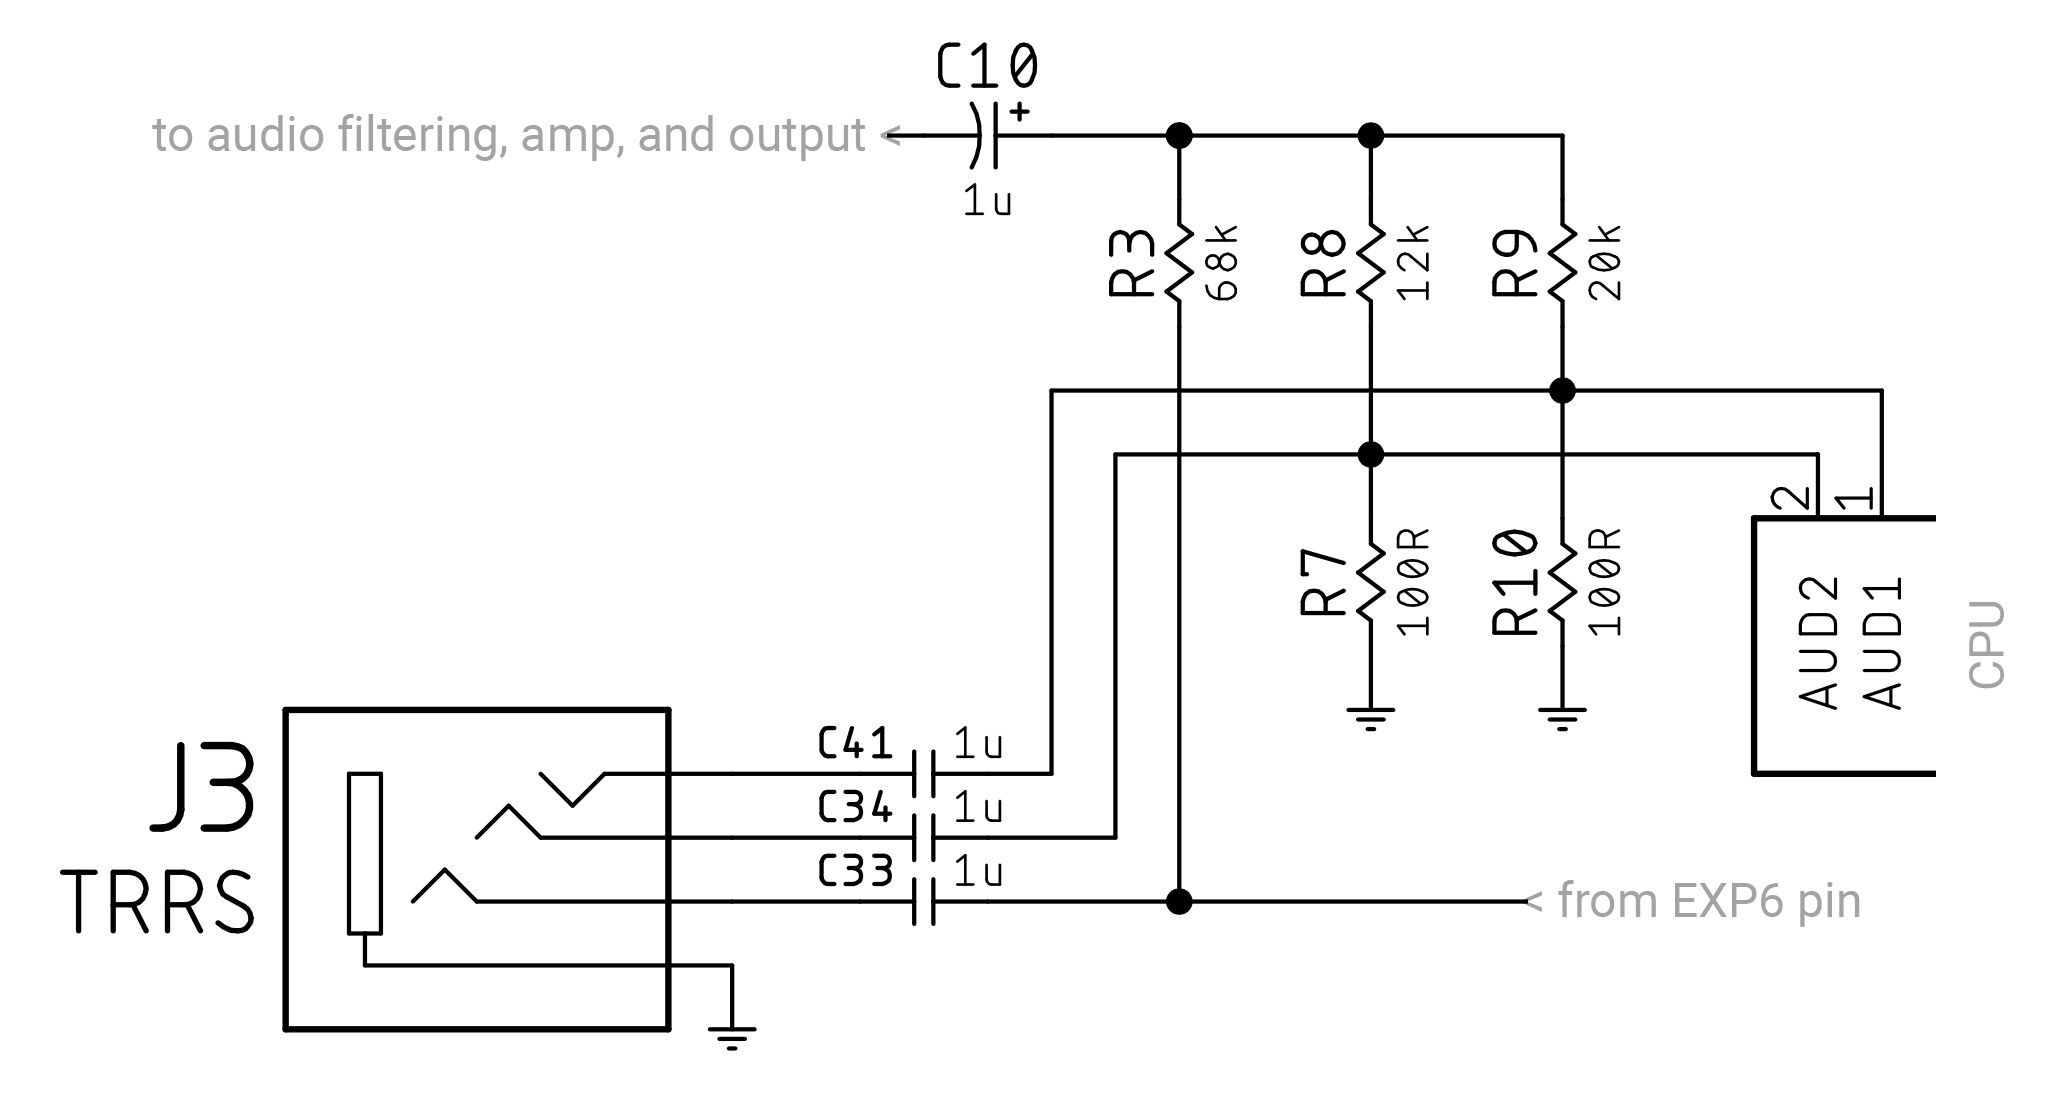
One exciting little change: we’ve added Famicom expansion audio to the internal audio mix, and we’ve also added a separate TRRS 3.5 mm jack on the rear of the console which will output the three audio channels (AUDIO1, AUDIO2, and EXP6) individually in their raw (unmixed, unfiltered, and unamplified) form.
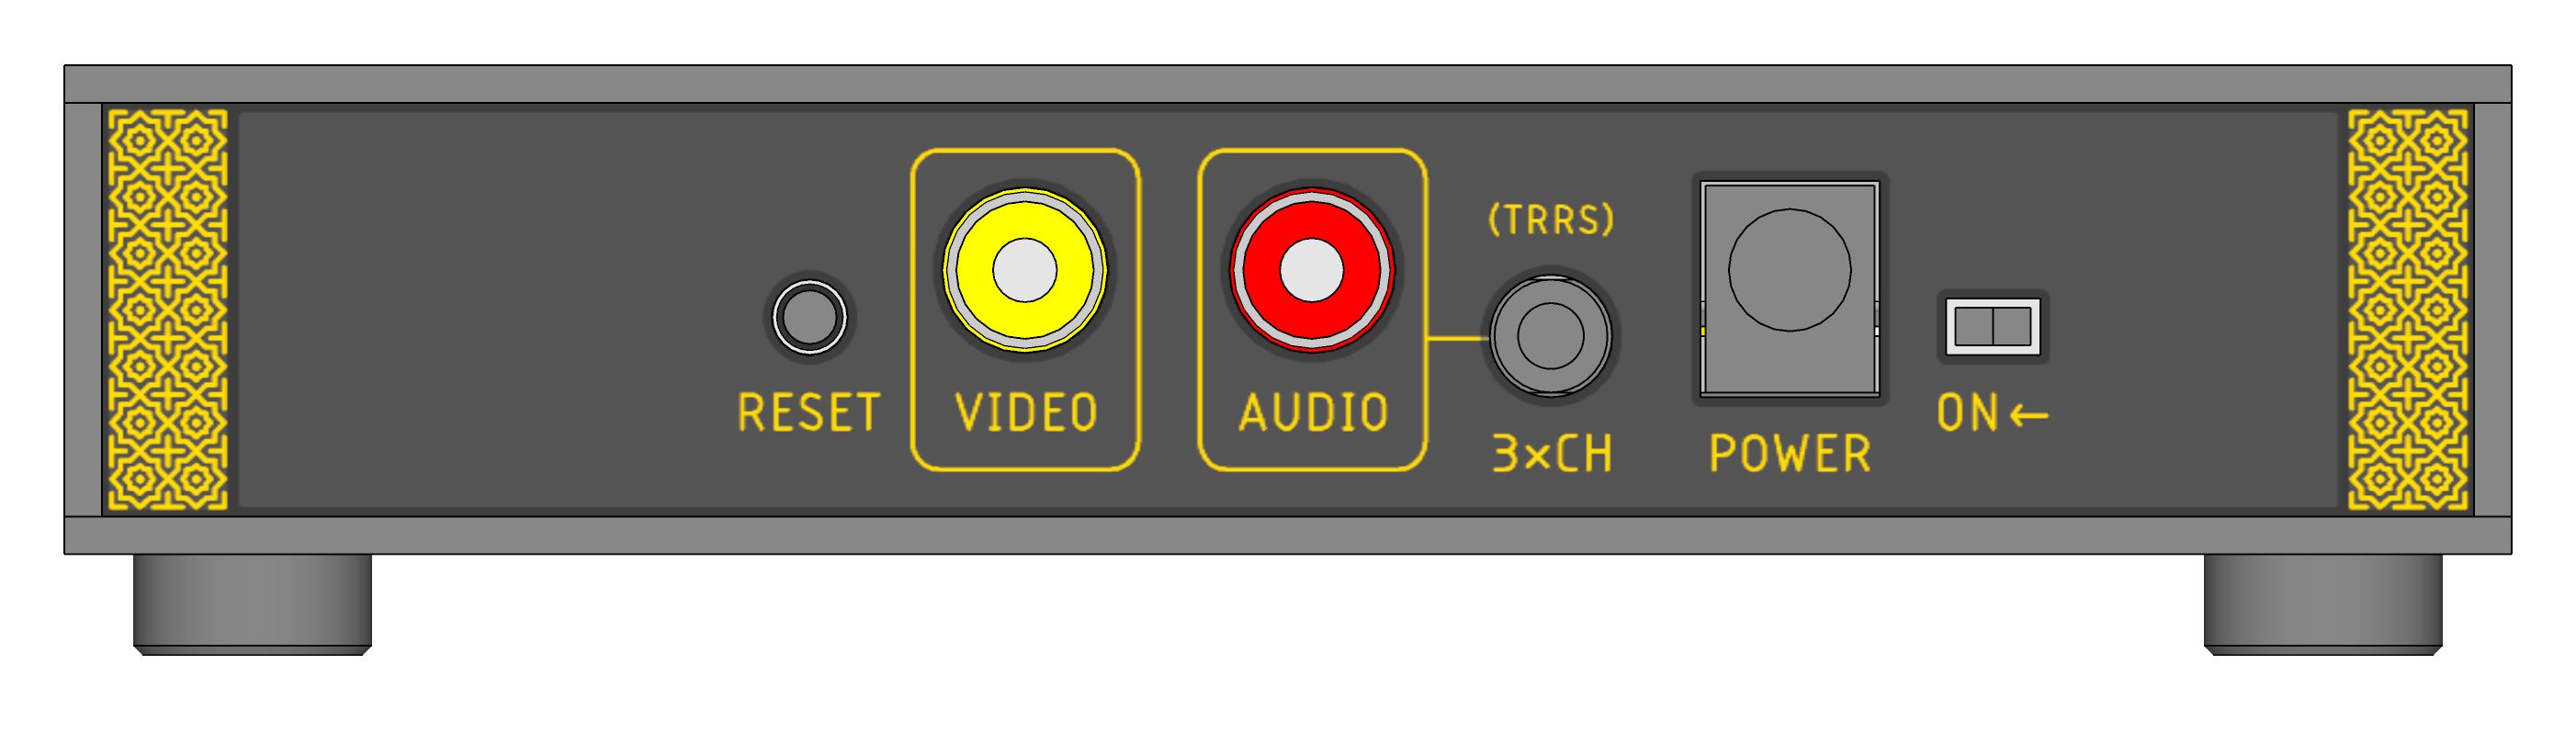
Here are the current new rear panel and internal mixer schematics:
We’ll also be including a handy little breakout cable for the new TRRS jack. Don’t let those colors confuse you (that’s not left, right, and video)! But this is the cable that’s widely available and it’ll get the job done well.
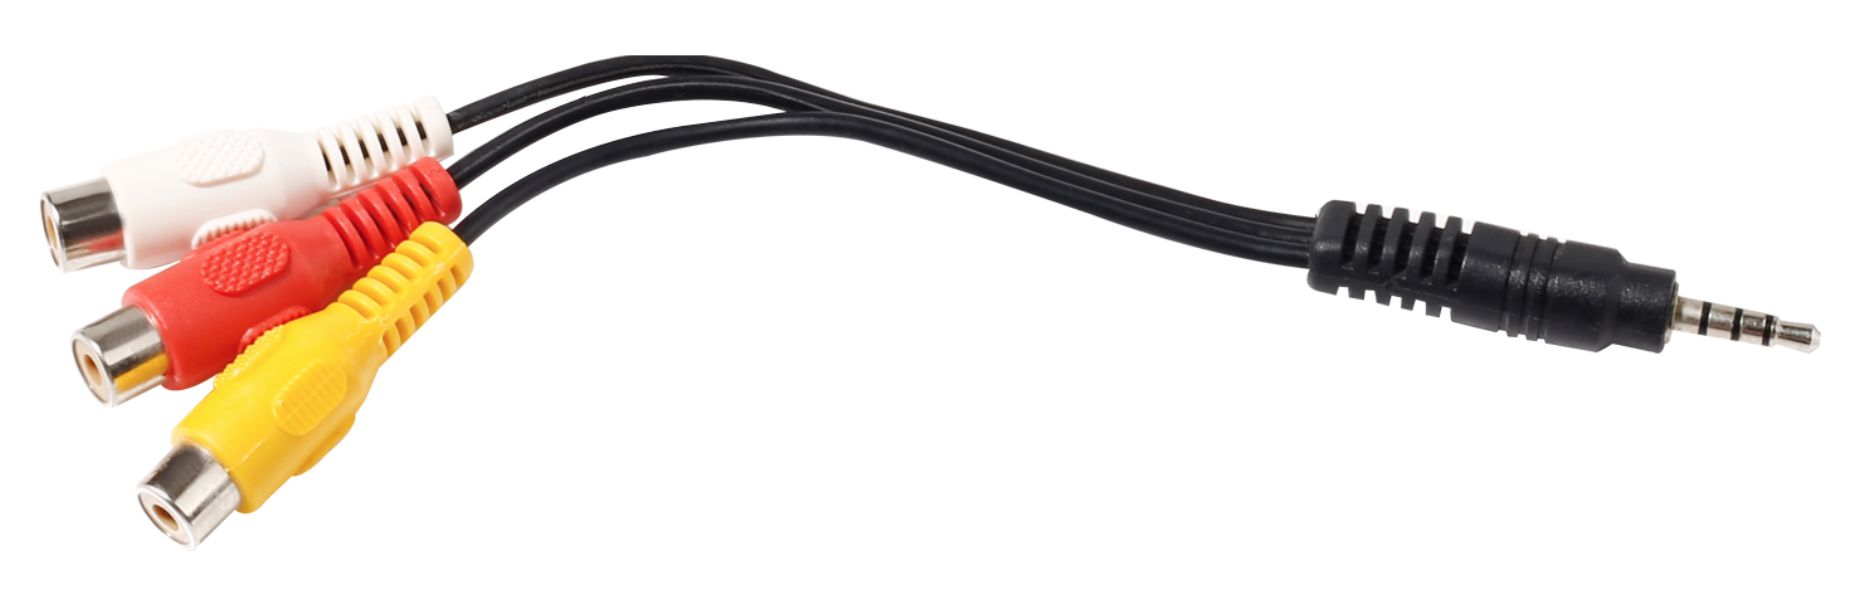
We know that not everyone cares about these audio-specific features, but the people who do should really benefit!
Coming Soon
In the days and weeks ahead, as we finalize the production samples and functional prototypes of these accessories and other changes, we’ll be sure to post photos and video clips of all the new goods.
Thanks again for all your comments, suggestions, and support! That’s all for now.
Dan