Project update 12 of 15
SavvyCAN Bus Monitoring with CANFDuino
by daniel kSavvyCAN developed by Collin Kidder is the best open-source cost per channel software tool for CAN bus sniffing. It is just as powerful as many of the paid CANalyzer tools on the market and it’s very easy to get up and going - it even supports multiple CAN bus channels on multiple OS types (OSX, Linux, Windows).
SavvyCAN was originally developed for Arduino DUE platforms including the EVTVDue and CANDue hardware and will also work with the Macchina M2, Teensy 3.x boards, PeakCAN, Vector, and other socketCAN compatible devices. Collin’s firmware is called GVRET (Generalized Electric Vehicle Reverse Engineering Tool) which is targeted for Arduino DUE based hardware platforms on the EVTV website.
The Togglebit CANFDuino can also be used with SavvyCAN for CAN bus sniffing, fuzzing, transmission, dbc file signal monitoring etc. with all settings getting saved into flash. Below are the steps to follow get up and going with SavvyCAN.
Step 1 – Install, Build & Verify
Do everything in the getting started section of the git repo readme file to make sure all software and hardware is working properly. Hook up the CAN/FD ports to the buss(es) you want to monitor..
Step 2 – Program CANFDuino with the firmware
Open ArduinoIDE, go to File->Examples->CANFDuino_SavvyCAN.ino. Upload it with the IDE and, once complete, place a jumper on “NO BOOT” pin to bypass the bootloader when the device is reset (see hookup guide).
Step 3 – Get SavvyCAN
Download and install SavvyCAN for your platform. Watch Youtube videos on how to use SavvyCAN.
Step 4 – Connect to CANFDuino
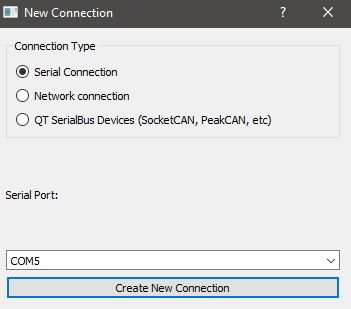
In SavvyCAN, open the connection window, “Click Add New Device Connection”, select “enable console” to see the serial traffic including the heartbeat, click select “serial connection” you should see a COM port present corresponding to the CANFduino, click “create new connection“.

You should see messages confirming data tx/rx over the serial port in the console window. For CAN0 and CAN1 shown in the bottom tabs select “enable bus” and select the “baud rate” you wish to monitor from the drop down list. Select “reset selected device” to reset the CANFDuino with the new baud rates. The baud rates will now be remembered and you do not need to reprogram the device each time you want to use SavvyCAN. If you are connected to a bus, you should see packets coming in the serial window, close this window to see the bus traffic in the main window.
Step 5 – Start Sniffing a Bus
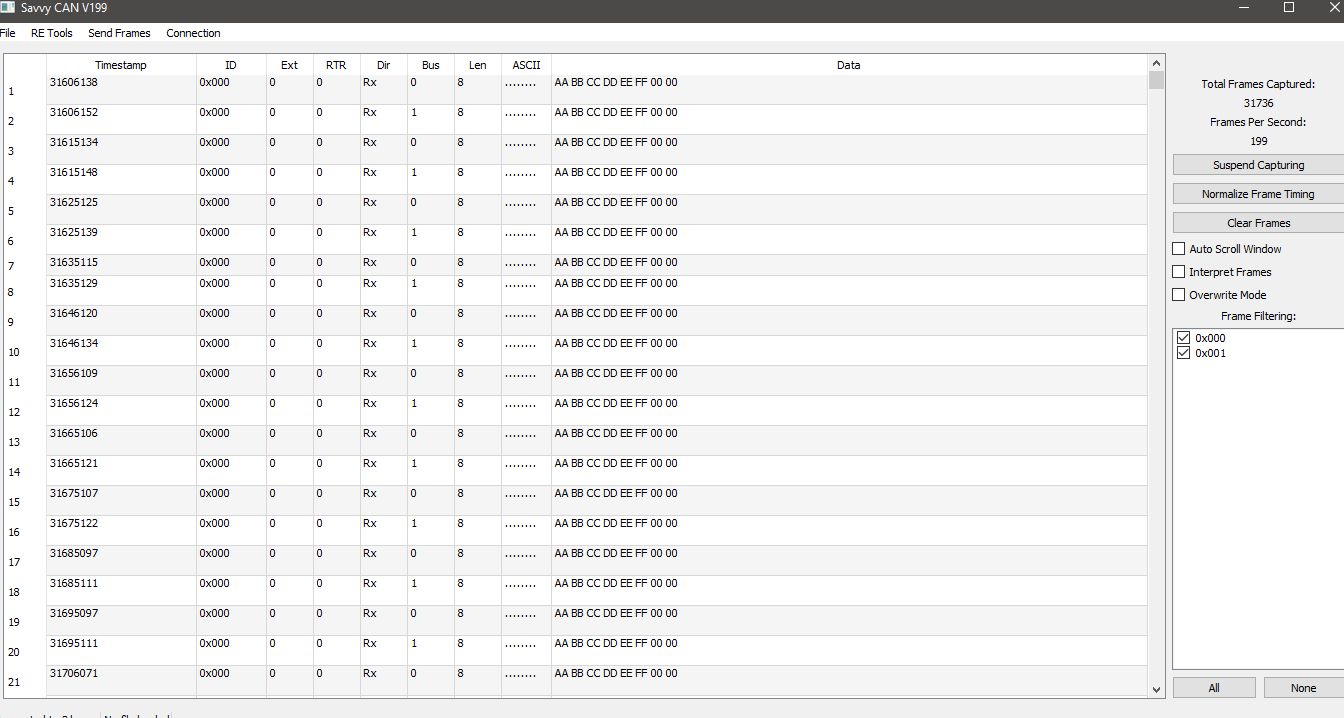
Ok, now that we are connected, time to connect to your CAN bus(s) and start sniffing. Remember you’ll want to understand where the terminations are and observe proper wiring in your network and if you need to enable one on your CANFDuino. You should now see traffic in the main window and the source of that traffic (CAN 0 or CAN 1). Really huge props to Collin Kidder for developing such a powerful tool for the community!