Project update 2 of 12
Lite3DP FAQ
by Alfredo BoniniHere are a few answers to some recent commonly asked questions about the Lite3DP. If your question isn’t answered here you can also use the Ask A Technical Question form on the campaign page.
How can I customize the Lite3DP?
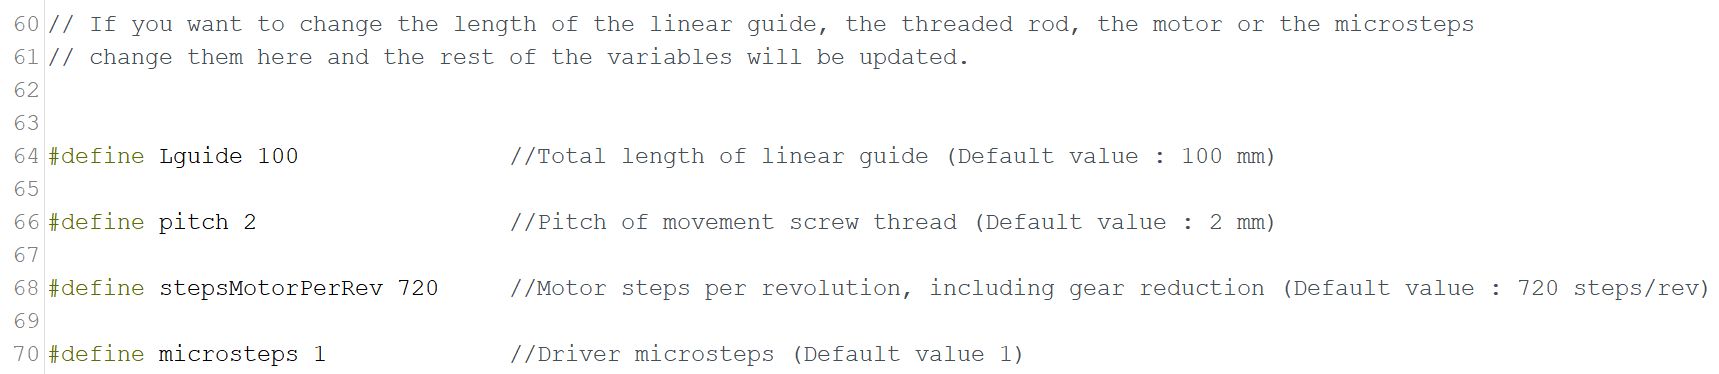
The Arduino code is prepared for a simple customization of the following parameters: linear guide height, threaded rod, stepper motor and driver microstepping.
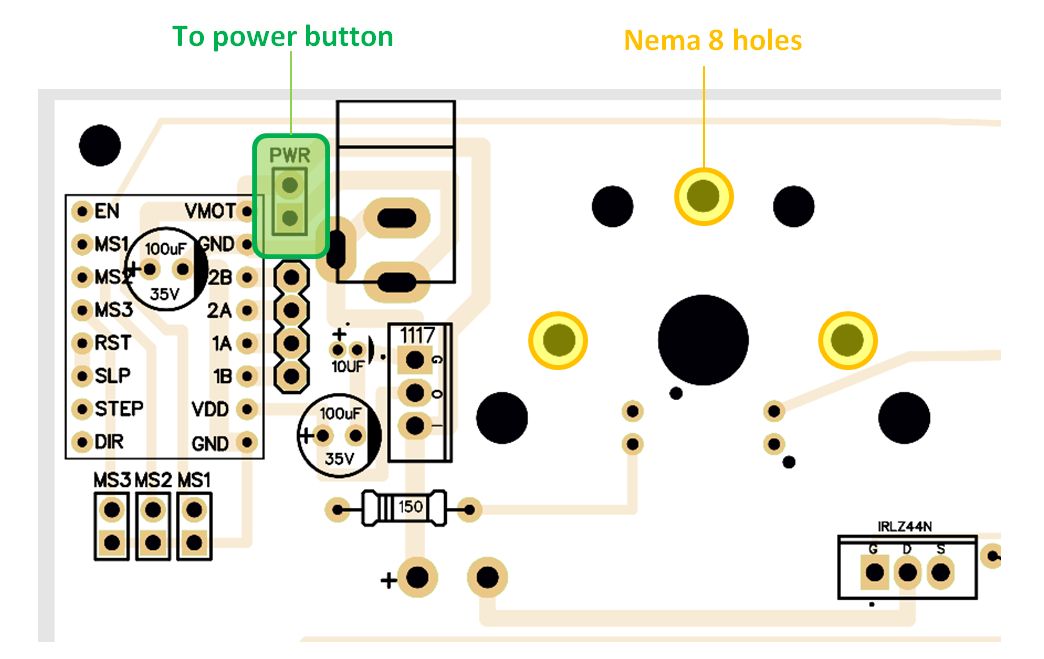
The PCB is prepared with holes for a Nema 8 stepper motor. It also has two pins to easily add a power button.
Soon we will launch STL models of different accessory parts, including some covers, bases and the support for the Nema 8 stepper. Other deeper modifications will require a greater effort, but there is no limit: use of batteries, changes in layer thicknesses, self-filling resin system, etc.
Where do I find all the information and documentation? Is there a list of components and reference links?
All the information and documentation is available from the page www.lite3dp.com/download.html (according to the characteristics of the information, it was divided between the Github, Instructables, Youtube and PCBWay pages). A complete list of components is included with some reference links for purchase (this only applies to the Essentials Kit and building from scratch).
Are all plastic parts FDM printable?
Yes, they are (and print settings are available). However, in order to avoid any possibility of resin leakage or breakage, it is highly recommended to get the injected tray on Crowd Supply. Extra trays can be purchased separately in the campaign.
Is a cover necessary?
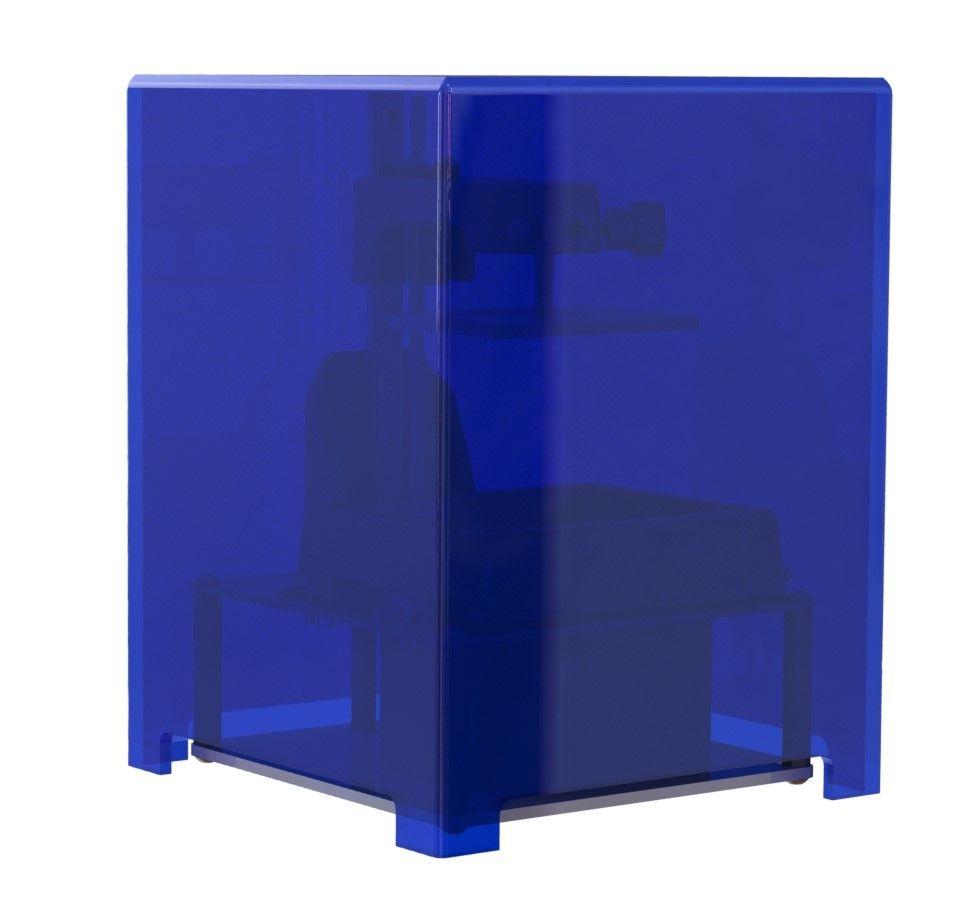
Exposure to strong light can cause unwanted curing of the resin in the tray. In a few days we will release some STL models for the Lite3DP, including some covers. You can also simply use a small cardboard box to cover the machine (with bottom slots to allow ventilation):
Is there a way to check the progress during 3D printing?
Holding the ESC button during printing (until the current layer is finished) will raise the platform to the top, then the printer wait for the OK button to be pressed to resume printing. This way you can verify that everything is printing correctly, and you can refill the tray more comfortably.
How does one-time-slicing work?
Since exposure times are selected on the screen before printing begins, any resin can be used with the same processed file. Regarding the layer heights, Chitubox will process the 3D models for a layer thickness of 0.05mm. When layer thickness of 0.1 mm is selected, only odd images will be used during printing (1.bmp, 3.bmp, 5.bmp, etc.).
What resins can I use?
Any resin suitable for the 405 nm MSLA technology can be used. Today there is a wide variety of brands and types of resin, some of them are: castable, flexible, dental, standard, industrial and tough. For each resin and layer thickness it is necessary to determine the optimal exposure time for its solidification (about 10 to 25 seconds per layer).
I have never used a 3D printer, is it difficult to learn how to use it?
Like all new technology it takes some time to learn how it works and experiment to get the best results. However, Lite3DP S1 can be considered one of the easiest 3D printers to operate, ideal for beginners. No special skills or great prior knowledge is required.
Can more than one piece be printed at the same time? What if I want to make a larger piece than what goes into the build volume?
As long as the pieces together can be properly placed within the printing volume and in relation to the platform, more than one piece can be printed. A larger piece can be scaled to fit. It can also be printed in several parts and then joined or glued.
Can Lite3DP be harmful?
Lite3DP is not overly dangerous, but some precautions must be taken: do not look directly or expose to UV light and use protective elements as some resins can irritate the skin.
Are additional elements needed for post processing of 3D printed parts?
The printed parts will require a cleaning to eliminate the rest of liquid resin that may have remained adhered (in a container with water or IPA, depending on the resin). After cleaning, to obtain a greater hardness of the piece, a post-cure can be performed; this can be done by exposing the piece to UV light, typically in a special chamber, or simply by exposing it to sunlight in a transparent container with water (about 15 minutes).
Can I print from BMP drawings (made for example in Paint) instead of 3D models?
Yes, this is a possibility that some users will find interesting. It can be especially useful for teaching children or creating simple pieces that you have a picture of. In some of the next updates we will do a short tutorial on this topic. Stay Tuned!