Hello everyone,
Many thanks for your support during the past week!
As a follow up to our last update, we want to show you how Vapor phase One utilizes its five isolated temperature measurement channels to produce a clean soldering profile.
Monitoring the Temperature of the Heating Element
We start the sequence by defining a temperature. For this purpose, we use two temperature sensors that are welded directly onto the heating element. This redundancy is useful for error detection: if the temperature difference between the two sensors is too large (e.g. if one of them has detached itself from the heating element), we can trigger an error.
Controlling the Temperature of the Galden
To monitor and adjust the Galden temperature, we use a simple bang-bang controller with an adjustable hysteresis. This control topology acts very quickly, and is perfectly adequate for our purposes. The third temperature sensor is directly immersed in the heat transfer medium.
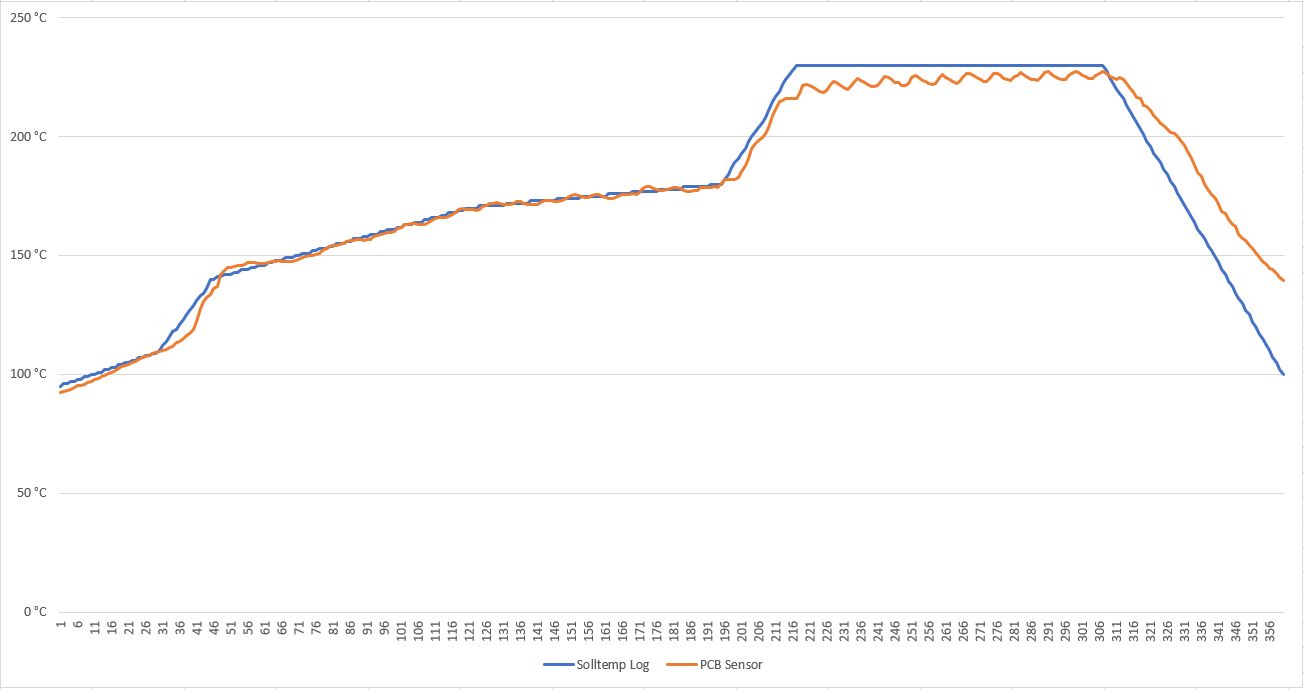
Adjusting the Height of the Lift
As soon as the heater and the Galden have reached the temperature specified by the start criteria, the lift begins to lower the PCB. From this point on, the value of the fourth temperature sensor—which is positioned near the PCB—is fed into the PID control loop, which has the ability to raise and lower the lift. The height of the lift above the medium surface determines the temperature of the board. As soon as the lift drops into the vapor phase, the temperature changes very quickly. For this reason, it is important that the temperature sensors have a high sample rate so they can react in time. Since the lift can be adjusted very precisely, it is possible to maintain a specified temperature even under these highly non-linear conditions, by partially immersing the PCB into the vapor phase.
Monitoring the Dissipation of Heat
To keep the vapor phase in check, we cool the side walls of the process chamber with water, and we use one sensor channel to monitor the temperature of that water. A closed convection cycle forms in the process chamber, and the Galden is vaporized, forming a relatively sharply defined vapor layer over the liquid. The thickness of this vapor layer can be influenced by the power input and the power output (which also includes the thermal capacity of the board). In order to maintain a reasonably high Galden temperature, it is therefore necessary to dissipate heat. This is handled by the cooling water and by two 120 mm radiators. Vapor Phase One converts about 1100 W of power into heat, so we have to keep a close eye on the cooling water temperature. If it rises too much, the soldering cycle can be interrupted at any time as a safety precaution.
In our next update, we are looking forward to showing off some sample soldering results!