Hey Everyone!
Piotr here. Welcome to another Glasgow campaign update.
We are still in the process of finalizing a few things related to the Glasgow, the case, and cables that are part of the project. February is always a bit slow as related to prototypes and part sourcing because of the Chinese New Year. But now that we are in March things should pick up speed.
We should have more regular updates coming as we get closer to manufacturing. There’ll be lots to talk about as we finalize the Glasgow RevC3 design, order a new round of case prototypes with some final changes, and start receiving components and cables from various manufacturers.
In February, I finished the design of the Ram-Pak add-on for Glasgow. We should get all the parts for that very soon, it will be a nice expansion of Glasgow that might actually fit inside the Aluminium case. I am sure we will talk about it more in an upcoming update.
For now enjoy this brief history of the Glasgow aluminium case from Timon).
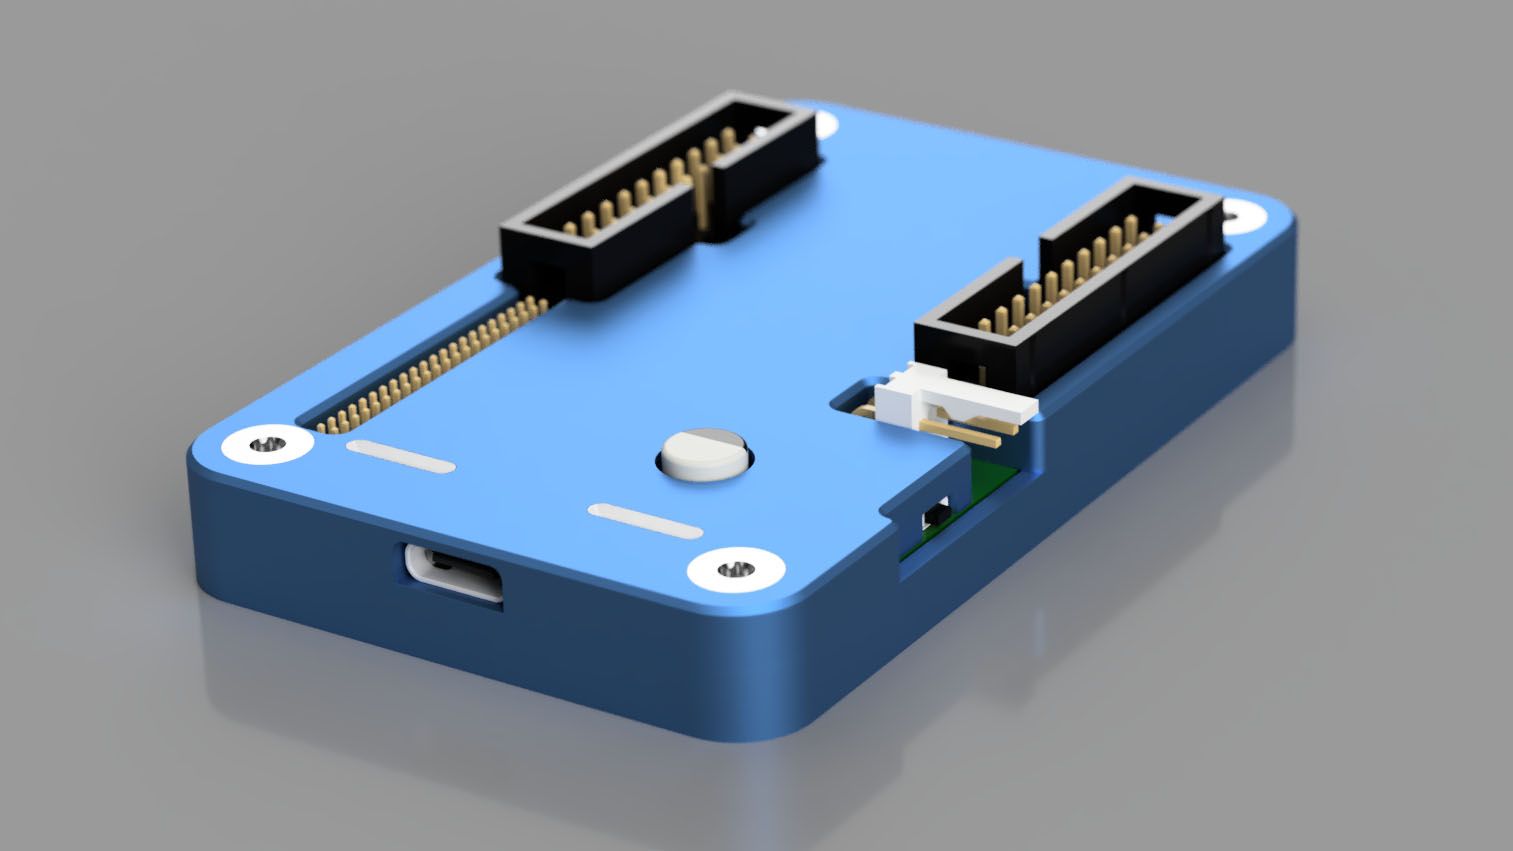
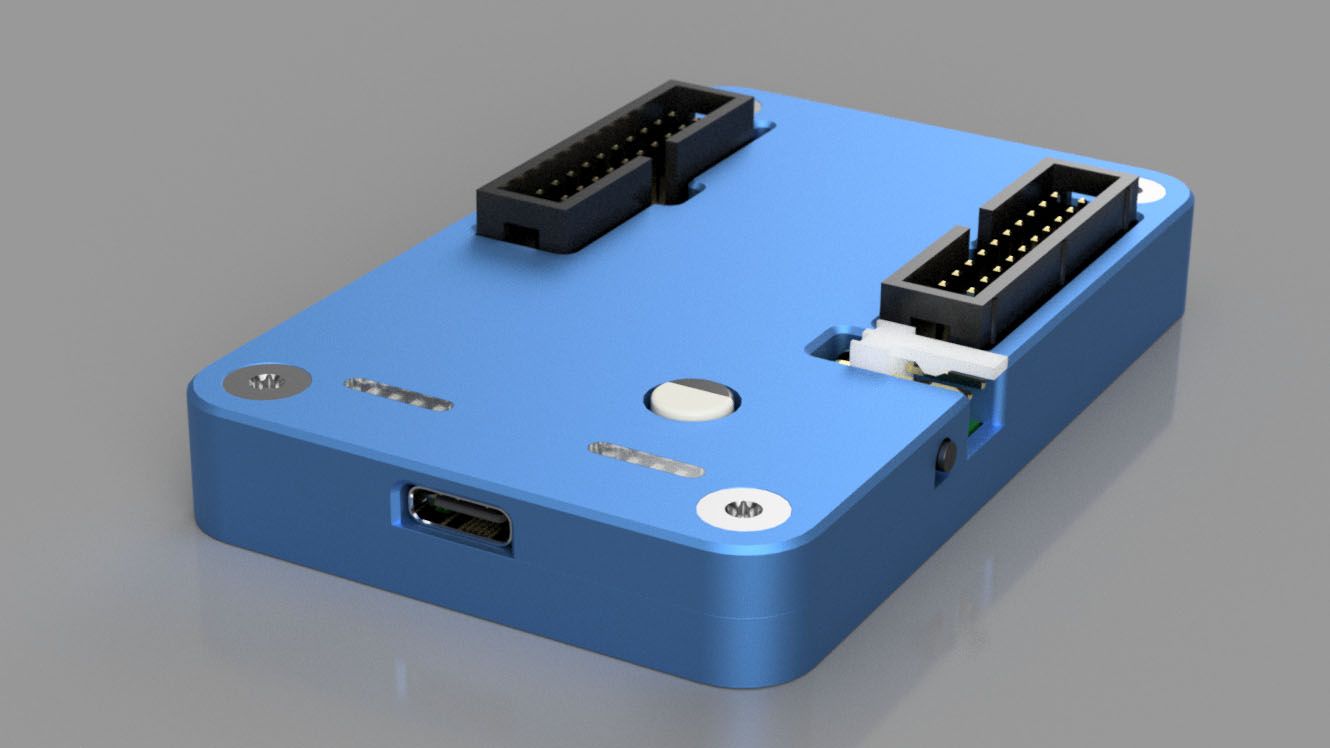
Keep in mind that what follows includes images of the early prototype Glasgow case designs; the blue case and black connectors are not what we ended up choosing for the final version of the cases.
Cheers,
Piotr
Mechanical Case Story
In this update, I will give you some insight into the production of the aluminium case.
Our manufacturer managed to squeeze in a rushed prototype production before Spring Festival (Chinese New Year) was in full effect. Manufacturers are extremely busy at this time, so we are very grateful they managed to get this done in time.
So I’m glad to be able to show you some pictures of the first professionally produced prototypes today instead of more renders. Though before we go into that I wanted to give you a bit of history into the design and how it came to be.
The Beginning
Back in August 2020, Piotr mentioned in one of his Twitch streams that it would be cool to have a machined aluminium case for the Glasgow. But he was concerned this would be too much for him to handle on his own. While I usually work more on the electronics side of things, I do enjoy mechanical design a lot and offered to help Piotr out by designing a case and finding a suitable manufacturer. I already have CNC machining design experience, so this sounded like a fun project.
We formed a little task force for the case and I went on to design some concepts. Below is the first version of the design from back in September 2020.
First draft
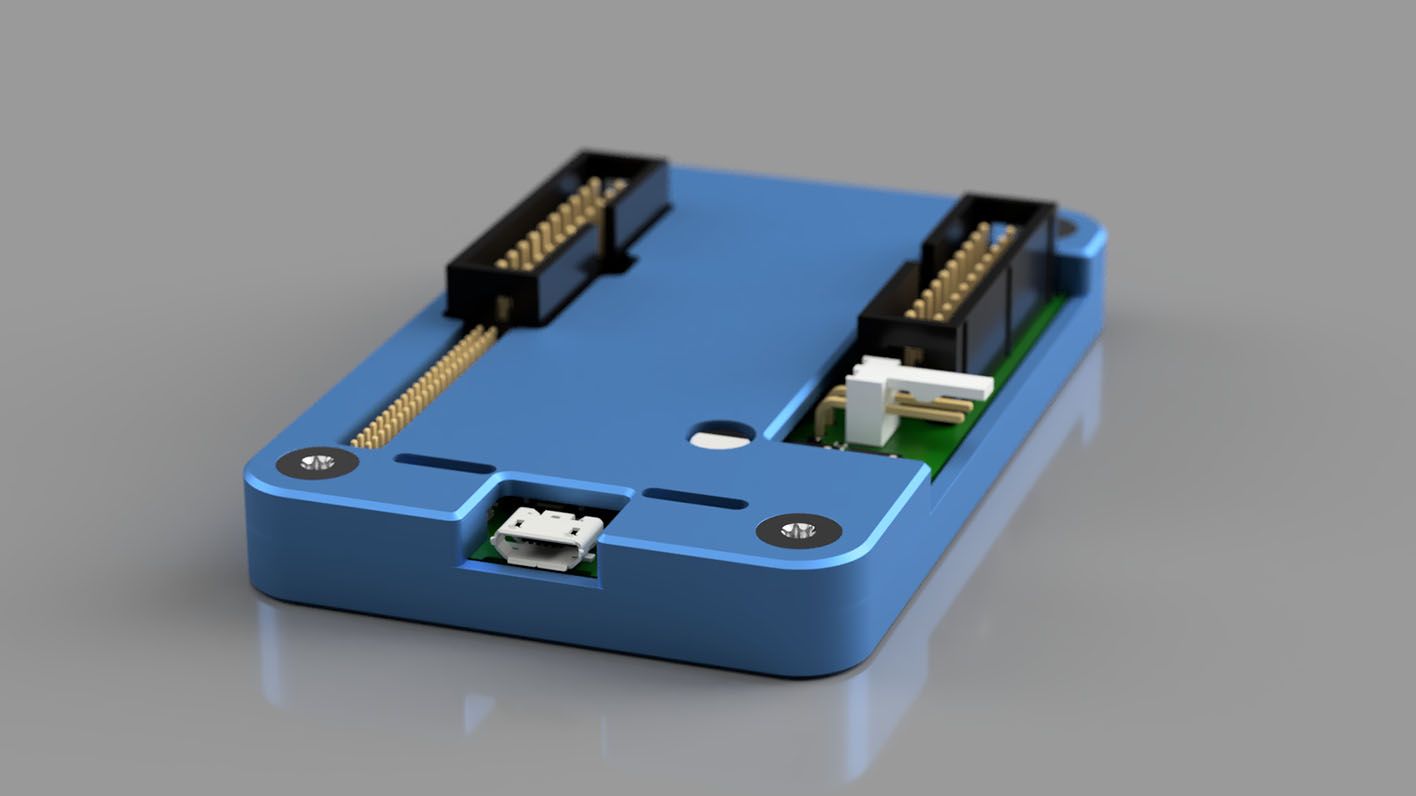
This case was based on revision C1 and was a lot slimmer, as you can see by the capacitor poking out. The right side pin header was also giving us issues as the sync connector was a lot closer to its back, so I was not able to encase it. Piotr found space to move it further away so I could fix it.
A lot of the design effort was finding ways to make a case design work with decisions that were made before plans for a tight fitting, CNC machined case were even on the table. Very early on in the development of Glasgow, the plan had been to make a simpler acrylic sandwich style case.
Reset Button
One big design issue was that the reset/stop button was a tiny, top-actuated button. Early on I wasn’t sure if the PCB design could take any more changes, so I tried to find workarounds. Some of these looked rather silly, like this early design where I tried to find a decent way to make that tiny button accessible.
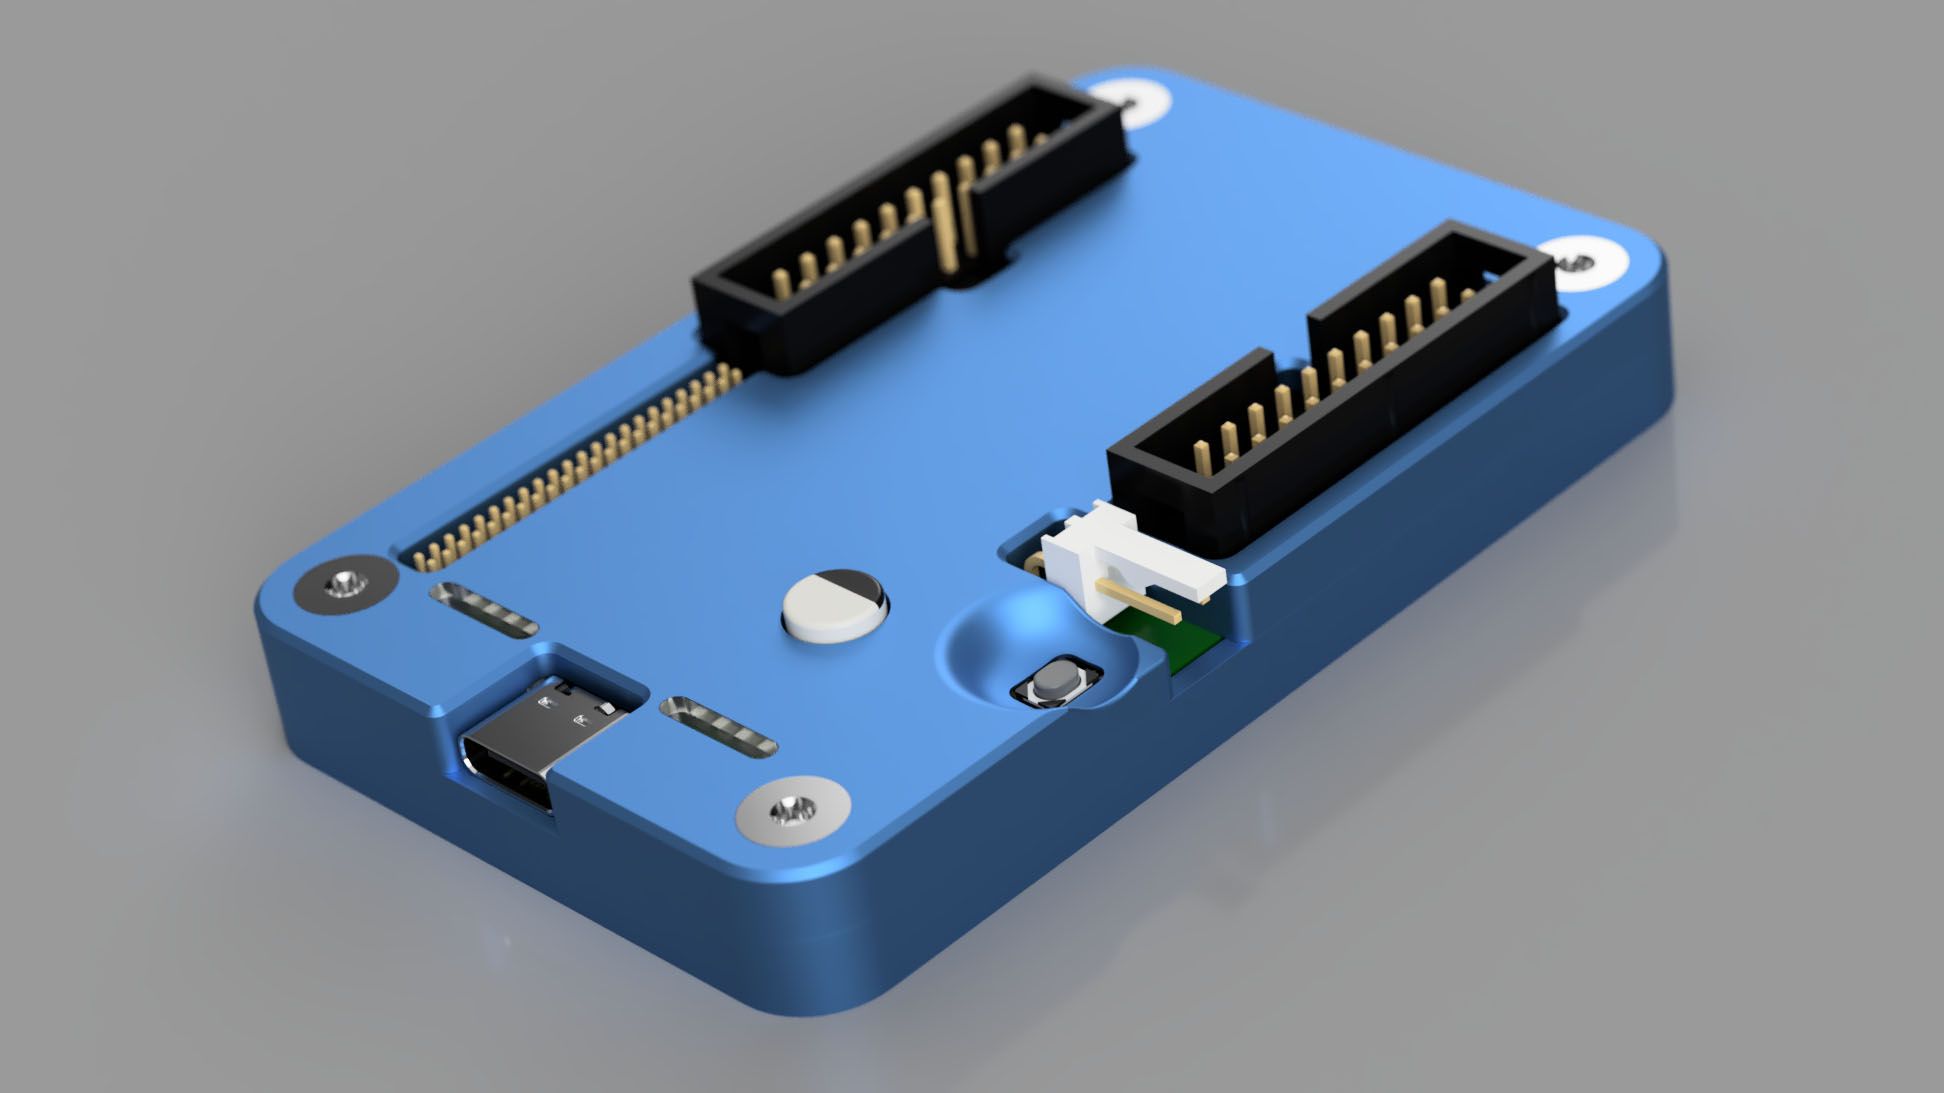
Piotr then looked for a side actuated button and integrated that. This was better but still a bit awkward to make accessible as it was still a small button.
Piotr looked once more to make space on the PCB for a chunkier button and that’s how the button for Glasgow revC2 was chosen. We are now getting closer to how the design looks today. Several of the smaller design changes in the final revision that were influenced by this version.
Physical Prototype
Below is the first revision of the case that I milled at home from acrylic to do a test fit.

You probably noticed the capacitor is still poking out. The reason for this was my assumption that the sync cable connector was latching and had to be actuated with your fingers to release the cable. Making the top thicker in order to hide the capacitor would have meant that the sync connector would be inaccessible and you would need to use a screwdriver to actuate the latch.
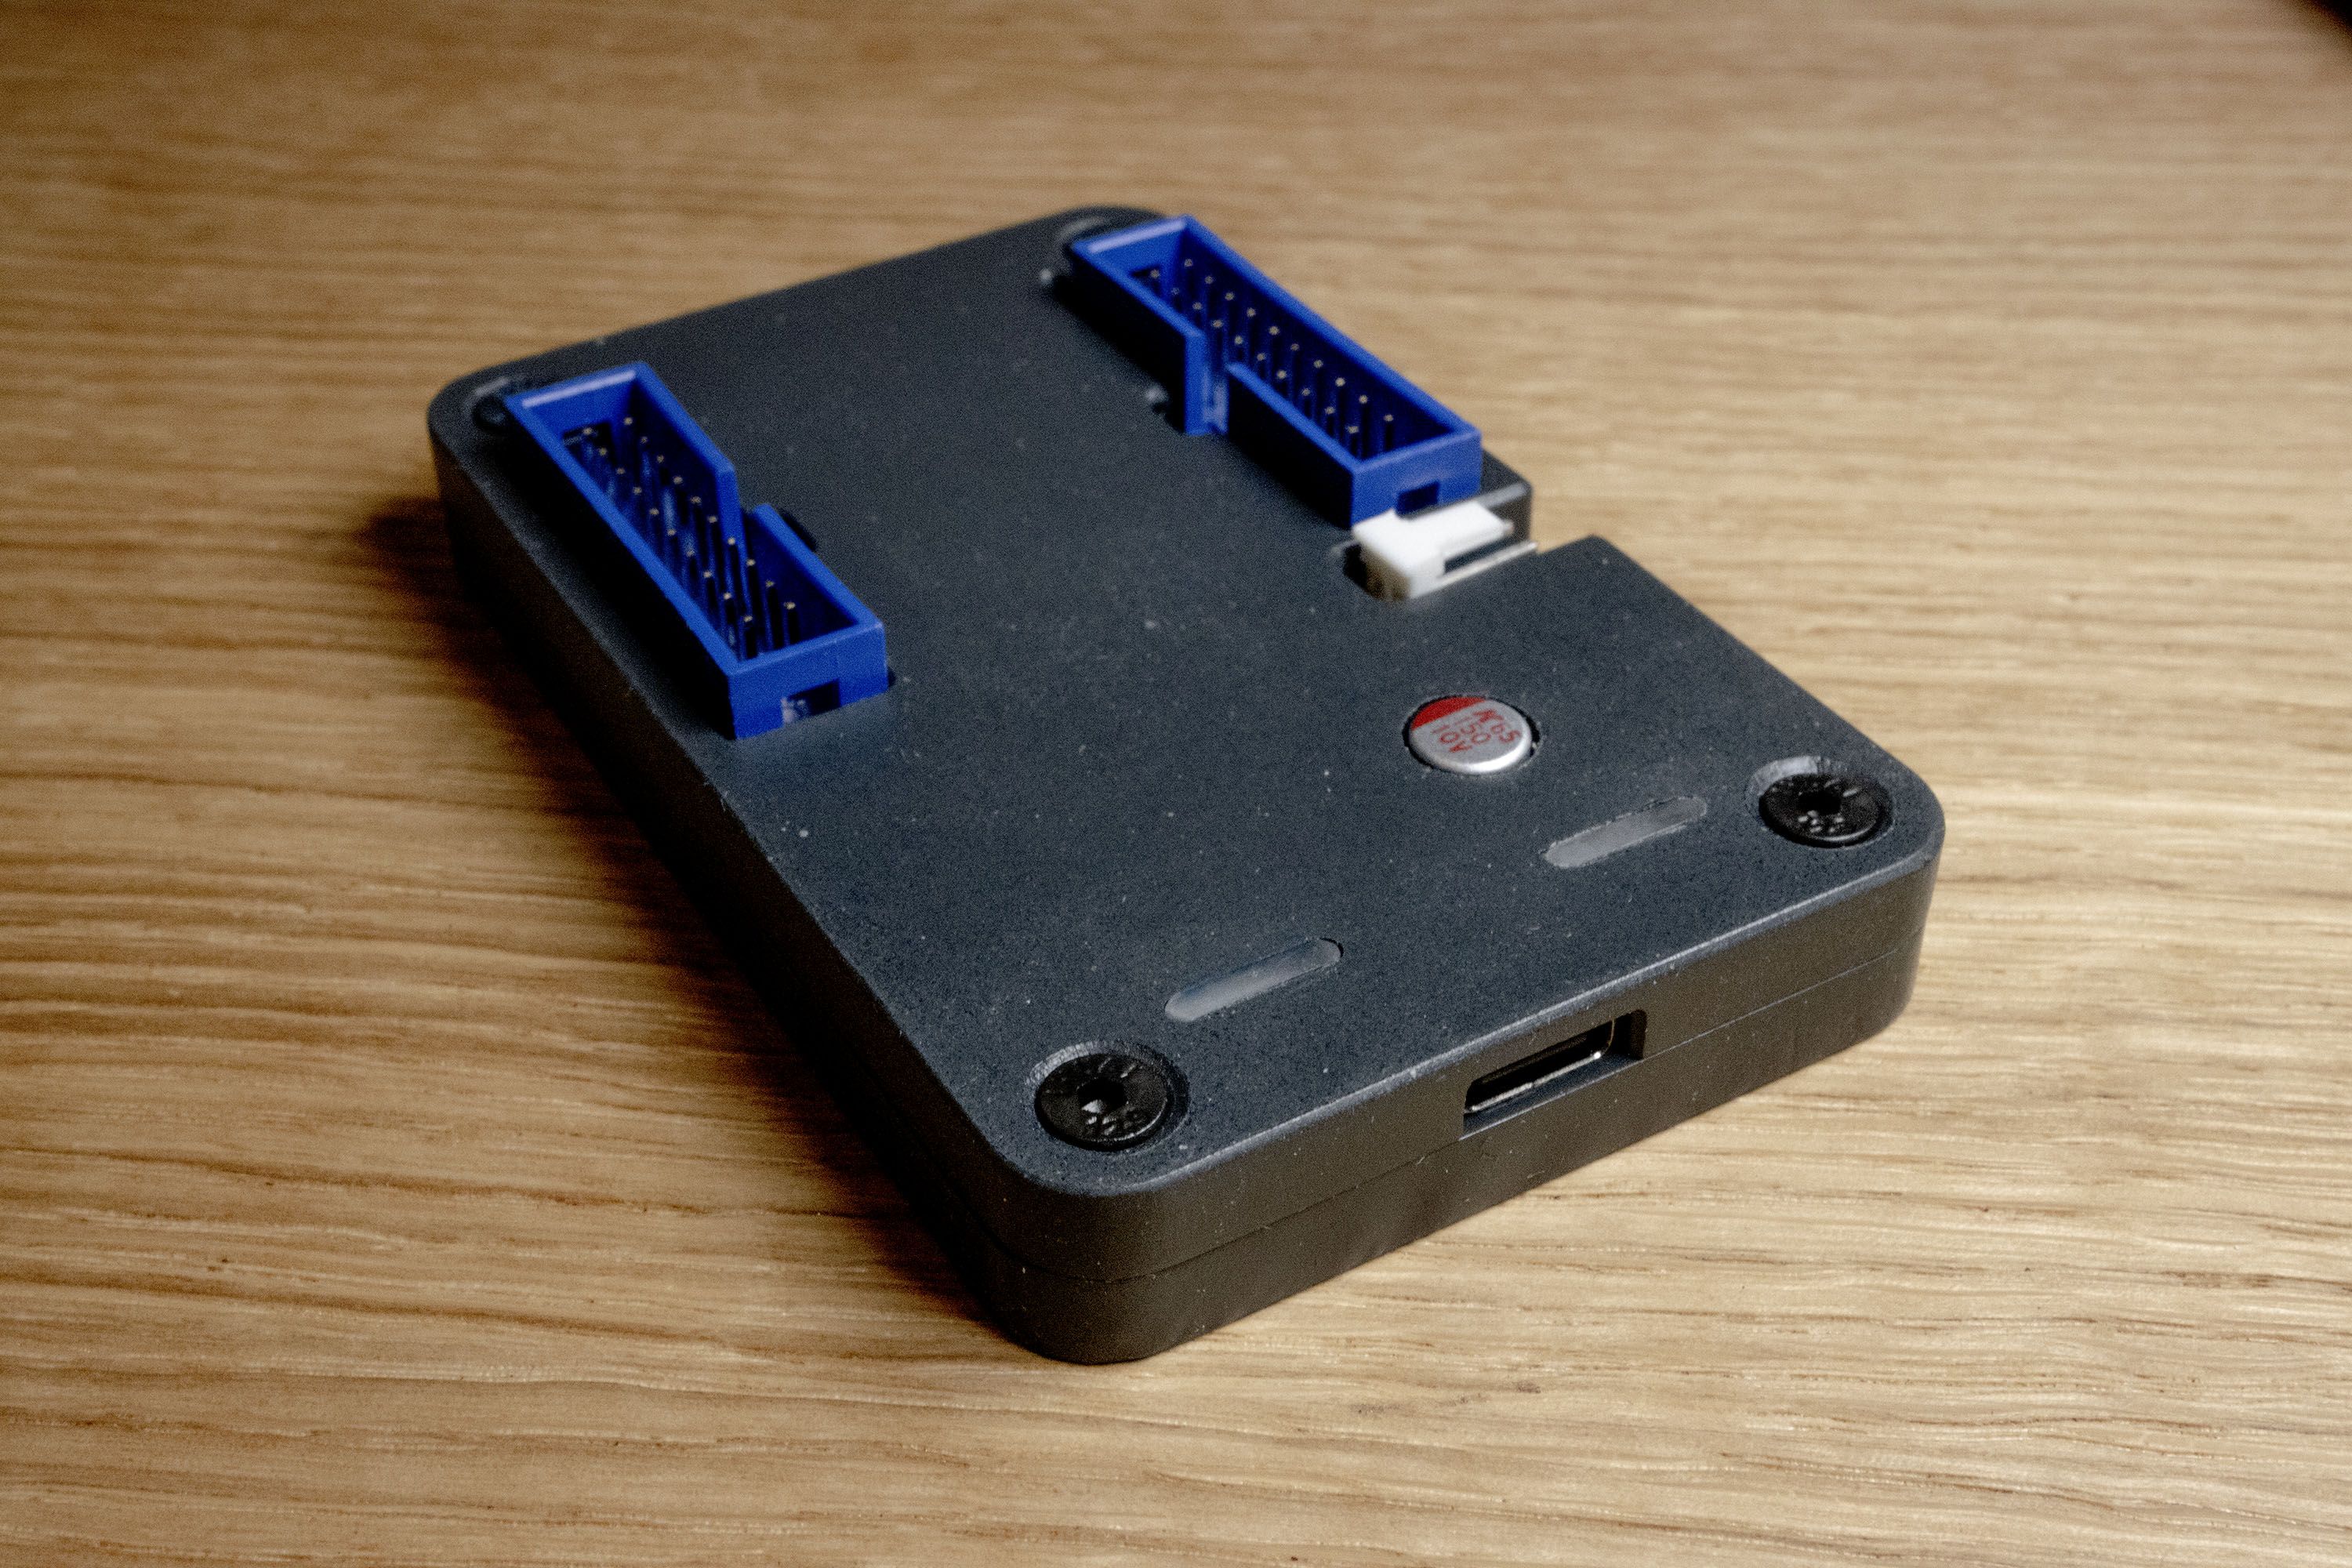
It turned out this wasn’t right and the cable could be easily released without touching the latch. So the thickness of the case was increased and that brings us to today. Piotr had designed the silkscreen legends for the case in the meantime, for that he chose an old type setting style font that is used for mechanical schematic drawings. You all have seen the renders of this latest revision on the campaign page so I will skip that and go right to the real deal that arrived recently. It is always amazing to see something designed in CAD turned into reality.
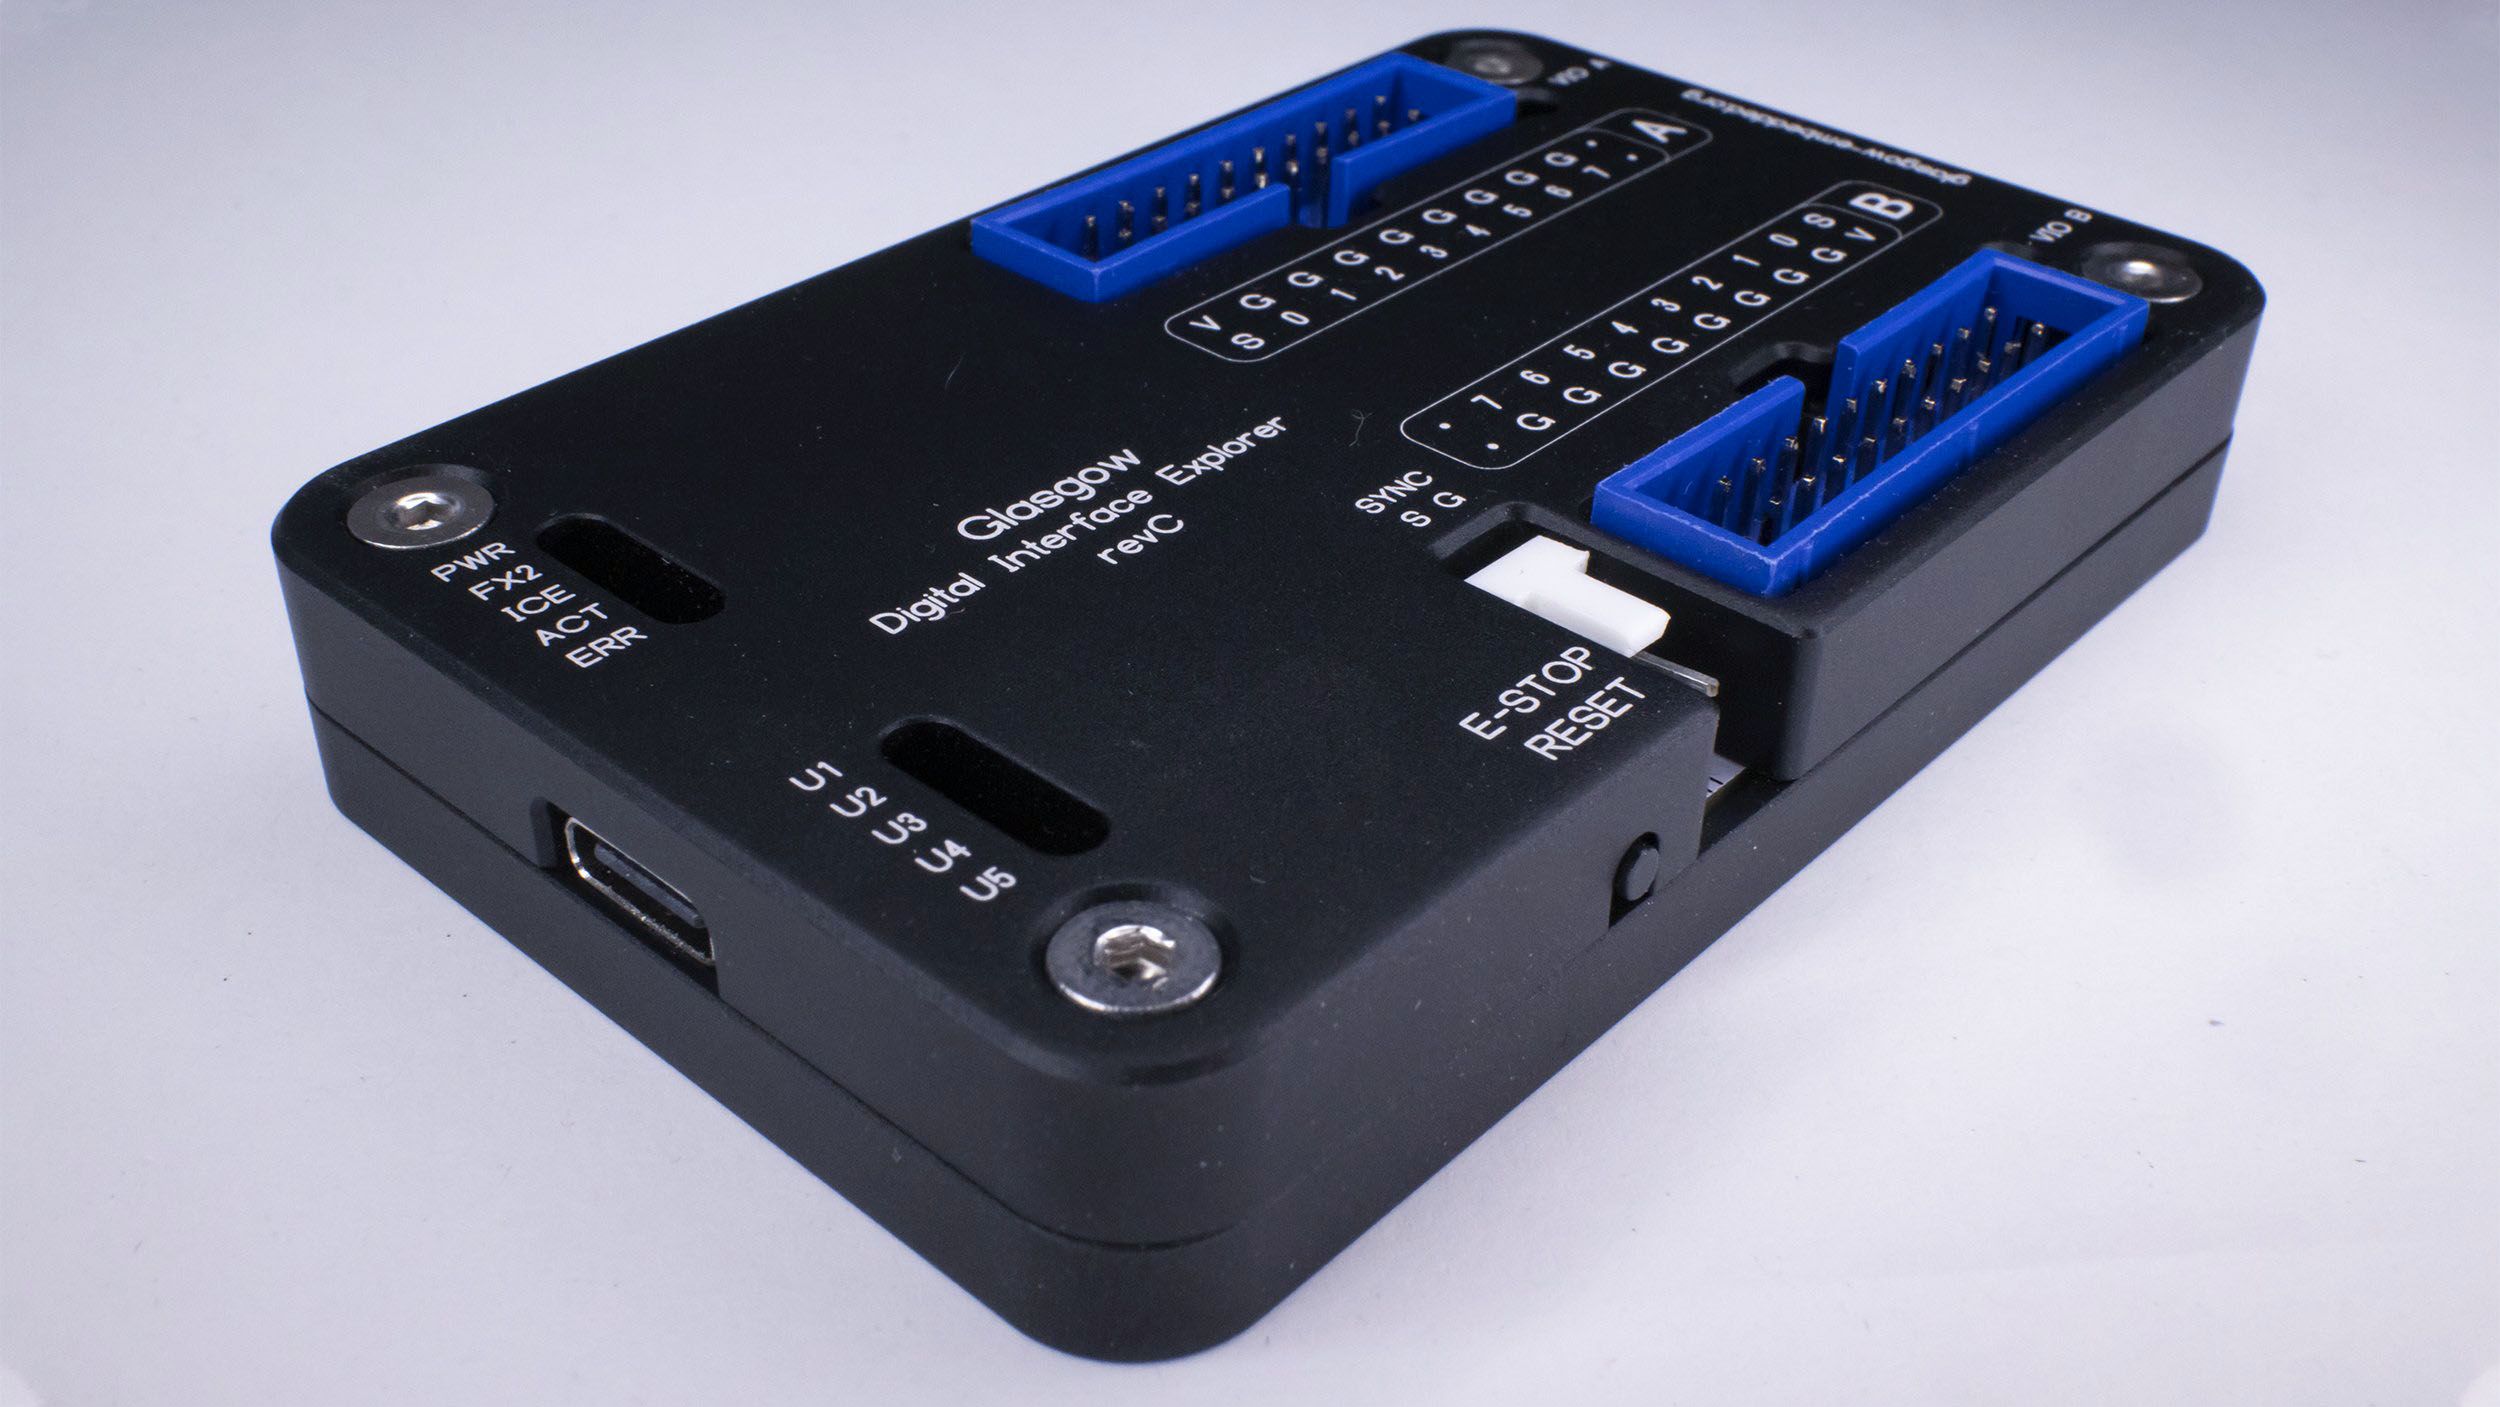
The cases turned out really great, with just one small issue with the silkscreen (which is actually laser-etched and not silkscreened) being slightly offset. We already talked to the manufacturer about this and it will be fixed in the next revision. I suspect this was just operator error during the stressful crunch time that spring festival poses for many manufacturers. Other than that, the legends are very crisp and I’m pleased that even the fine lines turned out perfectly.
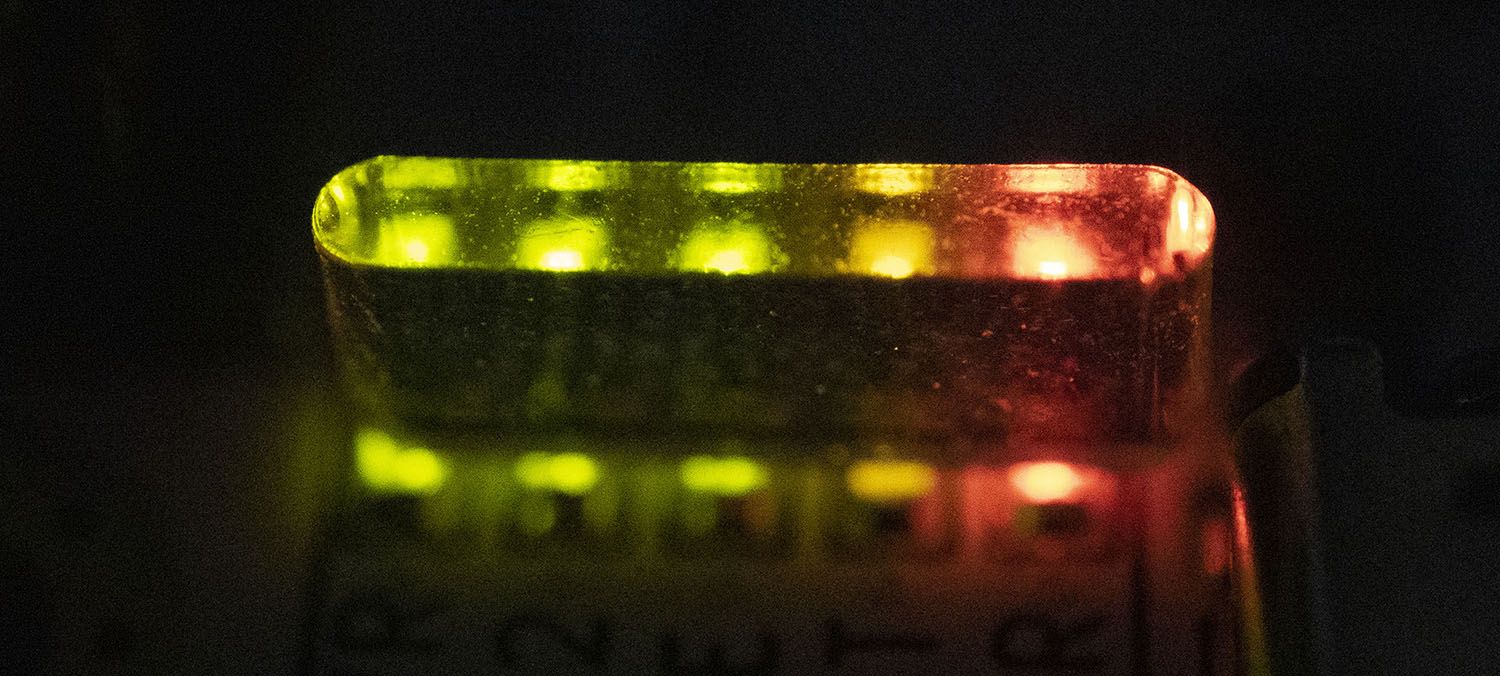
You may have noticed that the case is missing its light pipes for the status and user LEDs. Unfortunately, I was not able to make new light pipes in time for this update, but we’ll have something to show you very soon. In the meantime, I can briefly show you some results of the light pipe research I did prior to this revision (the size of the light pipes changed so they don’t fit this revision).
This was also one of the more complex issues to solve. Of course you can buy off the shelf light pipes but those require very specific placement of the LEDs in respect to the case. Making such a big change was out of the question. At that point we could have re-routed the whole board. So I came up with a way to economically make our own light pipes or at least something that did a similar job. The idea was to use pieces of acrylic easily laser cut in mass from a single sheet. The question, though, was if light was actually transmitted to the top and if you could then still discern each individual LED. Normally light pipes literally have a "pipe" called a light guide, for each individual LED in order to avoid "bleeding" from other LEDs. I tried both frosted and clear acrylics intended for LED applications. Here are some pictures of those experiments.
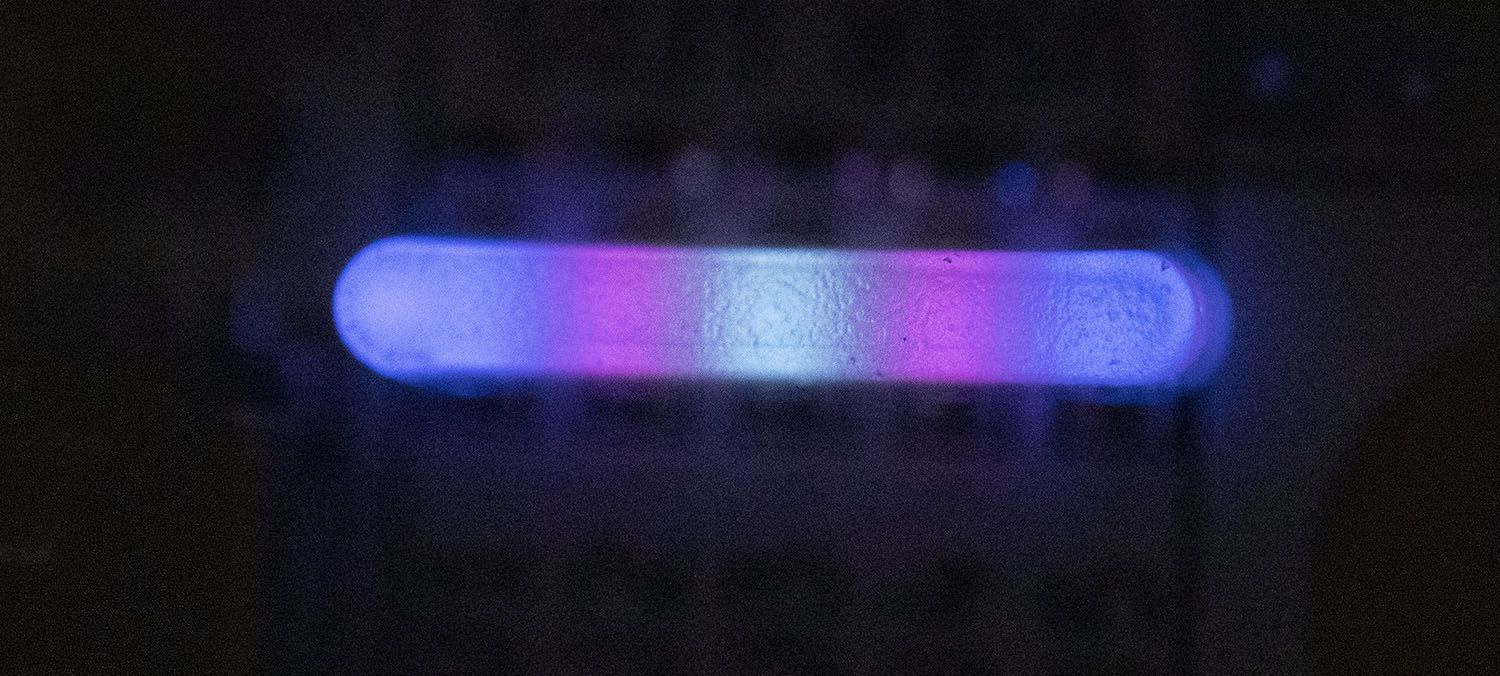
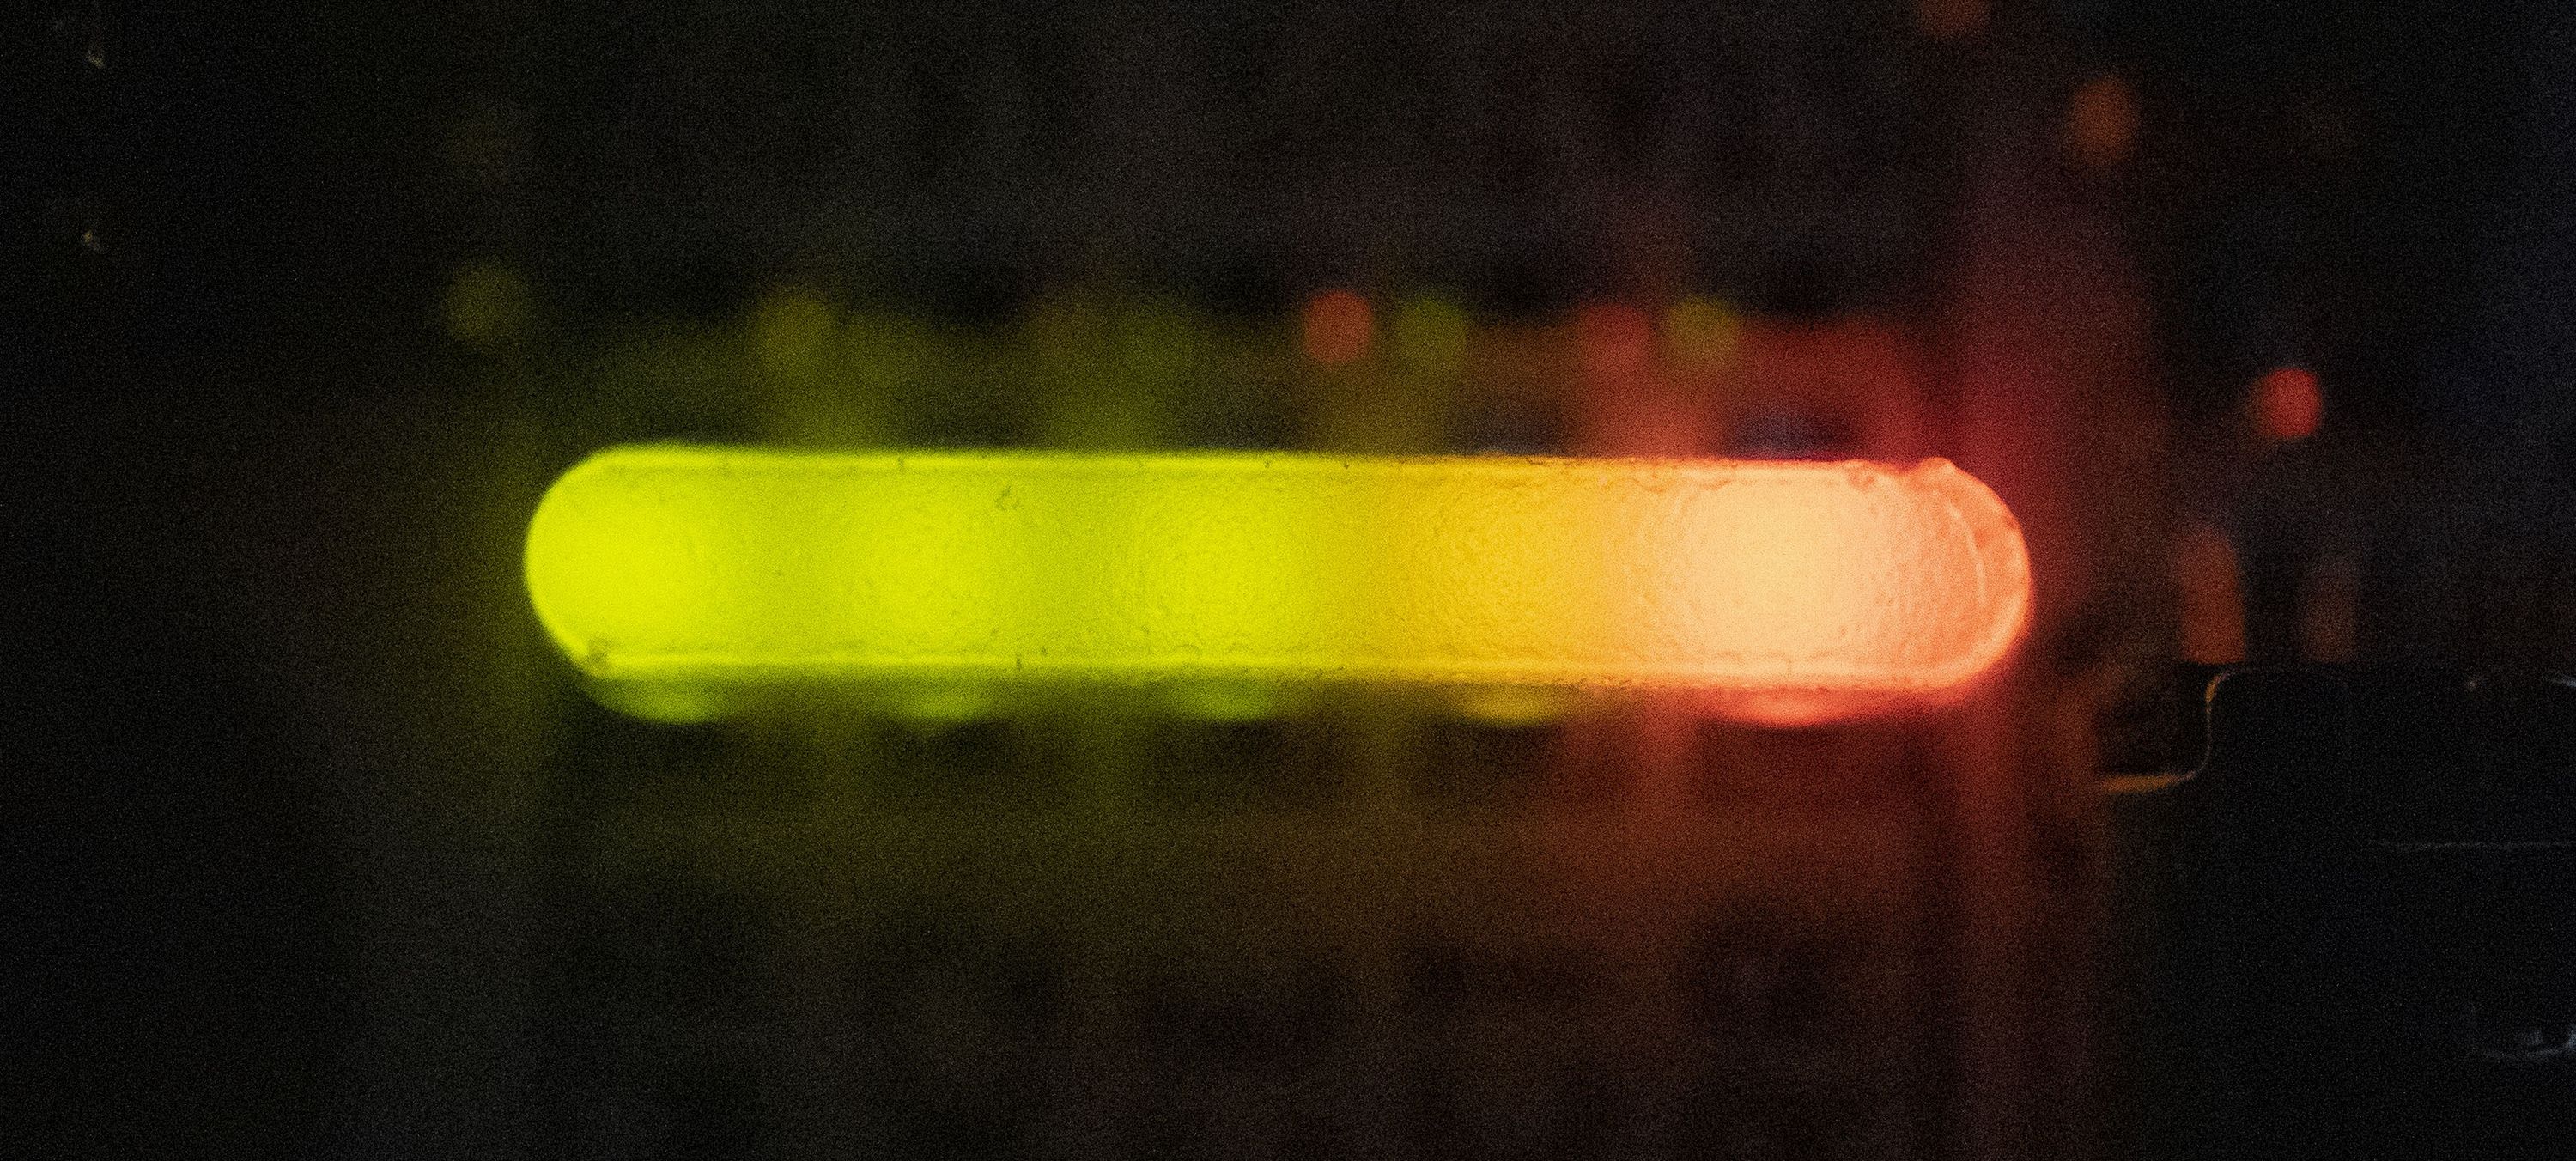
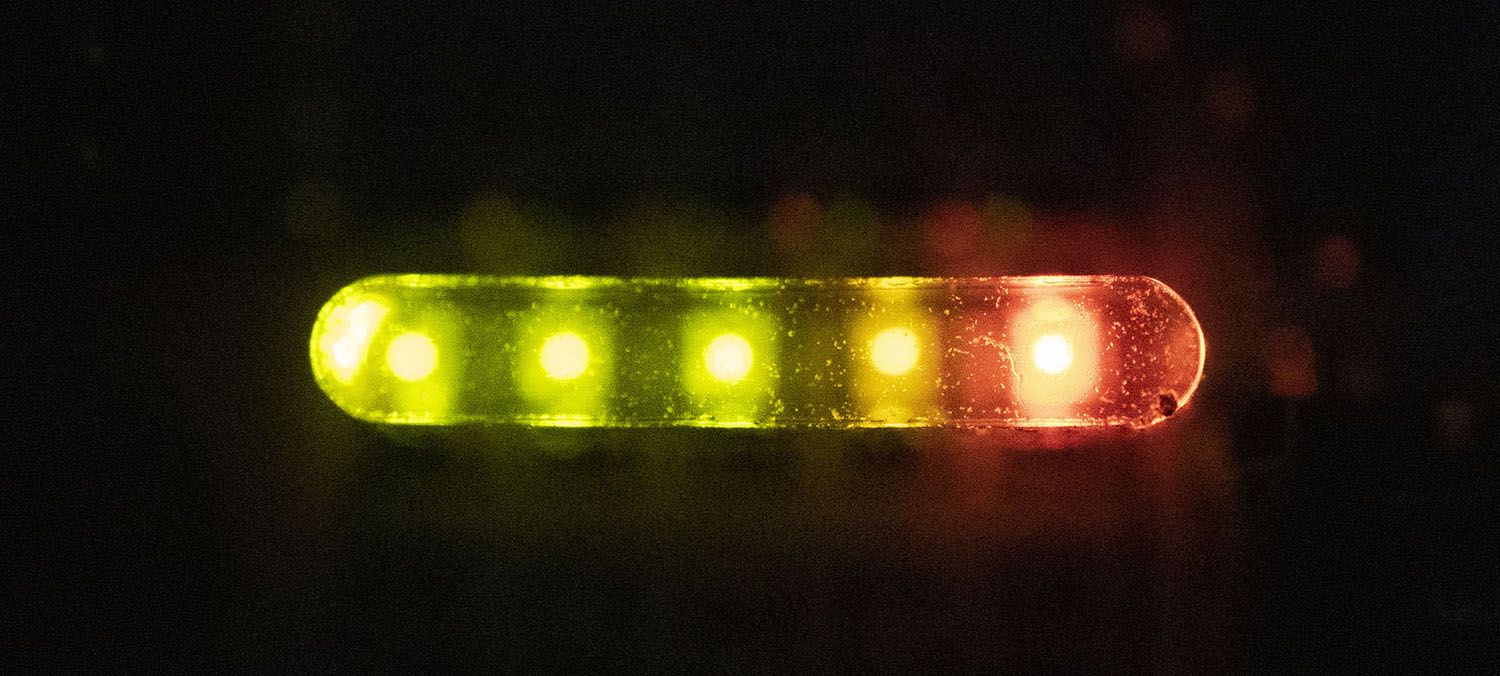
The single-sided frosted acrylic looked great on the user LEDs but on the status LEDs the color bleed made it hard to discern the three green LEDs from each other. For this reason, those LEDs might get a bit of a color change to make them easier to discern. Another solution is to use clear acrylic, with that we found you can make out each LED but lack the nice diffusion.
I was worried seeing the LEDs at a shallow angle might not work with the clear acrylic but that turned out not to be the case.
I hope this update was an interesting look into the design of the case. I never expected the case would be so popular, so it makes me very happy so many of you chose one during this campaign. As some have asked, a 3D printable design and step files will be open sourced as well but they will probably not appear in the Glasgow git repo until the design is thoroughly tested and finalized.
In another update we will take a closer look at the silkscreen and maybe doing a bit of a revision on that.
Cheers,
Timon