Project update 4 of 11
New Application, Software Improvements, Connecting to an IDE, and Production Update
An Interesting application
A few days ago, we got an email from Matt Liberty, who recently crowd funded JouleScope, an excellent power measurement tool. He suggested to us an application for ctxLink that we had not previously thought about.
Matt’s idea relates to debugging systems where ground isolation is important. Control systems where ground loops must be avoided, for example. A little research revealed a couple of existing SWD/JTAG debug probes that provide isolation. However, when we investigated the price of these devices, they turned out to be around twice the projected retail price of ctxLink. And that is without the SWD/JTAG probes themselves. With the probes, these solutions are about four times the price of ctxLink.
Our thanks to Matt (@mliberty1) for the suggestion and for bringing JouleScope to the community.
ctxLink software additions
In the previous update, we wrote about two additions to the ctxLink software. To implement the first feature, sending data from a target connected UART to the network, we had to refactor the TCP server code that provides the GDB connection so that it could support more than a single listening socket. That work is done, and we are now focused on routing the target data to USB or to the network.
Connecting ctxLink with ImageCraft JumpStart C++
Getting ctxLink connected though the ImageCraft JumpStart C++ IDE is really easy since their debugger setup already includes an option for ctxLink.
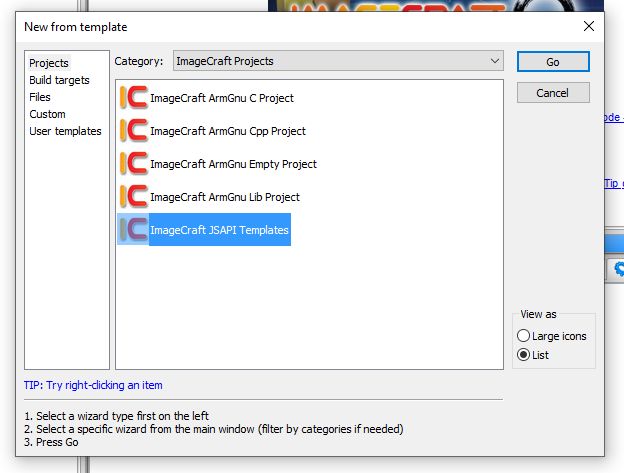
To create a test program, start the new project wizard, select the "ImageCraft JSAPI Template," and follow the on-screen instructions. For our test we used the 1bitsy STM32F415RG evaluation board from 1BitSquared.
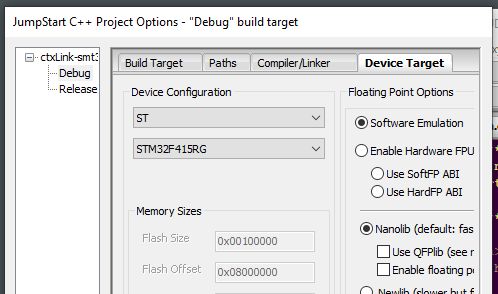
When the Project Options dialog is presented, click on the "Device Target" TAB, select the target MCU, and press "OK". The toolchain will then set the required compiler and linker options for your selected MCU.
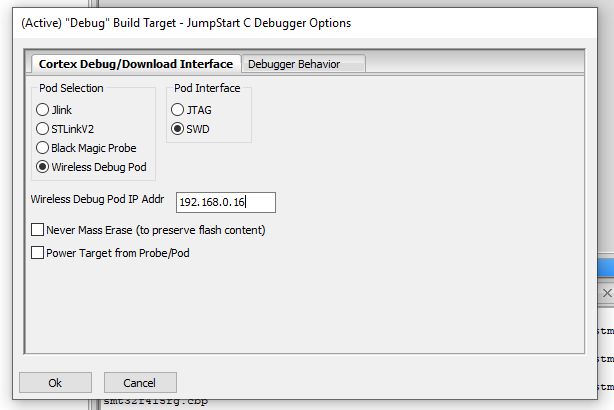
When the toolchain has finished creating and configuring the project, it will open the debug options dialog. Select "Wireless Debug Pod," enter the IP address of your ctxLink in the field provided, and press "OK."
A library that supports the ImageCraft JumpStart API, which provides a setup method to initialize the target system clocks, is automatically included in our project thanks to the "JSAPI Template." All that remains is to add a few lines of code to blink the user LED on the 1Bitsy board.
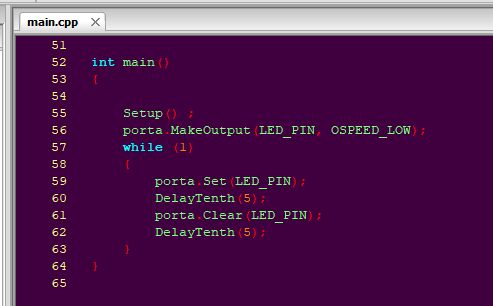
To compile the project press CTRL-F9. Once the build finishes, press F8 to flash the target MCU and run the program to "main". Pressing F8 again will continue the program and the 1Bitsy LED will flash.
Production update
The PCB design is ready to go and the Bill of Materials (BOM) is waiting for us to place the order. All we need is your continued support so we can "pull the trigger" and begin production. Thank you for your interest in ctxLink. We look forward to delivering a new debugging experience to each of you!.